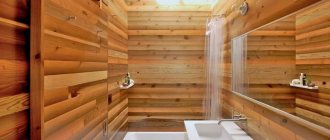
Decorating a bathroom with plastic panels is a simple and cheap way to decorate the interior. There are polymer materials decorated with different patterns or imitating tiles. Their cost differs slightly from the price of tiles; savings are ensured by the low cost of installation.
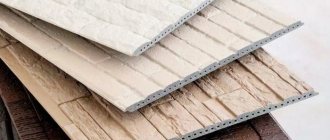
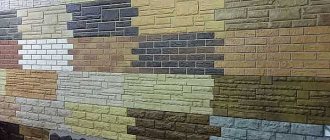
PVC panel for bathroom.
Pros and cons of PVC panels
The main advantages of plastic panels are the following characteristics:
- Resistant to moisture. The surface does not swell or become stained when splashed with water.
- Safety and practicality. High-quality material does not emit toxic fumes and does not absorb unpleasant odors. PVC panels do not require special care.
- Easy to install. Finishing the bathtub using this method is completed within a day, after which the room can be used for its intended purpose.
- Possibility of masking communications. When installing panels using a frame method, you can hide sewer or water pipes.
- Variety of colors. The material harmonizes well with modern interiors. It can be used to decorate a small shower room.
The negative qualities of the material under consideration include the following:
- Fragility. When hit or exposed to cutting objects, cracks or breaks appear on the surface. Pressing with a finger may leave shallow indentations.
- Release of toxic substances during combustion. The material cannot be called fireproof.
- Condensation accumulation. If there is no ventilation in the room, the joints between the plastic panels will become places for mold to grow.
Advantages of plastic panels.
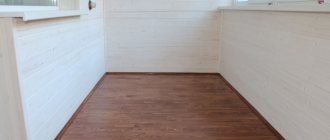
Ideas for decorating a small bathroom
A small bathroom is not a reason to abandon large-scale plans and bold design ideas. It seems that country, rustic or Provence are not for an intimate room, where paneling with natural wood is out of the question? However, there are tiles or PVC panels that are difficult to distinguish from real boards even close up.
With the right combination of finishing materials, small bathrooms can look very stylish and creative.
The selection below proves this.
Decorating a 4 sq.m. bathroom m :
design 6 sq. m:
Bathroom decorating ideas are endlessly varied. It is important to choose the style that best suits your inner mood, and then you will definitely find decorative techniques to bring your idea to life.
How to choose the right plastic panels
When choosing plastic panels, take into account the following characteristics:
Plastic panels in the bathroom.
- Strength of the material. Before purchasing, the lamella is squeezed with your fingers near the end. Expensive panels are not always durable. Quality depends on the raw materials used and manufacturing technology. You cannot buy soft panels; if damaged, it will be difficult to replace them.
- Matching pattern. The application of complex multi-colored patterns requires careful control at all stages of production. When installing low-quality panels, the pictures may not match. If ceramic tiles are adjusted to match patterns, then the same cannot be done with plastic. It will not be possible to check the material in the store. You need to warn the seller that an inspection will be carried out at the home.
- No gaps at joints. Sometimes when juxtaposing panels, gaps of uneven width remain. This deficiency becomes more pronounced in bright light.
- Thickness of elements. This parameter must be the same over the entire area. Combine the two panels and see if there are differences at the junctions. If they are present, the panels are defective. This will ruin the appearance of the wall in the future.
- Plasticity of the material. If the panels are made from recycled PVC, they will be damaged during installation.
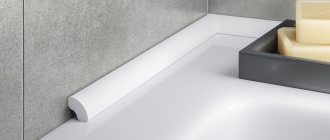
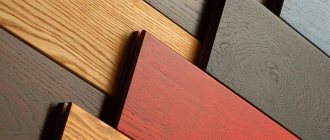
Lining
- pleasant relief;
- basic installation;
- unpretentious care.
. In the second case, the material is reliably treated with antiseptics and does an excellent job of protecting against constant exposure to water flows. But - for the time being.
Fragility is the main disadvantage of lining. Over time, even the most durable MDF swells and loses all its attractive qualities. In order to delay this moment, owners often coat the lining with varnish. This allows the material to acquire additional decorative value by playing with reflections of light.
The lining also helps to visually enlarge the room. To do this, you need to attach it to the wall vertically. In general, this finishing option is most often typical for private houses - in the format of multi-apartment buildings, people prefer other options for decorating walls. If you decide to focus on this particular material, then an instructional article will help you: “How to attach lining to the wall.”
Equipment and additional elements
When finishing a bathroom or toilet with plastic panels, the following types of components are used:
- Universal corner. It is a plate bent at a right angle. The part is used for finishing internal and external corners.
- Skirting for floor and ceiling. Part of the profile is placed under the panels, the other side covers uneven cuts and surfaces.
- Outdoor corner. Helps to beautifully decorate the outer corner, hiding unevenness.
- Inner corner. It differs from the external one in the size of the sides. The wide part is placed under the lamellas, the narrow part is used to hide irregularities.
- Connecting corner. Used to connect panels without a lock. It is used when the length of the lamellas is insufficient for finishing the surface.
- Start/finish profile. It is installed when laying the first and last panels. Sometimes a finishing guide is used instead of a universal angle.
- F-shaped corner. Placed at joints and can replace casing.
- Sheathing plank. It is considered the main element of the frame. The part is made of metal or plastic.
- Klyammer. Used to press panels to sheathing. Allows you to remove slats without damaging them.
- Fastening elements. The material is secured with self-tapping screws, staples or liquid nails. The choice of fixation method depends on the installation method of the cladding and the quality of the walls.
Agglomerate. New from manufacturers
Agglomerate is a new achievement of modern technologies. It is an artificial stone, which contains compounds of stone chips, cement and dyes. Externally, the agglomerate resembles ceramic tiles, but it is more durable and easier to install.
Agglomerate comes in different colors and any texture. It is elastic, waterproof and resistant to temperature changes. The walls do not require special treatment before installation; just a flat surface is enough.
This modern material also has its disadvantages. The agglomerate requires special storage conditions, since it tends to deform under its own weight. The price of this material is significantly higher than its analogues.
What tool and how can you process the material?
There are the following methods for cutting and processing panels with your own hands:
- Construction knife. Use only new blades with sharp tips. Can be cut along panels. The element is laid on a horizontal surface, the places of cuts are marked. When slicing, use a long, straight
Method of cutting panels.
bar It is placed on the panel, and a cut is made on one side with the tip of a knife. Turning the lamella over, bend the cut point. The remaining part is cut off in a bent state. Cutting across the panel is more difficult; you need to carefully cut the jumpers with the tip. - Bulgarian. The tool is equipped with a metal disk with a minimum thickness. The cutting process does not take much time, but you need to know how to use a grinder. After the cut has cooled, the burrs can be easily removed. When working, observe safety rules; the tool can cause serious injury.
- Hacksaw for metal. The inconvenient method takes a lot of time. It is used in the absence of other tools. The saw teeth must be of a minimum size. The quality of the cut depends on your skills in using a hacksaw. Uneven places are hidden with the help of additional elements.
Calculation of the number of panels and additional elements
The bathroom has a small area and a large number of corners. Therefore, measurements take a lot of time. The more transitions, the more unusable material residues there will be. When implementing interesting ideas that require creating a drawing, the amount of waste increases. When calculating the material, you need to take into account a margin of 15%. Measuring the number and length of corners will help you understand how many corners and profiles you will need. Additional elements are inexpensive and can be purchased in large quantities.
When calculating the components of the sheathing, it is taken into account that they are placed in increments of no more than 0.5 m. The guides must be installed at the junction of the walls and the ceiling or floor, near doorways. Reiki are placed here in any position of the final element. It is not possible to determine the exact number of fasteners. They are bought in packs.
Calculation of components.
Differences between flexible stone
This modern material is presented in three layers:
- Fabric base.
- The adhesive itself.
- Rock in the form of fine chips (marble, quartz, granite).
From a distance they can be mistaken for natural stones. This material is very durable, practical, and can withstand even very damp rooms.
Installation methods
Wall covering with plastic panels is done in several ways. Step-by-step instructions will help you learn the intricacies of the installation process.
Frameless
When using this method, the panels are fixed to the surface with glue. The method is suitable for cladding smooth walls. Therefore, the base is pre-plastered. The corners need to be treated especially carefully. They should not have unevenness or concrete burrs. Plasterboard walls do not require preliminary preparation.
Fastening panels with glue.
Frame
Installing a metal frame allows you to align the slats regardless of the condition of the wall. Bathroom renovation is done like this:
- The locations of the guides are marked on the surface. The distance between them is no more than 0.5 m.
- The hangers are secured with dowels. If the drill hits the reinforcement while forming holes in concrete, the work is stopped. Damage to metal elements negatively affects the load-bearing capacity of a reinforced concrete structure. The hole is shifted, this does not impair the quality of the sheathing.
- Bearing profiles are cut. You need to calculate their number in advance.
- Install load-bearing elements. They are given a vertical position based on the holes in the hangers. For precise installation of the sheathing, the guides can be bent. The load-bearing characteristics of the frame do not deteriorate from this. Profiles and hangers are fastened with self-tapping screws.
- Finishing material is placed. The elements are fixed with self-tapping screws and press washers.
On the walls with glue
Neoprene glue is used to attach the finishing material. The inorganic base of the composition is resistant to moisture. The use of universal types of glue is allowed. Before gluing the lamellas, mark the wall. Glue is most often applied to plastic, but sometimes additional treatment of the walls is required. Having lubricated the part with the composition, it is inserted into the profile, shifted and pressed. The work is completed by sealing the joints and installing additional elements. You can see how to install the panels yourself in the video.
Option #2 - self-adhesive film
The basis of self-adhesive film is polyvinyl chloride. A decorative pattern is applied to the front side of the coating; on the opposite side there is a layer of glue that holds the material to the surface. It is covered with a protective layer of paper.
To apply the film to the wall, you need to very carefully and gradually remove the protective layer, while straightening and pressing the vinyl to the base. This film adheres perfectly to plastic, wood, glass, plasterboard and metal surfaces.
There are many varieties of self-adhesive film available. On sale you can find a single-color coating, glossy or matte, mirrored, with a 3D effect or metallized.
Films that imitate various materials are interesting: fabric, mosaic, tile, wood, cork, and the like. The advantages of vinyl film include:
The disadvantages of the material can be considered sensitivity to direct exposure to high temperatures, which is why it is not recommended to glue it near hot objects. In addition, low-quality film can shrink or stretch.
Installation of the coating is extremely simple, however, before starting it, it is necessary to prepare the base very well, since all, even the smallest cracks and irregularities will be clearly visible.
Ceiling methods
There are several ways to properly sew a ceiling with plastic.
Installation of panels on a rough ceiling
The rough ceiling does not require special preparation. The finishing elements are laid as follows:
- Treat the surface. Antiseptic compounds are applied to the base and left until dry. It is recommended to install a waterproofing material, such as polyethylene film. The joints are taped.
- Measure the distances between walls located opposite each other. The skirting boards are cut so that when two parts are combined, an angle of 45° is formed. It is not recommended to fasten the part with self-tapping screws. When installed on an uneven surface, the additional element will sag. Liquid nails are used for fixation. At this stage, only 3 skirting boards are installed, the fourth is installed after laying the cladding.
Installation of panels. - Panels are cut. The element fits into the plinth by 2 cm. Having measured the distance between the walls, add 1.5 cm to the resulting value. The remaining 0.5 cm makes installation easier.
- Re-measure the ceiling. If there are minor errors, they are eliminated by changing the size of the gaps between the lamellas. It is recommended to align the panels in hidden places. Open areas must have smooth joints.
- The end of the lamella is inserted into one plinth. The element is slightly bent and the second end is inserted into the opposite profile. The long side is inserted into the third plinth.
- Pressing the lamellas tightly against each other, they are fixed with staples. The more tightly the elements are installed, the stronger the connections will be. When fixing on an uneven ceiling, pieces of plastic are placed under the end of the panel. This will help prevent cracks from appearing.
- After installing the entire elements, measure the width of the uncovered part of the ceiling. Taking into account the obtained value, the material is cut using the previously selected method.
- The lamella is inserted into 2 skirting boards. One edge is connected into a lock, the second is secured separately. The element is fixed with liquid nails or self-tapping screws.
- The fourth plinth is removed from the base part. The remaining part is treated with glue and installed on the wall.
Installation of panels to the ceiling on a metal frame
This method is used when finishing an uneven ceiling yourself. The work is carried out as follows:
- Mark the installation locations of the supporting profiles. The parts are placed in increments of 0.5 m. If there are pronounced irregularities, hangers are used. They are mounted in the same way as on the walls.
- 3 skirting boards are glued using liquid nails. If there are no right angles, the cuts will have to be adjusted. The plinth is attached both to the wall and to the metal frame. After applying the plastic element, it is removed for 2-3 minutes. After reinstallation, the correct position is checked with a level. The corners are sealed with sealant.
- The ends of the lamellas are inserted into the baseboards. The finishing material is laid along the long side of the ceiling. This reduces the number of cuts and waste. The plastic sheathing is attached to the profiles with self-tapping screws. To prevent the screwdriver bit from coming off from damaging the finish, place a metal spatula on the ceiling when screwing.
- The finishing panel is cut, taking into account the dimensions of the uncovered part of the ceiling. The back side of the fourth plinth is removed. The remaining parts are lubricated with glue and pressed to the base. After the glue has dried, they proceed to placing the lighting fixtures.
Fastening plastic panels to the ceiling in the bathtub.
How to install panels when mounted on a ceiling diagonally
This idea is difficult to implement. Installing the frame and adjusting the cladding elements is a labor-intensive process. The work is carried out as follows:
- Determine the area of the base and the longest length of the lamella. To do this you need to measure the diagonal of the ceiling. The volume of waste when using this installation method increases, so the material is purchased with a reserve.
- 3 skirting boards are installed in the standard way. When the glue dries, the height of the additional elements should not change.
- The end of the panel is cut at an angle of 45°. The second end of the lamella is cut off at the same slope. The result will be a starting element with the shortest length. It is installed in the corner.
- Measure the length of most of the installed part. This is how the length of the shorter side of the second element is determined. Markings are applied to the panel and cuts are made. Use the same method to cut and fasten the remaining parts. You can see what the ceiling will look like in the photo.
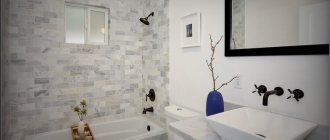
Option #1 - ceramic tiles
This is the name given to plates of various shapes and sizes made of baked clay. The tiles are made by pressing a homogeneous crushed mixture and subsequent firing in ovens at a temperature of about 1200C. There are different types of ceramics:
Glazed tiles. Additionally, it is coated with a special transparent layer, which not only protects the ceramic plate, but also gives it a more attractive appearance. Unglazed cladding.
There is no protective layer. The tiles are distinguished by the natural structure of the material and attractive natural texture. It can be considered conditionally suitable for decorating wet rooms.
The design of ceramic tiles can be very different. In addition to the traditional square and rectangular cladding of various sizes, more interesting plate shapes are produced: hexagons, triangles and even circles and ovals. The colors and textures of the tiles are also varied.
Interesting models with all kinds of inserts made of metal, mirror or stone. Manufacturers offer tile collections that include basic cladding and decor: borders and plates decorated with various patterns and motifs.
The obvious advantages of ceramics include:
The main disadvantage of any ceramics can be considered the complexity of installation, before which it will be necessary to carry out labor-intensive work to prepare the surface of the walls for cladding.
The features of the finishing material are such that it can only be laid on a completely leveled, dry base primed with a special compound. The cladding process is also complex and requires the involvement of specialists. It is almost impossible for a person without experience to lay tiles on walls efficiently.
In addition, the surface of ceramics is always cool to the touch, so leaning against such a wall is not very pleasant. The material is classified as brittle and fragile, which complicates transportation and laying of tiles. The cost of cladding depends on the quality and the manufacturing company.
On sale you can find both elite models belonging to the high price category and quite budget material. Thus, if desired, cladding that is acceptable in cost and quality can be found without much difficulty.
Ventilation arrangement
The ventilation system is an important part of any room with high humidity. In the absence of air circulation, plastic panels become covered with mold, which negatively affects the health of apartment residents. To ensure ventilation, a hole is made in the plastic casing that matches the size of the ventilation window. The latter is covered with a decorative lattice. It is fixed with glue or sealant. The ventilation grille should not touch the frame rail.
The mine is equipped with an electric fan that provides a constant flow of air. Devices can be exhaust, supply or multifunctional. The device is powered from a separate grounded outlet. The electrical wire is connected to the bathroom switch. Work is carried out before finishing the walls. It is recommended to install an additional ceiling fan.