When starting a bathroom renovation, the first question that arises is the choice of finishing materials. The standard set in the form of ceramic tiles, plastic panels, stone is no longer able to satisfy the needs of a modern person. Naturalness, environmental friendliness and practicality - these are the main tenets that are gaining increasing popularity among consumers. It is the lining in the bathroom that will break past ideas about the primitive design of this room.
Destroying stereotypes and dispelling myths
Doubts about the reliability, strength and durability of the finishing material are completely justified. Any choice should be approached responsibly, having first weighed all the positive and negative qualities of the lining.
Main problems:
- Deformation;
- The appearance of mold;
- Moisture.
Having dealt with each problem separately, you can quickly choose the appropriate option for using the lining for finishing.
Wood-effect wallpaper for walls
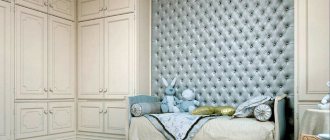
Wallpaper is back in fashion. In the market, we can admire a variety of options in different designs, colors, textures and sizes. Today, with the help of the right wallpaper pattern, our interiors can turn into warm and original spaces where we will feel like we are in an exclusive apartment, where the walls are covered with leather, stone or look like a mountain house with wooden walls.
There are many reasons why we decide to use this finishing material for walls in our home. Sometimes this is due to our preferences, sometimes due to the interior designer's suggestion, and sometimes for practical reasons. There are situations when it is especially recommended to choose a specific type of wallpaper for the walls. For example, if you need to hide surface imperfections, in particular, all irregularities, to protect against dirt (moisture-resistant models are used), if you need to optically change the room and give the interior an impressive character.
Existing problems and methods for solving them
To choose high-quality lining, you need to take the choice of material seriously, pre-prepare the room for finishing work and take into account a number of other important factors.
Deformation manifests itself in the form of swelling of the skin or torsion. Such problems are associated with the choice of material of inadequate quality. The incompetence of the workers themselves performing the finishing work also leads to dire consequences.
The lining in the bathroom must belong to the Eurolining class, which is confirmed by several factors:
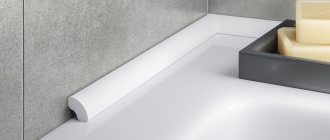
- Presence of milled compensation grooves on the rear side. This allows you to drain condensate and relieve internal stress. In this case, torsion of the lining is practically impossible;
- The rigidity of the material, despite the small thickness of the product, equal to 12.5 mm.
Eurolining will also help to cope with swelling or uncoupling of the material. Reliable docking is achieved due to a larger tongue-and-groove system. Do not forget that during the installation process it is necessary to pack the lining tightly. There must be free play at the joints. Compliance with this rule will allow you to avoid breaking the joints even with slight expansion of the material.
In order to avoid squeezing out the lining, you should pay attention to the reliability of the fastenings. To increase the mounting points for the lining, reduce the distance between the frame posts.
Finishing touches
Be sure to cut the holes for the rosettes while the wallpaper is still damp. Gluing should be done indoors without access to fresh air. Leave the wallpaper for a couple of days until it is completely dry, making sure that the corners or joints do not peel off. Reinstall the baseboards.
The boring look of old lining can be decorated with wallpaper
Tired of the look of wood paneling on your walls? Then update the interior with wallpaper, this will allow you to avoid major expensive repairs to completely replace the interior decoration. I propose to understand in more detail how to do this correctly.
Other common problems
The following rules will help in the fight against mold:
- The lining should be placed in a vertical position so that water does not stagnate in the depressions;
- Before finishing work begins, each element is treated with an antiseptic, then varnish. Such a surface will be reliably protected from moisture;
- Don't forget to install a good ventilation system;
- To create additional “ventilation” of the space, you can make small holes in the top and bottom of the wall.
To combat the spread of high humidity levels, the following methods are used:
- Coating wood with varnish to prevent moisture from entering and changing the original appearance of the material;
- It is allowed to use varnish only with water-repellent properties;
- Any type of wood is suitable for coating;
- The advantage of water-repellent varnish is the formation of a special film that is not able to move away from the surface or crack;
- Varnishing extends the life of the lining and preserves the beautiful appearance of the wood;
- It is enough to repeat the varnishing procedure after 6 years;
- The lining in the bathroom can be varnished, even if it is a local type of wood or something exotic. The main thing is that the finishing material has water-repellent properties. This information is available on the packaging.
Another universal method that can be used to increase the moisture-repellent properties of the lining is to coat it with oil.
This is due to the fact that oil is able to penetrate even the smallest crevices and create a film effect.
However, it should be borne in mind that when using oil, wood loses its original appearance and becomes dull over time. A monthly repeating procedure will allow you to avoid such errors. If the lining in the bathroom is treated with oil, then its photo will look several tones darker.
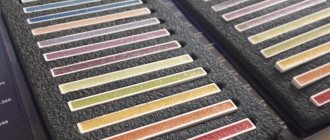
No less reliable protection of wood from moisture is achieved by using tinting. In most cases, this method is ideal for creating an imitation of wood by “playing with color.” To achieve the desired shade, this method should be repeated every 2-3 years.
Disadvantages of lining
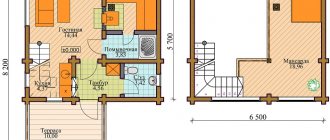
In country cottages, covering a bathroom with clapboard is easier, and in some cases, even cheaper than in apartment buildings. For example, in a frame house there is no need to make additional sheathing, since the racks are already present in the structure of the building walls themselves.
The main disadvantage of this finishing material in a private cottage is the reduction in hygiene and service life of the cladding compared to tiles. In the rooms of standard apartments, lining is usually found only on balconies/loggias. Therefore, the interior of the bathroom will be quite unusual.
Otherwise, eurolining is no different from other finishing methods. The loss of usable space is standard, but the productivity of finishing work increases and the requirements for the qualifications of a home craftsman are reduced.
Advice! If you need bathroom renovation specialists, there is a very convenient service for selecting specialists from PROFI.RU. Just fill out the order details, the experts will respond and you can choose who to collaborate with. Each specialist in the system has a rating, reviews and examples of work, which will help with the choice. Looks like a mini tender. Placing an application is FREE and does not oblige you to anything. Works in almost all cities of Russia.
If you are a master, follow this link, register in the system and be able to accept orders.
Installation Rules
After selecting a material and carefully studying how to solve common problems with its use, you can move on to the installation process. There is no need to try to do the work yourself without studying a detailed video and reading specific instructions. This will allow you to avoid many mistakes, which may no longer be possible to correct.
Lining in the bathroom is carried out using the following tools:
- Level for creating a perfectly flat surface and eliminating curvature of corners;
- Hacksaw;
- Hammer;
- Nails of various diameters and lengths;
- Tape measure for accurate measurements and material calculations;
- Screwdriver for precise and quick tightening of screws;
- Electric drill for sheathing.
Calculating the material will allow you to buy exactly as much as you may need. However, do not forget that the size of the room area does not yet provide accuracy in choosing the amount of lining. The height of the walls and the length of the material itself are taken into account. Scraps cannot be avoided, so you shouldn’t take too much, because it’s always better to buy more than to throw away unnecessary leftovers.
The arrangement of the linings allows you to visually expand or reduce the size of the room itself. So, placing the slats vertically or horizontally, you always get a different result. It is better to decide on the location in advance, because the final calculation of the material will depend on this.
Having received seemingly accurate measurements, another 5-10% of the material should be added to the final result.
The choice of finishing materials is no less important than the purchase of the lining itself, namely:
- External and internal corners;
- Facing film for joints.
To completely hide cracks and irregularities, you should choose strips and corners of a wider diameter.
The main work begins with assembling the frame. First of all, the issue of precise placement of the lining is resolved. This is necessary for designing the mounting location for the frame and counting the number of planks. It is best to choose longer slats.
The lining should not contain any knots or traces of splitting wood. For reliable fastening to the wall, special hangers are used. They can also be converted into the shape of the letter - P.
If you find a significant difference between the wall and ceiling, you should level them in advance, even before starting work on attaching the frame. The most durable devices for securely fastening elements are dowels and self-tapping screws.
To insulate the ceiling and walls, if such measures are necessary, mineral wool is used. Using a stapler, the insulation layer is covered with a hydrobarrier. During the installation of the lining, a tongue-and-groove connecting system is used. In this case, special clamps are used. It is also necessary to take into account the thickness of the lining itself. This will allow you to most conveniently and accurately install the lining to the sheathing.
To nail the canvas to the plank as tightly and reliably as possible, and at the same time not leave unnecessary marks, it is necessary to use special nails without heads. As a rule, they come complete with clamps.
To more accurately calculate the clamps, it is necessary to take into account that for 5 sq. m requires 2 packages of 100 pieces each.
Work order:
- Installation of plumbing and electrical equipment;
- Treatment of the sheathing with an antiseptic and its subsequent installation;
- Installation of insulation;
- Sheathing work.
The main part of the work on installing the lining begins from the most visible corner of the bathroom. There should be no errors here. The first rail should be perfectly smooth, without any flaws or errors.
You should make sure that the desired side of the canvas is in the blind corner, with the presence of a ridge. Following this rule, the groove will be on the working side. When working with a hammer, you can put the following comb on the rail. If you find the last element of large dimensions, it is enough to shorten it and secure it with self-tapping screws. All connecting seams are successfully disguised with a decorative facing strip.
How to glue plastic to wallpaper. What is the best way to glue a plastic corner to the wallpaper?
You have hung the wallpaper and purchased the necessary fittings. There is only one question left: how to glue the plastic corner. Various methods of fastening this element are known. We will tell you about the most effective ones, and analyze the pros and cons. Read more in the article.
Basic methods of installing a corner
First, let's talk about what you should not use to glue a corner to the wallpaper. On the forums you can find advice on using adhesive for ceiling tiles. At first glance, this is a good recommendation. If the ceiling glue can withstand the weight of the tile, then the corner will definitely grab tightly. But the consistency of the composition is liquid. You will have to work extremely carefully. On paper wallpaper, along the plastic border, yellow stripes will appear over time. PVA glue is not suitable for these purposes either. If only at the corners of window openings, where no special mechanical impact is expected.
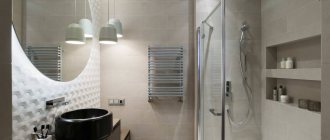
Interior solutions
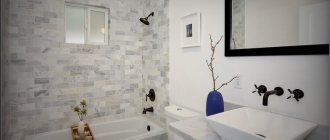
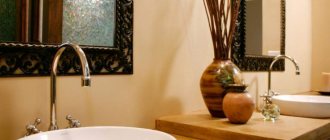
Finishing a bathroom with lining takes on a special look. Different types of wood have a unique decorative element. The unique texture allows you to create real works of art. Varnishes and tinting compounds affect the color scheme, which radically changes the shade of wood.
Lining can be successfully combined with other finishing materials, creating the most decorative, unpredictable image in the interior of bathrooms. Environmentally friendly material, durable, easy to use.
The main thing is to pay enough attention to the processing and protection of the material from moisture and mold, make the correct calculations and pay attention to the quality of the lining itself. In this case, finishing the bathroom will take place without unnecessary disappointments and costs.
By following the entire algorithm for installing the lining, it is possible to carry out the work yourself. You can count on success only when choosing high-quality material and its pre-processing.
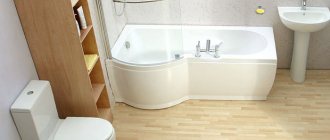
Alternative to tiles in the bathroom
Most of all, ceramic tiles correspond to the above characteristics: they are most often used to decorate bathrooms. However, this material is quite expensive, and you can’t put it on the ceiling. In cases where the repair budget is limited, lining, suitable for finishing any surface except the floor, can be a good alternative to tiles. We are talking about products of small width, fastened using a tongue-and-groove method.
There are two types of lining used in the bathroom:
- Plastic. It can be suture or seamless. The latter option involves a more dense joining of the lamellas, which allows you to create an almost monolithic surface. Plastic tolerates moisture well, without requiring additional protection from fungus and mold.
Plastic lining for bathroom
- Wooden. It also has the appearance of lamellas, but is always connected using a suture method. Most often made from pine. As you know, wood reacts poorly to moisture, so before installation it must be treated with antiseptics. Finished surfaces are usually varnished or hidden with wax. In modern bathrooms, this type of lining is not used very often: baths and saunas remain traditional premises for wooden cladding.
Wooden lining for the bathroom
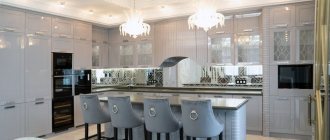
A more suitable option for finishing a bathroom is plastic lining . A common option is when ceramic tiles are laid on the walls and the ceiling is covered with panels. Although, when implementing budget repairs, the walls are also covered with plastic.
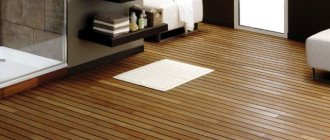
Floor finishing
Before laying the final floor covering, screed and waterproofing must be carried out. The bathroom floor in a wooden house can be covered with the following materials:
- ceramic or porcelain tiles;
- laminate;
- moisture-resistant wood;
- linoleum.
The easiest way to finish the floor is with tiles. It is durable and resistant to moisture. To save money, you can use linoleum.
Waterproofing
Waterproofing a bathroom in a wooden house is one of the key requirements. To protect walls, floors and ceilings from moisture, materials of the following categories can be used:
- coating They form a durable coating on wood that protects against moisture penetration. This includes mastics and emulsions applied in several layers with painting tools;
- impregnating After impregnation of the wood in several layers, they provide protection from moisture. The composition contains various chemicals, so such materials are not recommended for residential premises;
- stick-on Various waterproofing materials that adhere to overlapping surfaces. A sealant is used to seal the seams.
Ceiling
In wooden houses, ceilings in bathrooms are usually suspended or suspended. For tension ones, PVC film is used, and for suspended ones, PVC panels are usually used.
This finish reliably protects the main structure from moisture. Under suspended and suspended ceilings, you can aesthetically hide electrical wiring and ventilation ducts.
When using plasterboard for ceiling installation, use a metal profile coated with zinc or a polymer material that prevents the development of corrosion. GKL is often finished with glass wallpaper; for rooms with high humidity this is one of the most practical finishing options.
Water supply
In wooden houses, condensation often forms on cold water supply pipelines. Therefore, you should not use steel pipes.
The best option would be plastic pipes. Condensation usually does not form on them or is present in smaller quantities, which eliminates the risk of damage to the wood.
You can minimize the likelihood of the development of putrefactive processes in a tree in the following ways:
- do not install pipes close to walls;
- secure the pipes with rubberized clamps;
- thermally insulate the pipeline with tubular polyurethane foam insulation;
- install a drain valve that drains accumulated water on the floor.