Types of material
In the photos of tiles in the bathroom presented on the site, you can choose an interesting option for decorating your own room. Based on the manufacturing method and components, ceramic, stone, glass tiles, and porcelain tiles are distinguished. This type of finish is in great demand for its efficiency and durability.
In interior design
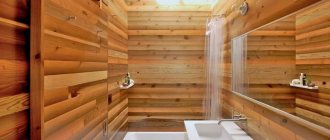
Tiles are used to decorate bathrooms in any style. A huge variety of colors, shapes, sizes and textures of the material allows you to make your wildest dreams come true. Let's look at the interesting interiors of tiled bathrooms in a modern style.
Modern
Modern style is based on the use of bright colors and unusual contrasts in the interior of the room. Suitable for both small and spacious rooms. Such an interior can be budget and very expensive.
Provence
For the interior of a Provençal-style bathroom, discreet pastel colors of ceramic tiles are used. This assortment will create a romantic mood for the owners of the bathroom. Sky blue, lavender and soft pink work best. For wall decoration, choose tiles with small floral designs.
To decorate spacious rooms, designers choose the loft style. To do this, use ceramic or natural stone tiles in beige and sand colors. Brick color and chocolate shades are required for use in the interior. Dark brown and terracotta can be the walls and floor of the room or individual accessories.
Classic
The classic style of bathroom interior will always be popular. To decorate it, use marble tiles. Finishing materials for classic interiors are high-quality and expensive. A good color solution is to choose calm, soothing shades that will suit furniture made of expensive wood.
Art Deco
All shades of gray are used to decorate an Art Deco style bathroom. Wall cladding with gray graphite tiles will go well with the black floor. A large floral pattern on the tiles will emphasize the elegance of the room. Tiles with an unusual pattern on the floor look very impressive.
Patchwork
The interior in the patchwork style consists of alternating tiles of small sizes. This can be a tile of the same color with or without a pattern. An impressive looking wall covered in small tiles of different colors that work well together.
High tech
At first glance, the high-tech style may seem impractical for the bathroom. The main rule for decorating walls in such an interior is the use of glossy surfaces made of facing materials. Laying tiles at different angles, using materials of different shapes - all this is typical for this style.
Baroque
A Baroque bathroom can become the highlight of the whole home. The tiles for such a room are selected in subdued pastel colors. The tiles are laid in the classic version. The luxurious interior will be provided with exquisite accessories.
Oriental
The interior in oriental style is characterized by peace and quiet. Natural stone is used to construct walls and floors. The tiles are selected in beige and brown tones. Simplicity and minimalism are the main features of interior design.
Scandinavian
Recently, the Scandinavian interior trend of using harmonious shades of light colors has been gaining popularity. Ceramic tiles with small patterns go well with wooden elements.
The beauty of natural stone
Tiles made of natural or artificial stone look very impressive on the wall. Environmental friendliness and excellent appearance are highly valued among buyers. Available in different shapes and sizes.
Among the disadvantages are the fragility of the material and susceptibility to mechanical damage: it breaks easily, crumbles, leaving sharp edges, cracks, scratches, chips often appear on the surface, and there is a high probability of fungal growth.
Finishing a bathroom with stone tiles will create an elegant, comfortable environment and, if handled correctly, will last a long time.
Recommendations
When installing tiles on slopes, you should follow these recommendations and advice from experts.
- Preliminarily estimate the location of the parts on the wall. Wide pieces should be located at the junction. Otherwise the look will deteriorate.
- Correctly join elements on different surfaces. The cladding starts with a large piece. If this is not possible, then trimmings are used.
- If the width of the slope is less than the required size, the whole figure is attached along the outer edge. The gaps between the frame and the cladding are closed with scraps.
- Heavy elements that cannot be held by glue are supported with wooden clamps. They are removed after the adhesive has completely dried.
- Grouting is carried out after the glue has dried. Depending on the thickness of application, this may take 24 hours or more.
Finishing the slopes must be done very carefully. If you have no experience in solving such problems, it is better to turn to the experts.
Tiles are a universal material that is used for finishing different surfaces. It is resistant to high humidity.
Translucent weightlessness
A new and rather expensive material has appeared on the building materials market, which successfully replaces conventional materials.
Glass tiles have a perfectly smooth surface, which makes it easy to cope with dirt, splashes, and plaque. It is enough to wipe the surface with a damp cloth with detergent or make a home remedy: stir 2 tbsp in 0.5 liters of water. spoons of vinegar. And wipe the glass surface with this product.
The dense structure prevents mold and mildew from developing under the surface. Modern design with different visual effects allows you to create a unique and unusual design in the room. A large collection of glass tiles for the bathroom can be found in the Leroy Marlene catalog.
Carrying out work
You need to approach the work very carefully. Finishing window slopes with tiles is carried out in several stages.
Preparatory stage
Preparation is one of the main stages. The strength and quality of attachment to the base depends on it. Preparation is carried out in several stages:
- prepare the workplace so that nothing interferes with work;
- plaster the slopes, which will ensure high-quality adhesion of the glue to the base;
- cover the frame and glass with masking tape or plastic film so that you don’t have to clean them of the adhesive later;
- carefully prime the slopes;
- prepare glue.
To stir the glue, use a drill with a special attachment. After this, wait 15 minutes for it to brew.
Step-by-step instruction
When the surface is prepared and the glue is mixed, proceed to the actual finishing.
The adhesive is applied to the back of the panel with a notched trowel. After this, it is carefully pressed against the wall. The evenness of the surface is checked using a level. Glue is added if necessary. The corners are joined using a special strip or by cutting the edges at an angle of 45°.
Final work
At the final stage, the joints are grouted. To do this, wait a day after installation.
The fugu is applied with a rubber spatula. Remove excess with a damp cloth. If the grout dries out, it will be difficult to remove.
Top seller
The most popular option for decorating bathrooms is ceramics. This is an inexpensive tile for the bathroom, it has a different surface structure, a wide range of colors and effects (matte, glossy, sprayed, rough, ribbed).
A simple and fast production method, affordable, environmentally friendly components (clay, sand, additives) bring this type of finishing to a leading position. The advantages of the material are moisture resistance, strength, wear resistance, ease of installation, and ease of cleaning.
Benefits of technology
When replacing window structures or during repairs, they decide how to finish the slopes. There are several ways to solve the problem. Among the popular options are the design of different types of materials. The technology has advantages:
- beautiful view of the walls;
- variety of textures;
- surface resistance to mechanical stress and negative environmental factors;
- a wide selection of materials in color and shade, which allows you to fit the finish into the design of the room;
- meets all hygienic requirements;
- simplifies the cleaning process;
- durability.
To see all the advantages of the technology, you need to correctly finish the window slopes with tiles yourself. The appearance and durability of the coating will depend on this.
Strength comes first
One of the types of surface coatings is porcelain stoneware. This is a very durable material, so it is often used as bathroom floor tiles. It repels moisture well, has a non-slip surface, imitates stone with a phosphorescent effect, which gives the room additional attractiveness and charm.
A few nuances
In order for the finishing of door or window slopes to take place without unpleasant surprises, several conditions must be observed, the main one of which will be high-quality preparation of the working surface. The base on which the coating is to be laid must be as smooth as possible and free from significant flaws. In bathrooms and other damp places in the house, you will need to pre-treat the base with various impregnations or primers to create additional protection from moisture.
Since in most cases design elements will have to be cut anyway, it is better to practice in advance on unnecessary fragments or simply ask a more experienced craftsman to do the work. Without experience, it is difficult to obtain a high-quality result, and if you don’t have it, you can choose a coating that does not require trimming parts. This can be like finishing with gypsum tiles, which can be easily sawed with a regular hacksaw for metal, or mosaics in general, which practically do not require any adjustment in size.
Savings in the case of such difficult-to-work material results in a very low-quality result. The photo below shows what finishing slopes with tiles can look like with an amateurish approach. Everything looks sloppy and does not add beauty to the design of the room. To avoid such results, contact an experienced technician if you have never performed such repairs yourself.
Pixel diversity
A separate option for finishing walls and plasterboard structures is mosaic tiles. It consists of small squares with a side of 1-5 cm, has different textures, and a wide selection of colors. Mosaic is present in every collection of finishing materials.
Made from plastic, glass, clay, stone. It has a matte, mirror surface, well masks uneven walls, hiding small cracks.
In combination with other materials and in combinations with larger tiles they create an original, pleasant interior. Laying out mosaics is a labor-intensive process and requires special skills.
If you do not have experience in laying, it is better to entrust the work to a professional master who will lay tiles in the bathroom according to all the rules with guaranteed quality.
How to install on a bathtub: step-by-step instructions
Before installing the product, the gap between the bathtub and the wall should be filled with sealant. The joint is cleaned of contaminants, after which a degreasing compound is applied to it.
Before installing the product, the gap between the bathtub and the wall should be filled with sealant.
The width of the bath must be taken into account. Using tape, its sides and part of the adjacent wall are sealed (4 cm above the level of the curb).
After the coating has dried, the gap between the bathtub and the tile is treated with a cement solution or sealant, and then sealed.
The plinth for framing must be cut to the required size. To do this, you need to make correct preliminary measurements. For fastening such a structure, liquid nails would be a suitable option. Having applied the product to the desired section, apply it to the wall section and hold for 1 minute.
Transparent sealant is used to seal joints and gaps. Special plugs will help give this design an aesthetic appearance. This way you can prevent water from leaking outside the bathroom.
All materials must match the interior design. Not only products made from natural materials, but also their substitutes will look beautiful.
Installing a rim on an old bathtub
If the bathtub was used for a long period, the corners could become unusable.
Plastic skirting boards are a good option for resealing the gap. To install them, you do not need to dismantle the old surface finish, since the coating will not deteriorate.
The installation process is divided into the following stages:
- Dismantling old corners. To do this you will need a knife and a spatula. To install a new element, you must first measure the length.
- Then you need to remove the old sealant. If this fails, you can use chemicals to dissolve it.
- Using an antiseptic solution, plaque and mold formations are removed from the corners. To prevent the re-formation of fungus, you should use the Anti-Mold product.
- The detergent composition will help get rid of plaque, dirt and dust. After this, the product must be treated with alcohol, acid solution or acetone.
- The gap must be filled with new silicone sealant. Before applying it, you need to cover the edges of the walls and bathroom with tape.
- New corners are cut with a jigsaw or knife. You can also use a hacksaw for this purpose. The joints should be smooth. To do this, they need to be cut at an angle of 45°.
- The inner surface of the corner is coated with a silicone-based sealing compound, then it is pressed against the edge of the bathtub and the wall.
- Excess sealant must be removed. After this, plugs are put on the corners.
Experts recommend attaching plastic corners to acrylic bathtubs. This technique is also appropriate if there are PVC panels on the walls. Borders made of the same material, attached to tiles, will last no more than a few years.
To prevent the re-formation of fungus, you should use the Anti-Mold product.
Advantages of finishing rooms with tiles
Why should you choose tile finishing:
- Long service life. This includes indicators of strength, heat resistance, and moisture resistance.
- High levels of practicality. The surface covered with tiles is reliably protected, there is minimal harm from mechanical damage, and it is not susceptible to the formation of fungus.
- Easy to maintain cleanliness and original condition. Wet cleaning with detergents removes any type of contamination (plaque, dust, dirt, soot).
Plastering
The slope is primed and pendulum profiles are installed along the opening. Next, apply plaster from a cement-sand mortar. Alabaster can be added to improve adhesive properties. The prepared solution is applied to the surface with a trowel and leveled with a spatula, focusing on the beacons.
If you plan to paint, the slope must be carefully prepared. To do this, plaster with large fractions is applied to a reinforcing mesh, followed by finishing. For strengthening, a perforated profile (corner) is installed. It is pressed into the wet plaster.
The plaster must be completely dry before it can be painted. Plastering is a cheap finishing method, but requires careful leveling of the surface.
How to choose tiles and not make a mistake
In order not to make a mistake when purchasing material and choose the best option for ceramic tiles in the bathroom, use the advice of experienced professionals:
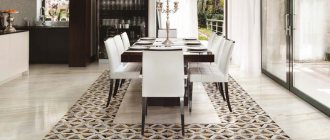
For large rooms, you can choose tiles of any size. A combination of different formats looks impressive. The smaller the room, the more you should move away from the mosaic option, as it reduces the space even more.
Using materials of different colors and textures, you can successfully divide a room into functional zones. Large tiles are suitable for floors and walls, smaller ones will limit the utility area from the hygienic and laundry areas.
The correct format of tiles can enlarge or reduce a room, hide minor defects, emphasize, highlight individual places and thus create a cozy interior.
The color of the material plays a big role. Dark, rich tones visually reduce space. Light ones, on the contrary, make the room more voluminous. Using one color in the interior can make the room boring and depressing. You can dilute this design with decor, bright accents in the form of multi-colored accessories. Tip: do not use more than three colors at the same time in the interior.
Tiles are purchased based on their purpose. For highly durable floors, for walls with an emphasis on appearance.
Pay attention to the product labeling, which indicates the composition, approximate service life, and installation tips.
You need to purchase the most expensive material according to your request. This way you will protect yourself from low-quality counterfeits and not overspend your budget.
A consultant in the store will help you calculate the material consumption for a specific room. Always take +10% stock. The shade may differ in different boxes; if one tile is damaged, you will have something to replace it with.
Before purchasing, inspect the material manually for cracks, chips, or bent surfaces.
Installation requires special knowledge, how to lay tiles in the bathroom, what adhesive to choose, what method to use, seamless or with seams. If you don’t have enough practical skills, you can watch the video on the website with detailed instructions and descriptions. The second option is to use the services of professional builders.
Mosaic slopes
To install a mosaic covering on the slopes of windows and doors, you can use special soft canvases on which ceramic pieces are glued. The base can be paper or in the form of a mesh. Their convenience lies in the fact that you can cut the canvas to the required size.
The installation process is simple. The surface of the slope must be dry, clean and level. At the preparatory stage, preliminary markings are made on the slope, according to which the mosaic canvas is then glued.
- the glue is applied with a notched trowel;
Use a notched trowel to apply the glue. - When gluing the mosaic canvas, you do not need to put too much pressure on it so that the adhesive does not squeeze out through the seams;
It is necessary to glue the mosaic canvas without strong pressure - It is recommended to use epoxy resin-based grout for sealing joints; Epoxy resin is used to grout joints
- Using a rubber spatula, spread the grout in an even layer;
To distribute the grout evenly, use a rubber spatula - After the grout has dried, its excess is removed with a damp sponge.
Window and door slopes, finished with one of the listed materials, will decorate any interior and retain their original appearance for many years.
Design features for an interesting design
Repairs are usually done for more than one year. In order not to oversaturate the interior with bright accents, and to avoid getting tired of the design after a week, we offer several original ideas for creating a unique, “eternal” design:
Use different combinations of textures. For example, wood + glass, metal + mirror. The combination of different materials at different viewing angles will open up new views, and if you use multi-level lighting, you can “change” the interior as often as you like with the click of a switch.
The classic version of laying tiles is significantly refreshed by photo landscapes on the tiles. You can choose from ready-made paintings or order a custom image printed. This could be a portrait, a seascape; images of fish, the seabed, and dolphins are popular.
Designers use ways to visually divide space, using a border, narrow or wide, bright decor that stands out from the rest of the tiles, different laying methods, straight, diagonal, herringbone, with overlap.
The “near-far” effect can be created using light, mirror surfaces, intricate patterns, and transparent partitions. Such an interior will not overload your eyes with a monotonous picture, will create a lot of different interpretations, and will delight you for many decades.
When decorating, the emphasis can be placed on niches, beautiful mosaic design of the bathroom frame, wall panels or designer accessories.
Slopes made of tiles or ceramic tiles
If it is necessary to finish the slopes of windows or doors with elements with precise geometric dimensions, you must follow the instructions given below.
Laying
Before starting work, the slopes must be carefully leveled. The tiles will be laid with high quality only on a smooth, even surface . This must be controlled using a building level.
There are several methods for leveling slopes: using plaster, drywall or chipboard.
You can line the window opening with plasterboard
Below we will tell you how to lay tiles on a previously plastered and primed slope.
Before gluing the tiles, parts are laid out on the prepared slopes to assess their future position. Lay out the tiles starting from the corner. The principle is the same as when laying tiles on a wall - the first bottom row is laid out first.
Laying tiles begins from the bottom row
The glue is applied to the wall using a metal spatula. The texture obtained in this way will contribute to better adhesion of the adhesive and tiles. The joints are grouted after a day using a rubber spatula.
How to make a corner connection
At the preparation stage, it is necessary to install metal or plastic perforated corners under the plaster mortar to give the corner edges of the window opening a clear geometric shape.
The layout scheme must be selected in such a way that the width of the tiles on both sides coincides and the seams between the tiles coincide in all planes.
The seams between the tiles must coincide in all planes
The corner can be finished using grout. Therefore, fixing the tiles at the corners should be done in the manner shown below.
Corner finishing is done using grout
In another case, you can use a decorative corner.
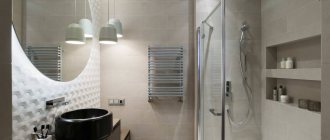
Photo of bathroom tiles
MDF finishing
Cut MDF panels are laid on the prepared base using the above method. The panels must be carefully adjusted to each other so as not to violate the integrity of the design. The edges of the planks are cut at an angle of 45 degrees so that they fit together.
The top strip is coated with glue and attached to the top of the slope. Do the same with the side rails. Cover the gaps between the bevels and the base with plastic corners. Use liquid nails to secure.
For strong fixation, install supports for the panels while the glue dries.
External slopes on windows
External slopes on windows are not only a decorative element of the window, but also a practical necessity. After installing new windows, the seams are sealed and insulated using polyurethane foam. In many cases, in openings without a quarter, the hardened foam on the street side is not protected from sunlight and rain. And ultraviolet radiation is destructive to polyurethane foam and it can collapse in a few months, losing its thermal insulation properties. This is especially true for owners of private houses who postpone the installation of external slopes outside until later. The faster you improve the outer slope, the less work you will have to do to restore the heat-insulating assembly seam.
Wooden models
These are popular due to their appearance and good performance. Installing them is not difficult. Wood panels must be the same in structure and thickness.
The surface is pre-cleaned, primed, and plastered. Then the frame is prepared. Glue is applied to the planks, applied to the wall, and secured with self-tapping screws. Excess glue is immediately removed.
You are convinced that slopes are quite easy to make with your own hands. Which material to choose depends on your taste and financial capabilities. With little expense you can decorate everything beautifully. You can show your imagination by using combined materials. Do not forget about sealing, for which use polyurethane foam or mineral wool.
Loading…
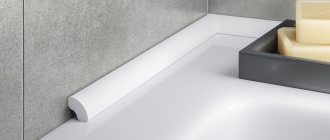
Plastic corners for tiles
As noted above, polymer alloys are affordable. In addition, the range of these products includes various colors and shades. As for performance, PVC models do not deform and withstand daily loads.
Their surface does not change its calf with regular solar insolation. Vinyl corners can correct defects in the area of cutting ceramic tiles. They are often used to decorate the outer and inner corners.
Note!
Epoxy grout for tiles: pros and cons, scope, varieties, how to work with it (instructions + photos)
Do-it-yourself tile shower tray step by step: instructions, dimensions, design, installation of communications, types of structures, photos
- White tiles in the bathroom: 170 photos of the best ideas and new tile designs. Layout schemes and beautiful combinations
Internal corner for tiles is divided into two categories:
- Unilateral. It is designed to be built into the grooves between the tiles at the time of their installation. In this way, the master carefully places the plastic part, which is tightly fixed with a building compound;
- Two-part. This fittings are also walled up at the stage of laying the tiles. The plastic element is placed along the inner corner.
A one-sided model of a tiled corner is always on sale. Its cost is much lower than that of a two-piece model. This model can be used to smooth out sharp and right angles. It is not recommended to purchase it for decorating obtuse angles.
- Outer. This type is a peculiar design, one edge of which is fixed on the tile, and the second is carefully pressed into the area of the first row. Thus, during further laying of the tiles, neat joints of ceramic elements are obtained;
- C-shaped profile. During the installation process, 2 edges of the cut tile are carefully fixed under the outer surface of the semicircular profile. The photo of the tile corner shows this product model.
Finishing slopes of plastic windows
After installing the glazing structure in the opening, it is necessary to finish the adjacent slopes. Finishing work decorates the window opening, gives it a finished and attractive look, and provides conditions for the safety of the junction unit.
Functional significance of slope finishing
Finishing the slopes is a set of works along the perimeter of the window frame from the inside and outside of the opening, including sealing the junction of the window sill and ebb. To comply with the warranty conditions and the required quality of work, we recommend finishing the slopes in our company.
FINISHING WORKS ARE IMPLEMENTED BY:
Decorative design of the window opening after completion of installation work.
Finishing the opening from the street side protects the junction from rain and sun.
The slopes reliably isolate the junction unit from indoor humidity.
Finishing materials for window slopes
To finish the slopes, we use plastic panels that are best combined with PVC windows.
Sandwich panel 10 mm thick (2 sheets of solid PVC 0.8 mm and 0.5 mm thick + extruded polystyrene foam) Matte surface. High thermal insulation.
Foamed PVC sheet 4-8 mm thick for construction and finishing works. The surface is matte. High impact resistance, good thermal insulation.
Cost of finishing work on slopes
Delivery of materials to the site within the Moscow Ring Road (+ 10 km) - 700 rubles, then - 15 rubles/km.
| Slope depth | Sandwich panel (running meter) | Panel - foamed PVC (running meter) |
| up to 25 cm | 650 rubles | 930 rubles |
| up to 30 cm | 690 rubles | 990 rubles |
| up to 35 cm | 840 rubles | 1200 rubles |
| up to 40 cm | 900 rubles | 1270 rubles |
| up to 45 cm | 930 rubles | 1330 rubles |
| up to 50 cm | 1000 rubles | 1430 rubles |
| up to 60 cm | 1200 rubles | Negotiable |
INCREASE RATIO:
- bay windows - 1.15
- arched windows - 1.5
- colored slopes - 1.8
COMPLEX OF WORK FOR FINISHING SLOPES:
- removing old plaster from slopes
- leveling large potholes, chips, and mortar overflows
- plastering the gap under the window sill to a depth of 3-10 cm, up to 80 mm high
- installation of plastic slopes
- sealing the joint between the frame and a quarter of the wall opening on the street side
- sealing the joint between PVC panels and the window frame
- designing the joint between the slope and the wall with decorative corners
How to finish window slopes
The seam between the frame and the quarter opening is filled with cementitious adhesive for street use. The adhesive mixture has the required level of vapor permeability and ensures the evaporation of possible moisture from the assembly seam. The cement mixture has maximum durability and maintainability.
If there are decorative facades adjacent to the window, the seam between the frame and the opening is filled with sealing tape (PSUL) to protect against precipitation. To comply with working conditions, the tape is installed in openings with a slight deviation from the vertical; it cannot be plastered, painted, or coated with sealants.
For slopes we use high-quality sheet panels that have a white matte surface. The seams between the panels are sealed with a special glue - “liquid plastic”. After the sealant hardens, the joints do not become dirty or change color.
Regardless of the width of the slope, only solid PVC panels are used. In houses with slopes more than 40 cm wide, we recommend using sandwich panels 10 mm thick. The space between the wall and the PVC sheet is additionally filled with foam.
Advantages of our slopes
High-quality, fast and neat installation.
Compliance with construction requirements.
They do not retain dirt and are easy to clean.
Stable color - do not turn yellow or fade.
Examples of plastic slopes - our work
Arrangement of the junction assembly assembly
MORE ABOUT THE MOUNTING UNIT
Finishing of slopes - in the aspect of arranging the installation seam of the window junction unit according to the standards of GOST 30971-2012. Consideration of the tasks of finishing work after installation of plastic glazing structures.
CALLING A MEASURER
"Window company VESTA"
- Products
- Rehau plastic windows
- Office, entrance and portal doors
- Blinds, roller blinds, curtains
- Services
- Glazing of balconies and loggias
- Finishing balconies and loggias
- Slope finishing
- Prices
- Prices for plastic windows
- Prices for glazing of balconies and loggias
- Application for calculation
Moscow, st. Znamenskie Sadki, 11 Opening hours: 10:00–19:00, seven days a week Phone: +7 (495) 411-9045 (multi-channel) [email protected] Site map
© 2006-2020. Rehau plastic windows in the official sales office of REHAU "Window Company VESTA" LLC. All rights reserved © Price information is for reference only and is not a public offer. The exact cost of products is determined by managers.