SHARE ON SOCIAL NETWORKS
FacebookTwitterOkGoogle+PinterestVk
Split systems are used to purify the air and create a comfortable microclimate in the house. Due to the high cost of specialist services, many owners try to carry out the installation work themselves. This article is a step-by-step guide telling you how to connect an air conditioner in your home: do-it-yourself installation, choosing the optimal location for placing climate control equipment, general information about the design of the equipment and the principle of its operation.
In order for the equipment to work without failures, installing the air conditioner yourself must be done strictly according to the instructions
The internal structure of the air conditioner and the principle of its operation
Before installing an air conditioner in a house or apartment, you must become familiar with the operating principle of this device, as well as its structural structure. This knowledge will not only speed up installation work, but also perform it correctly.
The air conditioner consists of a compressor and an evaporation unit connected to each other by tubes
Split systems consist of an evaporator unit and a compressor. These elements are connected to each other by tubes. To mount the external unit or compressor, the plane of the outer wall is used, and the evaporator is placed indoors. Expensive models of climate control equipment may have several indoor units. All of them are connected to one compressor.
Operating principle of split systems:
- Under the influence of high pressure, refrigerant is supplied through the nozzle into the evaporator chamber.
- There the working substance expands and boils. The vapors formed during this process absorb heat.
- As a result of this process, water condensate is formed, which settles on the radiator in the evaporation unit.
- From there, the moisture enters a special tank and is removed from the room through a tube.
During operation of the air conditioner, the following occurs with the working substance:
- The compressor pumps out vapors and increases the pressure.
- The working substance is heated, which changes from a liquid state to a gaseous state.
- In the form of a dense fog, the refrigerant enters the condensate collection chamber.
- The fan cools the condensate vapor, which again turns into a liquid state.
- Then the working substance, driven by pressure, again enters the evaporator nozzle. The cycle repeats.
To install everything correctly, you should have an understanding of the structure and operating principle of the air conditioner
The efficiency of climate control equipment, as well as electricity consumption, depend on the conditions under which the air conditioner operates. If a heating device is installed nearby, electricity consumption will increase.
Note! If you want to install an air conditioner in an apartment, you must take into account the position of the heating devices. Their close proximity increases the load on climate control equipment, which can cause it to fail.
Troubleshooting yourself
If your air conditioner suddenly stops cooling the air in the room entrusted to it, you can independently determine the cause of the problem:
- Does not work. The reason may be a lack of power supply. Occurs due to a damaged plug or cord, a blown fuse, or a lack of voltage in the electrical network.
- Poor cooling. Air flow is obstructed by a dirty filter, an obstruction, or a nearby heat-generating appliance.
- Doesn't heat well. The heat exchanger located outside is frozen, which prevents air circulation.
A normally operating window air conditioner will make a barely audible click when the thermostat starts and stops, and after the compressor is turned off, the fan will still run for a short period of time.
Review of the design of the external unit before connecting the air conditioner: diagram and structure
When installing an air conditioner with your own hands, it is useful to familiarize yourself with its structure. This will allow you to avoid mistakes during the work process and better master the technology.
The design of the external unit consists of the following components:
- fan;
- compressor;
- capacitor;
- four-way valve;
- filter;
- control boards;
To install an air conditioner with your own hands, you need to familiarize yourself with its structure.
- fitting type connections;
- protective cover with quick-release design.
The fan generates air currents that blow across the condenser. In it, freon is cooled and condensation occurs. The air that is blown through this radiator, on the contrary, heats up. The main function of the compressor is to compress freon and maintain its movement within the refrigeration circuit.
There are two types of compressors:
- spiral;
- piston
Piston compressors have a lower price, but they are less reliable. Unlike spiral ones, they react worse to low temperatures during the cold season. When connecting an inverter air conditioner, the control board is usually located in the outdoor unit. If the model is not an inverter, all electronic components are placed in the part of the split system that is installed indoors. This is done in order to protect the control board from humidity and temperature changes.
The design of the external unit includes the following units: compressor, valve, fan
Four-way valves are usually found in reversible types of air conditioners. Such split systems operate in two modes: “heat” and “cold”. When the air conditioner is set to heat, this valve reverses the direction of refrigerant flow. As a result of this, the functionality of the blocks changes: the inner one begins to heat the room, and the outer one works for cooling. Union connections are used to connect copper pipes that connect the indoor and outdoor units.
The freon system filter prevents copper chips and other particles from entering the compressor. During the process of installing an air conditioner with your own hands, small debris is generated. The filter traps particles before entering the compressor.
Note! If the installation of climate control equipment is carried out in violation of the technology, a large amount of debris can enter the system. In this case, the filter will not cope with the contamination.
The quick-release cover is designed to protect the terminal block intended for connecting wires and fitting connections. In some models, it provides partial protection, covering only the terminal block.
Regardless of what structural type the split system belongs to, its outdoor module always has the same working units
Height from air conditioner to ceiling
The most optimal height at which to hang an air conditioner is considered to be 10 cm from the ceiling. This will ensure the correct flow of cool air passes through the top. In this case, there will be enough space for air circulation. However, for more powerful air conditioners, this distance can be increased by 5-10 cm.
The distance is calculated from the baseboard
Review of the design of the indoor unit, installation of the air conditioner: diagram and structure
The indoor unit is placed indoors, so manufacturers pay great attention to its appearance. The split system must fit into the interior design. In addition, the size of the indoor unit of the air conditioner is of great importance. Its width varies between 0.7-1.6 m, its depth can be from 16 to 20 cm, and its height can be from 20 to 32 cm.
The indoor unit consists of the following components:
- front panel;
- coarse and fine filters;
- evaporator;
- fan;
- horizontal and vertical blinds;
- indicator panel;
- control boards;
- condensate collection pan;
- fitting connections.
The front panel looks like a plastic grille. It provides air access to the block. The coarse filter traps large particles of dust, debris and animal hair. It is a plastic mesh that needs regular cleaning (at least 2 times a month). Fine filters come in two types. Coal types of products are aimed at removing unpleasant odors, while electrostatic ones remove plant pollen and fine dust from the air.
The air conditioning system must fit into the interior design
The indoor unit has a three- or four-speed fan. The evaporator is essentially a radiator where the cold working substance is heated and turns into a vapor state. The air flows that pass through this element, on the contrary, are cooled.
Horizontal blinds control the movement of air vertically. They are equipped with an electric drive. Their position is adjusted using the remote control. Horizontal blinds are capable of automatically performing oscillatory movements, as a result of which the cooled air is evenly distributed throughout the room. The indicator panel is located on the front side of the split system. It is a set of light indicators that allows you to determine in what mode the air conditioner is operating. In addition, LEDs indicate breakdowns.
Water collects in a tray located under the evaporator and is discharged outside using a drainage hose. The control board consists of an electronics unit and a microprocessor. Union connections are used to connect pipes between the external and internal units. Vertical blinds control the horizontal movement of air.
Note! The position of vertical blinds is manually adjusted. Only some models of premium split systems have the ability to configure using a remote control.
The indoor unit is a technically complex device consisting of many elements
Outdoor unit installation
The requirements for installing the outdoor unit are similar. The main rule is to securely fasten the dowels in the plates holding the block itself. More powerful anchors are used in the work, since the load on the outdoor unit is higher, and safety comes first.
If the installation is carried out in a high-rise building, then there may be problems with outdoor installation. You will need the help of industrial climbers who have the appropriate equipment and experience in performing high-altitude work.
Which is more profitable: professional installation or DIY split system installation?
The price of installing an air conditioner depends on the complexity of the work, the power and size of the equipment. To make the comparison correct, as a basis, you can consider the cost of professional services for installing a small-power household appliance, for example, 3.5 kW.
This service includes:
- installation and connection of both units;
- laying the harness (up to 5 m);
- formation of through holes in the wall.
The cost of installing an air conditioner also includes the cost of consumables. On average, professional installation of low-power split systems costs the client 5,500-8,000 rubles.
Average prices for renting tools and purchasing materials for installing an air conditioner in an apartment with your own hands:
- Rotary hammer (“Makita”) – 500 rub./day.
- Two-stage pump – 700 rub./day.
- Installation kit + communications (5 m) – 2500 rub.
Self-installation of a split system saves from 1,500 to 4,000 rubles
In some cases, equipment is rented only on security. It is approximately 4000-8000 rubles. The amount of the deposit depends on the cost of the equipment leased. If pipe rolling is required, then to the specified list you will have to add tool sets designed for these purposes. The cost of their rental is 350-500 rubles/day.
The total amount reaches 3,700 rubles. To this value you need to add 10%, which will cover unforeseen costs and the purchase of consumables. The result will be about 4,000 rubles. This means that installing a split system yourself saves from 1,500 to 4,000 rubles.
It is worth noting that the minimum amounts for professional installation do not always include a complete list of work. The client may have to pay extra for some of them. Taking this into account, we can come to the conclusion that the savings are about 2500-3500 rubles.
Note! Economic benefits can only be achieved through proper installation of a split system with your own hands. Repairs and alterations will only entail additional costs.
The cost of installing an air conditioner includes the cost of consumables
Safety
Read also: Secrets of soundproofing walls in an apartment: we use modern materials and technologies (25+ Photos & Videos) + Reviews
Damaged air conditioner
The electrical connection diagram must comply with the “Electrical Installation Rules”, since the air conditioner is a high-power device. Before you buy a device, you need to calculate the power of your electrical devices and compare all the restrictions. Otherwise, this may lead to emergency situations.
How to do it yourself: air conditioner maintenance at home
To achieve savings, many apartment owners resort to independent maintenance of climate control equipment after installing an air conditioner with their own hands. Videos from the Internet contain a lot of useful information on this issue, so there are no special problems.
Related article:
How to choose an air conditioner for an apartment: effective cooling and ventilation
Types and features of devices, additional functions. Power calculation based on room parameters. Care tips.
The simplest cleaning method is foam washing. For this, a special detergent is used, which is sold in the form of an aerosol can.
The procedure for cleaning a split system with foam:
- Unplug the air conditioner, open its lid and remove the filters.
- Rinse the filters with running water and leave to dry.
- Treat the evaporator fins with foam from a can and wait for the time specified in the manufacturer's instructions (10-30 minutes).
- Install the filters back and turn on the air conditioner, setting it to ventilation or heating mode (the choice of mode depends on the recommendations of the foam manufacturer).
- After 30 min. The air conditioner can be turned off and the room ventilated.
The most common method of cleaning an air conditioner is foam washing.
In the video “How to clean a split system at home” you can learn more about this process. This method is suitable for removing contaminants from the heat exchanger. To clean the drainage basin, fan and hidden areas of the air conditioner, you will have to disassemble it.
Advantages and disadvantages of self-installation
It is no secret that installation of any equipment by specialists costs money, and a lot of it. In pursuit of savings, many buyers of air conditioners refuse installation in favor of self-installation. In practice, a number of questions and problems arise that can affect the performance of the equipment.
This leads to the emergence of undesirable situations, which turn savings into a real problem, which cannot be solved without the same specialists. Therefore, before refusing the help of those who “ate the dog” during the installation, look at the advantages and disadvantages.
Advantages:
- Significant cash savings
- Independent choice of location and planning of work during the day
- Quality depends only on the person
- You can choose the highest quality materials for installation
Flaws:
- High risks of equipment breakdown and malfunction due to improper installation
- Formation of large amounts of condensation and risks of collapse if the air conditioner is not properly fixed to the façade of the building
In fact, installing an air conditioner and connecting it will not take much time, but without the ability to work with equipment it will be extremely difficult to do. If you want to test your strength and prove to yourself and others that there is a man in the house, before work, be sure to study detailed information about the process, the necessary tools and the sequence of actions. The result will depend on this.
There is no need to spoil the nerves of yourself and your family, waste energy and “damage” equipment in pursuit of savings.
A stingy person always pays twice, so you should not install an air conditioner yourself if:
- There is no suitable equipment - you will definitely need a hammer drill or a screwdriver; it is not profitable to rent or buy them for installation alone.
- There is no skill in working with the tool - incorrect movements can damage exposed parts of the body, as well as the air conditioner itself or its parts.
- There is no free time - working at night or in a hurry is always accompanied by losses, be it material, moral or physical losses.
- The façade of the building is complex and requires special permission for installation - the work requires not only skill and care, but also precision.
Expert opinion
Starostin Konstantin Adreevich
Air conditioner installation and maintenance specialist
Before starting all work, plan and sketch out on paper the nuances and sequence of installation. This will allow you to avoid mistakes at the planning stage, saving money, time and effort.
How to install an air conditioner: choosing the optimal installation location
Usually, there are no problems installing an air conditioner yourself in a private home. The main thing is that the outdoor unit is mounted on a load-bearing wall. If installation work is carried out in an apartment, you will have to take into account the neighbors and adhere to the standards.
The following standards are provided for the placement of the indoor unit:
- The distance between the split system and the ceiling is at least 15 cm.
- Between the air conditioner and the wall (left or right) - at least 30 cm.
- Between the split system and the floor – 2.8 m;
- The distance to the nearest obstacle is at least 1.5 m.
The outdoor unit is most often mounted near a window. On the first and second floors of the building, the structure is located as far as possible from passersby. On floors above, the unit can be installed on the side of the window or directly below it.
The efficiency and correct operation of the equipment depends on the correct installation location of the air conditioner.
The length of the route between the internal and external units should not exceed 6 m. Otherwise, an additional amount of working substance will have to be pumped into the system. If the distance between the evaporator and the compressor is 1 m, then the length of the route should be no more than 5 m. In this case, all excess is collected in a ring and hidden behind the block.
Interesting fact! Each manufacturer provides its own maximum between blocks. For it is 3 m, and recommends a distance of 1.5-2.5 m.
Installing a window air conditioner yourself also requires certain requirements. The structure is placed directly on the windowsill. For installation, a special casing is used, which comes with the device, or a jumper is inserted into the window. If you don’t want to spoil the double-glazed windows, the optimal place for such an air conditioner will be a window.
It is not recommended to install a window unit into a wall if its thickness is more than 25 cm. In this case, the intake grilles may be blocked, which will limit air access, reduce the efficiency of the air conditioner, and its parts will fail prematurely.
Open type air conditioners must be installed on the floor
The requirements for the installation location of a mobile air conditioner with your own hands depend on the type of device. Closed models are best placed in a corner of the room, on a cabinet or shelf. Open type devices, on the contrary, need to be installed on the floor. In this case, the air duct of mobile air conditioners is discharged through the window.
How best to place an air conditioner: do-it-yourself installation on the left and right of the outer wall
The indoor unit can be placed on the left or right of the outer wall. Each installation option has its own characteristics. If the unit is located on the left, and its route extends straight out of the room, then the air conditioner is fixed at a distance of at least 50 cm from the outer wall. This segment can be reduced to 10 cm. To do this, it is necessary to wrap the route onto the adjacent wall, making sure to keep its length equal to 50 cm. This figure is not allowed to be less.
If it is not possible to place the route on an adjacent wall, there is an alternative. The outlets can be routed from the left side of the air conditioner. To prevent pipes from spoiling the appearance of the room, they should be laid in grooves. This option is possible if the connection area between the route and the leads is hidden under a cover and access to them is provided if necessary.
If the work will be carried out on the front side of the building or the house is of cultural or historical value, it will not be possible to stretch pipes and cables along the outer wall without spoiling the appearance of the facade. In this case, the air conditioner route is installed indoors. Communications are laid out in grooves. This installation method requires significant expense and effort, but the result is aesthetically pleasing.
The indoor unit can be installed to the left or right of the outer wall
Helpful advice! The most budget-friendly way to lay a route indoors is to install communications in the corner of the room. Special boxes are used as camouflage.
The option of connecting the air conditioner to the right of the outer wall is classified as a standard solution. In this case, the route in a special box is led directly into the wall. If necessary, communications can be directed down in the corner of the room using the same box. It is also allowed to use grooves for laying routes indoors.
How to choose a place to connect the external air conditioner unit
Much more problems arise with the placement of the outdoor unit, since not all buildings can install such equipment on the walls. In this case, there are two options:
- Installation of climate control equipment in a room intended for these purposes - air conditioning.
- Installation of air conditioning through a loggia or balcony.
In buildings where installation of climate control equipment on the facade is prohibited, balconies and loggias are usually glazed. In such conditions, it is very difficult to ensure optimal operating conditions for the air conditioner. It is imperative to organize a cooling system to prevent overheating of the equipment. You should also take care of the effective removal of air that has already been exhausted.
The external unit is often hung under or to the side of a window
If there are no restrictions on the placement of climate control equipment, then the split system is usually mounted on a wall or on a balcony railing. This can be done on the front or side. If you intend to install the air conditioner on a balcony that is glazed, the external unit is mounted so that there is an opening flap above it. Otherwise, maintaining the split system will be problematic. On the loggia, equipment can only be placed on the front side.
If the apartment does not have a balcony or loggia, the external unit is hung directly under the window or on the side of it. This is done in the place where there is an opening flap. Otherwise, servicing, cleaning or dismantling the air conditioner yourself will be impossible. To perform these operations, you will have to call in industrial climbers.
Briefly about the features of a window air conditioner
The window climate control unit does not have to be installed specifically in a wooden window frame or plastic double-glazed window. This air conditioner can be perfectly mounted into a wall or door leading to the garden. But windows are rightfully considered the most suitable place for it, given the design features.
In window climate systems, the outer part is placed together with the compressor unit in one housing. Therefore, as we have already written, there is no need to connect them with pipes and drill walls for these purposes, or lay furrows in them to construct a route. In addition, this design eliminates freon leaks that occur due to depressurization of working routes.
In a window air conditioner, all functional components are located in one housing, which eliminates the need to lay a route connecting two units in conventional systems
But we note right away that placing both functional components in one housing does not eliminate the need to install part of the system outside so that the equipment can freely capture air from the street for processing and supply of cold or heat (depending on the season) to the room being processed.
In order for air capture to be complete, virtually a third of the device or even half of it must be located outside the enclosing structure. That is, the installation must be done so that the air intake grille is completely behind the wall or window frame. As a result, the weighty part of the body ends up on the outside.
Monoblock equipment in a window opening or other structure must be positioned so that fresh air from the street can freely enter the water intake grilles
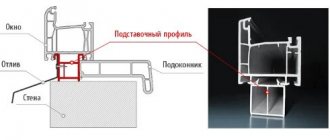
Since it is not possible to completely install an air conditioner on the windowsill of a plastic window, various supporting structures are built for its outer part. Their task is to accept the load of equipment, albeit not heavy, but still having quite a serious weight.
Recommendations for installing an air conditioner: instructions and step-by-step installation of a mobile device
To install an air conditioner at home, you will need to build a special structure consisting of a mosquito net frame and plexiglass. The air conditioners are equipped with a pipe designed to remove exhaust air outside the room, as well as the connecting parts necessary for its fastening. To prevent hot air from flowing back into the room, you need to buy a special air duct in the form of a socket. Subsequently it will be mounted in plexiglass.
Helpful advice! On sale you can find various options for sockets that are fixed with glue or screws. It is better to give preference to products equipped with clamping rings. They are the most convenient.
A mobile air conditioner can be used as a temporary alternative
Instructions for installing a mobile air conditioner in an apartment with your own hands:
- A mosquito net is taken, the dimensions of which correspond to the size of the door where hot air from the room will be discharged.
- Its dimensional parameters are measured and transferred to plexiglass. To do this, you can use an awl or a breadboard knife.
- In accordance with the markings, a piece is cut out of plexiglass.
- The edges of this section should be cleaned with sandpaper.
- In the place where the air duct will be attached, a hole is cut in the plexiglass for its installation.
- The duct-socket is inserted into this hole and sealed tightly. To do this, you can use a pressure ring, if provided, or sealant.
- The plexiglass is glued to the previously degreased surface of the frame.
- The mosquito net is carefully removed from the frame using pliers or tweezers.
All that remains is to open the window sash for ventilation and insert a frame with plexiglass there, connect the air duct pipe to the outlet and turn on the device. Of course, a mobile unit is not as efficient as a full-fledged split system. On the other hand, installing a more powerful air conditioner yourself is much more difficult. A mobile device can be used as a temporary alternative. It is also suitable for cooling a specific area in the room.
Instructions for installing the air conditioner and step-by-step description of all operations
Before you begin, you need to make sure you have the necessary tools and consumables. According to their purpose, they are divided into several groups. For installation work you will need to purchase power tools:
If you are planning to install the air conditioner yourself, you need to prepare in advance all the tools that you may need.
- grinder;
- perforator;
- drill.
To install the air conditioner yourself, you will need a measuring tool and marking equipment. To ensure that all structural elements are installed level, you must use a laser or construction level. Markers or marking pencils are needed to draw lines.
High-quality installation of climate control systems is impossible without specialized equipment:
- Tools for working with copper pipes - a gas torch and solder (for low-temperature welding), a pipe cutter and pipe bender, as well as a rolling or rimmer for forming a chamfer.
- Industrial vacuum cleaner – for removing small construction debris and dust.
- Vacuum pump – for drying the line.
Before you begin installation, you need to thoroughly study the installation process of split systems.
Installation of climate control equipment is impossible without drywall, pliers, stepladders, screwdrivers and other auxiliary tools. Before starting work, you need to carefully study the process of installing split systems; videos on the Internet can provide invaluable assistance in this matter.
Important! Do not use a hacksaw for cutting pipes. When using this tool, small chips are formed that will fall into the line and cause damage to the air conditioner.
Conclusions and useful video on the topic
Self-installation of an air conditioner is clearly shown in this video:
In the same video you can see the most common mistakes made when installing an air conditioner yourself:
Air conditioner installation can be done independently. To do this you need to have a little knowledge and skills. When installing air conditioner units, be sure to follow the instructions and safety requirements. However, when performing work, you cannot do without the help of an assistant - the weight of the outdoor unit can exceed 20 kg.
If, after reading the article, you still have questions or have installation suggestions based on personal experience, be sure to share them in the special comment block below the article. Here you can also add unique photos of your air conditioner installation.
How to install an air conditioner: installing external and internal units
First you need to determine the places where the blocks, route and other elements of climate control equipment will be placed. To do this, you need to walk along the entire route with a device designed to detect wiring and apply preliminary markings.
After this, a plate is attached to the wall to fix the indoor unit. This element is placed strictly in a horizontal position, so during the work you must use a building level.
The choice of brackets for mounting outdoor units must be approached very responsibly
Installation procedure for the indoor unit:
- The plate is applied to the wall, leveled and the places where the fasteners will be placed are marked.
- The plate is removed and holes are made at the marked points using a drill.
- Fastening elements are installed. In wooden houses you can use self-tapping screws; for concrete and brick buildings it is better to use dowels.
- The plate is put in place and securely fixed. Particular attention should be paid to the latches that hold the unit at the bottom.
All that remains is to check the horizontality of the plate and attach the evaporator to it.
Then you should install the air conditioner yourself from the outside. To do this, taking into account the standards, markings are applied, and metal corners or brackets are installed in accordance with them. As fasteners, you can use stainless steel anchor bolts measuring 10x1 cm. The choice of brackets must be approached very responsibly. These elements must not only withstand the weight of the external unit, but also cope with wind and snow loads.
After making sure that the brackets are installed level, the external unit is secured to them using bolts. The compressor must be lowered to the installation area very carefully, having first tied it with ropes. In the place where communications will pass through the wall, a through hole of the required size is made with a puncher.
Do not install the air conditioner close to the ceiling or side walls
Helpful advice! To prevent the walls from becoming saturated with moisture, it is advisable to use pipes in a heat-insulating shell.
The second stage of installing an air conditioner with your own hands: connecting the blocks
To connect the external and internal units, a cable and copper tubes of two diameters are used. The dimensions of the connecting elements are usually indicated in the instructions that come with the split system. The length is calculated taking into account the placement of blocks. You need to add 30 cm to the resulting value. Processing copper tubes:
- a cut of the required length is made from the bay;
- the edges are straightened and all burrs are removed;
- plugs and plugs are installed at the ends;
- thermal insulation is put on.
After this, the pipes need to be taken out through the hole in the wall and bent in the right places using a pipe bender. Crimp lugs are installed on the cable on both sides, after which it is inserted into the hole and connected in accordance with the instructions.
When installing a split system with your own hands, the drainage pipe is connected to the indoor unit (a special outlet is provided for this) and is brought out to the outside at a distance of about 80 cm from the wall. To prevent sagging, it should be fixed at every meter. Before placing communications in a plastic box, they should be tied into a bundle using metallized tape or ties.
The outdoor unit is installed first, and then the system is installed indoors.
How to connect an air conditioner: connecting copper pipes
First, the tubes are connected to the indoor unit. On its side wall there are two ports with fittings of different diameters. You need to remove the nuts from them. As a result, a hissing sound will appear, indicating that the nitrogen that was pumped by the manufacturer is coming out of the block. It is necessary to protect internal parts from oxidative processes.
Next, you need to remove the plugs from the tubes and check their edges again for defects. The surface must be flat. After this, you can put union nuts on the pipes.
Important! Be sure to make sure that the thread is directed in the right direction.
Then the edges of the tubes should be flared. When performing this procedure, you need to hold the product with the hole facing down so that dust and small chips do not get inside. The tube is clamped in the holder so that 2 mm remains outside. Then the roller is installed and the screw is tightened. This is done until the cylinder stops lowering. As a result, a “skirt” is formed on the product.
Copper tubes are connected to the indoor unit of the air conditioner
The tube is connected to the outlet of the indoor unit with a flared edge. A union nut is used as a connecting element, which is tightened with a wrench. There is no need to use sealing materials. The tubes are connected to the external unit in the same way.
Preparatory work
Before proceeding with the installation of the air conditioner, it is necessary to carry out a number of preliminary procedures and calculations. First of all, you need to decide on the place where the installation will take place.
Choosing an installation location
The quality of air conditioning, the well-being of the owners living or working in the room, and the design of the house or apartment depend on where the air conditioner is installed.
The choice of location for a window air conditioner is obvious. The mobile air conditioner can be installed in any desired location. The main problem is with classic split systems.
When choosing a place for installation, in particular, an indoor unit, you can follow several recommendations:
- Do not place the device on the wall opposite the entrance to the room.
- The distance from the block to the ceiling should not be less than 10 centimeters.
- The air flow is directed in the direction where people are least likely to be. If the split system is installed in the bedroom, it should be placed away from the bed. If remote installation is not possible, the unit can be installed above your head so that cold air flows to your feet.
- The air conditioner is installed at some distance from the cabinets. If the furniture is placed next to and slightly below the split system, air currents, blowing dust from the top cover, will form a dusty curtain.
- The air duct route can be laid in boxes or pre-equipped gates. The minimum length of the air duct can reduce the cost of installing a split.
The location for installing the external unit is selected separately. The simplest option is to place the block on the external wall of a balcony or loggia. Installation can also be done on the roof. The second method is relevant for residents of the top floors of high-rise buildings.
Air conditioner check
Before carrying out installation work, the air conditioner must be thoroughly inspected. The owner must ensure that the unit was not damaged during transportation and that all parts specified in the package are available.
When inspecting the air conditioner, you must ensure the following:
- There should be no dents, cracks or other deformations on the external unit of the split system.
- There should be no foreign elements at the connection points. The thread must be clean and undamaged. Deep scratches on the metal are unacceptable; this is a sign of defective or unskilled dismantling.
- There are stickers on the external unit that detail the manufacturer, power and other information about the air conditioner. All this data must match the instructions.
- The electrical circuit of the air conditioner should be located under the cover or in another accessible place.
- The split system must include screws with which the remote unit is attached to the bracket. If their availability is not provided by the manufacturer, they are purchased separately.
- Damage to the indoor unit is not allowed.
- The filters should be free of stains, odors, and traces of detergents. If this is present, it means the air conditioner has been used and washed.
If no visible deformations are detected, you can check the operation of the air conditioner. To do this, the indoor unit of the split system is started in “fan” mode from the nearest outlet. There is no need to check other modes; this will lead to incorrect operation of the device. If everything works properly, you can disconnect the unit from the network and continue the installation.
How to vacuum an air conditioner
The evacuation procedure is necessary to remove residual argon and air from the system. This will extend the life of the equipment. This will require a vacuum pump with two pressure gauges to monitor the pressure in the system. This tool connects to the charging port on the outdoor unit. Within 15-20 minutes. the remaining nitrogen and air will be completely removed from the system.
After the specified time has elapsed, the pump must not be disconnected immediately. It turns off and remains in this position for another half hour. During this period, you need to carefully monitor the pressure gauge readings. If they change, it means the system is leaking. In most cases, the problem is in the copper pipe connection area. This problem needs to be fixed.
If the readings remain unchanged, open the bottom valve completely without disconnecting the pump. When noise appears, it will mean that freon has begun to fill the system. You need to put on gloves and quickly disconnect the pump hose, and then open the top valve on the route.
Installation of a split system necessarily ends with a vacuum procedure
How to install an air conditioner yourself without a vacuum pump:
- Unscrew one plug on the upper port and two on the lower one.
- To exit the lower port, which is located perpendicular to the side wall of the split, you need to select a hex key of the appropriate size.
- The key is inserted into the connector and turned counterclockwise 90° for 1 second. The working substance will begin to come out of the block.
- The same port has an output with a spool. For a split second, you need to press the spool with a long object, but not with your fingers. A hissing sound will appear, indicating that a mixture of gases is escaping from the unit. You shouldn't release it completely.
You need to repeat the cycle again: open the freon supply for a split second with a hex key, and then release the mixture of gases. For a 4 m long route this will be enough. All that remains is to tighten the plug at the outlet with the spool and, using a hex wrench, open the valves on the upper and lower ports to release the working substance into the system.
This completes the installation of climate control equipment. Evacuation of an air conditioner without a pump can be used as an alternative solution if tools are not available, but there is a possibility that there will be a small leak of freon.
After installing the split system, all excess air and moisture should be removed from its device.
Installing an air conditioner is a complex procedure. However, if you follow all the requirements and recommendations, it is quite possible to complete this activity yourself.
Preparing tools and supplies
The following tools will be useful in your work:
- perforator;
- pliers;
- drill;
- drill;
- building level;
- file;
- metal hacksaw for cutting pipes;
- sandpaper.
The standard list of materials is:
- dowels;
- anchor fasteners;
- insulation for pipes;
- power cable;
- copper pipes for the cooling system;
- plastic protection for communications;
- drainage tube.
As for materials, their quantity and technical characteristics must correspond to those declared by the manufacturer.
Some air conditioner models include a complete set of all consumables used in installation. Their availability should be checked with a consultant before purchase, so that during the installation process you do not have to run around the shops looking for missing elements.
All tools must be in good working order, and the person performing the installation must be able to work with them and know all the intricacies. This is especially true for a hammer drill.
Expert opinion
Starostin Konstantin Adreevich
Air conditioner installation and maintenance specialist
Before starting work, be sure to determine the presence of communications passing in close proximity to the installation site of the air conditioner. If they are damaged, you will have to spend money on expensive repairs.
Installation of communications
To connect the internal structure of the air conditioner with the external one, you must:
- Lay a copper pipeline - consists of two copper pipes of different diameters, which are cut to a measured length and the edges are treated to remove burrs. The pipes are insulated along the entire length with a margin for the section inside the wall. The joints are treated with metal-based tape.
- Lay the cable - the ends of the cable are stripped, terminals are installed on them, and they are crimped with pliers. The plate above the connectors for the pipeline is removed, the cable is connected to the corresponding connectors.
- Laying a drainage pipe - here it is important to correctly calculate the length so that the end of the pipe is 60-80 cm from the plane of the outer wall.
Expert opinion
Starostin Konstantin Adreevich
Air conditioner installation and maintenance specialist
The drainage channel must not be allowed to sag. Fastenings are performed every 20-30 cm. It is best to install the drainage last, defining the lower part of the channel for it.
After all the systems are laid, they are taken out and temporarily fixed together, after which they are installed to the indoor and outdoor units.
Pros and cons of the device
An undeniable advantage of the device will be installation in a wooden window or in a double-glazed window made of metal-plastic. In this way, room owners can significantly save space on the wall, which could not be done when installing a standard split system.
Several positive characteristics of this device:
- affordable price;
- ease of installation;
- possibility of self-installation;
- mobility - the device can be removed and installed in another place, for example, in the country;
- miniature design;
- ease of operation;
- There is no need to refill with refrigerant.
Another positive point is trouble-free operation for several decades thanks to the thoughtfulness of the design and its compactness.
The disadvantages, according to user reviews, are the high noise level: 40-59 dB. Another problem is that when installing a window air conditioner, the room becomes darker, since part of the window is covered by the device in one part.
Helpful tips for installation
It is advisable to position the air conditioner so that the direct flow of air does not fall on the bed, directly on the sofa, which is a resting place, or on the work or play area. Ideally, place the device centrally to ensure optimal air circulation in the room.
The part of the air conditioner protruding onto the street must be protected from atmospheric precipitation falling on it. The simplest visor is quite suitable for this.
Today, to simplify installation work, you can buy a special kit for installing the device at any hardware store. It also includes a special metal casing into which the air conditioner will later be installed.
Be sure to take care of high-quality grounding of a device that is difficult to operate. This will protect both the room and the air conditioner from power surges.
Before purchasing a particular model, it is advisable to independently calculate the required power of the air conditioner. Here this parameter will depend on the area of the room and the height of the ceilings. And the device should be purchased with a power reserve. This is due to the fact that even each person emits a certain amount of thermal energy. There are also windows that, facing the sunny side, also contribute to additional heating of the room.
FAQ
Is it possible to install an external unit at the end of the building and an internal one on the far wall?
It is possible if the length between them along the cable is not higher than 6 m. The greater the distance between the blocks, the higher the freon consumption and the more often it will have to be added to the system.
Is it possible to install an air conditioner above a heating radiator?
It is not recommended to do this due to safety regulations.
In conclusion, it is worth noting that installing air conditioners is not an easy job, requiring care, accuracy and knowledge of construction tools. Improper flaring and laying of communications will not allow you to enjoy the coolness on a hot day. If you are not confident in your abilities, then it is better to entrust the work to professionals.
Minimum set of tools
Installation of a window air conditioner begins with preparing the necessary tools:
- impact type drill or hammer drill;
- set of drills;
- metal file for cutting metal-plastic of the required size;
- set of chisels;
- glass cutter;
- ordinary level;
- grinder or special attachment for a drill with a cutting wheel;
- internal and flat corners for furniture;
- silicone based sealant;
- paint and brush.
Before installing a window air conditioner, you need to draw up a work plan, take careful measurements and order a special frame made of the same material with a hole in the middle for the product. The last point is especially important for metal-plastic windows, because such an installation is significantly different from installing an air conditioner in a wooden frame. The algorithm is almost identical, but there is much more work with metal-plastic due to its specific properties and standard glass block sizes. In a simple wooden frame, just remove some of the glass, insert a bulkhead and that's it. Installing a window air conditioner in a plastic window is more difficult: it requires special calculations, otherwise it simply will not withstand the load.
