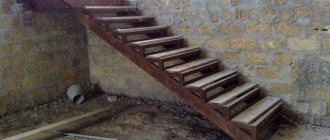
Balusters are vertical supports for handrails and railings, attached to the bottom of the steps or to the side of the staircase frame. They are designed to create safe stair railings and provide the necessary rigidity for the railings attached to them. An additional, but no less important function is to decorate and create a certain style for the entire staircase structure.
Proper fastening of balusters and staircase posts ensures the safety of people when moving. The railings must be strong and stable. Therefore, the issue of choosing a technology for fastening support elements is very important when constructing stairs.
Number of balusters and support posts
First of all, you need to decide whether there will be one baluster on the step or two. Both options are acceptable. The second point: you need to decide where and with what frequency the support pillars will be placed. There are several options:
- At the beginning and at the end of the flight.
- Through the step.
Most often, support pillars are located at the beginning and end of a flight of stairs. - In two steps.
- Three steps later.
A large number of pillars on the stairs is necessary if the balusters are thin or the filling is not vertical, but longitudinal “threads” that do not carry the load, but perform protective and/or decorative functions.
Marking space for posts and balusters
In any case, all pillars and balusters on the span must be on the same straight line. Moreover, if the radius/size of the balusters/support pillars is different, their centers are aligned on the same line. After installing all the balusters and posts, if you look along the line, they should all be in the same plane.
The first stage of installation of railings is marking the installation locations of pillars and balusters
At what distance from the edge of the step should the balusters be placed?
On average, the center of the baluster is installed at a distance of 6-10 cm from the edge, but it is possible at the very edge. Choose as you like. But you need to choose this distance in order to decide on the place where you will need to make holes for installing balusters.
There is an algorithm to determine the distance. It is usually assumed that the stair post or baluster should be located at a distance of 2-5 cm from the side edge of the step. Divide the size of the post or baluster by two, add the selected distance to the edge and get the required value.
The distance from the edge of the step is chosen arbitrarily
Let's give an example of calculating the installation location of a baluster. Let them have a square section at the bottom, 80*80 mm. They should be spaced 3 cm from the edge of the step. Total we get: 8 cm/2 + 3 cm = 7 cm. That is, when marking the place where the balusters are to be attached on the stairs, you will need to set aside 7 cm from the edge of the step. We also do this if the balusters are round: diameter 7 cm, from the edge - 3 cm. 7 cm/2 + 3 cm = 6.5 cm. That is, in this case, the hole for installing stair balusters is made at a distance of 6.5 cm from the edge of the step.
Algorithm for installing balusters
The process of marking balusters can be described step by step as follows:
- At the top and bottom steps of the flight, a certain distance is set aside from the edge of the step, which depends on the size of the pillars/balusters.
- A straight line is drawn between the found points. This can be done by: driving/screwing nails/screws into the designated points, pulling a thread between them;
- setting the line on the laser level;
- by setting a level bar/guide along the marks.
Balusters can be installed one or two per step. There is also an option - two on one, one on the next, on the third step two again and so on, alternating and placing first one, then two
The main task of this stage is to transfer the straight line to the steps as accurately as possible. The second is to choose such a distance between the pillars and balusters that there are no visible differences. If you can’t do everything the same way, you can do it symmetrically - leave larger or smaller distances along the edges or alternate them after one or two. There are no universal solutions, since each staircase is unique, with its own parameters and features.
Optimal distance
When installing railing posts, you need to correctly make markings, as well as identify the correct distance between individual elements.
To do this you need to follow these simple rules:
the step between balusters should not be less than 15 cm; if there are children in the home, it is also important to take this into account when fixing the balusters - in this case, it is better to make the space between them even smaller; the ideal height of the posts for fixing the railings should be 80-100 cm; balusters must be created from the same raw materials, suitable for the material of the stairs; The posts need to be fastened at 2 points - at the top and bottom.
The optimal step between supports is 15 cm. If this figure is larger, it may increase the risk of injury. If you cannot comply with this requirement, it is permissible to install 2 racks on one step at once.
The order of assembling the railings
In order for the installation of railings on the stairs to take place without surprises, you need to clearly understand the whole process.
- The two outermost pillars are fastened - at the top and bottom of the span. They are placed so that there is the same distance from the edge of the pillar to the edge of the step (usually 3-6 cm). If the staircase is made on a stringer, they are placed by aligning the edges, or making sure that there is the same distance on both sides.
- A rope is stretched between two mounted poles. Self-tapping screws are screwed into their center, twine is pulled, along which it will be necessary to set the centers of the installed balusters and pillars, it will be possible to check the height, etc. Instead of a rope, you can install a guide if you are sure that it is level and does not sag anywhere.
The procedure for assembling stair railings consists of several sequential steps - Balusters are attached and pillars are placed according to the existing markings. Their position is strictly vertical and so that the top is level with the thread/guide.
- When installing each element, its position is verified: The pillars/balusters must stand strictly vertically, without the slightest deviation. It is necessary to check in two planes.
- They should be in line with those already installed, not “walking” to the right or left.
The process is then repeated for the second span. The last thing to complete the installation of the railings is the union of the support posts at the turning point. The specific method depends on the type and material of the handrail, but you need to manage to make this section a transition from one span to another, while being comfortable and not seeming alien.
Requirements for stair railings
The height of the balusters must be at least 0.9 m.
Building regulations regulate the height of the railing so that it reaches at least the lower back of a person.
The height of the fences should be:
- not less than 0.9 m on internal spans;
- from 1.2 m in preschool institutions and on emergency stairs.
Handrails prevent people from falling from a height beyond the line of the square; they rest their hands on them when walking, descending and ascending. The attachment of the railing to the stairs must be strong and ready to support the weight of a person. The surface of the supporting elements is made smooth so as not to injure your hands.
The sizes of handrails with or without balusters are tied to the size of a person and his functionality when moving between floors. The dimensions do not change depending on the increase in the horizontal and vertical parameters of the building.
Fastening wooden balusters and posts
Many will agree that installing railings is more complicated than making the staircase itself: there are too many different components, there are no standard solutions suitable for everyone. This is where the difficulty lies. Wood railings are perhaps the most difficult to install. The material is plastic, but therein lies the problem: an element that is well secured at first can wobble with a decent amplitude after a year or two. Therefore, they approach the fastening of wooden posts and balusters very, very carefully, play it safe, use combined methods, adding glue if possible. This makes the connections tighter.
Not the most elegant installation of wooden balusters on stone or concrete steps, but reliable
In general, a baluster or post is attached either to the step board itself, or to the stringer - it depends on the design of the staircase. Internal stairs on stringers are rarely made today, so we will mainly talk about installing railings to the steps.
Using a bolt (capercaillie) to the step through
There is a simple option - through fastening of balusters and support pillars to the step. The only requirement: the thickness of the step must be decent - more than 40 mm.
In this case, to install a baluster or pillars at a selected point, a through hole is made in the step board through which a bolt with a diameter of at least 8-10 mm is passed (12 and 14 mm is possible, depending on the cross-section of the baluster). The minimum length of wood grouse is 80 mm (the rest can be sawed off). A hole of larger diameter is drilled under the bolt. After installation, it must be recessed so that at least 5 mm remains to the edge of the board. The resulting hole is closed with a decorative overlay (you can choose a plastic one of a suitable color or make it from wood).
Installation of wooden balusters: fasten through to the step
A bolt is inserted into the hole, and a hole 2-3 mm smaller in diameter than the diameter of the bolt used is drilled in the center of the baluster. The specific diameter depends on the type of wood: the harder the wood, the smaller the difference between the diameters of the drill and the bolt should be. The depth of the hole is equal to the length of the bolt.
The bolt is screwed in from below, passes through the step, and enters the body of the baluster. It is screwed onto the thread and exposed. Finally tighten from below using a socket wrench of the required diameter. The good thing about this option is that, in theory, the connection can be tightened if you remove the plug and use a wrench to reduce the backlash. But the “tightening” works until the hole in the wood becomes too large from the play. And it (play) will appear sooner or later - from loads that are directed in different directions, from natural processes occurring in the wood. So the connection is not permanent.
On a dowel or threaded rod
If it is impossible to get to the steps from below, there is an option for attaching balusters to dowels (50*10, 60*12, 70*14, 70*16 mm). The dowel is chosen to be large, with a large diameter. The installation of balusters in this case is as follows: a hole is drilled in the step with a depth equal to half the length of the dowel. We drill a second similar hole in the lower part of the baluster. The diameter of the drill is 1-2 mm less than the diameter of the dowel.
Installation of wooden railings on dowels
Epoxy glue is poured into both holes, the dowel is inserted into the hole in the step until it stops, then a baluster is put on it. For greater reliability of such fastening, you can coat the entire lower part of the baluster with glue.
One point: look for dowels from the same wood from which the steps and railings are made. They have the same coefficient of thermal expansion and react equally to shrinkage and increased humidity. This will make the connection more durable. Installing balusters on dowels is a traditional, but not the most reliable method today. Firstly, the dowels can break, and secondly, the connection itself still becomes loose. So in a few years you will have to look for a way to fix the dangling railings.
Instead of a dowel, you can use a threaded rod. The process of installing a baluster is no different. Everything is the same, only you don’t have to fill the hole with glue, although...
For self-tapping screws
The most “collective farm” method, which professionals really dislike, but which is easier to understand and implement, is installing balusters on self-tapping screws. For fastening to the steps, use wood screws with a diameter of at least 6 mm and a length of 60 mm. Place two on each side (total, 8 screws on each side).
The simplest and most “wrong” way. And one more thing: a lot of hassle in order to cover unsightly marks
They need to be screwed at an angle of 30-40°, and holes must be pre-drilled for the caps. Install screws, then close the holes with plugs cut from the same wood or cover them with wood putty.
Using Zipbolt (zipbolt)
A relatively new fastening element that can be used to attach balusters to both steps and handrails. It is easy to use, but expensive. If you install the railings with your own hands and “for yourself,” this is a good option. Installing balusters using zipbolts is also good because the connection can subsequently be tightened, eliminating any play that appears.
The zipbolt consists of a threaded rod and a removable gear head. There are two types:
- of two movably connected threaded rods of approximately equal length;
- from one threaded rod (type 13.600).
The option with movably connected pins is good for connecting balusters and railings, railings with support posts. A straight zip bolt is good for hidden connections of perpendicular bars. This is exactly the case for installing balusters on steps, support pillars on the floor, and the ceiling of the second floor. The dimensions of this fastener are substantial - diameter 8 mm, length 96 mm, so it will hold the pole well, and there is no doubt about the reliability of fastening the balusters.
Zipbolt device for perpendicular connection of parts
The algorithm itself is similar to mounting on a stud: you need to drill a hole in the step and baluster for installing a threaded stud. The length of the hole in both parts should be equal to the length of the stud, minus the height of the head.
The difference is that to install the head you need a technological hole perpendicular to the main one. It should be slightly larger in size than the diameter of the head, and its center should coincide with the axis of the hole for the pin. After the pin is installed, a removable gear head is inserted into the technological hole. It has special slots along the key. Install the head so that the slots are accessible. Using a 6 mm hex key, which is inserted into these slots, the head is turned until it stops, pulling the baluster towards and fixing the pin.
When installing railing support posts on the floor using a zip bolt, questions may arise regarding the method of fastening. If the floor is wooden, the threaded part is simply screwed in. If the floor is concrete, you can use chemical anchors. If there are metal embedded parts, the bolt can be welded. The last method, by the way, is the most reliable: at least the bolt will no longer be loose.
Dovetail connection
Another way to connect balusters and steps is carpentry. Using a specially shaped groove and tenon - dovetail. This option is possible if you make the balusters yourself or if they have a significant margin in length at the bottom.
Such an installation of balusters is possible if the railing is planned to be made almost from the very edge of the steps. Then trapezoid-shaped holes are cut into the steps from the end, and the same ones are formed on the balusters. The ends of the cuts are lubricated with wood glue or epoxy resin, aligned and fixed.
When fastening with a dovetail, you can also use nails to strengthen the connection between the baluster and the step
With this method of connection, the racks must be fixed in a vertical position for some time - until the glue dries - as they may deviate. To do this, construct a temporary supporting structure, which is disassembled after the glue has hardened.
To make the steps look better from the side, the ends are covered with overhead decorative strips. The planks can be “planted” with glue, nails, screws, and dowels. The choice is absolutely arbitrary, but the most correct and invisible one is dowels. Such installation of balusters is based entirely on the art of carpentry and requires precise adherence to dimensions.
Installation of balusters on a stringer (string)
When installing balusters on a bowstring or stringer, you can use the same methods of installing balusters: on dowels, studs, self-tapping screws, zipbolts. You can even make a dovetail, but you will have to cut it in a different plane, which is no more difficult, and, perhaps, even simpler. For decoration, you can use strips on both sides.
The difference between installing balusters on a string (string) is that the post must be sawed at a certain angle so that they stand strictly vertically. But in a surface cut at an angle, it is difficult to drill a hole that runs along the axis of the element. To avoid problems with this, first drill holes, then cut at the desired angle. A simple trick that makes the job much easier.
Installing balusters on a string: a simple process
There is one specific method designed specifically for a ladder with a bowstring. They make a baluster: a bar that “sits” on the bowstrings thanks to a groove cut in the lower part. The posts are attached to the baluster through and through - with bolts, dowels or self-tapping screws (the worst option). The choice is yours, and then the entire structure is installed on the bowstring. The connection is adhesive; for reliability, you can use bots, screws, and nails. But they are for additional fixation.
There is another method that is usually used only for this type of stairs: the balusters are secured with nails or self-tapping screws, decorative strips are installed on the sides, and the gaps between the balusters are closed with fixing strips. With this method of fixation, you can also additionally use glue - it will not be superfluous.
A few words about increasing reliability
All baluster fastenings - on studs, self-tapping screws, dowels, bolts - become loose over time and play appears. This is an inevitable process. When loaded, the railings wobble a little. At first, the deviation is a fraction of a millimeter, absolutely imperceptible. As you use it, the deviation increases, and the railing at hand already noticeably “walks.” The softer the wood, the faster the play appears. We have to take it down and redo it. In order to delay this moment to the maximum, they use any available additional methods of fixation.
There is a special fastener for balusters on a bowstring
Most often, glue is used as an additional fixing force. You can use any carpentry resin or epoxy resin. There is no point in looking for more expensive ones - these work very well. All joints are coated with glue. You can even lubricate screws/nails with glue. For better adhesion, the places where the glue will be applied are cleaned of dust/debris and wiped to remove greasy deposits.
Fastening methods
It is permissible to place supports at the edges of steps or on a string. So, if the width of the steps allows, it is permissible to install two elements on them at once. The quality of the structure as a whole will depend on how securely and firmly the balusters are installed. Today there are several main ways to secure these parts. Let's get to know them.
Hairpins
Installation of posts using a threaded rod on a bowstring is used in situations where the parts are located clearly perpendicular. These components are not used to attach balusters to the handrail.
To make a threaded rod, you will need screws with a head with six edges (such parts are called “wood grouse”). These fasteners are fixed in pre-drilled holes at the bottom of the posts. The pin and hole must be secured with glue. These types of fasteners are well suited for fixing wooden balusters.
Self-tapping screws
Using self-tapping screws and self-tapping screws, it is possible to attach balusters to the floor. These fasteners can be used to install both wood and iron objects.
The most popular approaches are:
- baluster;
- use of a support plate;
- use of direct fixation.
These methods have a lot in common. A stronger connection to the steps can be achieved using plates that are attached with 4 screws. It is also possible to attach balusters to the side railings using self-tapping screws.
Dowels
Dowels and rods are mainly used in the construction of wood bases
It is important to remember that their diameter should not be more than ¼ of the diameter of the rack, and their length should not be 2 diameters of the baluster itself. In this case, markings should be applied to each element - railings, steps, and pillars
The depth of the hole should be half the diameter of the dowel. When installing fasteners coated with glue, you must start with the steps and then move on to the railings.
Such fasteners can be used when installing balusters on the plane on which the laminate lies.
Installation of metal balusters
Installation of metal balusters is simpler: there are special clamps - thrust bearings, which are screwed into the steps or to the side of the stairs. The baluster, post, and post are then attached to the installed elements. All you need to do is select elements of the appropriate shape/size.
Attaching metal balusters to steps is somewhat simpler
There is one point: most of the fasteners suggest fixing balusters in them using clamping screws. So, screws are not very reliable; such a connection quickly begins to “loose.” Of course, they can be tightened a couple of times, but welding is much more reliable. If the metal thickness allows - from 1 mm or more - it is better to use welding.
We attach it to the step
Marking the installation locations of metal balusters occurs as described above. First, we select one rack to stand on a step or two at a time, then we distribute them so that all distances are the same. Heel pads are installed in the designated places. They usually “sit” on 3-4 fasteners. Use self-tapping screws if the steps are wooden or dowels for concrete or brick steps.
Metal balusters/racks are inserted into the installed thrust bearings, positioned strictly vertically, and welded. It is better to “grab” from four sides - to exclude the possibility of deviation in any direction. This completes the installation of metal balusters (stainless, nickel-plated, chrome-plated steel). Next you just need to install the handrail, which is also not particularly difficult.
This is what standard fasteners for installing metal balusters of prefabricated railings look like
If the wall thickness of the tube of prefabricated metal railings is too small for welding, it is not possible to select the appropriate welding mode; the tubes have to be secured to the heel supports using bolts. We still don’t recommend squeezing. Such a connection really gets loose quickly. You can drill through holes in the pipes and screw bolts of a suitable diameter into them.
Another option for installing rod balusters: weld a pin to the bottom and screw it into the step. If desired, you can glue a nut into the hole in the step.
Gypsum
It is much easier to make balusters from plaster. In the retail chain you can easily find ready-made casting molds suitable in shape. Stores dedicated to landscape design offer such forms in a wide range.
If the finished mold is not suitable for some reason, you can make your own using silicone or rubber. You will need to carve a sample according to which the mold is prepared.
When the issue with the form is resolved, the casting process begins. The two halves of the form are fastened together. Dissolve the gypsum powder to the consistency of thick sour cream.
The finished mixture is poured into the mold and left to harden for a day. If small defects are found on the casting, they can be easily eliminated by machining.
Lateral (end) fastening of balusters and posts
Attaching the racks to the steps is the traditional installation method, but there is another way: attaching them to the sidewall. In this way, you can attach any type of railing: wood, metal, glass. For metal and glass, special fasteners are required - clamps that are attached to the wall, and themselves have a groove and a system for fixing the racks for the stairs. Wooden posts and balusters are fastened through with zip bolts or studs/screws, hiding the heads under decorative covers.
Bracket for side mounting of round support post
Option for prefabricated metal railings
When attaching wooden poles to the side of the stairs, the attachment point can be made in the form of a decoration
There are different options
Bracket for attaching round staircase posts to the wall
With end-mounted racks, stairs are usually made with support pillars installed at a certain distance. Between the pillars, a filling is installed that is not connected to the base of the staircase, but only to the support posts. Of course, this is not a rule, but this is exactly the look that most stairs have with similar fastening of balusters and support pillars.
The side mounting method is suitable for any stairs with a closed sidewall. Naturally, the sidewall material must have sufficient load-bearing capacity. The very method of attaching the staircase racks looks somewhat unusual, which adds decorativeness.
Lateral fastening is also possible to steps, but not for all types of stairs
Forged railing for stairs with side fastening. The fasteners are made immediately “built-in” into the railing
Another option for forged railings with side fastening to the stairs
For those who do not suffer from claustrophobia
Each rack can be mounted separately
Non-standard approach
Lateral fastening of glass railings - with special clamps
Prefabricated metal staircase with side fastening of racks to the staircase
Typically, two clamps are used for each rack, which are placed at a distance of 5-10 cm from one another. When marking, you can also use a stretched thread, guide or laser level. The location is chosen mainly in the center of one of the steps. The number of racks is selected based on the load-bearing capacity of the base to which they will be screwed. For wood, the normal step is 50-80 cm, for brick, concrete, etc. Longer distances can also be done.
Attaching a handrail to a welded or forged stair railing
A wooden handrail is usually placed on a forged or welded fence. In its lower part, a cut is made according to the dimensions of the upper lintel of the finished fence. The seating depth of the handrail is about 2 cm. More or less is possible - it depends on your desire. The railings are connected to the handrail with self-tapping screws, which are screwed through the holes in the upper lintel. It is important to choose the length of the fastener: it should be slightly (at least 5 mm) less than the height of the handrail so that the screw does not stick out on the surface.
Make holes in the top lintel and secure the railings through them with screws
In this case, installing a handrail on the stairs is simple:
- Holes are made in the upper jumper that are slightly larger than the diameter of the selected screws, but smaller than the diameter of the cap. Step - from 50 cm to 1 meter.
- The handrails are trimmed where necessary, and the joints are adjusted to perfect condition.
- Place the handrails in place, having achieved a perfect alignment of the joints, and secure them in this position with clamps.
- Fasteners are installed through the holes in the jumper.
- Remove the clamps. The handrail fastening is completed, the railing is ready for use.
Selecting the handrail profile is also important
There is also the possibility of gluing a wooden handrail to welded or forged metal railings. When choosing a glue, you need to make sure that it can connect wood and metal. For external stairs (to a porch, for example), you must also pay attention to the range of operating temperatures. Otherwise there are no difficulties:
- apply glue according to instructions;
- press the parts, secure with clamps;
- leave until the glue dries;
- remove the clamps.
To securely attach a handrail to a steel staircase, you can use both of these methods. One does not interfere with the other.