A deck oven in a nutshell
Lately, more and more often, customers are asking us to make them
a deck oven .
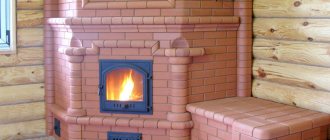
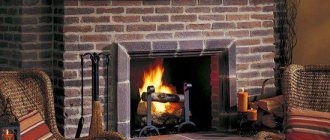
I must say that this is a fad of literally recent years - somehow there was no talk about this before. And so: I want a hearth! Let's look into the details. First of all, let's define what a deck oven is. A hearth is a stove in which the firebox is devoid of an ash pan and a grate. In other words, in a deck oven, fuel burns in the same way as wood burns in a fire, or in a hearth. The fuel simply burns at the bottom of the combustion chamber, or just the firebox. The most striking example is the Russian stove. There is the bottom of a spacious firebox, or under, and logs are stacked on it. Or, here, the fireplace is the most, I think, familiar example to everyone. A fireplace is essentially a fire surrounded by stones. The wood burns like in a fire, the smoke along with the flue gases goes vertically into a chimney located above the fire - the simplest version of the combustion process. In other words, there may be indescribable beauty outside, but inside it is Paleolithic: the hearth of a caveman. And no science. This is essentially a fireplace, beloved by so many. This is in warm climates where there is enough radiant energy to provide warmth.
In Rus', things were different - the climate was different.
It’s difficult to say when exactly he became different, but it’s obvious that at the beginning it was also warm. And then it got colder. This is evidenced by the design of the Russian stove. When radiant heat became insufficient, a savvy Russian peasant decided to move the fire deeper: he moved the back wall of the fireplace, creating an additional combustion chamber. And before the smoke exited, he attached a cover - an obstacle to force the smoke to fall down, and leave some of the heat at the top, in the cap thus formed. of the deck oven appeared .
But gradually people figured out how to optimize this process as well. I came up with the idea of enhancing the natural combustion process by supplying additional air and removing non-combustible debris formed during the combustion process, which interferes with the full combustion of the fuel. In other words, he came up with an ash pit, a blower door and a grate , or grate .
It is believed that this happened with the advent of the steam engine and coal-fired locomotive, which needed a higher combustion temperature. However, I think that much earlier, since blacksmithing has existed since time immemorial, and in the forge hearth they use forced air injection, and the grate, together with the bellows, serves precisely to supply additional air to the fuel combustion area. But this is already a historical question. We understand the features of the firebox design.
So, the additional air supply was quite a serious step forward. Now the fuel could be burned under more optimal conditions. Moreover, through the grate not only air is supplied to the fuel from below, but also helps to remove the products of incomplete combustion down into the ash chamber, thereby increasing the supply of oxygen to the fuel. And this increases the intensity of combustion. As a result, it becomes possible to increase the combustion temperature, which means that the efficiency of fuel combustion increases: more energy is released and less soot is formed. And this is good: less fuel is needed for heating and more heat is generated!
The second consequence : the fuel combustion time is also shorter and, therefore, during the same time, more heat is released in the firebox than in a furnace that does not have an ash pit, that is, in a hearth . Why is it important? But because you can close the pipe earlier and leave more heat in the stove, and therefore in the room. Because while the pipe is open, heat literally flies out into it, and we drown the atmosphere. How to optimize the process?
Obviously, it is necessary to reduce the heating time of the furnace, but at the same time increase the combustion temperature. Then more heat will be released per unit time. This is exactly what the ash chamber and grate serve. The sooner we close the stove, the more heat will remain in the stove after closing the chimney. Therefore, the ash pan and grate are a useful invention. This, one might say, is a new stage in the development of stoves.
Furnace departments
Any stove, be it Russian, Dutch, Swedish or a sauna structure, consists of several main sections. For each of them, the material should be selected separately, since certain characteristics required specifically for a specific part of the hearth are important.
Foundation
The first step is to build the foundation. Since the structure is usually located on the ground floor, the proximity of the ground must be taken into account. Therefore, a concrete slab is usually laid as the first layer, below the floor level, and a layer of waterproofing is applied to it.
Thus, we get a layer that will withstand the mass of our future structure, and also will not allow moisture and cold that come from the soil to affect it. Solid brick rows are usually laid on top of the waterproofing layer; there can be from two to four.
Another section of the design that raises the most questions about the selection of material is the firebox. This is the very place where firewood is laid and where the fire is made. The bricks in the firebox are directly exposed to the flame for a long time, and this happens over many years. Therefore, appropriate requirements are imposed on them.
As a rule, fireclay blocks are used to lay out the firebox. They have the highest fire resistance of all possible options, so they quietly perform their functions throughout the entire life of the fireplace.
In principle, the entire structure can be assembled from fireclay. But this is very expensive. In addition, the firebox lined with cream-colored fireclay blocks looks very advantageous when surrounded by red brick blocks, so this solution is optimal from the point of view of not only functionality, but also design.
The chimney does not come into direct contact with the fire and does not carry a particularly high load. However, it also has certain requirements.
Firstly, it is exposed from the inside to aggressive chemicals released during combustion.
They have a detrimental effect on the condition of the building material from which the inside of the chimney is lined, so special attention should be paid to the stability of these bricks in various destructive factors
Secondly, the part of the chimney that is located above the surface of the roof of the house - that is, the pipe - is also subject to attacks from the external environment. Rain and snow, frost, wind, sudden changes in air temperature - all this significantly undermines brick blocks.
The appearance of the fireplace is also important, especially in modern private homes. In principle, if we are talking about an old hut, then usually the structure is simply covered with whitewash, as in the old days.
But still, as a rule, recently preference has been given to finishing with facing bricks. This option is suitable for the Russian oven, and for the Dutch oven, and for other varieties.
When choosing a cladding, you need to consider two factors:
- heat capacity. She must be tall. The brick is required to accumulate as much heat as possible;
- thermal conductivity. This ability is important so that the stove not only stores heat, but also releases it into the room.
As a rule, both of these indicators are present in second-grade ceramic facing bricks. This is the material that experts recommend using for the exterior finishing of the stove structure.
Any stove, be it Russian, Dutch, Swedish or a sauna structure, consists of several main sections. For each of them, the material should be selected separately, since certain characteristics required specifically for a specific part of the hearth are important.
Foundation
The first step is to build the foundation. Since the structure is usually located on the ground floor, the proximity of the ground must be taken into account. Therefore, a concrete slab is usually laid as the first layer, below the floor level, and a layer of waterproofing is applied to it.
The opinion of the luminaries
A.I. Shkolnik , a generally recognized authority among modern stove makers, says about this
“ The efficiency of a firebox with a solid bottom , that is, without a blower and grate, does not exceed 35% . The low efficiency of a firebox with a solid bottom is explained by the following reasons. Firstly, excess air, which, without participating in the combustion reaction, passes through the furnace in transit and cools its surfaces. Secondly, the low temperature of the supply air, which does not come into contact with the heat-transfer medium. Thirdly, the air in a firebox with a solid bottom moves above the fuel and not through its thickness.
A firebox with a blind bottom is more difficult to operate than a firebox equipped with a grate, since access to a sufficient amount of air is difficult for the fuel located deep in the fuel volume and the fuel does not burn. In order for the fuel to burn, it must be moved to the front of the firebox. In addition, it is necessary to continuously monitor the fuel combustion process, loosen and move it within the hearth. When loosening the burning layer, doors 2 and 3 have to be opened, which leads to additional cooling of the furnace mass with air.” (A.E. Shkolnik. Stove heating of low-rise buildings. M., 1991, p. 24)
And here are the words of I. S. Podgorodnikov , creator of the first two-bell furnaces, which are now called Kuznetsov furnaces:
“When burning fuel on a blind hearth (i.e. without a grate - my clarification - O.S.), most of the air necessary for combustion passes over the fuel, carrying the heat with it into the chimney ." (I. S. Podgorodnikov. Household two-bell stoves., M., 1992, p. 22)
Height adjustment
To adjust the height of the heating device, special bolts are used, which are installed on its legs, or using supports. To set the required distance from the bottom of the firebox of a brick structure to the floor, lay several rows of bricks. Basic requirements before placing the combustion chamber in height:
you need to ensure a distance to the floor of 300-400 mm; if there is a niche for firewood under the firebox, this distance may be greater; When calculating the placement of the bottom of the combustion chamber, please note that you need to take into account the structure of the floor with all its components. Think about this when planning your heating system.
Fireplace size calculation
Fireplace size calculation
Operating principle
A deck oven has high efficiency with minimal fuel consumption.
The operation of a deck oven differs from a classic one. The main property of such products is high efficiency with minimal fuel consumption. Burnout is distributed evenly. Thanks to the air entering through the firebox door, sufficient oxidation of the firewood occurs, increasing the quality of its combustion and the level of heat release.
The loading of firewood is carried out at the lower level in the loading chamber. Then the combustion process occurs in the working area. Gases are removed from the upper level and heat exchange occurs.
To maintain high temperatures (about 400°C), the furnace body is made of polished stainless steel. The lining is made of fireclay bricks or other fire-resistant material.
or rustic unpretentiousness against the backdrop of modest charm
The etymology of the word “rustic” speaks of the most characteristic features of this style - deliberate “roughness”, “rudeness”, stylization for a rustic interior (this style is also called country). The desire of our ancestors to introduce an element of aesthetics into the arrangement of their primitive home gave rise to this architectural trend, which subsequently began to develop so widely and comprehensively.
Country style is characterized by natural details, components and materials, emphatically “rough” processing and an open shape of the hearth. The most suitable materials are: shell rock, sandstone, tuff stone, etc.
Isn't a stove dangerous? A spark falls from the tank, or the wall overheats - and that’s it, there’s a fire!
For safety, fire safety cuts and retreats have long been calculated. Setback is the safe distance of the stove from the wall (the wall must be protected from overheating and fire, and the distance can be either closed or open).
Cutting is performed at the intersection of combustible house structures with a stove or chimney and represents a completely non-combustible space.
You can read more about fire protection using the link at the end of the article.
How to calculate the number of bricks
The amount of this material depends on the size of the Dutch oven. If there is a ready-made project, then, as a rule, the amount of building materials is indicated. Experienced furnace specialists also know how much material is required for a furnace of a given size. But if you plan to lay a Dutch oven with your own hands, there is a universal formula for counting the number of bricks. It should be noted that the quantity calculated here is also imprecise, conditional.
You should calculate the number of bricks required to lay out the bottom row, provided that they are laid solid. Then calculate how many rows you plan to lay out in height, taking into account that the height of one row is approximately 7 cm. Multiply these two numbers and subtract 1/3 from the result.
//www.youtube.com/watch?v=apKtactWkqo
Let's say the base of the stove measures 3 by 4 bricks. It turns out that there will be 24 pieces in the first continuous row. Then you need to calculate the height of the future furnace. If the height of the house inside from floor to ceiling is 2 m 40 cm, the cutting height must be subtracted from this number - approximately 30 cm. The result will be 2 m 10 cm. Taking into account the row height of 7 cm, the result will be 30 rows in height. Then you should subtract a third of this number. 30 divided by 3 equals 10. Subtract 10 from 30 to get 20 rows. Then you need to multiply 20 by 24. You get 480 pieces. It will take about 50 pieces to cut, in the end it turns out that for such a stove you will need 530 bricks.
The amount of material per pipe is calculated separately. 1 linear m of pipe contains approximately 14 rows. For example, one row of pipe consists of 6 bricks, 6 multiplied by 14, you get 84. This number of bricks contains 1 m of pipe. Let the length of the pipe be 4 m, then 84 is multiplied by 4, you get 336. The result is that you will need 336 pieces per pipe.
The formula is quite simple. Of course, the amount of material calculated is not exact. But at the same time, you can already estimate how many bricks will need to be purchased and how much it will cost.
The Dutch oven has a simple design, is light weight and fits perfectly into a small room. It does not require large financial costs. For your dacha, you can build a rocket stove out of brick.
//www.youtube.com/watch?v=I4up-2P_lkc
It heats up quickly and can heat a room a few hours after it is lit. However, this design also has disadvantages. Its efficiency is about 40%, so it is difficult to heat houses where people constantly live. If you don’t close the view after heating, the stove will quickly cool down; it has a small heat capacity, so it has to be fired up often. These properties make the Dutch oven the most suitable, economical option for heating a summer house, garden house and other premises where people do not live permanently.
Advantages and disadvantages
Stoves of this type have advantages and disadvantages over other types of heating and kitchen devices. The main advantages are:
- It is possible to install several tiers to cook many dishes at the same time.
- Quickly warms up large rooms.
- It does not pollute the atmosphere with its smoke (unlike grate stoves).
- Easy to use.
- Durable (subject to operating rules).
It is also worth noting the high efficiency of the stove (79-82%), long burning period (in a wood-burning stove, 10 kilograms of briquettes burn out in 10-12 hours).
The downside is that the design requires only one heat source (wood, electric heating or gas). There are no hearth stoves that run on peat or coal.
Peculiarities
The structural features of a classic fireplace suggest that air access is provided to the firebox through the fireplace window. Experts have calculated that the optimal traction force speed for a heating device of any size should be less than 0.25 m/sec. In practice, it is difficult to measure thrust speed. Until the fireplace is lit, its presence can be determined by the vibrations of the flame of a lit paper sheet. The user of a fireplace can only verify the adequacy of the traction force in practice.
Its presence or absence is also influenced by such external parameters as:
- indoor and outdoor temperatures;
- chimney condition;
- type, volume and dryness of fuel.
The main condition for the serviceability of the fireplace is to comply with the basic parameters and their relationships in the design of the heating unit. Optimal parameters of the heating design will allow you to organize high-performance operation of the device. An ideal result can be achieved if the basic requirements are met.
To avoid any violations in the device, the fireplace must meet the following tasks:
- provide warmth;
- remove smoke from the room;
- ensure the correct amount of air in the combustion chamber.
The standardization of dimensions mentioned above does not lead to the same appearance of all devices. Among all the device parameters, there are some that really affect its performance.
Certain dimensions must be implemented in projects exactly. These include:
- linear dimensions of the combustion opening;
- chimney dimensions;
- distance from the floor to the first edge of the window;
- tooth location;
- parameters of the pipe width in the area where the tooth is located.
Other parameters do not affect the operation of the device, but only determine the difference between the devices. The dimensions of the portal are often associated with the dimensions of the combustion chamber. They are associated with certain location parameters.
There is no absolute value:
The dimensions of the device are closely related to the volume of the heated room. When implementing your own project, try using the table below. It specifies the conditions for normal operation of the device. Masters use similar tables.
The data presented in the table is formed from certain values. The starting point of calculation for creating a fireplace is always the area of the room. In accordance with this value, the size of the fireplace combustion window is determined. To do this, the area of the room is divided by 50. Next, the dimensions of the furnace are determined by calculating the ratio of width and height. Calculations are expressed as a fractional value of 2/3.
With a buried combustion chamber, the gas removal rate increases.
This is bad, since the warmth in the room cannot be expected in such an outcome. With a shallow combustion chamber, good traction force will not be achieved. Combustion products will begin to enter the room. The depth of the combustion chamber must be related to the height of the windows. Two-thirds of the latter value are proportional sizes that have been verified over the years.
To make it clearer, we give an example of the calculated indicators of a fireplace for a living room with an area of 28 square meters. meters. First, 28 needs to be divided by 50, we get 0.56. These are the parameters of the combustion window. The area of the combustion hole will be 0.61x0.92=0.5612 sq. m., the depth of the fuel chamber is (610x2) /3 = 406.7 mm. The calculated figure can be rounded: you get a fuel chamber 40 cm deep.
In addition to the firebox, a standard fireplace includes a ventilation duct (chimney).
The dimensions of the ventilation duct openings are usually 1/8, 1/15 of the dimensions of the combustion box. In this case, the length of the chimney duct is taken into account. The permissible height is 10 meters. In this case, the design should not be too low. The most optimal height of the chimney structure is 4-5 m. The device is usually supplemented with knee bends.
The required height of the chimney is achieved with a specially laid foundation. Often the pedestal is not connected to the foundation of the house. It also serves as a safety platform for the fireplace. Therefore, it is often made to protrude several centimeters beyond the hearth.
The fuel chamber is placed on a pedestal made of non-combustible materials
, the height of which can be from 30 to 40 cm. An increase in the height of the pedestal is allowed by the structural features of the chimney. In some cases, a place under the pedestal is organized for storing firewood. Calculations of the position of the firebox, as well as the pedestal itself, include the characteristics of the flooring material.
Can a fireplace be installed in any room of the house or are there restrictions?
There are a lot of restrictions. It is not allowed on the second floor (usually the ceilings are not designed to support the weight of even a small fireplace), in a regularly shaped room with an area of at least 20 square meters with three-meter ceilings, so that the volume of air is sufficient for normal combustion. But a fireplace that is too small will not be able to heat a large room. For masonry fireplaces there is a rule:
area of the combustion window = 1/50 of the area of the room.
The firebox window should “look” into the middle of the room.
Advice for beginners from professionals
To better understand how to install a Dutch oven and make as few mistakes as possible, you should listen to the following advice from experienced craftsmen:
- If the area of the room in which the Dutch oven will be installed is 40 m2, then it is possible to determine the optimal dimensions of the oven. For a stove whose height is 210 mm, dimensions of 780x580 mm are considered acceptable.
- In order for the masonry to be of the highest quality possible, before laying the bricks, experts recommend immersing each of them in water for a few minutes - during this time, excess air bubbles will be removed from them. This will ensure that during laying the brick will not absorb too much moisture, as a result of which it will turn out to be of better quality.
- Due to the fact that door frames installed during masonry are sensitive to high temperatures, before installing them in the oven they are either varnished or wrapped in asbestos cord. These materials are known to have fire-resistant properties.
- Most often, during the repair of a stove that was in operation, bricks break off at the ends and corners, which will then have to be restored. To prevent such a problem from arising, during brick laying it is advisable to finish it with special plates of various shapes.
- There is another fairly important quality indicator that guarantees long-term operation of a Dutch oven. Experts recommend maintaining the distance between the chimney and the roofing. We must strive to ensure that it is more than 150 mm.
conclusions
Don’t think that building a Dutch oven is completely simple and can be easily done without skills and experience. Rather, on the contrary, it is a process that will require from the master not only technical knowledge, but also attention to detail, accuracy and diligence. In our article, we tried to provide as many practical recommendations as possible from experienced stove makers to make it easier for you to learn this process. We hope that it will help you avoid common mistakes and make a high-quality and functional stove with your own hands. It is worth noting that all recommendations are dictated not only by experience, but also by safety precautions. Therefore, you should not experiment with building a stove, otherwise you cannot avoid serious risks not only to health, but also to life.
https://youtube.com/watch?v=GlVclepGte0
Normative base
In Russia, the manufacture and use of equipment for public catering establishments, including baking ovens, is regulated by several standards:
- GOST R 50620-93 “Machines and equipment for the baking industry. Safety requirements".
- GOST 26582-85 “Food machines and equipment. General technical conditions".
- GOST 12.2.092-94 “Electromechanical and electric heating equipment for public catering establishments. General technical safety requirements and test methods."
- For rotary baking ovens, on the basis of the European standard EN 1673:2000, GOST R 54320-2011 “Rotary baking ovens” was developed and implemented. Safety and hygiene requirements."
Brickwork of the stove base
stove base masonry
At the end of all calculations, exactly twenty rows are obtained and now this figure must be multiplied by twenty-four (the result is four hundred and eighty). Also, we must not forget that an additional fifty bricks will be needed, which will then additionally need to be added to the general cutting.
During laying, we also must not forget that the required number of bricks to build a chimney must be calculated separately. And a novice builder will wonder how many bricks are in a linear meter. In order to build one linear meter of a standard pipe, you will need fourteen rows of bricks (each row has approximately six bricks). It follows from this that there are approximately eighty-four bricks in one linear meter.
A similar formula for calculating building material is distinguished by its simplicity and convenience.
But, it is important to remember that such a formula is conditional and you can easily make mistakes when making calculations (so double-check the resulting numbers several times)
You can also read about the features of stove construction here.
Device
Studying the design will allow you to understand what a deck oven is. It consists of 11 most important elements:
- No. 1 – Convection chamber with louvers and valves on top.
- No. 2 – Body, made of steel or fireclay.
- No. 3 – “Direct stroke” valve (“summer stroke” type), directing smoke directly into the chimney.
- No. 4 – Main firebox (chamber).
- No. 5 – Side fireboxes.
- No. 6 – Fireclay brick of the side firebox (fire-resistant element).
- No. 7 – Under (lower horizontal surface of the stove)
- No. 8 – Reinforced wall (made from SHA-94 brick).
- No. 9 – Fireclay brick in the 4th combustion chamber.
- No. 10 – 4th combustion chamber.
- No. 11 – chimney outlet, the chimney pipe is attached here.
The listed stove parts are shown in the diagram:
Scheme
All models are equipped with doors (cast iron, steel). Sometimes a heat-resistant window is made in the center of the door, allowing you to observe the flame.
If the stove will be used for cooking, it is equipped with grates and burners that reduce the thermal stress in the stove, then dishes can be placed on it.
Which brick is suitable
Choosing the right brick is very important when creating a stove. It must be of high quality in order for the stove to be economical, heat up quickly and retain heat for a long time.
The quality of bricks can only be determined by personal inspection.
Fireclay contains 70% fireclay clay. Its main qualities are refractoriness and fire resistance. It is from this material that a brick oven will be of high quality. It heats up quickly, but it takes a long time to release heat. Brickwork is also made from solid ceramic bricks. It is created artificially and when fired it becomes durable, moisture-resistant and heat-resistant.
It is advisable to choose a brick that is whole, without cracks, of the correct shape, and of a standard size. How much will be needed for the future stove depends on this size and the quantity in the tray. Usually there are 250 pieces in a pallet, but sometimes there are other quantities depending on the manufacturer. Ceramic bricks must have smooth edges in order for a product made from it to look aesthetically pleasing.
I made a foundation for the fireplace stove, tied to the main tape. Am I right?
No. The stove, like a cat, loves to walk on its own, and the foundations for heating structures must be autonomous. This will protect the foundation from frozen groundwater, movement and any lateral loads.
Exceptions are made in two cases:
- quicksand soil;
- piles.
In the case of an abutment, a soft insert is installed between the furnace foundation and the tape. But not a wooden shield, for example, or sand. The simplest soft insert around the perimeter of the foundation under the stove can be made from a foam plastic board 5 cm thick.
If you nevertheless decide to make a common foundation for the house and the stove, you need to take into account the uneven load and install additional reinforcement in the concrete monolith between the main perimeter and the platform along the foundation of the stove.
Correct definition of parameters
A corner fireplace, the dimensions of which have already been calculated, can be made of any materials and have a certain lining of the hearth. Before making your choice, we recommend that you familiarize yourself with the following selection rules:
Criterias of choice
Detailed description
Decorative hearths
The dimensions of a corner fireplace largely depend on the type of hearth chosen for installation and the fuel used for its operation.
If you are looking for a purely decorative solution or a firebox that will serve as an additional source of heating for your house or apartment, we recommend that you pay attention to fireplaces that operate using bioethanol or electricity.
Effective foci
Installation instructions for the finished model are always included in the basic package. The most effective fireplaces that can become the main source of heating in rooms are gas and classic wood-burning structures. If installing a gas boiler is possible both in a private and apartment building, then wood-burning fireboxes require a chimney, which is only possible in your own home. It should be noted that the installation of such installations is more complex, costly and time-consuming.
Budget materials
The chosen finish, materials for making the hearth and portal also play a big role. The most inexpensive and budget coatings are plasterboard, metal profiles, ceramic tiles, and decorative plaster. Due to their low cost, the design of portals, fireplaces or such cladding provides lower efficiency and efficiency.
Expensive coatings
The price of materials and coatings that form and provide the furnace with additional heat capacity, efficiency, and heat transfer is quite high. This category includes tiles, natural minerals, cast iron, steel
The distinctive features of the materials are practicality, durability, fire resistance, easy maintenance and environmental friendliness.
Principle of operation
The furnace operates using an energy carrier - fuel, the combustion of which leads to the release of heat. A distinctive feature of the design is maximum efficiency and reduced heat loss. The molds in which the confectionery products are placed are placed in the inner cavity. These can be buns, cakes, pies, bread.
Baking occurs as a result of the movement of confectionery products inside the oven. On an elongated belt, products move at a certain speed and are exposed to different temperatures. Heating can be adjusted externally during operation.
The baker also changes the heating intensity of the heating elements from above and below. When moving products through different compartments, the products are first baked more intensely, then the intensity decreases. This principle allows you to produce baked goods and confectionery products on-line, resulting in a large quantity of high-quality products.
Production process
Calculation example
To understand the calculation method, it is worth considering it with an example - this will allow you to later calculate how many bricks are needed for a stove, but for an individual project. Regardless of the perimeter of the stove, its first row is still laid out completely - for example, 4x4 bricks, i.e. for a monolithic first row you will need 32 bricks.
To continue calculating the bricks for the stove, you need to determine the number of rows, for which the height of the room must be known. A standard single brick has a height of 65 mm, and the thickness of the seam between rows is 5 mm. As a result, it turns out that the total thickness of one row is 7 cm. With a room height of 2.8 m, 30 cm is subtracted from this value for the fire protection structure, and the calculated size of the stove is 2.5 m.
The resulting value must be divided by the thickness of one row, and in this case you get 36 rows. By multiplying the calculated number of bricks required to completely lay one row by the number of rows, the result is 1152 bricks. The design of the stove is one-third hollow, so 2/3 of the total number of bricks is calculated - and this is 768 bricks.
The next step to find out how many bricks are needed for the stove in the house is to calculate the number of bricks for the chimney. In a standard square pipe, each row consists of 6 bricks - and for a 4-meter pipe consisting of 57 rows, 342 bricks will be required. Here the calculation method is exactly the same as in the case of the main part of the furnace. Of course, this method is not suitable for determining the number of bricks in the case of round or rectangular chimneys.
When deciding how many bricks you need for a stove, you must take into account the number of bricks that will be used for cutting. This amount directly depends on the design of the stove, its location and the thickness of the wall, if the stove is built into it. For a single wall, the minimum groove width is 25 cm, so a single groove is laid out on each side of the oven. The total is 36 rows on both sides, or 144 bricks. If the stove is not adjacent to the wall, then cutting is only needed near the ceiling and roof elements. In this case, the number of bricks will vary from 30 to 50 pieces.
Conclusion
A simple stove for a summer house or private home can have a different design. There are many models of heating devices made of brick, which differ in both appearance and functional characteristics.
When choosing a type, you should take into account the purpose of the unit, the size of the room and the period of operation. One of the main steps is choosing the location of the stove: it should be installed near a wall with an adjacent room. This way you will achieve the most optimal temperature for the whole house.
Let's determine the heat loss of our home
We need to understand how much energy consumption will be required to maintain the desired temperature in the house. The easiest way to do this is experimentally.
| Here is a selection of materials: IN Everything you need to know about heating and climate control Features of the selection and maintenance of boilers and burners. Comparison of fuels (gas, diesel, oil, coal, wood, electricity). Do-it-yourself ovens. Coolant, radiators, pipes, heated floors, circulation pumps. Chimney cleaning. Conditioning |
In cloudy, windy weather, close all windows, doors, ventilation openings in the house, and turn off all equipment, for example, the refrigerator. We don’t cook anything in the house; it’s better not to be in it at all. We open all internal doors to form a single space. Leave it like this for a day. After a day, we measure the temperature. It is better to measure in all rooms and average.
Now we turn on the electric heater, with a power of, for example, 1 kilowatt. If there are many rooms, then you can turn on several low-power heaters in different rooms. Again we leave it for a day. After a day, we measure the temperature. Again, it is better to measure in all rooms and average.
This experiment can be done at any time of the year. Basic temperature values do not affect the result, only relative changes are important. But it is necessary to conduct the experiment in cloudy weather. Sunlight, especially the infrared component, will spoil all measurements. And you need wind, since heat loss with wind is usually several times higher than without it.
We calculate the difference in average temperature without and with heaters. Divide by the power of the heaters in kilowatts. We get a number that shows how many degrees Celsius the temperature in the house rises from a one-kilowatt heater. In my house it turns out to be 10 degrees per kilowatt.
Video description
For a clear overview of laying and applying mortar, watch the video:
- Duplicate row, but the stones are laid flat.
- The brick is on edge, the walls are wiped with a wet rag.
- The brick is laid flat, and on the back side - on the edge.
- Next, the firebox is closed, 2 bricks should hang over the chamber (if the structure is planned to be used as a fireplace and the firebox is not covered), the flame will be directed to the middle of the structure.
- The stones are moved a little to the back side, they will support the door. Before laying the brick, wet strips of asbestos are laid to seal it. The panel cannot be placed on the mortar - cracks will appear due to the difference in thermal expansion.
- A pipe is formed to remove smoke. A smooth expansion is made towards the back. Stone is used for the base; light metal is used for everything else.
- A valve is installed, it is necessarily sealed with asbestos, first coated with a solution. This completes the construction of the structure.
Decorated stove for cooking and heating Source mainavi.ru
At the end, several tiers of the chimney are made, and a pipe is inserted into it. The brick (installed without mortar) and all debris are removed. The joint of the structure near the floor is closed for decoration with metal. The structure will dry completely after 1-2 weeks.
How to build a simpler type of oven if you don’t have the time, necessary materials or skills? Take advantage of the following structure, which can be erected in just a few hours. It has the simplest operating principle.
Fuel is placed below, which burns there, and where it settles. The draft is created by temperature changes. This design is characterized by a minimal amount of smoke and almost complete combustion of fuel. For this option, two half stones and 20 whole bricks are enough. There are five rows in the stove, the stones are tied together with mortar, but you can lay out the stove without using it - it will be a temporary structure.
Stocking up on materials
If you have chosen the type of stove (“mini” or “maxi”), a firm decision has been made to build a Dutch oven - it’s time to stock up on materials and select tools.
The following materials are required
- standard size refractory kiln bricks;
- clay;
- crushed stone;
- sand;
- water;
- roofing felt;
- thin steel wire.
In addition, you should take care of the facing materials. The furnace heats up to a very high temperature; accordingly, a number of requirements are imposed on the facing materials:
- high strength and heat resistance
- resistance to mechanical stress
- low porosity structure
- thickness from 6 mm.
The volume of materials used in construction is taken structurally. In this case, it is necessary to calculate how many bricks are needed to build a Dutch oven.
During construction you will need the following tools:
- level;
- Master OK;
- roulette;
- container for building materials;
- shovel.
In addition, you will need stove dampers that regulate the draft and burning rate of fuel, and a combustion door.
Let's move on to calculating the number of bricks required to build a Dutch oven.
Designing a long-burning potbelly stove
The starting point in the process of designing a long-burning potbelly stove is the need to ensure a comfortable temperature in the room with minimal expenditure of time and effort. The next stage is the search for the optimal design option. To heat a residential house, you can use a Burelyan or rocket stove circuit. But for a greenhouse, garage or industrial premises where there are no high requirements for cleanliness, you can use bubafonya - a stove with vertical fuel loading.
In practical terms, the following is taken into account:
- Location of heating devices;
- Purpose of the premises;
- Dimensions of the heated room;
- Availability of necessary materials and tools;
- Availability of skills to work with tools.
Each of these points is important in its own way and it is simply irrational to discard it during design. The installation location must ensure complete safety of the premises, both in terms of fire safety and safety during use
In addition, it is important to place the stove in such a way that it does not interfere, the chimneys do not take up much space, and the heat from it is evenly distributed over the entire area of the room
To efficiently heat a room, you need to choose the right dimensions of the structure itself. In a garage or workshop, it is enough to construct a stove of standard sizes, but for a greenhouse you will need a stove from a 200 liter barrel.
The idea of building a long-burning stove with your own hands is often put off until later due to the lack of necessary materials or tools. But on the other hand, if there is no metal sheet 5 mm thick, this does not mean that the idea should be abandoned completely, because there are many successful stove designs created from old cylinders, channels, angles or thick-walled pipes.
How to calculate the number of bricks
The amount of this material depends on the size of the Dutch oven. If there is a ready-made project, then, as a rule, the amount of building materials is indicated. Experienced furnace specialists also know how much material is required for a furnace of a given size. But if you plan to lay a Dutch oven with your own hands, there is a universal formula for counting the number of bricks. It should be noted that the quantity calculated here is also imprecise, conditional.
You should calculate the number of bricks required to lay out the bottom row, provided that they are laid solid. Then calculate how many rows you plan to lay out in height, taking into account that the height of one row is approximately 7 cm. Multiply these two numbers and subtract 1/3 from the result.
//www.youtube.com/watch?v=apKtactWkqo
Let's say the base of the stove measures 3 by 4 bricks. It turns out that there will be 24 pieces in the first continuous row. Then you need to calculate the height of the future furnace. If the height of the house inside from floor to ceiling is 2 m 40 cm, the cutting height must be subtracted from this number - approximately 30 cm. The result will be 2 m 10 cm. Taking into account the row height of 7 cm, the result will be 30 rows in height. Then you should subtract a third of this number. 30 divided by 3 equals 10. Subtract 10 from 30 to get 20 rows. Then you need to multiply 20 by 24. You get 480 pieces. It will take about 50 pieces to cut, in the end it turns out that for such a stove you will need 530 bricks.
The amount of material per pipe is calculated separately. 1 linear m of pipe contains approximately 14 rows. For example, one row of pipe consists of 6 bricks, 6 multiplied by 14, you get 84. This number of bricks contains 1 m of pipe. Let the length of the pipe be 4 m, then 84 is multiplied by 4, you get 336. The result is that you will need 336 pieces per pipe.
The formula is quite simple. Of course, the amount of material calculated is not exact. But at the same time, you can already estimate how many bricks will need to be purchased and how much it will cost.
The Dutch oven has a simple design, is light weight and fits perfectly into a small room. It does not require large financial costs. For your dacha, you can build a rocket stove out of brick.
//www.youtube.com/watch?v=I4up-2P_lkc
It heats up quickly and can heat a room a few hours after it is lit. However, this design also has disadvantages. Its efficiency is about 40%, so it is difficult to heat houses where people constantly live. If you don’t close the view after heating, the stove will quickly cool down; it has a small heat capacity, so it has to be fired up often. These properties make the Dutch oven the most suitable, economical option for heating a summer house, garden house and other premises where people do not live permanently.
What is the difference between a Dutch woman and a Swedish woman, I confuse them
The Dutch oven was created specifically as a heating stove, but now they are making a hob in it. This device is much simpler than a Russian stove: a combustion chamber with a labyrinth of smoke ducts on top. The smoke travels along this winding path for a long time, and thanks to this the heat does not escape. In our country, Dutch was traditionally decorated with tiles - this option is considered a classic.
The Swedish stove is an improved version of the Dutch stove with a vertical system of smoke circulation channels. Swedish scientists optimized it in the mid-18th century by expanding the lower part and adding an oven to the side.
The Swedish oven is the result of careful calculations. With its quite compact size, it warms up quickly, allowing you to cook food, heat the house, etc. The efficiency of the Swedish stove is slightly inferior to that of the Russian stove, but this design requires precise calculations. They drown the Swede twice a day.
How many bricks do you need for a stove?
/ Furnaces /
Owners of country houses, private lands and other types of buildings are increasingly introducing various stoves into the interior of their houses, and the first problem they face is how many bricks are needed for masonry, and how to make the correct calculations. The information presented below will be extremely useful to those who do not yet have experience in this area.
The best oven
The Dutch oven is characterized by ease of operation, simple design and high productivity.
The compact Dutch woman can be used in a country house or in the country. It heats up quickly and cools down slowly when the damper is closed.
The classic version of the stove is rectangular in shape, with extended chimney channels above the firebox - intended only for heating.
However, over time, various shapes arose: triangular, round, trapezoidal. Various options for using Dutch ovens have also appeared: in addition to heating ones, there are heating and cooking stoves that are combined with a stove, there are combinations with a fireplace, with a stove bench, and with a container for heating water.
Skillful design will allow you to make such a stove part of the decor, effectively integrating it into the interior of the room.
Type of material for the project
Scheme of laying furnace rows.
The outer layer of the project is usually made of ceramic bricks. This material is easy to process and has sufficient thermal conductivity.
When purchasing, carefully inspect its surface. High-quality stones of this type have no differences in color over the entire surface, there are no cracks or chips, and the geometry meets the standards.
The furnace firebox requires special refractory bricks that can withstand high temperatures and are highly durable. The latter property is both an advantage and at the same time a disadvantage, since it complicates its mechanical processing.
Refractory bricks are made in various forms. Moreover, it has no voids. This type of artificial stone can withstand temperatures of +1400… +1600 ºС. It differs from the usual type in its composition and characteristic metallic ringing when struck.
It is made from special refractory clay in industrial ovens at very high temperatures. This material has clear edges, which makes it possible to make precise geometric structures from it. But refractory bricks have a fairly high cost. Therefore, it is recommended to divide the building into external and internal decoration.
This allows you to significantly reduce project costs without compromising its safety and thermal conductivity.
We build it ourselves
If we take a strict approach to the issue of baking pizza, then no factory equipment can give a truly “real” result. This means that lovers of Neapolitan or Diabola will have to build a pizza oven with their own hands.
Foundation
The total mass of the finished structure is quite large. Even installing any brick oven outdoors requires a solid foundation in the form of a foundation. Our Italian stove will rest on a solid reinforced foundation with a crushed stone cushion.
To dig a pit you need to know the dimensions of the future furnace. As with any other construction, you will need a drawing. The layout of the furnace is quite simple, so the drawing shows only the dimensions of the structure. The pit should have linear dimensions slightly larger than the dimensions of the furnace podium.
Good to know: Is it worth using a gas heater in the country, which model to choose
A pillow is installed at a depth of 40 cm. To do this, a layer of crushed stone is poured and compacted tightly. Then, the rest of the foundation is filled with mortar, for the preparation of which cement and sand are used. This is an ordinary solution with a ratio of 1 and 4, which fills the space limited by the formwork. A reinforcing mesh should be placed on the surface of the pillow and throughout the entire layer of mortar.
After raising the foundation to the desired level, you need to check the horizon and leave it for several days for the solution to dry completely. To ensure that moisture evaporates evenly over the entire depth and cracks do not form, the new foundation is covered with a film.
Stand and table top
It is too early to design the firebox, as it will be located low and inconvenient to work with. In addition, you can create a functional addition to the stove - a compartment for storing firewood. A stand will be formed on the surface of the foundation. It plays a load-bearing role and determines the height of the furnace. When building independently, the height is selected according to your height. The walls of the stand are formed of strong concrete blocks; there is no front wall. A kind of niche is formed for storing firewood.
Creating walls
The height of the table top is usually 10 cm. This layer of mortar should have two layers of reinforcing mesh. There is a gap of 5 cm between them. After pouring, the tabletop is covered with film and dries for several days. Now you have a base that can support a wood-burning pizza oven.
Walls and dome
To build any wood-burning stove, you need to stock up on refractory bricks. The inner surface of the firebox, where the highest temperature is observed, is lined with fireclay bricks. Clay mortar with good adhesion can be purchased at the store in the form of a dry mixture. Preparing the solution yourself will take a lot of time, since you will first have to select a type of clay suitable for its fat content, grind it and mix it with sand.
At the first stage, the arch of the vault is laid out. It is necessary to prepare a wooden template that will hold the arch until the solution hardens.
Creating an arch of the desired shape
After this, we begin the construction of the dome. A row of bricks is laid out around the circumference on the tabletop. To form a dome, many craftsmen advise making a wooden internal frame.
Appearance of the finished structure
But there is a more convenient and practical way. Sand is poured into the space limited by the first row of bricks. A pile of compacted sand is given the desired shape. It can be used to lay out the dome, and then the sand can be removed through the firebox inlet.
Creating a firebox shape using sand
The wood-burning pizza oven body is plastered with clay mortar. Clay can withstand temperature and will prevent heat from escaping from the firebox through possible cracks.
Good to know: Tiled stoves-fireplaces, a new wave of popularity of antique finishes
Chimney
The design of the chimney in a Pompeian stove is quite simple, but at the same time it has one feature. The pipe protrudes forward, towards the entrance to the firebox. Since the stove model is outdoor, there is no need to build a high channel. It is enough just to ensure that the smoke escapes outside.
Construction work has been completed
Having completed all stages of construction, the oven should be left for several days. Despite the fact that the solution dries quickly on the outside, moisture will remain throughout its entire depth for a long time.
