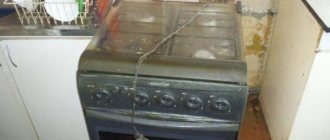
In the cold frosty winter, bath procedures are much more relevant than in the summer. This is a great opportunity not only to take a steam bath, but also to relax comfortably in a warm room. To heat a classic Russian bath, a wood-burning heater is chosen; for modern saunas, electric saunas are often used.
In any case, correct installation of the stove in compliance with fire safety standards is important. To do this, you need to select a location in advance, determine the type of furnace, what raw materials it will be heated with, and whether there will be a heat exchanger.
Users often search for:
- Stones for the sauna heater
- How to make shelves in a steam room correctly
Basic options for installing a sauna stove
The most common:
- Placement of the entire structure in the steam room. The advantages include loading firewood directly from it. It is convenient to easily adjust the traction. But there are many disadvantages: oxygen is burned out relatively quickly in a small room, it is difficult to maintain the required humidity level, and when using it, dirt from the logs remains on the floor.
- Installing a stove in a bathhouse with an external firebox is the best option in terms of safety, cleanliness and space saving. True, its installation needs to be thought out in advance, because to bring out the fuel channel it is necessary to provide a technological hole, since if it is not made, you will have to break the wall.
- The fuel channel can even be placed outside. This option is the rarest, and is used in extreme cases, when the area of the steam room and dressing room is small, or coal, which is very dirty, is planned to be used as fuel. The main disadvantage of this design is the inconvenience of operation, especially in winter.
It is necessary to decide on the placement option at the stage of building the bathhouse. If you plan to move the furnace firebox to an adjacent room, then when constructing a dividing wall between the steam room and the dressing room, an opening is immediately installed in it. In the case of a completed reconstruction, it is quite acceptable to cut out the necessary window in the wall to remove the fire door.
Project
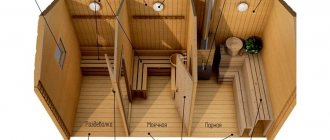
To avoid problems with construction, you need to make a design and plan for the steam room for the bath. It would seem that nothing is simpler, but still it will take a lot of time and effort. If a mini-bath or sauna is being designed, then this should include certain areas: a dressing room, a washing room and a steam room.
The dressing room can also serve as a rest room. A separate room should be a washing room, where both a swimming pool and a shower can be located. And there must be a separate room for a steam room, the project of which must begin with the installation of a stove, which is the main part of the steam room.
During construction, it is necessary to choose the dimensions of the stove that correspond to the proportions of the steam room, that is, the volume of the entire room. It is also necessary to take into account the ratio of its power to the size of the entire room. For this, the following proportions are used: one kilowatt of thermal energy should be used per cubic meter in the steam room.
The number of people in the steam room at the same time is also important. According to unwritten standards, approximately 0.70 meters of space is needed per person. You also need to take into account the height of the tallest member of the family, adding twenty centimeters to it. When calculating the project, do not forget that insulating the steam room will take up a couple of centimeters of space, and if you make the room too high, then the heat will be wasted.
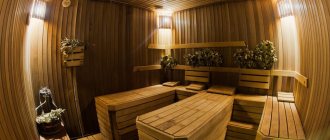
A steam room can be built without windows, but in this case it is necessary to take care of artificial lighting. And if there is a window, it should be blind and have a minimum size of approximately fifty by fifty centimeters so as not to let heat out into the street.
It is worth considering the quality of the double-glazed windows. They must be heat and sound insulated. Don't forget about the ventilation system. After all, if it is not there, the tree will quickly become unusable, and mold will also form, which will have a bad effect on the health of any person. For additional insulation, you can use blocks, lining and other wall cladding options.
How to install a stove in a bathhouse, at what distance from the wall
To completely prevent the possibility of fire or less dangerous, but also negative consequences from contact with hot metal, the firebox should be located at a distance of 1 m from other objects. But in practice this is almost unrealistic, because there is simply not so much free space in the steam room or adjacent rooms. Therefore, wood and other potentially flammable surfaces are lined with heat-resistant materials (baked clay, brick). There is an alternative - laying a plot - but it does not turn out to be convenient and worth implementing in all cases. But when performing thermal insulation, the minimum distance will be reduced from one meter to 80 cm. The distance between partitions and shelves from the heat source will remain at least 110 cm.
Is the quality of cast iron the same among different manufacturers?
Oddly enough, but cast iron is different from cast iron. This metal can be very different in its chemical composition. And, if its production was unscrupulous, then during the use of such a stove even cracks may form. And in Russia, according to experienced stove makers, high-quality cast iron is not produced at all.
Much more enthusiastic reviews today are received by units from the Swedish company Keddy, in which the fireboxes are solid cast iron. The doors are fitted manually, without a seal, and the chamber is completely sealed. If used correctly, such a furnace will never burst - after all, such products are made using the centrifugal method, and from special cast iron, the secret of the composition of which the Swedes still keep secret.
But ordinary cast iron is really afraid of thermal shocks, it’s true. It can burst if the temperature difference between its two nearby points is more than 80 degrees. For example, this can easily happen if cold water gets on such a stove in a bathhouse, which is not at all uncommon. That is why almost none of the leading manufacturers make cast iron sauna stoves, and the domestic Sudarushka will serve for a long time only if treated with extreme care.
However, every thing has its own lifespan, and just because a cast iron stove holds heat well, you can turn a blind eye to all its other disadvantages.
Where to install the stove in the bathhouse
When choosing a point for installation, you must be guided by current SNiPs and take into account how and where remote tanks and external heat exchangers, connecting pipes, and mesh casings are located. The following requirements must also be met:
- the heating unit must not be placed in a niche;
- the distance to unscreened wooden interior items must exceed 1 m;
- the distance to a thermally insulated and plastered ceiling must be at least 0.8 m, to an unprotected fire-resistant coating - at least 1.2 m;
- from the firebox door to the opposite wall - at least 1.25 m, from the hot body - 0.5 m;
- the partition for the outlet of the channel-sleeve is made of fire-resistant material (not completely, but from the beginning of the floor and, continuously, up to a level of 0.25 m above the boiler).
Required Tools
For bathhouse needs, they usually purchase double-circuit gas boilers with a closed combustion chamber. They are easier to install, and in addition, do not require the use of a carbon monoxide indicator. Such sensors are required for boiler equipment with an open chamber or with air intake from the dressing room or boiler room.
The sensors are very capricious in operation, they are easily triggered by cigarette smoke and even fried potatoes, so it is still better to buy closed models for a bathhouse.
To install the boiler you will need:
- Hammer with ring drill and drill;
- A set of anchor bolts or hooks, this fastener is often included with boiler equipment;
- Template for marking the wall.
Simultaneously with the installation of the boiler, the heating system is being installed, so you will need a soldering iron for polypropylene pipes, registers, taps and shut-off valves.
Installation base
Any modern heating device weighs relatively little, but add to this the mass of stones in a mesh casing, water in the tank, loaded logs, and brick lining. As a result, the load constantly experienced by the floor is quite serious. If the firebox stands on four point legs, over time they can push through the wooden covering.
If the floors are non-flammable, they do not need to be additionally shielded. A screed poured over the ground will already be a sufficient solution. Although it is still better to lay a separate fire-resistant base in any case. The main thing is that the total weight of equipment and fuel does not exceed 700 kg.
Flaws
- Since the fuel in this case is wooden firewood, and the metal surface of the equipment is subject to strong heating, operation of the stove is associated with a high risk of ignition of surrounding elements.
Due to these circumstances, quite serious fire safety requirements are put forward for the use of a heating unit, especially when the stove is a privately produced product.
- To carry out engineering work independently requires special knowledge. In addition, a homemade design is susceptible to all sorts of malfunctions, since such manipulations require the most accurate compliance with all technological standards. It is extremely difficult to achieve such a result in non-production conditions.
Choosing the type and size of foundation for the furnace
It is advisable to lay it out at the design stage. After all, if you act with a steam room already equipped, you will have to remove the floor, replace the damaged structure, then fix new logs or strengthen the old ones. What foundation options are there? If we are guided by current SNiPs, these are:
- Monolithic reinforced base, not combined with a bathhouse, laid below the soil freezing line.
- The pile-slab base, also separate, is useful when building on heaving soil.
- Shallow foundation (up to 0.6-0.7 m down), going in conjunction with the base of the steam room and adjacent rooms. Just reinforce it with anchoring to prevent vertical movements of the slabs during frosts.
The dimensions of any of the options depend on the dimensions of the rooms, so this is always an individual indicator. The main thing is that there is a distance of 7-10 centimeters from the edge of the perimeter to the beginning of the walls.
The final touch
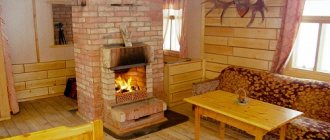
Finishing the firebox with natural stone or decorative brick is required to obtain the effect of a Russian bath - fine steam and light “good” heat. Without additional work, the result may be not a bathhouse, but a sauna.
Open metal parts of the fuel apparatus emit aggressive heat, burn out oxygen in a steam room, and are dangerous. Unfinished ovens create pronounced convection and produce heavy water vapor.
Chimneys also transmit heat and need to be enclosed. In addition, brick finishing of pipes will make the stove more fireproof.
The temperature of combustible gases in the chimney pipe will be significantly reduced due to the masonry. When heated, the finishing material itself will serve as an additional source of heat.
In many models, stone finishing of the outer contour is provided by the manufacturer. Brickwork is carried out independently taking into account:
- gaps required for metal expansion;
- entry and exit of air flows (convection), the ability to block them.
Serpentine stone, soapstone chloride, soapstone magnesite and others are used as natural finishing materials. In addition to its heat-resistant and aesthetic properties, when heated, natural stone saturates the air with ions that are beneficial for the human respiratory, cardiovascular, and digestive systems.
Pouring a monolithic foundation
It is carried out according to the rules for installing a stove in a bathhouse, exactly according to the diagram it is necessary:
- To carry out the main excavation work - carefully dig a small vertical pit 1.5 m deep so that on all sides of the perimeter it is 10 centimeters wider than the future foundation. To speed up the process, it is possible and even recommended to use special equipment.
- Set up a sand-crushed stone cushion - fill the bottom with river sand, compact it, watering it with water. At the same time, mix the fine-grained material in a ratio of 1 to 1, then lay it in an even layer of 15-20 cm.
- Mix the “milk”, that is, not a thick cement mortar, then gradually pour it into the pit. Allow time to harden so that the crushed stone and gravel adhere firmly.
- Waterproof the initial layers of the base using roofing felt or liquid bitumen.
- Assemble the formwork - make panels from plywood (or boards, as an option), nailing them together or fastening them with screws, and then placing them in the pit. Align vertically (the height of the structures here should rise right up to the finished floor), check the diagonals, making sure that the finished sole will be in the shape of a rectangle (square).
- Reinforce - tie the frame (10 cm less than the perimeter and height of the formwork) with wire and place it inside.
- Pour - prepare a solution (in a ratio of 1 to 2.5 to 4 from sand, cement and crushed stone, respectively), mixing thoroughly, and tie it in layers with everything that was placed in the foundation pit earlier. Don’t forget to compact it with an in-depth vibrating device or a regular rod. Allow to dry for 3 weeks, then remove the formwork and fill the resulting voids with a mixture of sand and soil.
- Waterproof the finished concrete slab, first leveling it with grout (if necessary). To do this, lay the roofing material in two layers, fastening each with liquid bitumen mastic.
Specifications
Before understanding the technical characteristics of the equipment, you need to consider the features of this metal:
- Cast iron, used for the manufacture of furnace equipment, has a high heat resistance. Its surface does not collapse during sudden cooling (for example, when exposed to water).
- The material transfers heat better than brick or other types of metal. Bathrooms heat up quickly with low fuel consumption.
- Cast iron parts must be cast because it is very fragile. Welded joints quickly lose strength when exposed to high heat. Therefore, individual parts are fastened together using a tongue-and-groove system or using bolts.
When considering the technical characteristics, you need to pay attention to several indicators:
- Power - selected depending on the size of the steam room. To correctly calculate the power, you can use a special formula - multiply the area of the steam room by 1.5. The resulting result is considered the optimal power indicator.
- Thermal capacity. The optimal range is from 15 to 35 kW. It is better to choose models with a heat capacity of 20 kW. They consume a small amount of fuel and retain heat for a long time.
- When choosing a material, it is better to give preference to gray cast iron.
The technical characteristics of furnace equipment are influenced by additional functions:
- secondary gas combustion system;
- ash drawer pull-out mechanism;
- vertical stiffeners that increase the strength of the structure.
Some stoves are equipped with a clean combustion function. It involves the location of a special hole above the firebox door. It is designed to remove air from the combustion chamber.
Cast iron furnace with secondary combustion
Pile-grillage foundation
How to properly install a stove in a bathhouse that will be built on unstable soil? It is on this foundation, according to the following scheme:
- Prepare the place - remove the top layer of soil and use ropes and stakes to mark the location of the future sole.
- Make pits (at the corners of the marked perimeter) - dig them to a depth of 15-20 cm, no more.
- Take the piles (section width 108 mm and length 2.5 m) and screw them strictly vertically into the holes made at the previous stage. It turns out that they are above the finished floor line - cut them with a grinder so that they go 10 cm below.
- Weld the heads, paint the protruding elements to protect them from external influences and extend their service life, and secure another “ten” channel around the perimeter with shelves inward.
- Lay sheet steel inside the resulting contour and fix it.
- Lay reinforcement (if necessary), pour concrete, give it time to dry, coat with waterproofing solution.
What do you need to know?
First you need to decide on the fuel that will be used and, therefore, on the type of boiler. It is not advisable to make electric and gas appliances yourself, but if the choice was made in favor of one of them, then it is better to buy a ready-made high-quality boiler. Otherwise, the risk of emergency situations will increase.
Solid fuel boiler for baths, diagram
It is also worth noting that an installed gas boiler must be inspected by a representative of the relevant authorities. Therefore, it is much easier to assemble and install a solid fuel unit.
Shallow base
Here is the answer to the question of how to properly install a stove in a bathhouse with minimal time and money. Such a foundation is made relatively quickly and simply, however, it is only suitable when building on stable and water-free soil. The sequence of work on its arrangement is as follows:
- Mark the boundaries of the pit and dig it - up to 0.5 m deep.
- Tamp the bottom, leveling it with river sand (5 cm layer), moistening it with water and compacting it.
- Make a cushion of crushed stone (15-20 cm) and fill it with liquid cement.
- Wait until it dries, waterproof the base with roofing felt, install the formwork, strengthen the structure with 20-30 cm of concrete.
- After hardening, remove the unnecessary panels and level the foundation horizontally.
Disadvantages of cast iron stoves
The main disadvantage of the unit is its high cost, which not every person can afford.
In addition, it is important to choose the model wisely so as not to make a mistake with the quality of the alloy. And, unfortunately, it can be different
Many experienced stove makers do not trust Russian cast iron, considering it to be of lower quality. But Swedish-made stoves with solid cast iron fireboxes are called the standard of strength. In these models, the doors are adjusted manually without the use of a seal. At the same time, the level of work of the craftsmen is so high that in the end the oven chamber is completely sealed.
If you do not make gross mistakes during operation, such a boiler will never burst, despite temperature changes. The same cannot be said about low-quality cast iron, which is terribly afraid of temperature changes, when in two adjacent places the temperature difference is more than 80 degrees. And such an incident can easily happen if, for example, cold water is accidentally spilled on the stove, which happens in a bathhouse. Therefore, many Russian leading manufacturers of bath equipment do not make cast iron stoves. And those companies that do create sauna boilers from cast iron strongly recommend that buyers of their products treat it very carefully.
Preparing a wooden floor for stove installation
Since we previously agreed that we were planning installation work even before the construction of the steam room and adjacent rooms, we will consider an option in which we do not have to dismantle the ceilings.
- Mark the dimensions of the heater (strictly at the location of its future location), with a margin of 5-10 cm in each direction. Remember the distance to the walls and the protection (in the form of a metal sheet) in front of the door. Draw all this on the prepared sole.
- Cut out a shape from the mineral slab, the same shape as the one obtained in the previous step, and screw it to the floor with self-tapping screws.
- Mix the refractory mortar and use it to lay out 2 rows of bricks, preferably fireclay, but red solid brick can also be used. Check for compliance with the horizontal level and hit it with a mallet.
- Dilute heat-resistant glue and fix the porcelain tiles to the prepared base. For what? You not only need to understand how to properly install a sauna stove, but also know how to prevent the floor from catching fire during its operation. And this material, which can withstand even very high temperatures, will be an excellent fire protection.
You can simplify the procedure and put a sheet of mineralite, and on top of it another one, but this one made of steel, securing each one with self-tapping screws. But we advise you not to skimp on fire safety and to play it safe.
Step-by-step installation instructions
After calculations and design on paper, the specialized specialist begins the actual work:
- Mix the solution using cement and sand of medium or fine fraction.
- Lays bricks - sequentially, from the base, one level after another.
- Takes into account the ligation of seams when creating rows - they should go like a “ladder”, and not an even vertical line.
- Use jointing when the masonry of the portal for the sauna stove is completed to prevent surface roughness.
Afterwards, you can additionally decorate the “front entrance”, for example, with tiles, but this is not necessary, since if the work is done correctly, it already looks quite aesthetically pleasing.
Fire door
The features of its arrangement during installation depend on where it goes:
- If it is in an adjacent room, then the opening must be lined with bricks and insulated with fire-resistant sheet material. The gaps between the wood and the masonry will need to be foamed, and the joints will need to be sealed with heat-resistant mastic.
- When going to the steam room, the wall should be covered with a stainless screen. The thickness of the steel should be at least 3 mm, and even better 4-5 mm.
Building a boiler yourself
There is nothing special or complicated about building a boiler for a sauna with your own hands. Before starting work, you need to prepare special tools and materials, and if there are instructions, study them carefully.
Material
The correct installation of the boiler in the bathhouse depends on the material that will be used in the process.
- When installing boiler equipment, professionals usually choose metal barrels with a volume of up to 200 liters for its base. To do this, you can use a small piece of thick pipe, up to 1 meter long and 51 centimeters in diameter.
Advice! Do not install the sauna boiler very close to wooden walls to avoid fire.
Homemade boiler diagram
- Such an installation can heat a room with a volume of up to 15 cubic meters, which is an area of 3 x 3 square meters. First you need to prepare > with metal circles and a home welding machine. grinder>
Chimney
It is important to know how to organize the exhaust gas outlet. Proceed as follows:
- Mark the location of the passageway on the ceiling.
- Saw the ceiling, treat it with fire-retardant impregnation, insert the groove (box with outlets) and secure it in the corners with self-tapping screws, lay 7.5 mm thick basalt insulation.
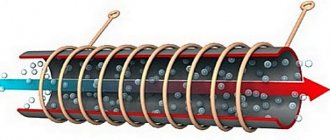
- A single-wall module, at least one meter deep, or a pipe heat exchanger is first installed on the sauna stove. Next, an adapter from a single-walled to a double-walled pipe, then the use of a sandwich structure is recommended.
- Connect the free end to the adapter, to which, on the other side, connect the first section of the chimney, followed by the second, and so on. Reinforce the joints with metal clamps.
- Protect the outlet pipe with a steel sheet (from the attic side), which is secured to the wooden ceiling using self-tapping screws.
- Cut a hole in the roof and bring out the pipe using a groove with an aluminum element.
- Make sure that the chimney rises 0.5-1.5 m above the roof level and install a cap.
If you purchased a ready-made unit, you must follow the instructions. On the website you can find high-quality factory-made polyurethane foam, presented in various configurations: “empty” or with additional insulation. In the first case, it is necessary to cover the base of the unit (stainless steel sheet) with basalt cardboard from the inside, and install the polyurethane foam itself in a box protected by mineralite sheets. We leave the distance between the pipe and the sheet empty. But the assembly itself must be covered with kaolin wool to a depth of 5-7 cm from the attic side; no more is needed to avoid overheating of the pipe.
Wall decoration
It is a “pie” made of a thermal insulation layer and a metal sheet. The first reflects the received energy and distributes it evenly, the second prevents smoldering and fire.
You can choose one of the following insulation materials:
- basalt cardboard – characterized by excellent insulating properties, including noise absorption, and is not subject to rotting;
- mineral wool – non-flammable, resistant to stable exposure even to very high temperatures;
- BSTV (bazvata) is environmentally friendly, but hygroscopic.
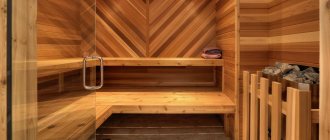
Facing cladding
It is attached with a binding solution to a heat-insulating base - for the decoration of the “gate”. Look at the photos of the portals of sauna stoves designed in this way - they look very impressive.
The following materials are in demand for decoration:
- tile terracotta - made of baked clay, durable, wear-resistant, resistant to mechanical stress, with the possibility of painting and glazing;
- clinker - similar to the previous one, only of a different shape (resembles a brick);
- tile - with a decorative surface covered with patterns, prints, ornaments of any complexity;
- porcelain stoneware - with a chic texture that imitates noble stone, non-flammable, effectively resisting abrasion;
- soapstone - with special resistance to impacts, environmentally friendly, interesting gray-green shade.
Firing the furnace before installation
It is carried out outdoors, as increased formation of caustic gas is possible. First you need to treat the heating unit with an anti-corrosion agent, and at the same time carefully inspect for cracks, chips and other defects on the grill, door, heat exchanger, and also make sure that there are no cracks or gaps. Then:
- Place the equipment on a flat and heat-resistant base, connect a temporary chimney (longer than 200 cm).
- Load firewood up to half the volume of the firebox and set it on fire (with the door loosely closed), maintaining the flame for an hour.
- Wait until the fire goes out (do not extinguish it).
Thanks to this, the internal coating of the heat generator will finally harden, and it will be possible to proceed to permanent operation.
Useful tips
When heating the stove, the smoke must go freely into the chimney, since if carbon monoxide is not removed through the hood, it can cause serious harm to the human body. If a problem exists, you must immediately find the cause of the weak draft and eliminate it.
Several ways to determine the absence or interruption of furnace draft:
The easiest way is a regular sheet of paper or a lit match, brought to the open door while the stove is firing. If the sheet or flame of a match deviates inward, then there is a draft. If there is no deviation or it occurs outward, then there may be a so-called backdraft, which can be very dangerous.
- One of the reasons for weakening draft may be a depressurized chimney, crack, break, pipe shift, or other defects.
- Another danger is an accidental spark falling into a crack in the chimney onto flammable material, which leads to a fire.
- The small size of the blower through which the exhaust is made can lead not only to the occurrence of reverse draft, but also to an insufficient supply of oxygen to the fuel combustion process.
- Blockages in the chimney can also interfere with the process of normal draft. In this case, regular chimney cleaning will help restore normal air movement. It should be noted that the presence of even one elbow in the pipe, where the bulk of soot accumulates as a result of aerodynamic processes, will greatly complicate the work of the “chimney sweep”.
- If for some reason the stove cannot be heated for a long period of time, an air plug consisting of dense air layers may form in the chimney. As a rule, it resolves immediately after regular heating begins on its own.
- Insufficient firebox volume.
- A wide and long chimney does not work with a small firebox.
Frame wall construction
How to properly install a sauna stove equipped with an external firebox? Of course, with the installation of a partition between the steam room and the adjacent room. It is made from two beams with a cross section of 100 by 600 mm and a height equal to the ceiling of the room, pre-treated with an antiseptic. Place these spacers vertically, securing them at the top and bottom with self-tapping screws using perforated corners. Also fix a horizontal jumper between them to create a frame shaped like the letter H. There will be a fuel channel and brickwork on the floor, and at the top, at the floor level, there will be sheathing and insulation. Insulate the structure - fasten basalt wool slabs between the beams, install the lining with lathing, fix the foil steam protection with a construction stapler. After this, make brickwork, leaving a gap of 3-4 mm between it and the channel and wooden guides. For reliability, use corners, take care of the visual beauty of the seams. The finished portal should look aesthetically pleasing, so mount the trim, complete the finishing, level it and correctly determine the center.
Operating principles
When operating, you need to take into account a number of rules:
- do not perform assembly near water sources;
- use different types of firewood for kindling;
- carry out regular cleaning of the structure from accumulating ash and soot;
- Split wood for kindling there so that it does not protrude beyond the firebox.
You need to lay metal sheets on the floor so that random sparks flying out of it do not cause a fire.
Cast iron stoves for baths are very popular among bath attendants. This is due to the advantages of the material and its low price. If you don’t want to spend a lot of money on buying ready-made furnace equipment, you can assemble the structure yourself.
Ceiling
Its preparation is implied by any competent scheme for installing a stove in a bathhouse. Why? Because a significant part of fires start from above the room - due to overheating or cracks in the pipe. Therefore, when arranging the ceilings, a hole is left for the chimney - with a diameter of 90 cm. Thanks to this solution, later, when connecting the heating unit, you will not have to cut out part of the beams and invent jumpers to maintain the strength of the structure. Attention, the pre-designed passage must be square, not round, so that the cutting box can be tightly inserted. This is a channel made of tin and stainless steel, inside of which the pipe will be located. But the outside still needs to be wrapped with basalt cardboard to prevent direct contact with the wood of the walls of the room.
Materials
Such a room can be built from various materials - brick, stone (natural), foam and gas blocks. But, of course, the best material would be wood. As a rule, rounded or planed logs are taken for the steam room. There are often cases when timber can be used. Glued laminated timber can also be a good solution due to its maximum moisture resistance. But it also has a corresponding cost.
The most convenient to lay and the most affordable is profiled timber, which is also quite resistant to various types of deformation. Wood species such as aspen, birch or larch and linden are ideal for constructing a steam room. The mentioned species of these trees do not emit any resins at all. You must be extremely careful if you decide to choose pine. It is better to make only walls from this wood, but it is better to finish them inside from non-coniferous wood.
Safe installation standards
How to properly install a stove in a bathhouse? Naturally, so that later it can be used without threat to one’s health, without the risk of fire. To do this you need:
- Position the firebox so that it opens in the same direction as the door.
- Coordinate all aspects with the fire inspectorate, invite an electrician to check the correct connection of devices and the quality of grounding.
- Insulate and screen penetrations through ceilings.
- Maintain the recommended distances from the heating unit to flammable materials.
- Equip the rooms adjacent to the steam room with means for extinguishing fires and carefully monitor their serviceability.
General description of the design
In fact, this is a special frame made around the heating source. U-shaped, it, as a rule, visually stands out from the general background, although it can be made of the same material as the masonry. Its other common names are “gate” or “front entrance”, given precisely because of its appearance.
It can go both into the living room - a separate kindling room - and into the rest room. In the latter case, the aesthetics of execution are especially important.
An already finished structure cannot be adjusted in any way - if changes are needed, it will have to be built anew. Therefore, it is worth paying special attention to its design: to calculating the dimensions and quantity of materials.
When a portal needs protection
In the event that the room is small, and the heating equipment is too powerful and therefore not only heats itself up, but also overheats everything around, including the surrounding air. In such a situation, the frame must be made of heat-resistant material to prevent its rapid failure. At the same time, you will protect yourself from burns and excess heat.
Adviсe
- Wooden walls can be reliably and economically protected with mineralite.
- To improve energy efficiency, install a heat exchanger and water heating tank.
- During operation, pay attention to the condition of not only the firebox, but also the chimney, as well as the stones in the mesh casing.
Now you know how and where to properly install a stove in a bathhouse - the steps are described in sufficient detail. But we recommend showing the finished result to specialists so that they can confirm that you did everything correctly.
Possible difficulties
Fitting and cutting - in practice, these operations take too much time. Therefore, it is easier to calculate the length and height of the “front entrance” in order to use only whole bars, boards and other piece products.
The presence of a door at the firebox can make access difficult. If it is removable, it is better to dismantle it, carry out all the work calmly, and then install it again.
Vertical and horizontal deviations arise not only due to lack of experience, but also due to uneven floors or walls. So it is imperative to carry out constant level checks - it will help to avoid mistakes.
Construction errors and their consequences
When constructing a stove foundation yourself, you can expect various errors to occur. The most common errors include those listed below:
- The main mistake is that there is often no working documentation for the foundation. It is unacceptable to skip or ignore the design stage. Otherwise, all the work and costs associated with it may turn out to be meaningless.
- The work should only be carried out by a qualified builder who already has experience in performing similar work. A worker without any qualifications will most likely not be able to perform work in strict accordance with the technical requirements.
- Another miscalculation that developers make is starting construction without a detailed analysis of the soils located at the construction site. Without this information, it is impossible to calculate the area of the foundation, choose the right place for supports and choose the optimal type of stove base.
- The construction of the foundation cannot be carried out without accurate knowledge of the depth of the foundation. Often, this parameter is calculated based on past work experience. To avoid such unpleasant situations, it is necessary to study the characteristics of the soil and constantly check the data with the design documentation. It must be remembered that any foundation must rest on soil whose structure has not been destroyed.
- Sometimes, when building foundations, the developer preserves the topsoil. It is unacceptable. It must be removed, and it must be buried 150 mm.
- An incorrect choice of foundation will certainly lead to unpleasant consequences. Up to the complete destruction of the structure.
New house
During the planning stage, the home includes a furnace.
This means that the project will be calculated along with the loads from its device.
It goes without saying that in this case it will be easiest to arrange the stove on the same basis as the house.
As a result, we should get a monolithic, perfectly flat surface with an area larger than the future structure.
If the foundation of the house is built using a pile or pillar method, then it is not enough to place additional supports under the stove; it is necessary to tie them into a single structure and fill it with a monolith slab of the required size.
To install a new furnace in an old house, you need to remove the floor
When installing a stove or fireplace in an already built and lived-in house, you will have to remove the floor. It is actually necessary to reach the ground
In such a situation, at the project stage it is very important to correctly calculate the weight of the future structure. If the weight of the body does not exceed 0.8 tons, then you can choose a shallow concrete pour
If the furnace is planned to be large-scale, then a strong foundation is needed.