Do you want to seriously renovate and update your apartment? Then it will not hurt to know that one of the most basic stages of major home renovation is replacing old plumbing and pipes with new ones. In addition, this is the most impressive item of expenditure in the budget allocated for this work.
Reducing already impressive costs is a normal desire of every prudent owner. Do you agree? It’s quite possible to reduce them: installing plumbing fixtures yourself will help. We will tell you how to do the wiring, how to move and connect plumbing equipment, and what tools and materials are needed.
You will learn how to change the pipes in the bathroom and connect plumbing fixtures yourself. And in order to make it easier to understand the repair issue, the article provides thematic photo guides and video instructions.
Which is better: series or collector circuit?
Today, two generally accepted wiring schemes are used - serial and collector.
The sequential (or as plumbers also call it, tee) system is considered classic. It is used in all standard apartment and private buildings with small bathrooms.
The system is very simple - from the central risers, through which hot and cold water is supplied to the apartment, it is laid under one main pipe, from which every plumbing fixture in the apartment is powered.
For each device, a tee is cut into the pipe. Thus, the entire length of pipes in a house or apartment is relatively short, so this wiring option is considered the most inexpensive
The amount of work involved in installing bathroom fixtures with your own hands is also not very large. However, this is where the advantages of the sequential circuit end. The main disadvantage of this type of connection is that all devices are powered from one pipe, and when one device is working, the pressure in all the others drops.
That is, when the washing machine pumps water, the pressure in the kitchen tap will be very weak, and vice versa.
Another drawback lies in the shutdown method. If one plumbing fixture breaks, then in order to repair it, you will have to completely shut off the water in the apartment. The collector system is used in those houses where there is a large load on the water supply system. In this case, all plumbing points are connected to the collector.
The manifold is a large-diameter distributor with a certain number of outlets. A separate tap is installed for each outlet
Most often, the collector is hidden in a special cabinet or closed niche for aesthetic reasons. Each plumbing fixture is connected to the collector separately, through a personal outlet. This connection method will require a large number of pipes, and installation work will take a lot of time.
Although you will have to tinker with connecting such a system, the advantage is obvious: the pressure in all plumbing fixtures will be stable under any mode of operation of the water supply system.
In addition, each device can be turned off or dismantled if necessary. In this case, there is no need to turn off the water completely - just turn off the tap at the desired outlet.
Design
Without a project, laying pipes will be more expensive, will take more time, and is fraught with errors during the work. The project must take into account the following factors:
- interior space layout;
- number of plumbing fixtures;
- pipe layout diagram;
- the amount of plumbing equipment on the cold water/hot water supply lines;
- presence, location of a water heater, heated towel rail, water heated floor;
- pipe material, method of connecting them;
- design, quality of bathroom interior.
In apartments of standard multi-storey buildings, there are several options for planning bathrooms:
- combined near the kitchen;
Communication diagram with one riser for the kitchen and bathroom. - combined separately from the kitchen;
Combined bathroom with independent riser. - separate near the kitchen;
Separate bathroom with common riser. - separate from the kitchen.
In a separate bathroom, the risers usually run inside the toilet and enter the bathroom through the wall.
In the first and third cases, the pipes are changed in the bathroom, toilet, and kitchen. In the fourth option, cold water/hot water supply risers and sewers usually run in the toilet, and only from there do communications enter the bathroom. The second option is the most convenient for major repairs - all the risers are inside the combined bathroom.
In a combined bathroom, all pipes are collected inside one room.
Then you need to take into account the number of plumbing fixtures indoors:
- bathroom – washbasin, bath and/or shower, washing machine;
- combined bathroom - a toilet and bidet are added to the above.
More plumbing fixtures fit inside the combined bathroom.
In addition, an instantaneous or storage water heater can be placed in the bathroom, and water heated floor contours are often laid under the floor covering.
The heated towel rail in the bathroom serves as room heating. This device can be connected to a central heating system with a separate riser, or to a hot water supply system.
Even in a small room, there can be a washing machine under the sink inside the bathroom.
Attention: Some electrical appliances (bidet or toilet lid, lighting, shower stall) require an additional cable. Others (water heater, washing machine) have an outlet.
Read more: Basics of proper bathroom wiring.
How to properly connect a regular sink?
First you need to calculate the installation height of the sink. In most cases, it is no more than 80 cm. However, if there are small children in the house, the washbasin can be lowered a little. Once the height is determined, we place a mark on the wall.
Focusing on it, we mark a horizontal line on the surface of the wall. After this, you need to measure the width of the back wall of the washbasin and set this distance down from the mark.
Detailed diagram of the installation of a washbasin in the bathroom, indicating all dimensions. Usually instructions and drawings are included with new plumbing fixtures
Before attaching brackets to the wall, you need to accurately calculate the distance between them. This is not difficult to do: turn the washbasin over and place the brackets on top so that they fit into the special grooves. Next, measure the distance between the brackets and transfer it to the wall.
Now you can make holes, beat dowels, tighten bolts. Next, you need to install the faucet on the sink, then secure it with bolts and washers, check the level of the sink and secure it with nuts.
We install a rubber gasket on the drain hole and mount the drain, connecting it to the siphon. Using an adapter, we connect the siphon outlet pipe to the sewer. Using flexible hoses, we connect hot and cold water to the mixer.
Heated towel rail
A mandatory attribute inside the bathroom is a heated towel rail. In standard apartment buildings, a separate heating riser is usually installed for this plumbing product. This is the most difficult pipe installation option for a number of reasons:
- the riser comes out of the lower ceiling and enters the upper slab;
- for hidden wiring, you will either have to make a false panel from plasterboard, or chisel reinforced concrete slabs to mount bends and cut grooves in the walls.
Less often, the specified device crashes into the hot water supply system, then there is no problem with hidden pipes to water outlets.
There are electric modifications of the heated towel rail that work even when the heating of the house is turned off. They are installed after laying the tiles, and an electrical outlet is installed for connection.
Recommendations for installing a toilet
The most popular toilet model is floor-standing. If the bathroom floor is tiled with ceramic tiles, you need to place something soft under the toilet - for example, a piece of linoleum or rubber. To connect the toilet to the sewer, you need to use a special cuff. One end of it is connected to the toilet outlet, and the other to the sewer pipe.
The toilet is attached to the floor with special pins, which are inserted into dowels fixed in pre-made holes.
The toilet is usually sold already assembled. All you have to do is attach it to the floor and connect it to the water supply and sewerage system.
In some cases, the toilet is glued to the floor using epoxy glue. In this case, the toilet cannot be used for approximately 12 hours until the glue has completely hardened.
Water heated floor
It is possible to connect the circuits of a water heated floor to the central heating line only in one case - if the apartment has only one riser for this purpose, from which the supply and return lines are extended to all registers in the premises. In other options, for a warm water floor, either a separate boiler is installed, or a heat exchanger is used that heats the water using the thermal energy of the centralized heating system.
For TP circuits, a collector wiring diagram is always used. Pipes are installed before pouring the screed, only in walk-through areas of the bathroom. They have no effect under the bathtub, cabinets, shower stall, or washing machine.
Heat exchanger for water TP.
Due to the bulkiness of collector units with heat exchangers, most users use electric-type heated floors (IR, heating cable, cassette modifications).
Installation of other necessary plumbing fixtures in the bathroom
Sink
Let's look at the features of installing a sink in a bathroom. The same scheme is used here as when installing a bathtub. Installing plumbing fixtures in the bathroom with your own hands is not a very complicated procedure. The washbasin must be placed on a stand (ceramic leg, cabinet, etc.). Before installing the sink, you need to place it in the right place, check the horizontalness of the structure using a level and mark the mounting holes. In these places you need to drill holes, then install plugs and screw the mounting pins into them. The sink should fit easily onto these pins.
After this, you need to install the drain. When choosing a siphon, you need to take into account the dimensions of the connecting corrugation or tube, which must correspond to the cross-section of the sewer pipe. Standard sewer pipes have a diameter of 5 cm, but the corrugated pipe, which can be bought in many stores, has an outlet of 3 cm. An adapter collar is used to connect it to the sewer pipe. Before assembling the cuffs and the sealing ring, they should be treated with silicone for better tightness.
To install a “tulip” sink, you need to assemble a corrugated siphon, as it makes it difficult to place the bowl on the leg. When placing the washbasin on the cabinet, you need to use a jigsaw and a wood crown to create a hole for the drain pipe. Manufacturers of bathroom furniture do not make such a hole, since it may not always be clear where the sewer outlet will be located.
If a faucet is included with the sink, it is better to install it before placing the sink on the pedestal. Hoses should be connected to the mixer. Then the sink is completely assembled with a pedestal, hoses are connected to the water supply systems and the siphon is connected to the sewer system. After installation is complete, you need to check the sink for leaks and treat the line of contact between the sink and the wall with silicone sealant.
Toilet
First, the toilet bowl must be connected to the sewer using a special corrugation or plastic corner. When using a plastic pipe (included with the corner) instead of a sealing ring, do not forget to install a special rubber sealing ring with a membrane that fits around the neck of the toilet (the so-called petal).
The toilet is installed in such a way that it stands securely on the floor and does not hang over the sewer outlet. To transfer from a cast iron sewer pipe to a corrugated or corner pipe, a special cuff is used.
When adjusting the structure, you need to make sure that the installation of the tank is not interfered with by room corners, taps, pipes, etc. It is necessary to mark the mounting locations for the tank and drill mounting holes in them. Then the tank is assembled, installed on the toilet bowl and connected to the sewer system. The O-rings must be lubricated with silicone. You need to connect water to the tank, adjust its filling and check for leaks. For aesthetics and to protect against water ingress, the base of the toilet should be treated with white silicone.
Cooperating with is reliable and prestigious. The specialists working here are professionals of the highest level. operates throughout Moscow and the Moscow region.
What determines the cost of sewerage installation in a private house?
The price of sewerage installation in a private house depends on the cost of the individual elements of which it consists. First of all, take into account the costs of purchasing building materials, equipment and paying for the work of craftsmen. This way you can determine the approximate amount needed to install the system.
It is necessary to create a sewerage project, perform excavation work, lay a pipeline, make internal wiring, connect plumbing equipment, start up and configure the system.
The price of installation work may increase if your site has difficult soil or if you need to install a sewer system in the wrong season. If VOC installation requires a large amount of labor and time, the cost will be higher.
You will need to buy pipes, connecting elements, a septic tank, plumbing fixtures, and consumables, such as adhesive and sealant. When choosing, it is important to consider the features of your cottage. It is quite difficult to give an approximate cost of materials, since the price depends on the number of risers, the length of the main, as well as how much plumbing is used.
Many companies add a maintenance fee for 12 months or 3-5 years to the cost of work if you order turnkey VOC installation from them. It is clear that professionals will not work for free, so the cost of their work is included in the price of the equipment.
If a sewer system is to be installed in a country cottage, then the estimate often includes the cost of dismantling, when the old pipeline must first be removed. In most cases, these figures are simply included in the total price of services. To save money, carefully study the price list, which should contain a detailed estimate indicating the costs for each type of work and all necessary materials.
If you do not want to overpay for sewer installation in a private home, you should calculate all costs as carefully as possible. After all, when the calculation is approximate, the cost of the work will certainly be inflated.
;
Sewerage
Did you find this article helpful? Share it with your friends:
Installing plumbing in the bathroom is impossible without correctly selected pipes
To install plumbing, it is also necessary to dismantle old pipes. A special tool may be required to perform this operation. To remove pipes hidden in the wall, you will need a hammer drill. You can cut them using a grinder.
Carrying out dismantling work requires strict adherence to safety regulations. To avoid injury when operating power tools, wear safety glasses. To protect the respiratory system from dust, wear a respirator. In addition, such work must be done with gloves.
Stages of dismantling old pipes:
- Shut off the water supply.
- Unscrew or cut off the root taps (replacement if necessary).
- Install new taps on the bends (it is advisable to use ball-type taps).
- Resume water supply.
- If possible, drain the water.
- Disconnect all devices from water supply and sewerage.
- Unwind or cut pipes.
If the old pipes were fastened using dowels, it is enough to cut off their heads so that they do not interfere with the finishing work. Before starting work on cutting old elements, it is necessary to put bags made of dense polyethylene on the taps.
How to choose pipes for installing plumbing in the bathroom? Manufacturers offer a wide selection of different pipes for arranging water supply systems, so choosing the best option can cause certain difficulties.
Previously, metal pipes were used for internal water distribution. Today they are practically not used due to the complexity of installation (welding work is required), low resistance to corrosion, as well as a decrease in throughput during operation (salts are deposited on the inner surface of metal pipes and scale forms). The disadvantages of this option include the high cost of metal pipes.
Plastic pipelines are most often used to install and connect plumbing in the bathroom. Plastic pipes do not have the disadvantages described above.
Let's consider various pipe options, starting with the most affordable items.
Polypropylene (PP). This is a fairly lightweight and corrosion-resistant material. The smooth inner surface of polypropylene pipes ensures minimal hydraulic resistance.
PP pipes are available in two versions:
- PN 10 and PN 16 - used for the installation of cold water supply, in which the pressure does not exceed 10 and 16 atm.
- PN 20, PN 25 – used for heating systems with a pressure of 20 and 25 atm.
The brands of pipes presented here have a reinforced layer of aluminum or fiberglass, which prevents thermal expansion. The peculiarity of PP pipes is the presence of thick walls, which determines the use of dimensional connecting fittings. This disadvantage is compensated by the ease of installation, as well as the affordable cost of pipes and fittings.
Types of polyethylene pipes:
- HDPE (low density polyethylene).
- PEX-A, PEX-B, PEX-S – cross-linked polyethylene (each brand has a different production method).
- PE-RT – polyethylene with molecular compaction.
Polyethylene products are used primarily for external pipelines.
Polyethylene pipelines are characterized by strength, elasticity and durability. It should be noted that fittings for polyethylene pipes are quite expensive. This type of pipe is used for laying pipelines in the ground.
Metal-plastic pipes consist of several layers of polyethylene and aluminum. This option will cost even more than polypropylene and polyethylene pipelines.
At the same time, a metal-plastic pipe will be the most durable, and fittings for such products are not large in size. The laying of metal-plastic pipelines is simplified due to the fact that the pipes bend easily and retain their shape well.
After we have examined the main types of pipes for installing plumbing in the bathroom, let’s return to the specifics of installation work.
The easiest and fastest way to install pipes is in an open way, but this option can interfere with the creation of an interesting bathroom interior design.
With the closed method of pipe routing, they are installed in pre-prepared grooves (channels).
After laying the pipes, the channels are closed and sealed with ceramic tiles. With a hidden wiring method, it is necessary to pay special attention to the quality of the pipes and the reliability of the connections. For this, polypropylene pipes are used, which, after proper welding, guarantee no leaks.
When planning the installation of pipelines in a hidden way, the need to install channels in load-bearing walls should be avoided.
Fashionable trends in the improvement of a combined bathroom
Almost all techniques used in the design of a small combined bathroom are aimed at saving space and visually increasing the area.
The trend of the season is ergonomics. Using the bathroom should be comfortable for you. Personal comfort when decorating must come first, and all ideas of interior decorators must be assessed from the point of view of individual comfort.
One of the popular trends is the installation of a wall-hung toilet. This model has the following advantages:
- practicality;
- compactness;
- functionality;
- ergonomics;
- aesthetics.
A wall-hung toilet will save several square centimeters of space and simplify the cleaning process.
Reflecting on the design of a combined bathroom of 4 sq. m, remember that industrial themes are trending. Use a technique such as imitation of a concrete surface in wall decoration. As for the style, it can be either loft or eco-style.
The introduction of materials of natural origin into the bathroom interior remains a common phenomenon. It can be natural stone, marble, wood, pebbles.
Artificial stone is also used in bathroom decoration. It is used as a facing material or for making countertops for sinks. Advantages - lower cost, attractive appearance, ease of installation and operation.
Another fashionable idea is the use of large tiles for wall cladding. There are even special formulas to calculate the optimal parameters of wall tiles. The large size of the tiles greatly facilitates its installation.
The design of the combined toilet and bathtub also welcomes Scandinavian style. This style direction is characterized by the use of white colors, the use of wooden furnishings and contrasting dark emphasizing the geometry of the room. It is also allowed to use indoor plants as interior accessories.
Installation of pipes during installation of plumbing in the bathroom
Let's look at how to install plumbing in a bathroom using polypropylene pipes. As noted above, such pipes provide the ability to create reliable connections. Special soldering irons are used to weld individual elements of a polypropylene pipeline. The ends of the connected pipes are heated to temperatures close to melting and pressed against each other. The result is a reliable monolithic connection. If it is necessary to make a detachable connection or transition to a metal pipe, fittings with internal metal threads are used.
You can buy a soldering iron for connecting polypropylene pipes at an affordable price in specialized stores. Before such devices appeared in retail sales, some craftsmen constructed soldering irons from irons. To cut PP pipes, special scissors are used, which allow you to make even, neat cuts. To clean the edges of foil-reinforced pipes, a device called a scraper is used. To avoid buying such a device, choose fiberglass-reinforced polypropylene pipes, the ends of which do not need to be protected. Choosing such pipes will protect you from the risk of buying low-quality products. The fact is that fiberglass-reinforced pipe products are inexpensive and, therefore, there are practically no counterfeits in this segment.
If you decide to install polypropylene pipes in a hidden way to install plumbing in the bathroom, they should be protected with special insulation based on polyethylene foam. This will create free space, which is necessary for thermal expansion of the pipeline.
To make plumbing connections as compact as possible, follow the following rule: for faucets, install fittings with internal threads, and for hoses with external threaded connections.
Despite the apparent simplicity of arranging a water supply system from polypropylene pipes, you must carefully follow all recommendations. For example, an incorrect angle of rotation of the fitting can lead to the fact that the installation of the mixer will be very difficult or it will leak. In addition, taking into account the need to ensure a distance of 15 cm between the centers of the fittings, you should use a soldering strip with standard parameters.
If you are planning to install a hidden water supply system that will be covered with plasterboard or plaster, you should not immediately solder the fittings or soldering strip to install the mixer. Make leads using pipe scraps and seal them with plugs. When the finishing is complete, solder the fittings so that they are subsequently located behind the level with the facing finish (for example, with ceramic tile). In the case of wall decoration with ceramic tiles, the pipes need to be extended approximately 6-10 mm above the level of the plaster (the length of the pipe sections depends on the thickness of the tile and the adhesive layer).
Street part of the system
The external part of the sewer begins from the place where the horizontal pipe, receiving waste from a vertical riser or individual branches, leaves the house. And here you have to think about how best to organize the disposal or collection of sewage waste.
Wastewater collection options
A variety of solutions are used for wastewater collection. What the options may be is clearly shown in the table:
| Options in pictures | A comment |
Connection to the city sewer | If your water supply is organized from a central main, then the easiest way is to connect the sewerage system to the city network. Your task will be to pay for the connection, install a manhole with a meter, and extend a pipeline to it from the house. If the distance exceeds 15 m, or there are drops and turns on the route, wells will also need to be installed at each of these points. |
Cesspool under the house | A cesspool directly under the house is provided when installing a backlash closet. In this case, waste from the toilet is not flushed into the public sewer. For them, a cesspool is dug under the outer wall near which the toilet room is located. The remaining wastewater can be drained into a filter well with a permeable bottom. |
Single chamber septic tank | The septic tank is located four to six meters from the house, and all sewage waste is collected in it. Otherwise, it is no different from a cesspool - when filling, it also has to be pumped out with a sewage disposal machine, and, by the way, this has to be done more often. To make pumping easier and more complete, the bottom of the container, if it is rectangular, is made with a slope. For construction, a concrete monolith or rings, red brick and even car tires can be used. |
Vertical settling tanks | In order not to create difficulties for the operation of the sewer truck, the depth of the septic tank should not exceed 3 meters.
|
| The last well is provided with a permeable bottom with drainage material wrapped in geotextile. The walls are also made permeable, using rings with perforations, brickwork with a gap, or ready-made plastic containers with slots. Rainwater from storm drains can be drained into the same well. Passing through the drainage layer, the wastewater enters the soil almost clean. | |
Overflow horizontal septic tank for local cleaning | Vertical septic tanks are usually installed for small volumes of wastewater. If there is a need to increase it - and, as has already been said, it is impossible to deepen it further than three meters, the structure can only be expanded horizontally. In this case, they either use rings of larger diameter (not 1, but 1.5 or 2 m), install a ready-made monolithic septic tank with several compartments, or build a rectangular container made of brick with a partition and overflow holes in it. |
Bioseptic design | In general, there can be a lot of solutions. In particular, you can give preference to factory-made plastic septic tanks that operate on the principle of biological treatment. Depending on the required volume, they are also two- or three-chamber. They require almost no pumping (sediment is removed once a year), are easy to install, and the purified water can be used for technical purposes or for irrigation (read the article on how to organize an irrigation system). If waste water is not used anywhere, then it is simply drained into the ground through the same drainage well mentioned above. Or, if the permeability of the soil in the area is low (for example, it is clayey), a filtration field can be installed instead of a well. |
Basic requirements for the construction of septic tanks
The design and arrangement of engineering systems - and in particular, sewage systems, in single-apartment residential buildings is carried out in accordance with the requirements of SNiP (31-02). We present the main ones below:
- The most important thing is to properly arrange the entry of the pipeline into the house: insulate it and prevent the accumulation of water in this place (the insulation of the sewer system is discussed in the article). Wastewater never sits in the pipes themselves, and therefore does not freeze.
- It is best to arrange the input using a sleeve with a warm sealing cuff, as shown in the photo.
Sleeve for arranging the sewerage inlet into the house
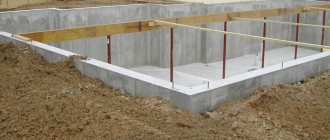
- The depth of the pipes depends on the location of the outlet, and it is interconnected with the height of the septic tank neck. When designing a system, you need to start from the design of the foundation of the house (read the article on how to choose the right foundation for a house), which determines whether the pipe outlet will pass through it, or whether the pipe can be laid under its base.
Arrangement of outlet on a pile foundation
- As a result, it should be so that the pipe approaching the septic tank at an angle can enter it no lower than 15 centimeters from the base of the neck.
- Its height usually does not exceed 90 cm, so the maximum depth of the pipe at the point of its entry into the septic tank will be 1.05 meters. Near the foundation, with a route length of 10-12 m, the elevation of the bottom of the pipe will be about 0.9 m.
Entering the pipe through the basement, through the foundation wall
- If the foundation is piled or it is a shallow strip, the pipe passes under it without any problems. For deeper installations in the foundation walls, it is necessary to lay a sleeve to carry out communications. Or, if this was not done, you have to drill them later.
- When installing a septic tank, it is necessary to maintain not only the distances from the house and water supply facilities, but also other buildings on your own and your neighbor’s property. For clarity, a diagram is provided below.
Standards for placing a septic tank on a personal plot
- Pipelines must be laid on local soil of undisturbed density. If the trench has to be leveled, then, in order to avoid subsidence, the bedding must be carefully compacted.
It is always better when the project is drawn up by a professional. If you visit thematic forums and read reviews of people puzzled by serious sewage problems, you will understand that a stingy person can pay even more than twice.
Let's remember the cat
If you want a cat litter box under the sink, you will need to measure the size of the sink and the cabinet underneath it to suit your cat's size. Otherwise the cat will go the other way.
Hidden communications wiring
There are four ways to conceal communications in a bathroom:
- box - plasterboard or gypsum plasterboard sheet fixed to a profile frame, covering part of the supporting structure (walls, partitions) where the pipes pass;
Piping in the box. - false panel - the entire wall is covered with plasterboard, again, on a lathing made of galvanized profile; PVC panels on a frame made of bars are less commonly used;
Disguising utility networks with a false panel. - cavity in the wall - after marking the water supply and sewerage routes, you need to trench a concrete or brick wall, lay pipes inside the resulting channels, cover it all with putty;
Laying pipes in grooves. - laying in a screed - pipes are laid on the lower floor and filled with concrete, semi-dry screed.
Pipes for screed.
Comparative characteristics of these technologies are given in the table below:
| Characteristics | Hidden installation type | |||
| box | false panel | grooves | screed | |
| usable volume of the room | decreases slightly | decreases much | does not change | is decreasing |
| labor intensity of work | low | average | very high | high |
| interior quality | average | high | ||
| access to communications | through the inspection hatch | – | – | |
| compatibility with installations | + | – | ||
| presence of wet processes | – | + | ||
| turnkey delivery | 1 day | 2 days | 2 – 3 days | a week |
Boxes reduce the quality of interior design, but convenient niches and steps appear for placing accessories and storing bath accessories. Behind the false panels you can hide any number of pipes, a boiler and other equipment. But, to attach wall cabinets and shelves, you will have to install additional racks made of galvanized profiles.
Outdoor installation of engineering systems
In Soviet times, open wiring of engineering systems was considered the standard. Even to the bathtub faucet, the pipes approached from the outside of the wall cladding, forming an inconvenient, unsightly gap between the side of the bowl and the enclosing structure. This method makes it much easier to bypass intersecting water supply and sewer lines.
Currently, water outlets are used, that is, cold water/hot water supply pipes laid in grooves. With sewerage, everything is much more complicated due to the too large diameter of communications. Therefore, a combined method is used here:
- behind the bathtub the pipes are laid in an open manner;
- the risers are closed with boxes, inside which additional plumbing equipment is installed - a meter, a manifold, filters, a reducer, a valve, shut-off valves, a boiler;
Riser box. - hanging plumbing installations are covered with plasterboard sheets by default;
- For the washing machine, bidet, and toilet, single water sockets are installed for cold water only;
Water socket for washing machine. - Double water sockets are installed for the bathtub faucet, washbasin, and shower cabin;
Double water socket. - Sewer pipes for sinks are often installed hidden; for bathtubs and showers they are laid openly.
Hidden sewer installation.
To connect mixers with hot water/hot water outlets, flexible open wiring is used - hoses. The washing machine drain is connected to a special fitting on any tee of a plumbing fixture.
Regulatory acts
In Moscow and the region, there are rules for the reconstruction of premises, in accordance with the Housing Code of 2004 and the Government Decree of 02/08/2005.
A permit to renovate bathrooms will not be required if the new fixtures are similar to the old ones in size and technical parameters. But if they are installed in other areas (a sink in place of a toilet or bathtub, etc.), the consent of many authorities will be required: SES, UGPS, DEZ, etc.
Coordination with them is also necessary when connecting a water heater, moving partitions, changing the width of openings and the direction of door movement. This is a lengthy and expensive procedure, during which any of the organizations may refuse to restructure.