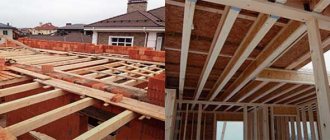
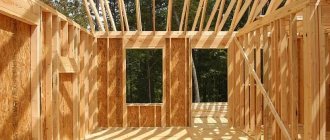
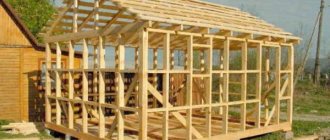
When constructing private low-rise houses made of wood, concrete blocks or brick, wooden floors are most often erected between floors. These structures, compared to alternative concrete slabs, have a number of advantages. Wooden floors do not overload the walls and do not require the use of lifting equipment during installation. In addition, they have high strength, durability and reasonable price. The installation of such ceilings is quite simple, so many home craftsmen do it themselves.
- 2 Attaching beams to the wall
- 3 Calculation of floor beams
- 4 Wood flooring technology
4.1 Stage #1. Installation of floor beams
- 4.2 Stage #2. Fastening the cranial bars (if necessary)
- 4.3 Stage #3. Attaching the reel boards for the rough base of the ceiling
- 4.4 Stage #4. Laying vapor barrier (if necessary)
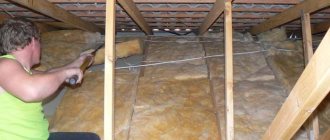
- 4.5 Stage #5. Thermal insulation or sound insulation device
- 4.6 Stage #6. Laying waterproofing film
- 4.7 Stage #7. Fastening boards (plywood, OSB) for the subfloor
- 4.8 Stage #8. Covering the floor from below and above with finishing coatings
Interfloor ceiling in a wooden house
The basis of the structure is beams resting at their ends on opposite walls. They take the load from their own weight, the mass of the ceiling and flooring, thermal insulation, furniture, people on the upper floor, ceiling lamps and other hanging devices.
When choosing beams, you need to take into account the entire load - right down to the lamps Source de.decoratex.biz
Types of floors by purpose and material
Interfloor ceilings have different purposes. They can be:
- attic;
- basement and basement;
- between two residential floors.
If the attic space is used as a residential attic, the calculation and installation of the floor are carried out according to the diagram for internal interfloor structures. When the attic is not in use, the main attention is paid to insulation and protection from moisture.
Insulation of the ceiling of a cold attic Source penoglas.ru
Basement floors differ from interfloor floors in that they have enhanced heat and vapor insulation, because... There is always high humidity in the room under the house.
For the manufacture of load-bearing elements, coniferous wood is most often used - pine, spruce, larch. These materials work well in bending, do not deform, and are durable.
Larch is beyond competition. Structures made from it last for centuries. The density of wood is 670 kg/m3, which is one and a half times higher than that of spruce. The price of lumber is quite high, which pays off in strength and quality.
Spruce and pine are looser and easier to process. They are inferior in strength and durability to larch, but their cost is lower.
Wood must be antiseptic to avoid destruction from rot and pests.
See also: Catalog of companies that specialize in interior redevelopment.
Treatment of wood against rotting Source bg.aviarydecor.com
Determining the strength of concrete
Concrete gains its strength by 30% approximately on the 3rd day, on the 7th day the strength of concrete will be 60%, on the 14th day - approximately 80% and on the 28th day the strength of concrete is considered to be 100%. However, concrete continues to gain strength even after 28 days. On the 90th day, the strength of concrete increases by another 30-35% from 100% on the 28th day.
The ceiling must be rigid, that is, under the influence of loads, it must not deflect (allowable from 1/200 for up to 1/250 of the span for interfloor).
The optimal temperature for hardening a concrete monolithic composition is considered to be 20-25 degrees. Optimal humidity is no higher than 90%. Of course, when building a structure with your own hands, it is difficult to make appropriate measurements of the strength of concrete, but we can still focus on weather conditions and accordingly draw certain conclusions about the strength of our structure.
For example, on days when the air temperature is 10 degrees, concrete gains strength by 40-50% on the 7th day, but if the air temperature is only 5 degrees, then concrete will gain strength by 30-35%. In hot weather of 30 degrees, the strength of concrete on day 3 will be 45%. At subzero temperatures, pouring a floor with concrete mortar with your own hands is not recommended, since concrete in such conditions does not gain any strength at all.
There are special additives to concrete mortar for such cases, but we are building for ourselves and with our own hands, so it’s better to wait. For now, you can only lay beams, make wooden floors between floors, build and install a reinforced frame, but it is better to postpone pouring concrete. But if you filled beams and reinforced frames with concrete mortar with your own hands, and then the air temperature dropped below zero, then do not rush into the decision to dismantle the formwork, wait until spring and warm weather.
Requirements for floors
Building codes put forward requirements for wooden floors:
- Strength, rigidity, soundproofing, economical and industrial.
- Durability must correspond to the service life of the building.
- Increasing fire safety with fire retardants.
- Convenient use of floor and ceiling.
- Thermal protection of heated rooms from cold ones.
- Sound insulation is at a sufficient level.
- Economic feasibility - the cost of work from the total volume should not exceed 18-20%.
The use of wooden floors is permitted for buildings no higher than three floors. In forest-rich areas there is no such restriction.
Reinforced concrete slabs
Partitions between floors in a house of any number of floors can be lined with reinforced concrete slabs.
They need sound insulation and insulation. They should be supported only by load-bearing walls, and at the same level, so that the ceilings are not skewed. The slabs used are factory-made 9 m long. They are hollow or thinner, flat, without voids. Place it on a fairly liquid clutch solution. All cracks at the joints of the slabs are also sealed with a cement mixture. Then the entire surface is leveled with a screed.
Calculation features
Wooden load-bearing structures must be designed for maximum load. This is necessary to check whether the adopted cross-section will withstand all possible impacts. Typically, beams are mounted parallel to the short side of the room. The height of the element is determined as 1/20-1/25 of the span width.
So, to cover a room of 6x4 m, the span width is 4 m, then the height of the load-bearing beam is 16-20 cm. The installation step of plank structures is 60-80 cm, timber can be laid every 60-100 cm.
The maximum span is 6 m. For larger values, laminated veneer lumber is used.
To determine the parameters of the section, use the table Source giropark.ru
To check whether the cross-sectional strength of the beam is sufficient, a special calculation is used, which takes into account the dead weight of the structure, the dynamic load from the equipment located on it, people, the depth and type of support, safety factors, and wood characteristics.
The maximum deflection is also determined; it should not exceed 1/250 of the length of the element. The maximum load for interfloor floors is 210 kg/m3, for unused attic floors it is two times less.
For the convenience of developers, online calculators have been created on the Internet to help quickly and easily calculate wooden elements.
Typical buildings of the USSR
Typical panel and brick 5-story houses began to be actively built during the times of Khrushchev, starting in 1957. The country needed cheap housing and as quickly as possible. That is why such projects were developed, some intended for the southern regions, others for the northern. The brick ones had a slightly better layout and room sizes.
The same serial project, built in different regions, could be slightly different. Different climatic conditions and the soils on which the construction was carried out made their own adjustments to the size of the five-story buildings. It is clear that each project differed in the height of the building.
Type series K7
Type series II-14
Type series II-05
Type Series 1605-AM-5
Type series 1-335
The length of a 5-story building with 4 entrances for a typical 5-story building of project 1-528-3k is 72.4 meters. It depended on the layout of the apartments and slightly on the thickness of the panels. The wall thickness of the panels ranges from 300 mm to 400 mm.
The length of the five-story building with 4 entrances is 72.4 meters
“Brezhnevki” were built until the end of 1980, and successful projects are being taken as a basis even now. They were not particularly different from the “Khrushchev” apartments, but the entrance area was larger, the flights of stairs were wider and a garbage chute was installed.
The choice of thermal insulation and sound insulation
To protect the room from heat loss through the attic or basement, heat insulators are used. Their choice on the construction market is quite wide. When constructing wooden houses, only fire-resistant materials are used, because Wood is a fire hazard and cannot resist the spread of fire.
Non-flammable insulation:
- basalt wool;
- glass wool;
- ecowool;
- liquid polyurethane;
- foam glass;
- slag;
- foil insulation;
- expanded clay;
- vermiculite;
- perlite
Expanded polystyrene is not used for insulation of interfloor ceilings. It burns and releases toxic substances that are dangerous to human health and life.
Floor insulation scheme Source pedkolledj.ru
Sound insulation of structures is carried out with the same insulation as the thermal insulation of floors. Due to the porous or fibrous structure, the material does not transmit sound waves well. They are reflected from the walls of microvoids in the thickness of the insulator, reducing their intensity.
Prefabricated monolithic base
The combined option involves the use of porous or polystyrene concrete panels followed by screeding.
Advantages:
- increased thermal insulation;
- reduced base weight;
- installation without the use of lifting devices;
- accelerated pace of work.
Flaws:
- increased labor intensity of laying the heat insulator;
- reduced span length;
- increased level of expenses.
In order to increase the safety margin of the insulated base, a reinforcement cage is placed before pouring the concrete.
Waterproofing elements
Particular attention should be paid to protecting wooden floors in the house from moisture, because... it can significantly shorten the service life of even the highest quality wood. Mold and fungi multiply quickly in a favorable environment and destroy material at the cellular level.
Waterproofing of structures includes a number of measures:
- Organize vents to ventilate the surface to avoid condensation accumulation.
- The elements are pre-treated with antiseptics.
- Places of contact with brick or concrete are coated with mastic and insulated with rolled waterproofing material.
Waterproofing of floors is mandatory Source licataspa.it
The construction market offers painting, lining, impregnating, penetrating and cast waterproof products for wood processing. The surface is pre-cleaned, cracks and unevenness are eliminated. Apply according to the instructions in several layers.
Conclusion
The advantages of a steel-reinforced concrete floor over a conventional monolithic one have already been considered by the developers of STO 0047-2005. Whether to use this technology in its original or unsupported version or to prefer another type of floor is up to everyone to choose for themselves. But the fact that the method works has been tested by many of our craftsmen.
To verify the viability of such an overlap, it is enough to study the relevant topic on the forum. What kind of ceilings there are in general - in the material about their varieties. In the video - another type of floors, prefabricated monolithic.
Subscribe to our Telegram channel Exclusive posts every week
Installation of attic and basement floors
The attic or basement floors of a house delimit rooms with different air temperatures, so they are additionally insulated and protected from condensation.
The load-bearing beams have a cross-section from 50x150 to 140x240 mm, depending on the size of the span to be covered and the pitch. It is possible to use rounded logs or laminated veneer lumber. The material must be well dried and free from large knots and rot.
Lumber you will need:
- cranial bars 40x40, 40x50, 50x50 mm;
- interbeam boards;
- insulation - slab, roll, bulk;
- vapor and waterproofing for insulation;
- board or plywood for the finished floor base.
Sequence of work:
- The beams are installed in increments of 60-100 cm. The cranial bars are reinforced along the bottom.
- An inter-beam roll made of boards or panels is placed on them.
- A vapor barrier film is laid with the joints taped.
- Fill up with granular or slab (roll) insulation.
- The top is covered with waterproofing to avoid water leakage into the thermal insulation.
- Arrange the subfloor for finishing.
The layers of insulation and insulation should not have gaps to prevent cold bridges and open access to moist air.
Insulation for attic floors Source info-housetop.ru
Price
The cost of installation of wooden floors depends on the source materials, the location of the structure, the height of the house, the type of walls, as well as on transport communications to the construction site, that is, the availability of railways and highways for transporting building materials.
Average prices for the construction of wooden floors for individual installation operations and types of building materials are summarized in the table:
| List of works | Units | Price RUR/m2 |
| Chemical protection treatment of wooden floor beams | m2 | 40 |
| Installation of load-bearing beams | m2 | 310 |
| Rough cladding of beams with boards | m2 | 160 |
| Installation of logs | m2 | 415 |
| Rolling flooring | m2 | 126 |
| Finished flooring | m2 | 390 |
| Sub flooring | m2 | 170 |
| Installation of bars on beams 50x50 mm | M2 | 150 |
| Installation of lathing/counter-lattice | m2 | 120 |
| Insulation of floors in 1 layer, mineral wool | m2 | 250 |
| Vapor barrier of floors | m2 | 50 |
| Waterproofing | m2 | 90 |
| Sealing seams | m2 | 100 |
| Total cost of 1 m2 of wooden floors | m2 | 2371 |
Installation of floors between residential floors
Inside the house there is no need to install thermal insulation of wooden structures, because the temperature of the upper and lower rooms is approximately the same.
When installing a floor in a wooden house between floors, it is important to create a noise-insulating barrier, because Beams and joists conduct sound waves and transmit them to the frame and walls of the building. This is achieved by laying sound absorbers, for example, mineral wool. To maximize the effect, all contacting surfaces are covered with insulation or an air gap is created.
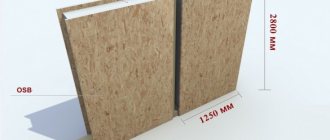
Strips of felt or basalt wool are placed on the supporting beams. Chipboard with a thickness of 16-18 mm or OSB boards glued together are laid on top. Then a rubber-cork backing is glued to its surface, and the finishing floor is run over it.
Soundproofing of floors between floors Source tarifi.info
If the floor is laid on joists, they are shortened so that when laying the ends do not reach the wall surface by 15-25 mm. The gap is filled with soundproofing material - a strip of foamed polyethylene or felt.
One of the new developments is a noise-absorbing membrane made of high-density polymer materials. It is used for soundproofing floors, ceilings and as a substrate for floating screeds.
Prefabricated version
Beamless floors between floors are formed from solid or hollow panels.
Advantages:
- increased load capacity;
- resistance to wet environments;
- durability.
Pouring a monolithic floor between floors
Flaws:
- installation only using lifting equipment;
- dependence of the building dimensions on the sizes of standard slabs.
During installation, the slabs are installed on cement mortar. The size of the supporting surface is 10–15 cm.
Attaching beams to the wall
Beams of wooden floors between floors in a brick or wooden house are attached to the wall in different ways.
The first option is to insert the end of the element into the groove or cut, having previously wrapped it with two layers of waterproofing. The end is cut at an angle of 60°, leaving open for air circulation inside the wood.
Place on an antiseptic-treated, waterproofed board. A gap is left in the hole, which is filled with tow or mineral wool. Support depth from 70 to 150 mm. Every fifth beam is connected to the wall with an anchor.
The second method is hanging mount. The ends of the beams are connected to the wall with fasteners - horseshoe-shaped profiles, corners, plates, holders.
Fastening beams with steel anchors Source stroy-brus.ru
“Dovetail” is a connection in which the end of a beam in the form of a tenon is inserted into a groove in a wooden wall. A correctly executed unit is highly durable and reliable.
With all types of fastening, special attention is paid to waterproofing the surface of the wood, where condensation may accumulate or moisture can seep through.
Video description
How to embed beams into a blank wall is shown in the video:
To obtain the desired section, it is allowed to use boards joined along the length, fastened with pins, as well as I-beams made of boards and OSB.
Note! In the case of wooden walls, waterproofing is not required.
On brick and concrete walls
Niches are created in stone walls during the process of laying or filling them, since this will be difficult to do later. Their dimensions are made such that there are ventilation gaps of about 50 mm around the supporting part of the beam, eliminating the formation of condensation and wetting of the wood. After installation, they are filled with insulation.
The depth of the support niche should not exceed 2/3 of the wall thickness. Its bottom is covered with roofing felt or sheet rubber for additional waterproofing. Otherwise, the installation technology is similar to that described above.
Laying the walls of the next floor continues after installing the logs Source lestnitsygid.ru
