Laying without mortar
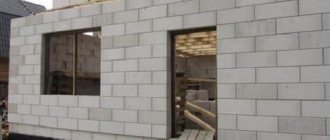
Laying cinder block walls begins with a simple laying of cinder blocks for the first row of the wall. The goal here is simple: determine the number of blocks needed for the desired wall size. When placing blocks, be sure to leave a gap between them. These spaces replace the mortar joints that will appear in the finished wall (not just between each block, but between each layer).
Cinder blocks are sold with nominal dimensions, which imply the presence of a construction seam. So while a standard block may be billed as 8 x 8 x 16, it actually measures 7-5 / 8 x 7-5 / 8 x 15-5 / 8. When figuring out the number of blocks you need, it's important to consider space, which will be filled with solution.
A piece of plywood will help you make an accurate and uniform gap. Once you are satisfied with the dry fit of your base run, run a chalk line along both sides of the blocks as a guide. Then, once you remove the blocks from the support, you can begin laying.
Standard Features
Weight is determined by the size of the blocks, the density of the material and the manufacturer .
The material is produced by professional workshops, but there are also artisanal producers who also appear on the market, so there is some difference in size and parameters. The weight of a cinder block 20x20x40 will be almost half that of a stone with dimensions 40x40x20. Standard weight according to regulatory requirements:
- solid cinder block weighs 25 - 28 kg;
- hollow – 18 – 23 kg;
- half blocks – 10 – 13 kg.
of products to transmit heat depends on the type of filler . The thermal conductivity coefficient of the material with shell rock is 0.27 W/m K, and for coarse crushed stone products it increases significantly.
Other characteristics:
- the density of the material is in the range of 0.75 – 1.45 t/m3, the indicator affects the strength, which is in the range of 35 – 150 kg/cm2;
- Frost resistance is measured in 12 – 50 cycles, the area of use (northern, southern) depends on this.
The use of chemical production waste limits the scope of use of cinder blocks only to external structures. Blocks made independently can be made environmentally friendly by using slag and ash from burning wood and coal in household stoves and boilers for filling.
Preparation of the solution
It's time to prepare the solution. For cinder block walls (as well as brick walls), choose a dry mix. Easy for those who are not experts in masonry projects, the premixed mixture remains workable for a long period of time without sacrificing high bond strength.
When preparing the solution, pay special attention to the instructions printed on the package. Just two ingredients – solution and water. The trick is to find a suitable ratio between them.
After adding both ingredients to the wheelbarrow or mixing hopper, mix them together using a spatula or electric drill with a mixing paddle attachment. Continue mixing until you reach a consistency that can be easily mashed.
Pros and cons of the material
Like any building material, cinder block has advantages and disadvantages. The advantages include the following features:
- Economic expediency.
- Durability and sufficient strength of the material for low-rise construction.
- Light weight and, as a result, reduced load on the foundation.
- Neutrality to any microflora: the risk of wall contamination by fungus or mold is zero.
- Fire safety: ignites only in a blast furnace; such temperatures are impossible in a normal fire.
- Ease of use: the material is lightweight, so construction work can be carried out by one person.
- Simplicity: if desired, can be made at home.
If we talk about the disadvantages, the following negative factors are highlighted:
- There is a possibility of purchasing material that does not meet environmental standards. Require certificates!
- When manufactured independently, the characteristics of the blocks may differ significantly.
- The building looks visually unattractive. The issue is resolved by additional external cladding.
- If the block filler has an organic base (for example, sawdust), then the actual service life of the structure may be lower than the calculated one.
- The material absorbs moisture, which requires additional costs during construction: insulation, external wall cladding.
- There is an opinion that it is not intended for multi-story buildings, but in some regions (for example, Yakutia) 5-story buildings erected during the Soviet era still stand safely to this day.
A cinder block is lighter and warmer than a sand block, stronger than a foam block. A detailed answer to the question: “Which material to choose” will require a separate article. In this material we will make a brief comparison of cinder block with other types of materials that are often used in modern construction.
Cinder block or gas block
If we compare the characteristics of these materials, the gas block has better thermal insulation and soundproofing. In addition, aerated concrete blocks have high strength, which makes them possible to use in multi-story construction. If we are talking about private buildings, there is no significant difference between the materials, except that aerated blocks can be used in regions with high air humidity, and cinder blocks are better suited for areas with a dry climate.
Cinder block or foam block
These materials have only two significant differences that set foam blocks apart: environmental safety (confirmed by certificates) and resistance to humid environments. Otherwise, the materials are identical, although they differ in production technology.
Laying the first row
When the mortar is ready, wet the surface of the base - place a layer of mortar 2.5 cm thick along the chalk lines you drew. Finally, use a trowel to make a V-shaped furrow down the center of the mortar layer; when you set the blocks on the mortar, this groove helps distribute the mortar evenly by pressing it against the edges of the blocks.
Now that you have placed a layer of mortar on the base, proceed to laying the first row of cinder blocks. Start at one end of the chalk outline you made earlier. Press the first block, the corner block, into the mortar. Be careful to create a seam on its underside.
Do not allow the block to slide out of place as this may dislodge the mortar and break the connection. There is no need to be careful or painstaking when handling cinder blocks. Simply grasp the sides and, looking through the hollow bars, press the block into place. Since the corner block determines the vertical and horizontal level for subsequent blocks in the row, take your time to double check that the first block is properly leveled.
Once you are satisfied, trim and remove excess mortar. Go to the opposite end of the planned wall and, using the same technique, install another corner block. Check its level and alignment, then cut off any excess mortar. Now run a mason's rope between the two blocks to help you maintain an even alignment as you add the rest of the route.
With a block placed in each corner, the next step is to fill in the middle. For corner blocks, apply the solution only to the base. Now you need to “oil” one side of each of the middle blocks to attach it to the adjacent block.
Do this by adding mortar to the flanges—the edges that protrude from the body of the unit. Here's how to spread: Stand the block upright at one end. Then use a putty knife to work downwards to leave a bead of mortar along each flange. The solution may not stick every time. If it falls off, start again with fresh mortar and try to press the material against the inside edge of the flange.
You can calculate the thickness of the walls. You need to find a wall calculator on the Internet, enter the length of the wall, the size of the cinder block to calculate the thickness of the wall, and press the calculator button. Using the calculator you can calculate the cinder block consumption for all walls. The width of the wall must be at least 211 mm.
You only need to coat one side of the block. But don't forget to make the V-shaped element with the tip of the spatula. Once done, press the block into the mortar mortar on the support. At the same time, tilt the lubricated side of the block towards the flanges of the previously laid block. Make sure the block is level and level with the adjacent block. If yes, continue.
Continue adding blocks in the same manner to complete the rest of the row. Lay the next row in a checkerboard pattern with the previous one, as in the photo of a cinder block wall. After construction, it is necessary to insulate the cinder block walls.
sizes and price per piece
Cinder blocks are considered a reliable and affordable building material. It allows you to build a strong and durable building. Manufacturers offer many size formats at an affordable price. These wall stones are used for the construction of load-bearing and enclosing structures.
Features of choosing cinder block
It is important to know that the price per piece depends primarily on technical characteristics, in particular density. And the last indicator is influenced by the quality of the filler (it can be blast furnace slag, ash, perlite, expanded clay chips)
One standard cinder block with dimensions 390*190*188 is equal in volume to 8 bricks. The product contains cement and binding components - blast furnace slag, ash, sawdust, gravel. Thanks to vibrocompression, they are compacted tightly, and the material comes out with good density. Due to the affordability and ease of masonry, a cinder block bathhouse will not cost too much, and by isolating the room from moisture, you can maintain all the technical characteristics of the products.
According to the standard, they can be full-bodied or 2, 3, 4 hollow. Porosity reaches 28, 30, 40%. Thermal conductivity, frost resistance, and strength depend on the number of cavities (rectangular, slot-shaped, round) and the saturation of the block with pores. The buyer is primarily concerned with the question of how much load the product can withstand. Its density reaches 750-1450 kg/m3. Most often, cinder blocks with a porosity level of 30% are chosen for the construction of walls; they have optimal strength indicators (up to 150 kg per 1 cm²) and the ability to retain heat. An alternative option is standard foam blocks measuring 20x30x60 cm; one product can replace 15 ordinary bricks.
A cinder block garage will be durable and reliable. It can be quickly built with a minimum of cash costs
It is important to build a strong strip and columnar foundation and insulate the external walls. If reinforced concrete slabs are chosen as the floor, it is imperative to install a monolithic belt, otherwise the blocks will not withstand the load
Foreman's advice: the main disadvantages of the material (high hygroscopicity, the need for additional thermal insulation of external walls) can be eliminated by using high-quality waterproofing materials and insulation. In return, the home owner will receive reliable lightweight material at an affordable price.
When buying a cinder block, you must check for a quality certificate. If during production standards were violated and toxic substances (heavy metals, carcinogens) were added, this will not only violate the technical characteristics of the material, but will also harm human health. An important aspect is storage conditions. Products have high hygroscopicity, that is, the ability to absorb moisture, therefore, if you do not protect them from dampness, they will lose their properties and will not provide the necessary strength and warmth in the house. Although the price of blocks made at home is cheaper than factory ones, it is not worth the risk. Products from a trusted supplier can be evaluated, double-checked, and a formal claim can be made in case of defects. In addition, cinder blocks made by yourself will not match the performance of those made using professional equipment, and this directly affects the quality of the product. High-quality blocks are produced only in accordance with state standards.
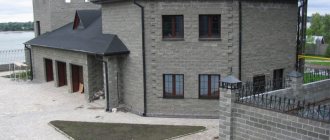
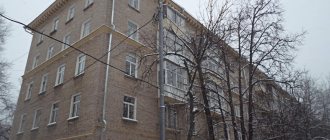
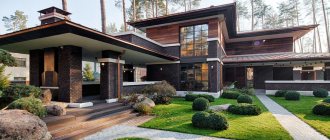
Photo: cinder block house
Sizes and prices
The standard dimensions of a cinder block are length 390 mm, width 190 mm and height 290 mm. The formation of the price per piece is influenced not only by the quality of the filler, but also by the dimensional parameters and the presence of a decorative surface. How much does it cost? On average, the cost of one product is 21-50 rubles, quite a bit. Wholesale purchases will cost the construction site owner even less.
The larger the particles in the cinder block, the less durable and lighter the product will be.
Size chart
| Types of blocks (GOST 6133-84, 99) | Standard (L) × depth (B) × height (H) | Quantity per cube/price | Approximate price per piece |
| Full-bodied | 390*190*190-240 | 72/2600 | 36 rub. |
| Double-hollow | 388×188×190 | 72/2520 | 35 rub. |
| Three-, four-hollow | 390*190*188 | 72/2300 | 32 rub. |
| Interwall septal | 390*90*188 | 151/2450 | 16 rub. |
| 390*120*188 | 113/2450 | 22 rub. | |
| 400×200x200 | 60/1440 | 24 rub. |
Foreman's advice: to find out how many cinder blocks are in 1 m³, you need to divide the volume of the cube by the volume of the product (this parameter is calculated by the formula V (volume) = L (length) x B (width) x H (height)).
Cinder block, like any other building material, has its pros and cons. But with proper preparation for construction and compliance with masonry technology, the shortcomings will be eliminated, and the building will serve the owner for a long time.
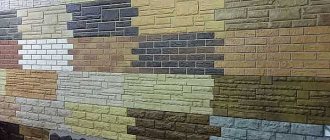
Photo of cinder block walls
What to choose for building a house
The further operation of the building depends on the choice of building blocks. Materials with poor characteristics can lead to the rapid appearance of cracks or the destruction of the house. There is also a certain impact on interior and exterior decoration.
Aerated blocks are the leader in good wall geometrySource prom.st
The quality of building blocks is determined by 6 main indicators:
- strength;
- density;
- thermal conductivity;
- frost resistance;
- shrinkage;
- water absorption.
The first property of the material that you need to pay attention to is strength. When erecting any building, this is the most important characteristic
During construction, blocks and other materials are placed on top of each other, creating pressure. The larger the building, the stronger the compression will be. If the material is not strong enough, the building will simply crumble.
This video shows the main mistakes in laying building blocks:
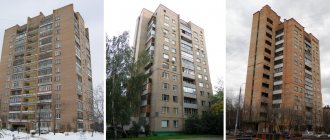
The second important parameter is the density of the material. Many people associate this concept with strength, but this is not entirely true, because the relationship is not always direct. The density of building blocks is more related to thermal conductivity. The lower the density, the lower, accordingly, the thermal conductivity. Any cellular concrete has a limitation - it is impossible to build houses with a height of more than 2-3 floors.
Comparison of characteristics of building blocksSource stroyfora.ru
Frost resistance of a material refers to the number of times it can be frozen and thawed before destruction begins. In general, frost resistance determines the service life of the blocks. When building a house, it is better to choose blocks that are not afraid of frost.
The most important indicator of the quality of a block is the heat reserve. Unlike thermal conductivity, this characteristic determines how long the heated walls will, in turn, warm the room when the heating is turned off. Accordingly, how long will the walls take heat from the air when heating a cold house. This characteristic is especially important if you are choosing material for the construction of a country house where you plan to come for the weekend.
And the last property that should be taken into account when choosing a building block is water absorption. There is a direct relationship here - the higher the water absorption, the better the protection of the walls from moisture should be.
Watch this video for a comparative description of the blocks:
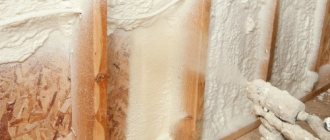
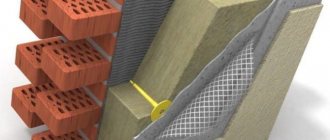
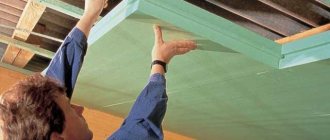
How and how to insulate a cinder block house from the outside
No matter what material the house is built from, the owner always tries to reduce the cost of heating and repairs. An excellent solution to such problems is the installation of insulation.
It is especially important to carry out such measures as quickly as possible if the structure is made of material that does not retain heat well. Therefore, today we will look at the insulation of a cinder block house from the outside.
APPENDIX 1 Reference
1. Thermal conductivity of concrete stones
| Name concrete | Thermal conductivity of concrete stones, W/(m °C), at average concrete density, kg/m3 (for operating conditions A/B) | |||||
| 1000 | 1200 | 1400 | 1600 | 1800 | 2000 | |
| Tufobeton | – | 0,41/0,47 | 0,52/0,58 | 0,70/0,81 | 0,87/0,99 | – |
| Pumice concrete | 0,30/0,34 | 0,40/0,43 | 0,49/0,54 | 0,62/0,68 | – | – |
| Concrete on volcanic slag | 0,29/0,35 | 0,41/0,47 | 0,52/0,58 | 0,64/0,70 | – | – |
| Concrete based on granulated blast furnace slag | – | 0,47/0,52 | 0,52/0,58 | 0,58/0,64 | 0,70/0,81 | 0,83/0,99 |
| Concrete based on fuel (boiler) slags | 0,38/0,44 | 0,48/0,54 | 0,59/0,65 | 0,72/0,78 | 0,85/0,93 | 0,92/1,08 |
| Expanded clay concrete on expanded clay sand | 0,33/0,41 | 0,44/0,52 | 0,56/0,65 | 0,67/0,79 | 0,80/0,92 | – |
| Expanded clay concrete on quartz sand | – | 0,48/0,55 | 0,63/0,69 | 0,72/0,83 | 0,85/0,9 | 0,99/1,13 |
| Shungizite concrete | 0,33/0,38 | 0,44/0,50 | 0,56/0,64 | – | – | – |
Notes:
1. Operating conditions A and B according to SNiPII-3-79.
2. In table. Table 1 shows the thermal conductivity indicators of a number of concretes used for the manufacture of effective and conditionally effective stones of the SKTs, SKI and SKSh types.
3. When calculating the heat transfer resistance of an external wall made of solid stones, it is necessary to increase the thermal conductivity value of concrete by 3%.
2. Thermal conductivity of whole stones
table 2
| Name of concrete | Thermal conductivity of whole stones, W/(m °C), at average stone density (including cracks), kg/m3 (for operating conditions A/B) | |||||
| 750 | 900 | 105 | 1200 | 1350 | 1450 | |
| Tufobeton | – | 0,31/0,34 | 0,37/0,39 | 0,44/0,49 | 0,51/0,55 | – |
| Pumice concrete | 0,27/0,29 | 0,31/0,33 | 0,34/0,37 | 0,41/0,43 | – | – |
| concrete on volcanic slag | 0,27/0,29 | 0,31/0,34 | 0,37/0,39 | 0,42/0,44 | – | – |
| Concrete based on granulated blast furnace slag | – | 0,34/0,37 | 0,37/0,39 | 0,39/0,42 | 0,44/0,49 | 0,50/0,57 |
| Concrete based on fuel (boiler) slags | 0,30/0,32 | 0,35/0,37 | 0,39/0,42 | 0,45/0,48 | 0,50/0,55 | 0,57/0,62 |
| Expanded clay concrete on expanded clay sand | 0,28/0,31 | 0,33/0,37 | 0,38/0,42 | 0,43/0,48 | 0,49/0,53 | – |
| Expanded clay concrete on quartz sand | – | 0,35/0,39 | 0,41/0,45 | 0,46/0,51 | 0,54/0,58 | 0,65/0,69 |
| Shungizite concrete | 0,28/0,30 | 0,33/0,38 | 0,38/0,41 | – | – | – |
Notes:
1. Operating conditions A and B according to SNiPII-3-79.
2. In table. Table 2 shows the thermal conductivity values of individual effective and conditionally effective stones used for laying external walls.
3. Thermal conductivity values are given for hollow stones with the dimensions and shape of the voids indicated in and. The thermal conductivity of stones made from other types of concrete and with other voids should be determined by thermal testing.
4. When calculating the heat transfer resistance of an outer wall made of whole hollow stones, it is necessary to increase the thermal conductivity value by 10%.
3. Thermal conductivity of longitudinal halves of stones
| Name of concrete | Thermal conductivity of longitudinal halves of stones, W/(m °C), with average density of longitudinal halves (including cracks), kg/m3 (for operating conditions A/b) | |||||
| 820 | 980 | 1150 | 1310 | 1470 | 1600 | |
| Tufobeton | – | 0,33/0,36 | 0,39/0,41 | 0,48/0,53 | 0,90/0,60 | – |
| Pumice concrete | 0,29/0,31 | 0,33/0,35 | 0,37/0,40 | 0,45/0,47 | – | – |
Concrete on volcanic slag | 0,29/0,31 | 0,33/0,36 | 0,40/0,42 | 0,46/0,48 | – | – |
| Concrete based on granulated blast furnace slag | – | 0,36/0,39 | 0,39/0,41 | 0,43/0,46 | 0,49/0,54 | 0,56/0,63 |
| Concrete based on fuel (boiler) slags | 0,32/0,34 | 0,37/0,39 | 0,42/0,45 | 0,49/0,53 | 0,55/0,60 | 0,61/0,68 |
| Expanded clay concrete on expanded clay sand | 0,30/0,33 | 0,35/0,39 | 0,41/0,45 | 0,47/0,52 | 0,54/0,56 | – |
| Expanded clay concrete on quartz sand | – | 0,37/0,41 | 0,43/0,47 | 0,49/0,54 | 0,59/0,63 | 0,70/0,75 |
| Shungizite concrete | 0,30/0,32 | 0,35/0,38 | 0,41/0,43 | – | – | – |
Notes:
1. Operating conditions A and B according to SNiPII-3-79.
2. In table. Table 3 shows the thermal conductivity values of individual effective and conditionally effective halves of stones used for laying external walls.
3. Thermal conductivity values are given for hollow stones with the dimensions and shape of the voids indicated on. The thermal conductivity of stones made from other types of concrete and with other voids should be determined by thermal testing.
4. When calculating the heat transfer resistance of an external wall made of hollow stones, it is necessary to increase the thermal conductivity value by 10%.
Briefly about the main thing
Foam block, along with cinder block, is one of the most popular materials in construction. However, the latter is mainly used for the construction of outbuildings.
If you choose which is better: a gas block or a cinder block for building a house, then preference should be given to the first. Cinder block does not absorb noise and has poor geometry. Such a building needs to be additionally finished with brick, and this is a rather expensive option.
The gas block has a porous texture, which promotes better air permeability through the walls. This feature prevents steam from accumulating under the ceiling, eliminating the possibility of mold and mildew.
All blocks require external finishing - some due to their external unpresentability, others due to high water absorption.
If you choose blocks for building a house, then in terms of a number of characteristics, expanded clay concrete and aerated concrete win out. Which one to prefer must be determined based on your conditions - first of all, your budget.