What is a SIP panel, who invented it, the price of a SIP panel
SIP panels were invented by the American architect Frank Lloyd Wright in the 30s of the last century. Frank took three sheets of plywood, in the middle of which was placed roofing cardboard impregnated with tar. The result was a sandwich 57 mm thick. According to the architect, plywood is a strength element of the cladding that takes on the load on the walls of the house. The structure is assembled according to the principle of a designer. This increases the speed of housing construction.
Frank's idea was not widely used due to the insufficient thermal insulation capacity of the panels. A few years later, Frank Lloyd's student Alden Dow improved the idea. He suggested gluing a 40 mm thick layer of insulation between two sheets of plywood. So, in 1950, the classic version of SIP appeared - Structural Insulated Panel - a structurally insulated panel.
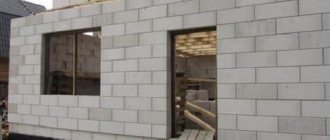
SIP is a sandwich panel, where between two strong layers of cladding there is a heat-insulating material - polystyrene polystyrene foam, stone wool or polyurethane foam.
A modern SIP panel is made from two sheets of OSB-3 - oriented strand board OSB 9 or 12 mm thick and PSB-S-25F foam plastic, density 16-17 kg/m³, thickness 50, 100, 150, 200 or 250 mm.
The most widely used for the construction of both one-story, with an area of 50 - 100 m2, and two-story mansions, from 200 m2 to 500 m2, are structural insulating panels of the following sizes:
- height – 2500 – 2800 mm;
- width – 1250 mm;
- thickness – 174 – 224 mm.
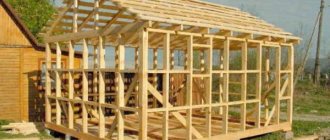
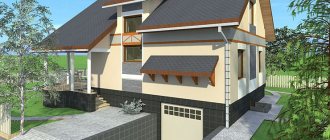
The panels are brought to the construction site and the team, on a pre-made foundation, assembles the house according to the project.
If you call companies that produce SIP panels, the price for this material in Moscow and Moscow Region, on average, varies from 5,000 rubles. up to 6000 rub. The cost of houses made of insulated panels, depending on the configuration, per m2 starts from 6,000 rubles. up to 15,000 rub. and higher. The companies promise to build a turnkey SIP house in the shortest possible time and at a price lower than for a house made of gas or foam concrete, brick or timber. Let's consider why, according to managers of SIP manufacturing companies , this is the best technology for building houses today.
The undeniable advantages of SIP technology
SIP panels are a modern building material that is made from sawdust chipboards, the space between which is filled with expanded polystyrene. The result is lightweight sandwich panels with excellent thermal insulation. Residential buildings erected from them differ:
- excellent energy saving. Electricity costs for operating heaters and air conditioners are reduced due to excellent insulating properties;
- no need for a deep foundation. Due to the relatively light weight of the structure, it is enough to lay a shallow strip, column or pile foundation;
- the ability to begin finishing immediately after the building is built (no additional leveling of the walls is necessary).
In addition, the price of a one-story SIP house is usually lower than the cost of brick or wooden buildings of the same number of floors and area. And in our time, this factor can be decisive for any family.
Decisive factor in choosing SIP technology
When choosing a technology for building a country cottage, a novice developer sifts through tons of information on the Internet. He reads reviews, looks at projects of one-story and two-story country houses made of SIP panels of different sizes. We'll make it easy for you. Study the results of the survey on FORUMHOUSE and reviews from real owners, and you will find out what was the decisive factor in choosing SIP construction technology.
An_NetModerator FORUMHOUSE
Dear portal participants! If you have a house made of SIP panels, write in the comments why you chose this technology.
SergeyU Member of FORUMHOUSE
If you are building on credit and have nowhere to live, and then want to save on heating, then I think there is no alternative to SIP. I wouldn't have enough money to build a stone house. And so, I lived in a wooden, frame, and stone house. SIP is stronger than frame. Warmer than a timber or block house. Sound insulation is the same as in an apartment or in a standard frame house. Ventilation in a SIP house is needed just like in any other house. If you do everything correctly, then it’s easy to breathe in SIP and it’s always fresh.
vik-rc FORUMHOUSE Member
When we decided to build a house, we wrote down the following points as the advantages of SIP:
- High construction speed.
- Energy efficiency.
- Modern appearance of the house.
- The ability to build a self-supporting insulated insulation system at home with your own hands, without hired workers.
- Relatively low cost of structurally insulated panels.
AbuhasanForumHouse Member
I also vote for the speed of erecting a box from SIP panels. The house was built in winter and we did not regret choosing this technology. To heat a country house, a couple of electric convectors are enough.
AlsquaiFORUMHOUSE Member
I voted for the last two points of the poll. He relied on energy efficiency and the ability to work with “one helmet.”
Jan 11FORUMHOUSE Member
I'll add my 5 cents. SIP technology has a high “fool resistance”. The design is simple, reliable, there are few complex components, all the work is visible. Workers are easy to control.
What's happened
All prices indicated are inclusive. That is, from the moment you purchase the project you like until you move into the finished building. The work of a construction company includes the following services:
- construction of a foundation (often a pile-screw type is used);
- building a house - framing, assembling the frame, creating a basement, erecting walls and partitions, interfloor and attic (or mansard) floors, roof);
- all consumables;
- roofing arrangement - rafter system, sheathing, counter-lattice, finishing coating;
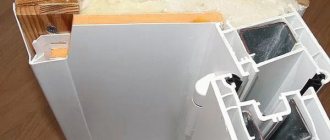
- installation of windows and doors;
- creating a terrace or porch, if the house design provides for one;
- final finishing of the facade.
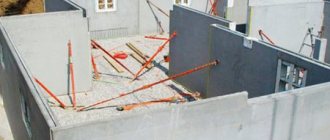
Construction of the foundation and installation of the lower trim
Foundations can be monolithic strip, pile, or a structure in the form of a monolithic ribbed slab. The type of foundation should be selected based on the properties of the soils underlying the structure at the construction site. When choosing the type of foundation, it is recommended to use a pile foundation - the most suitable in terms of simplicity of construction, relatively low cost, possibility of use in most types of soil conditions and ease of combination with the base of a prefabricated SIP house structure.
To support the piping on the top of steel pipes protruding above the ground surface, special heads with a horizontal metal plate are installed, or a steel beam from a channel can be laid with the shelves up. In the latter case, the strapping beam is attached to the steel beam with anchors every 50 cm. After the screw piles are immersed in the ground, they are united by a lower strapping or support beam with a cross-section of 200x200 mm or 150x200 mm, which is the load-bearing basis of the entire structure of the SIP house. The strapping beam is attached to each pile with self-tapping screws with a diameter of up to 12 mm.
The strapping beam must first be impregnated with a fire-retardant composition, and a gasket made of bituminized paper, roofing felt or other rolled waterproofing materials is laid between its lower surface and the support plates of the heads. If the support beam is laid on a metal beam or on a strip or slab foundation , waterproofing must be laid under the entire lower surface of the beam. The strapping beam is installed exactly according to the markings corresponding to the layout of the SIP house and its installation diagram.
At corners and intersections, the beam elements are connected to each other by tie-in brackets and fastened with 8x180 mm self-tapping screws. The fastening to the brackets is time-tested; the brackets can withstand heavy loads and do not burst. Provide additional rigidity and strength in critical areas.
In the case when the support beam is laid on the horizontal concrete surface of other types of foundations, it is secured with anchor bolts, which must be recessed into the body of the foundation by at least 100 mm with a length increment of 500 mm.
Installation of the plinth ceiling
After installing and securing the lower support beam to the foundation, a SIP floor is mounted on it, including: wooden beams-logs 100x150, connecting inserts between panels made of timber with a cross-section of at least 50x150 mm and SIP floor panels. The logs are installed in the grooves located in each sip panel along the perimeter. First, the first vulture floor panel is laid on any of the corners, the groove at the end is filled with foam from a mounting cylinder. A short connecting beam with a cross-section of 50x150 is inserted into this groove, which is fastened through the OSB board sheathing with screws with a diameter of 3.5 mm and a length of 40 mm on wood every 15 cm in length. Then a groove is foamed at the end of the second sip panel, and it is joined to the first sip panel. In this case, the protruding part of the connecting beam fits into the groove of the second product and is also fastened with screws for woodworking through the sheathing.
How many self-tapping screws are needed for one SIP panel? In increments of 15 cm, on average, one panel 2500x1250 mm will require 100 pieces. self-tapping screws, 80 pieces for half 600x2500 mm.
After connecting and securing the first row of basement vulture floor panels to each other along the outermost span of the vulture house, located near the end wall, a joist beam is installed along the entire length of the span.
Before this, the grooves of the products are again filled with mounting foam and the beam is pushed into this groove.
The subsequent assembly of panels, connecting bars and installation of joists is carried out in the same way, until one continuous plane of the vulture floor is formed. To fasten wooden beams to flat floor products, wood screws with a diameter of 4.2 mm and a length of 75 mm are used. In places determined by the installation diagram, reinforced beams and timber are installed. The entire ceiling is fastened through the joists to the strapping beam with self-tapping screws measuring 8 x 280 mm. The resulting open ends of the vulture ceiling of the first floor of the house are sewn up with a board having a section of 50 by 150 mm or 100/150 mm on all sides.
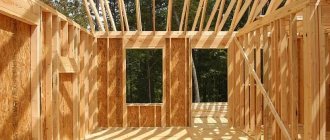
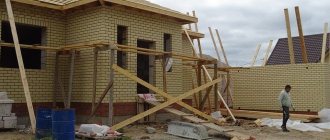
Installation of walls of the 1st floor
The structure of the first floor of a house made of sip panels is a frame consisting of wooden posts and SIP wall parts attached to the lower framing beam, posts, and fastened together. At the initial stage of assembling the enclosing structures of the walls of the first floor of the house kit, boards with a section of 25x150 mm are placed on the solid basement floor for each wall, the layout of which must correspond to the design layout and installation diagram. The strapping boards are attached with self-tapping screws with a diameter of 4.2 mm and a length of 75 mm to the ceiling every 40 cm. The markings for laying the strapping must be done with maximum accuracy without deviations from the diagram, so as not to cause difficulties in the future. It should be noted that there should be gaps between the edge of the basement floor, which coincide in thickness with the sheathing of the vulture panel made of OSB board - 12 mm, as indicated in the installation diagram. The strapping boards are laid without breaks in places corresponding to the location of the openings for installing doors in order to increase the accuracy and speed of their installation. Later, after installing the sip wall panels, cutouts are made in these places, so this must be taken into account when placing self-tapping screws. The main stage of assembling the walls can begin from any corner of the SIP house, where first a vertical stand is installed, having a cross section of 100 by 150 mm , which is attached to the bottom trim board with two self-tapping screws with a diameter of 4.2 mm and a length of 7.5 mm , and mounted to it first panel. Next, on one of the corner sip panels, the side groove is filled with mounting foam, then the product is placed in the design position with fastening to the rack. In this case, the stand should fit tightly into the side groove of the sip panel. After checking the vertical position of the element using a plumb line or level, the panel is attached to the trim board along the bottom edge and the stand using galvanized wood screws with a diameter of 3.5 mm and a length of 40 mm on each side from the bottom and along the side edge after 15 cm. In the same way another vertical beam and a second flat wall product are installed, adjacent to the corner of the house on the other side. After checking the verticality, both corner wall products are additionally secured to each other using structural screws with a diameter of 8 mm and a length of 200 mm in increments of 50-60 cm in height.
Starting from the first corner sip panels, racks and ordinary sip panels of external and internal walls are sequentially mounted in each direction. Before installing each element, the side grooves are foamed, the sip panels are attached along the side edges to the vertical beams and from below to the trim with screws with a diameter of 3.5 mm and a length of 40-45 mm every 15 cm on both sides.
At corner joints and T-shaped joints of walls, the products are additionally sewn together with structural self-tapping screws with a diameter of 8 mm and a length of 230 mm every 50-60 cm in height. The installation of the walls is completed at one of the corners, in the reverse order to the installation operation of the first corner - a vertical beam is inserted into the side edge of the last SIP panel, pre-filled with polyurethane foam, covering the end part of the wall. The SIP panel is attached to a vertical beam and strapping with self-tapping screws with a diameter of 3.5 mm and a length of 40-45 mm in increments of 15 cm on both sides. Next, two corner vulture panels are tightened using structural self-tapping screws with a diameter of 8 mm and a length of 230 mm in increments of 50 cm in height. The last operation to install the walls is to connect them with the top trim board. To do this, the grooves at the upper ends of the installed sip panels are filled with polyurethane foam, after which a strapping board with a cross-section of 50x150 mm is laid in them, which is fastened with screws with a diameter of 4.2 mm and a length of 75 mm to the vertical posts, then all wall sip panels are attached to it with screws with a diameter of 3.5 mm and 40-45 mm long on each side in 15 cm increments.
Installation of upper floors
If the house made of vulture panels is multi-storey, then after assembling the structures of the first floor, the interfloor ceiling is installed. All operations are carried out similarly to the installation of a basement floor. Then the installation of the second floor is carried out in exactly the same sequence as the installation of the structures of the first floor of the SIP house. Then everything is repeated on the next floor.
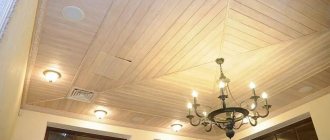
Installation of attic floors, attics, SIP roofs
The final stage is the installation of the attic floor, after which the roof . When constructing an attic floor, vulture wall panels of complex shapes are used - trapezoidal and triangular, on which the rafter roof parts rest. The roof includes a frame consisting of racks, rafters, purlins, Mauerlat, valley elements and ribs at fractures, as well as special SIP roof covering panels. These products, in the case where the roof is not gable, can also have either a rectangular or a more complex geometric shape - trapezoidal or triangular, so you should first carefully consider the installation diagram and outline the assembly order. In the case when the last floor of the SIP house is not attic, then first a mauerlat made of timber with a cross-section of 100x150 mm is installed on top of the plane of the attic floor along the perimeter of the walls. Then racks 100x100 mm, united by a ridge beam measuring 100x150 mm and rafters measuring 40x200 mm, resting on the ridge with the upper end and the lower part on the Mauerlat.
If the SIP roof has a complex configuration, then the frame is supplemented with intermediate purlins and details for the arrangement of valleys and ribs at the outer corners of the intersections of the roof planes. Mauerlat, ridge beams, purlins and other parts can have a trapezoidal cross-section, which is given to them during the manufacture of a house kit at the factory in order to accurately fit all roofing elements to each other. All elements of the roof frame are held together with galvanized self-tapping screws 8x280 mm, one at each fastening point. If necessary, in some places metal connecting plates with holes for screws are used. After assembling the supporting frame of the roof, roofing sip panels are installed, which are attached to the load-bearing elements in a similar way to the design of the fasteners used when assembling the floors. If necessary, the edges of some panels can be cut using power tools at certain angles on the construction site, for example, when it is necessary to form a ridge joint joining two panels.
If you find it difficult to understand these instructions for installing a SIP at home, we recommend that you contact the SIP 47-Factory SIP specialists.
Laying the strapping (crown) beam
Installation of strapping beams and floor joists
For installation, take a beam measuring 2.5 * 1.5 cm. Laying should begin from the middle of the foundation, while measuring its horizontal calibration. Next, the timber needs to be connected at the corners using a notch. After this, the parts are secured. For proper fastening, holes 1–1.5 cm long with a diameter of 2 cm are drilled in the timber and a dowel is driven in.
The timber is secured to the foundation using recessed anchor bolts. The fastening distance is about 1.5–2 m. The size of the bolts should be 35 cm in length with a diameter of 1–1.2 cm.