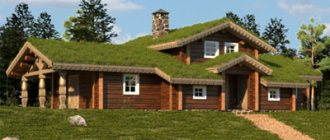
Over the past few years, the construction market has been flooded with so-called frame houses, which are erected weekly in huge numbers both by companies and with their own hands.
The reason for such love for “frameworks” lies in the ease of construction and the pace of construction.
The phased construction of a frame house allows you to assemble a full-fledged residential building in one season, which will look quite presentable, and have an attractive price and cost-effectiveness in maintenance. The technology is easy to understand and implement with your own hands.
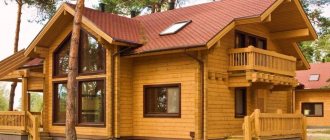
DIY frame house
What is the essence of building a frame house?
As the name implies, the technology consists of forming a kind of frame made of wood (boards or timber) or metal, with gradual, step-by-step covering of it with layers of films, membranes, insulation, etc.
This multi-layer wall design makes it possible to achieve good thermal characteristics with fairly thin walls.
Sectional view of a house wall without additional foam insulation
What materials form the wall?
- mineral wool insulation
- insulation foam sheets
- waterproofing in the form of a film or membrane
- vapor barrier in the form of a diffusion membrane
- OSB sheets
- external and internal finishing
Insulation of a frame house, as we wrote above, is best done in two types. We insulate the house from the inside with mineral wool, and from the outside with sheets of foam plastic.
Foam sheets will improve sound insulation, they are excellent wind protection and, if the properties of mineral wool decrease over time (this can happen when moisture or dew gets inside the walls), they will preserve the thermal characteristics of the house.
Do-it-yourself home insulation using mats
Waterproofing is necessary to protect the insulation from moisture that comes from outside in the form of precipitation.
It must be overlapped, secured with a special adhesive tape for insulation. This allows for 100% protection against water.
Waterproofing walls with isospan in a frame house
The vapor barrier is fixed on the inside of the wall and allows the walls to “breathe”.
Droplets of moisture that can condense in the wall are quietly discharged into the rooms, making the insulation last much longer.
When using high-quality membranes, the risk of mold formation on the walls, black mold spots and other side effects of sealed walls is reduced to a minimum.
And the installation of proper ventilation of a frame house completely eliminates these risks.
Vapor barrier of walls from inside the house using a do-it-yourself membrane
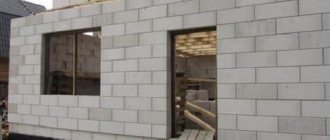
OSB sheets are nailed over the entire structure, and are the basis to which finishing materials will be attached.
Each stage of the work can be done with your own hands due to the lightness of the building material. The technology is quite simple, and it needs to start with the construction of the frame.
Sheathing a house with OSB boards
Minimum set of equipment
According to Ilya Kovalchuk, the minimum set of equipment, first of all, should ensure security, the ability to remotely monitor the cottage using video surveillance or alarm and motion sensors, as well as the ability to control heating. Thus, the technology will protect against theft and emergency situations.
Andrey Nazarenko:
– If a system can independently change its status, then it can be considered smart.
The main purpose of the technology is to increase the level of living comfort. This also includes ease of control: room lighting, minimization of equipment control panels, optimal operation of all engineering systems of the cottage in order to save energy.
Heated floors that turn off for the whole day when you leave for work and turn on an hour before you return, thereby saving energy, can be called “smart” heated floors.
Ekaterina Koroleva:
– There is a package of minimal functions that gives the system the right to be called a “Smart Home”. It includes two or more functions that can be controlled from a single interface:
- water leakage control;
- security and fire alarm system;
- gas leakage control;
- light control;
- climate control;
- voice notification.
Ilya Kovalchuk:
– “Smart home” also refers to the simplest monitoring and control systems: GSM sockets, emergency warning systems. In my opinion, this can be called any control or monitoring scheme built on the basis of high-tech equipment that brings real benefits to its owner.
Modern technologies and materials provide the opportunity to gradually increase functionality, which allows you to start small and subsequently create a complex and multifunctional automation system.
Ilya Kovalchuk:
– One controlled outlet (which includes a heating device) can be called a “Smart Home” at a stretch, but for some it can really make life easier, save on electricity costs, and help make their life more comfortable even in an apartment. In the future, it may become part of a more complex scheme.
Such flexible customization allows you to implement any solutions.
Ekaterina Koroleva:
– The possibilities are endless. The functionality can only be limited by imagination. Simply put, all devices that have an “on” button or "off" – can be automated.
First stage of construction: foundation
Like any other construction, a frame house begins with the construction of a foundation.
The foundation can be:
- tape
- columnar
- pile
We will not consider the remaining types, since they are used extremely rarely.
What is the essence of these foundations?
A strip foundation is a monolithic foundation made of concrete, which is poured in a liquid state under load-bearing external and internal walls.
To do this, you need to apply markings using stakes and rope, mark the locations of future walls, dig trenches with your own hands or with an excavator (mini tractor).
Install formwork in the trench, which can be removable, permanent, purchased in a store, rented, or made from boards or plywood with your own hands.
We waterproof the finished formwork with ordinary film from the inside and fill it with cement mixture for the strip foundation.
When it hardens, it is necessary to remove the formwork and check the geometry. If there are differences in height, apply an additional layer of cement for leveling.
DIY strip foundation
A columnar foundation consists of pillars that are installed in certain places: in corners, in areas of overlap, at a distance from each other of no more than 2-2.5 meters.
The pillars can be cast in cement or prefabricated from blocks. Filled ones are made in the same way as with a strip foundation, but not trenches are dug, but holes into which square or rectangular formwork is installed. The formwork is also waterproofed.
Columnar foundation for a house
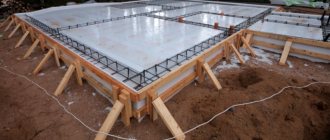
When using poured foundations, do not forget to use jibs, since liquid cement is often so heavy that it pushes apart the formwork that you put together with your own hands.
Important: do not forget to recess the reinforcement in the poured foundations or the mesh to make it stronger. It is also necessary to install anchor bolts at this stage.
Pile foundation for a frame house
A pile foundation resembles a columnar one, but the role of pillars is played by piles. They are driven into the ground in the same places where the pillars would be. And they have the same supporting function.
Piles can be used on difficult soils - clayey, for example. After installing the piles, the geometry must be carefully checked. Screw piles can be adjusted in height.
⇡#Compatible devices and features
Having understood the operating principle of the new platform, let's see what a Yandex Smart Home can consist of and what capabilities can be implemented in it. To begin with, we note that it can combine both Yandex’s own devices and devices from other partner manufacturers. Today, among them there are such developers of household appliances as Philips, Redmond, Rubetek, Samsung and Xiaomi. According to representatives of Yandex, they should soon be joined by Bosch, Elari, Perenio, Sapfir, and Z-Wave, on whose devices you can also see the phrase “Works with Alice.” Well, with the help of a smart remote control produced by Yandex, the list of compatible devices can be expanded literally indefinitely.
The universal remote control is an intermediary between Alice’s artificial intelligence and household appliances that are not intended to be connected to a smart home. The main thing is that this equipment has the ability to be controlled by an infrared signal. The remote control works with almost any TV or air conditioner, turning the power on or off, changing channels and adjusting the volume based on the user's voice command. Without exaggeration, this is the most interesting device from the group of smart new Yandex products.
Smart devices from Yandex
However, Yandex has few of its own compatible products, but all of them can be considered key. We are talking about a smart socket, a smart light bulb and the smart remote control already mentioned above. In addition to them, our test laboratory also included a smart light bulb from Xiaomi. A smart socket turns the power on and off using Alice’s voice command, and a Yandex smart light bulb can delight its user with brightness and color temperature adjustments. The analogue from Xiaomi has more possibilities. This light bulb can also change color on command. But both of these lamps are produced with a large E27 base, which is often not found in modern homes at all.
Partner manufacturers with whom Alice is currently working
There are already quite a lot of third-party household appliances compatible with Alice today. Among them are kettles, coffee makers and other kitchen appliances, humidifiers, fans, air conditioners, as well as robotic vacuum cleaners and even washing machines. All this can be controlled by giving voice commands to “Alice”. The only pity is that you still have to fill the kettle with water and load the laundry into the washing machine yourself.
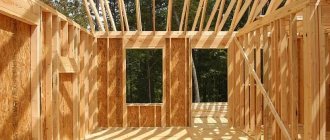
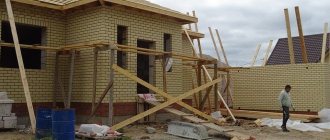
Second stage of construction: walls
At the second stage of construction, we build the frame of the future house.
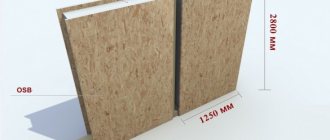
To do this, we take timber 150, since it is best to use 150 mm insulation, and it fits perfectly between timber of this size.
Wall of a frame house in section
Before installing the frame, it is necessary to complete the strapping device. In total, each house has 2 types of piping - upper and lower.
Banding boards or beams fasten the entire wall structure together. We begin the installation of the lower piping with waterproofing the foundation.
That is, we put a film on the foundation, and we place strapping boards on top of it. We fasten them using anchor bolts, pre-recessed into the unfrozen foundation.
Timber frame
We start the frame by installing corner posts. Their role is played by timber 100x100 mm or 150x150mm or board 150x50 mm.
Corner posts must be rigidly fixed using metal corners, and always struts.
Between the corner posts, simple vertical posts should be located at a distance of a meter and a half.
All vertical posts are fastened to each other by horizontal beams made of timber. More information about the structure of the frame here.
Wall with a window in a frame house
When constructing the building frame, do not forget to make openings for windows.
They must be strengthened with crossbars that take the load and distribute it evenly to the foundation. Read more about inserting windows here.
After erecting the walls, it is necessary to proceed to the next stage.
Where can I buy
You can purchase systems either in a specialized store or online in an online store. In the second case, the budget option for purchasing products on the Aliexpress website deserves special attention. For some sets there is an option for shipment from a warehouse in the Russian Federation; they can be received as quickly as possible; to do this, when ordering, select “Delivery from the Russian Federation”:
| Aqara wireless hub from Xiaomi | Zigbee remote control with a set of sensors | Broadlink gateway with sensor set |
| Xiaomi Mijia smart home mini kit | Security system set | SANCCE CCTV system |
Third stage of construction: roofing
Even while designing your house, you should have decided what type of roof will crown your building.
Most often, a gable roof is chosen for frame houses, however, single-pitch roofs are also in demand due to the ease of do-it-yourself installation, simplicity of design and lower price.
Rafter system diagram
The construction of the roof begins with the rafter system. The rafter system is the main frame of the roof.
The rafter system consists of the following elements:
- Mauerlat
- rafter legs
- racks
- runs
- puff
- sill
- struts
- sheathing
When the roof frame is completed, it is necessary to insulate it. The roof filling consists of almost the same layers as the wall.
From the outside, we insulate the roof with sheets of foam plastic or mineral wool, lay down waterproofing, which we fix with lathing.
Roof and its layers
On the inside we put a layer of mineral wool or polystyrene foam if the attic space is not intended to be residential. We fix the vapor barrier layer and cover everything with OSB boards.
We cover the roof with roofing materials depending on the slope of the slope and our own preferences.
Remember that soft roofing, which has become very popular recently, is laid only on a plane, so the sheathing must be supplemented with OSB boards. In this case, the angle of inclination can be small - from 5 degrees.
Control
I started thinking about how to implement more convenient system management than from a computer through the admin panel. Today there are applications for Android and iOS, but two years ago the official client for Android left much to be desired: I still didn’t understand how to use it. I found it, configured it, connected, but couldn’t use it. At that time I was an adept of Windows Phone, for which there was no client. “On my knees” was written by a client for himself - when the switches were out of sync, his wife turned to me for help.
A year ago, in February-March 2015, Pebble launched a fundraiser to create a new version of the watch - Pebble Time. I supported the project, and by October the watch was already in my possession. I thought this was a great thing for controlling a smart home. After all, the phone is not always in my pocket, at home I just put it somewhere, and the watch is usually on my hand. In addition, Pebble, unlike Android Wear or Apple Watch, connects to both the iPhone (which I was using at the time) and Android phones.
Fourth stage of construction: floors
On the ground floor, floors are most often installed on the ground. What does it mean?
The technology is as follows. We remove the initially fertile layer of soil and fill it with a layer of gravel.
It is necessary for drainage, since moisture will seep inside and have less contact with the cement screed.
On the ground we make a layer of sand of 30-50 cm, depending on the height of your foundation. Carry out compaction with your own hands or using equipment.
As a result, the sand layer should be located 5 cm below the foundation level to avoid cold bridges and freezing in the corners.
Scheme of rough screed on the ground in a frame house
Next, we perform a rough screed using liquid cement. If you take cement that is a little more liquid than for constructing a foundation, you will not have to level it with tools, since under the influence of gravity the cement itself will be evenly distributed over the ground. The most important thing is that the ground is level, otherwise the liquid cement will flow into one place.
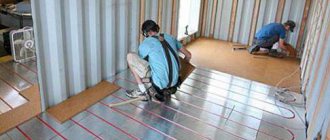
When the rough screed is dry, you can continue installing the floor. To do this, we waterproof it with a film, on top of which we lay out the floor insulation.
Using a mesh, you can attach underfloor heating pipes (liquid or electric) on top of the insulation. And fill in the finishing screed.
The final part of floor construction is the floor covering. These can be wooden floors, tiles, laminate, etc.
If you do not want to use cement in the construction of the floor (for example, if construction takes place in winter), the technology of constructing wooden frame floors based on logs will help you. How to arrange such a floor, see the diagram:
Floor installation using logs
To set it up you need:
- board 25x100
- timber 200x200
- timber 70x195
- board 50x150
- wind protection
- insulation
- osb
- underlay and laminate or tile
You will find more information about flooring in a frame house here.
Installation Features
It is advisable to go “from simple to complex”, first incorporating simple devices and functions into the circuit and gradually increasing complexity.
“Smart” complexes largely depend on the room where they are installed. For example, in a country house or in a private house, it is almost always important to connect to electricity, water supply, and heating systems; ventilation is important. These subsystems often have to work in autonomous mode, for which certain scenarios are prescribed.
In a city apartment, the connection to water, electricity and heating networks is centralized, and in most cases the task of a “smart home” is simply to turn these elements on or off in time. When installing smart infrastructure in a city, this functionality is often simply neglected. Although automated ventilation remains if there is, for example, an air conditioning system.
It is important to remember that the larger the room covered by a smart network, the more components and transmitting devices it will need, and the more actuators, the higher the autonomy. This is especially true for suburban projects, in which it is possible to implement an almost completely autonomous life support system.
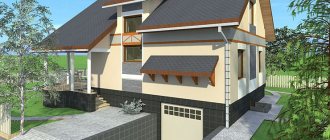
Fifth stage of construction: finishing
At the fifth stage of construction, the external and internal finishing of the house, installation of plumbing, connection of lamps, sockets, heating of the frame house and other work are carried out, which will make a real home for living or recreation from a simple box with walls and a roof.
Since the walls of the frame house are covered with OSB boards, it will not be difficult to carry out external and internal decoration even with your own hands.
You can read about how to do external finishing and choose the right materials in our article here.
External finishing with plaster
Interior decoration depends primarily on the preferences of the home owners, and can be done using tiles, wallpaper, liquid wallpaper, plaster, in particular decorative.
The walls can be painted, covered with clapboard, siding, the ceilings can be whitewashed, or suspended ceiling technology can be used.
The floor can be covered with tiles, parquet, laminate. In general, there is room for your imagination to run wild.
Interior decoration with block house
By this time, you should already have all the pipes for installing plumbing installed (they are removed during the construction of the floors, during the rough screed), and the electrical wires should be laid out.
Construction of a frame house from the first to the fifth stage takes about 3 months.
A little about sockets
My wife really likes to unplug everything. When she leaves, she pulls everything out, and then I return home and put it back in. I do not like it. I tried different things: begged, persuaded, convinced, threatened - nothing helped. And then I decided that I needed to find a high-tech way to resolve the conflict - somehow switch the sockets so that I didn’t have to physically pull out the plugs throughout the apartment.
Well, I have a soldering iron and my hands too. I started thinking about implementation, but a lot of questions immediately arose. For example, which controller should I use for control? I had experience programming controllers from the AVR line from Atmel. Everything looks quite simple: a relay, a transistor for decoupling and control of one controller pin.
There were two problems. Firstly, the controller and relay must be powered, and secondly, the controller must be controlled. There were three options for food.
- The simplest one is to power it from batteries. But the batteries will run out, they will have to be changed, and this is inconvenient.
- Place converters from 220 to 5 volts right next to the controller in each outlet. The method is excellent, but I didn’t find ready-made compact converters, and I didn’t want to tinker with the converter myself. Yes, and I was afraid of messing up and burning down the apartment.
- Supply external power to each outlet.
The task of controlling the controller fell into two fundamental ways: control by radio and control by wire. The option with a wire looks simpler, but again requires connecting a cord to each outlet. I decided that when I do the next repair, I will foresee this in advance and connect a wire to each outlet, for example UTP category 5. But for now it was necessary to deal with the existing unconnected sockets.
The last thing that made me finally give up on developing my own control system was “live testing”. It would be necessary to debug minor architecture and firmware bugs directly during operation, which would certainly cause dissatisfaction among others.
I began to study the available ready-made systems on which a “smart home” could be built. I immediately decided that the modules should communicate wirelessly. All that remains is to choose a technology. At first there were two options - Wi-Fi and Bluetooth. They are very common, there are many ready-made solutions for them.
But Wi-Fi operating at 2.4 GHz is not very convenient from a networking point of view. High propagation and lack of regulation when installing access points makes this frequency very noisy. I would like to have a more or less stable system so that switching sockets does not freeze when my neighbor’s router is running.
This turned out to be not the most serious problem. A much worse enemy of Wi-Fi is the microwave oven. The magnetron of my microwave emits waves at a frequency of 2.45 GHz - when it turns on, nothing works around it. Bluetooth audio streaming goes out, video streaming over Wi-Fi goes out, files don’t download, pages don’t open. Moreover, it doesn’t matter what design your microwave is, built-in or free-standing, it will cause interference in any case. Therefore, I also refused to use Wi-Fi and Bluetooth.