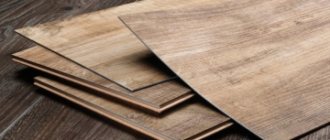
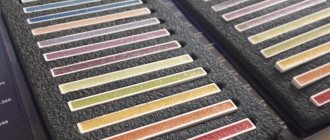
Recently, decorating a home has become a pleasure. Now there are no problems with the choice of floor coverings, cladding for ceilings and walls. Bold design decisions can be implemented and not think about where to find this or that decorative product.
Finishing of the floors begins when finishing work on the walls and ceilings has already been completed. The final floor covering is laid according to the overall interior and design. Materials for finishing floors should not only match the color scheme of the rooms, but also be optimally suited to the purpose of the room. Modern floor coverings meet all these requirements.
Moreover, they are very easy to install; even an amateur in construction can handle the installation. But sometimes the variety of materials can be confusing. Many people get lost in the abundance of floor products. In order to clearly know what kind of flooring is needed in a room at home, you should have an idea of the types of flooring.
In general, types of flooring can be divided into groups according to installation method:
- The first group will include rolled materials. They are very easy to install. The rolls are rolled out and secured using plinths.
- The second group will be represented by prefabricated structures. These are plank structures, the planks of which are secured using special locks.
- And finally, the third group includes materials that are installed for a long period of time. Installation requires the use of glue or cement mortar.
The purpose of the rooms and the characteristics of the material will also help you decide on a flooring product for your home. For example, no good owner would put carpet in the kitchen, because he knows that this room needs moisture-resistant material. The range of floor products is already narrowing due to the special purpose of the room.
What it is
Often, when choosing a finishing material, the consumer has the question of what is gypsum fiber board for the floor. As the name suggests, it is a gypsum fiber sheet. However, unlike the standard well-known drywall, it does not have an outer paper shell. The structure of the slab is homogeneous. The basic necessary properties are given to it during the following production process:
- The main components - gypsum, cellulose and various modifiers are mixed evenly.
- The mixture is filled into the form.
- The workpiece is saturated with water and fed into the press installation.
- The formed slab is dried - the material is brought to a certain degree of humidity.
- The finished product is transferred to the warehouse.
Another important difference between the material and conventional drywall is its higher strength, water resistance and density. Thanks to this set of properties, the GVL slab is used not only and not so much for finishing, but as a substrate for a coating, for example, laminate or parquet, and also as a rough version of the floor and even as a sound insulator.
GVL close-up Source company-megapolis.rf
Properties of DSP
Cement particle board for flooring combines all the advantages of building materials such as OSB, chipboard, plasterboard and fiberboard, and in some respects it surpasses them:
- Thanks to its multilayer structure, DSP has high strength, similar to OSB. This figure is higher than that of GVL.
- Since the slab has a smooth and even surface, it does not require additional processing before installing the final finish. With this quality, cement products have much in common with chipboard, OSB and plasterboard (about
Application area
Taking into account its versatile qualities, GVL can be called a universal building material. The following areas of application exist:
- Formation of dry floor screed.
- Use as a lining under the finishing coating - linoleum, parquet, etc.
- Creation of interior partitions.
- Construction of a subfloor on a wooden sheathing over a concrete floor.
- GVL flooring sheets can be part of the heat or sound insulating layer of various house structures.
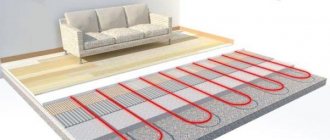
- Installation of a heated floor system.
- Design of fireproof communication boxes.
- Formation of fire-resistant surfaces in bathhouses and boiler rooms.
- Creation of moisture-resistant finishes in bathrooms, saunas, showers.
Advice! When choosing GVL, first of all, it is necessary to take into account the operating conditions. For example, for a bath or sauna, an option with increased resistance to water and fire is suitable.
GVL partitions indoors Source guruotdelki.ru
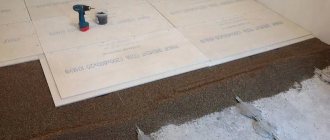
The main stages of arranging a subfloor with bulk expanded clay
| Leveling, insulation and sound insulation of the subfloor can be done with expanded clay backfill from a fine and homogeneous fraction along its base. | Before laying the finished panels, the expanded clay backfill is thoroughly compacted. |
| The sheets are laid in two layers and spaced at their joints on a leveled expanded clay backfill. | The second layer of material is laid on the appropriate glue and tightened with self-tapping screws. |
| Sheets or slabs of the subfloor are tightly tacked to each other. It is necessary to completely close the joints. The remaining cracks are sealed with putty. | Sheet material or finished elements for the subfloor are cut to size only at the wall, leaving a gap between them for an expansion joint. |
| It is advisable to treat any subfloor with a special water-repellent compound. | |
Characteristics
Standard gypsum fiber sheets for flooring are characterized by the following parameters:
- Strength – does not exceed 1.2 thousand kg/m³.
- Density – over 5.5 MPa.
- Humidity – less than 1%.
- Hardness index – 22 MPa and more.
- Thermal conductivity value is from 0.22 to 0.35 W/m × °C.
The dimensions of the standard plate are within the following values:
- Length – 250 cm.
- Width – 120 cm.
- Thickness – 10 mm.
In this case, the values of physical parameters may be different - depending on the wishes of the customer or the characteristics of production. For example, small-format versions are available in sizes 120 by 60 or 150 by 50 cm.
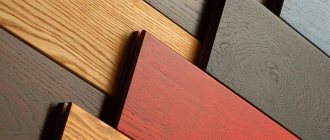
Choosing a DSP for the floor
Manufacturers produce cement boards of different sizes and thicknesses. If DSP is used on the floor for arranging a rough foundation, then you need to purchase products with a thickness of at least 10 and no more than 40 millimeters. The choice largely depends on the curvature and size of the floor differences.
High-quality cement sheets, which are used to level the base with technical characteristics similar to those of OSB, must meet the following requirements:
- humidity in the region of 6-12%;
- moisture absorption about 16%;
- density should not exceed 1300 kg/m²;
- tensile strength – 0.4 MPa;
- swelling of the material under direct influence of water within 24 hours – no more than 2%;
- surface roughness should not exceed 80 microns.
Varieties
Gypsum fiber boards of the type in question differ primarily by area of application into the following categories with appropriate markings:
- Standard - GVL . For ordinary premises.
- Moisture resistant - GVLV . For humid environments.
- Fire resistant - GVLO . With increased fire resistance.
- Moisture-resistant - GVLVO . For finishing in areas with high air humidity and elevated temperatures.
GVL for the "warm floor" system Source pol-exp.com
GVL, classified as fireproof, are classified into the following subcategories:
- Non-flammable - G1.
- Do not produce smoke when burning - D1.
- Non-flammable - B1.
- Low toxic - T1.
Due to the fact that it does not support the combustion process, the material is recommended for covering wooden structures of all types - when building houses using frame technology, creating partitions or finishing in wooden structures, including subfloors on joists made of boards or bars.
Note! GVL floor slabs allow not only leveling the surface, but also effectively insulating walls and ceilings from sound and saving heat in the room. At the same time, the structure of the material does not interfere with the passage of air and moisture, and therefore ensures a healthy microclimate in the house.
Finishing a house from GVL Source stroy-podskazka.ru
See also: Catalog of companies that specialize in finishing materials and related work
Basic requirements for the foundation
In addition to leveling and integrity, a number of other requirements are imposed on the subfloor:
- Durability - it must be made of materials whose service life exceeds at least 10-15 years.
- Strength - without this parameter, it’s unlikely that anything will work out.
- Low hygroscopicity.
- Safety.
In addition, the following properties are also desirable, which finishing coatings do not always possess:
- Thermal insulation ability - to save on heating costs.
- Noise insulation.
Advantages and disadvantages
The formation of a number of material properties is determined by the production technology and the modifying components included in its composition. Thanks to this, GVL is homogeneous in structure, dense and has the following set of positive qualities:
- Possibility of installing any heating system under the casing - both electric and water.
- Minimum thickness with maximum strength, sound and heat insulation.
- The installation technology is all-season and is allowed at negative ambient temperatures - since it does not include work with wet mixtures and solutions.
- The combination of strength, flexibility and high density properties, which greatly facilitates installation while maintaining useful performance characteristics.
- Moisture-resistant gypsum plasterboard for floors is significantly superior to plasterboard in its resistance to moist air and direct contact with water splashes. It can be installed in rooms where water splashes fall on the floor.
- The structure of the material does not change even after strong heating.
- After installation, the slabs do not creak.
Scheme for laying gypsum fiber board on the floor Source chudopol.ru
- Thanks to the combination of strength and elasticity, the surface can withstand heavy weight, shock and various mechanical loads.
- The material's high resistance to elevated temperatures prevents the spread of fire and prevents fires.
- Thanks to the fibers included in the composition, the material does not collapse during sudden temperature changes.
- In terms of areas of application, the material has virtually no restrictions or contraindications.
- High level of environmental cleanliness. Contains only natural and safe ingredients.
However, with all the obvious advantages and superiority over conventional drywall, gypsum plasterboard is not without some disadvantages:
- High specific density, significantly heavier product. So, just one standard sheet weighs about 17-18 kg. This complicates the installation procedure. More workers are needed.
- Despite the high levels of operational flexibility, the product is not without practical fragility. If installed improperly, the sheet can easily be broken or crumbled, especially at the edges and corners.
GVL slabs break easily during installation Source ekb-pol.ru
Overview of decorative mixtures
In this case, we are talking about expensive materials that are applied in a thin layer. The use of such funds for starting work is inappropriate.
- Paintpolymerstone-2. This material is also called liquid linoleum; after drying, it produces a perfectly smooth, shiny coating. It is characterized by high strength, resistance to various influences and durability. In this case, it is possible to add color. Most often used for arranging floors in rooms with significant traffic. There are many foreign analogues on the market at a high price, which are no better than domestic material, so it’s not worth spending extra money.
Liquid linoleum is of much higher quality than traditional linoleum; moreover, domestic compositions are in no way inferior to foreign analogues - Arturo EP2500. One of the most expensive options. Produced in the Netherlands, it meets strict quality requirements. The material allows you to obtain a seamless coating of the desired shade and is used for arranging floors in rooms for any purpose. To create a non-slip surface, you can add quartz sand, which will further save on material. If the pouring rules and appropriate conditions are observed, the coating will be ready for use in a week.
The ability to add sand allows you to save the base composition and at the same time obtain a high-strength coating - Remmers Epoxy OS Color. This is a polymer-based material that is suitable for arranging floor surfaces in residential and non-residential premises. After drying, the result is a smooth and abrasion-resistant coating.
Floors with the possibility of tinting and high resistance to abrasion are used in both technical and residential areas - Tikkurila Novopox LP. Ideal for creating self-leveling floors on balconies, loggias, basements and other unheated rooms. The material is made using resins. A thin-layer coating will reliably protect concrete or other surfaces from mechanical damage. In addition, after drying, a beautiful glossy floor is formed in one of 10 shades.
Thin-layer mixtures from Tikkurila are chosen if the coating will be used in extreme conditions of the street or basement - Elakor-ED. A transparent composition based on epoxy resin, which can be added in various colors, creates a durable and durable coating. The price of the material is relatively low, so it can be used not only for decoration, but also for minimal leveling.
Inexpensive transparent compositions "Elakor-ED" open up enormous opportunities for independent floor decoration
Installation technologies
Despite the apparent simplicity of the material, the procedure for installing gypsum fiber boards is quite complex and has many nuances. It is necessary to take into account both general requirements for the base and specific ones - in each installation option. Let's look at them in more detail.
Laying gypsum fiber board on an expanded clay cushion Source sense-life.com
General requirements for foundation and installation
The versatility of GVL slabs is also evident in the installation methods. They can be mounted either on a solid, level base or on beams with a sufficiently large gap from each other. At the same time, special requirements are imposed both on the surface on which the material will be laid, and on the material:
- The height difference should not exceed more than 2 mm for every 2 meters of the straight line of the base.
When laying soft finishing - linoleum, vinyl, carpet - small and shallow unevenness is allowed. However, leaving such defects for installation of parquet or laminate is extremely unacceptable. At a minimum, this threatens the subsequent spreading of the finish and the divergence of its locks.
- When installing on a non-solid base or on joists/lathing, it is necessary to use gypsum fiber boards of increased density and maximum thickness.
As an option, laying sheets in 2 layers is allowed. In this case, the modification of the material must necessarily be GVLV - moisture resistant, and the seams of the lower layer must be covered with the top sheet.
Laying gypsum fiber sheets on joists Source blogspot.com
- Immediately before laying, the ends of the slabs must be glued - coated with an adhesive base.
If installation takes place on a rigid base, for example, a concrete floor, it is allowed to use PVA, and if on joists or insulation, a sealant that retains elasticity after complete drying is allowed.
Important! The gaps between the gypsum fiber board sheets after installation should not exceed 1.5-2 mm. If the finishing has a soft base, then even smaller gaps between the slabs must be puttied.
Required Tools
The first thing you will need to carry out the work is the necessary equipment. To level the floor yourself, you will need:
- a steel brush, which is used to clean the base from peeling;
- chisel and hammer to remove corners and bumps that form on an uncured concrete surface;
- a paint brush with stiff bristles to remove small debris;
- trowel for applying and leveling the solution;
- tape measure, which is used to measure the surface;
- laser or hydraulic level for setting an even horizontal line;
- aluminum trapezoidal plaster rule;
- a hammer drill designed to create holes that will be used when installing beacons;
- hand saw for sawing concrete;
- an electric jigsaw that will cut plastic or wood without the risk of damaging the material;
- a roller roller with spikes that allows air to be removed from the self-leveling coating;
- a screwdriver, thanks to which you can quickly and efficiently set the levels;
- a steel triangle and a metal ruler, which are useful for creating accurate markings.
Preliminary preparation
The quality and durability of the screed depends on how the preparatory measures are carried out. Therefore, this point cannot be neglected. For this:
- using suitable tools, remove the old base;
- Clean the ceiling from dust and debris. After this, vacuum and wipe with a damp cloth;
- eliminate chips and peeling;
- cover the cracks with cement mortar and prime the seams;
- Disperse small crevices using an impact tool, otherwise it will not be possible to rub the solution into them;
- Wooden floors without a significant difference in the horizontal plane do not need to be opened.
Expert opinion
Anton Makarov
Expert of our site. She has been selling and installing floor coverings for over 7 years. Can give really valuable advice.
Ask a Question
It must be remembered that cement mortar will not adhere to concrete without preparing the base. Since concrete practically does not absorb water, it needs an additional adhesive layer. Without it, the cement mortar will simply peel off over time.
Level determination
The simplest method for measuring curvature is to use a building or laser level. To notice unevenness of the floor level, mark several control points, and then compare with the general plane. You need to push off from the highest point at which to install the laser self-leveler. The device will show an even strip along the periphery of the walls, which will be the level. You can use a construction hydraulic level, fix the first mark in an arbitrary place and transfer it to the remaining walls.
Interesting article on the topic: How to lay solid boards on screed, plywood and other surfaces
Installation of beacons
The main task for creating an intermediate layer when installing floors between the base and the finishing coating is to achieve a high-quality and perfectly flat surface. Guide rails will help with this. When using a viscous rolling stock, it is necessary to install special beacons to maintain the required level. If you carry out the procedure “by eye”, the surface will definitely have unevenness.
Even a specialist builder of the highest category who performs concrete work will not be able to achieve a perfectly smooth surface without benchmarks. Installation of screed devices begins with knocking off the zero level mark. A high-quality intermediate layer should not be less than three centimeters. For installation:
- using a laser or pipe level, draw lines along the periphery of the room at the selected height;
- From the line, measure the distance to the floor and write it down in a notebook. Mark the area with the lowest height as the highest point;
- taking into account the minimum thickness of the screed, add another three centimeters upward from the highest point and draw another horizontal line along the entire perimeter. This will be the main zero level;
- It is most convenient to carry out the procedure using a laser level with the “Horizon” function;
- aluminum profiles 27 by 28 for plasterboard are suitable as beacons;
- Having measured the distance from the highest point to the drawn horizontal line, take a small amount of the finished solution and place several piles at a distance of 15 cm-25 cm from the wall;
- set a benchmark on them, measure with a tape measure so that there is an equal distance along the entire length upward;
- Having installed the first one, do the same with the other beacons to the other end of the room, retreating from each 20 cm-25 cm so that the height from any point of the aluminum profile is the same distance.
When installing the first aluminum beacon profile more than 30 cm from the wall, dips in the floor surface may appear.
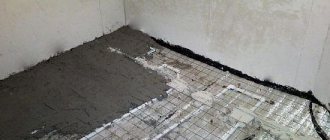
Screed
Before you begin screeding around the perimeter of the room between the walls and the floor, you need to fix the damping tape. Foamed polyethylene cut into strips compensates for the thermal expansion of the intermediate layer when installing floors between the base and the finishing coating. It will also serve as a sound insulator, and during pouring it will protect the walls from the ingress of mortar, dust and dirt.
Here you can use two options: buy sand and cement separately and prepare the mixture yourself, or purchase a ready-made solution. In the first case, screeding will be much cheaper. However, modern mixtures for installing screeds and leveling layers under finishing coatings differ:
- high quality;
- quick preparation of the working solution;
- convenient transportation.
When choosing one of the options, you need to use a mixer for construction work or a concrete mixer. You cannot use a drill or hammer drill to prepare the working solution, since the motors of these electric tools are not designed to work with such loads and can quickly break down.
The dry construction cement-sand mixture “TsPS-M300” is well suited for pouring the intermediate layer. For screeds more than two centimeters high, it is advisable to use pure sand concrete. To create an intermediate layer of less than two centimeters, it is advisable to add a fifth of the tile adhesive. Cover the base with the same binding element before pouring. Follow these steps during the process:
- Pour tile adhesive onto the base, which will serve as a contact layer, and roll it out with a roller. The connecting element will ensure excellent adhesion of the screed to the base surface and will not allow moisture to be absorbed into the base;
- without waiting for the glue to dry, pour out the working solution for the screed, distribute it evenly using a trowel;
- Level the mixture using a vibrating compactor.
Drying the coating
Drying the screed is one of the most important stages when performing work. Concrete mortar is a traditional leveling mixture that is used to finish the bottom layer. This type of coating takes the longest to dry. To prepare it, you need a lot of water, which is needed to evenly distribute the working solution over the surface. This is why the mixture remains moist inside for a long time. And even if at first glance it seems that the coating has dried and is ready for use, the installation of facing materials cannot be carried out earlier than after 20-25 days. If the height of the concrete screed exceeds 3 cm-4 cm, it will take at least a month to dry the coating. And pouring it in layers increases the time even more.
Interesting article on the topic: How to lay carpet tiles with your own hands
Semi-dry screed is the use of reinforced elements and a rigid semi-dry mortar, with the help of which the base is leveled and becomes more wear-resistant. The working mixture contains a small amount of water, so it dries in about 12-16 days.
Dry leveling is a simple and relatively clean process. After installing the beacons, a layer of expanded clay and sand is poured onto the base. And after the mixture has settled, it is leveled using the rule. After laying chipboard or other materials on a leveled surface, the floor is finished leveled, which dries very quickly.
Expert opinion
Anton Makarov
Expert of our site. She has been selling and installing floor coverings for over 7 years. Can give really valuable advice.
Ask a Question
Since the drying period of the listed mixtures is approximate, before laying the final floor covering, you need to determine the humidity level. This can be done using a carbide moisture meter. A universal device will accurately determine the degree of humidity of both the top and inner layers. The devices are popular among professional builders.
Gypsum fiber mixtures
Modern finishing material for leveling floors is made from gypsum with reinforcing elements and dissolved cellulose. Thanks to its characteristics, it is becoming more and more in demand. Designed for easy leveling of floors, walls and ceilings, it has a homogeneous structure with high density, is fire resistant and non-toxic. It is an excellent connecting element. This is exactly what you need to cover floors in bathrooms and kitchens.
The gypsum fiber mixture protects any finishing coating from warping. Can be used as a substrate for laminate and linoleum. This is what you need to level surfaces with large differences in height. To use it as a tie:
- fill the base with slats in the form of a lattice with windows and add medium-fraction expanded clay;
- Place gypsum fiber sheets on it in two layers;
- Secure the first layer to the slats with screws, anchors and bolts. Second - glue to the bottom one.
Self-leveling mixtures
How to level the floor yourself quickly and efficiently? Using a leveling mass that spreads independently and is evenly distributed in a single horizontal plane. Self-levelers will help you avoid mistakes and make it possible to perform high-quality surface leveling. Unlike cement-sand screed, semi-dry sand-concrete and sand mixtures do not require the use of complex beacons. And also do not put a large load on the surface. At the same time, you can walk on the floor in 10-12 hours, and lay any covering in just two days.
You need to prepare and use the solution for self-leveling floors very quickly. Dilute a portion and pour immediately. Immediately begin diluting and pouring the next “portion”. And so on until the entire surface is completely covered.
From foam plastic
Gas-filled material expanded polystyrene is a rigid foam with a cellular structure. Even an inexperienced builder can make a screed out of it. It includes several layers on a pre-leveled base. The bottom one is a waterproofing film on which foam plastic is laid, which also serves additionally as insulation. The finishing coat is applied on top in a thin layer.
From coniferous substrate
Eco-friendly material made from spruce needles and wood fibers is excellent as a self-leveler for correcting uneven subfloors. Initially, the material was intended for coatings that required the installation of wooden supports, but later it began to be used on concrete foundations. Sheets 3 mm thick are used for unevenness up to 2 mm. Thick plates smooth out differences of up to 5 mm. Experts recommend using a substrate to level the base in new buildings, since the height difference there will not be more than 2 mm-3 mm. The material improves sound and heat insulation performance.
Correcting unevenness using PVA
The original method is analogous to cork insulation, in which using PVA and sawdust you can quickly and easily level wooden floors. For this you will need:
- shavings;
- cement;
- liquid glass;
- glue;
- level;
- putty knife.
Mix sand with glue and add sawdust. While stirring, add a little water from a spray bottle until you get a viscous consistency. Add cement laitance and liquid glass. Repair the base in advance and set the level to zero.
Semi-dry screed
What can be used to level the floor in a small room? A semi-dry screed, which consists of compaction and compaction of a sand mixture, is durable with a flat, smooth surface. After this, the surface is thoroughly polished. How to correctly and simply carry out the procedure yourself? For this:
- clean the base and prime it;
- set the zero level and beacons;
- mix cement, water, sand;
- for resistance to cracking, add polypropylene fiber;
- spread the mixture evenly using a metal comb and compact;
- simultaneously sand and compact until a smooth surface is obtained;
- pull out the beacons and fill the voids, constantly checking the distance with the rule;
- moisten with water and cover with film for 10-15 days.
Interesting article on the topic: How to prepare a floor for laying tiles
Leveling a wooden floor
Before correcting uneven wood floors by raking, clear the surface of the concrete base and dust. If the flooring is simply “failed”, the best method would be scraping. After the procedure, the floors will not only be leveled, but their color will also be refreshed. By scraping without disassembling the top layer, differences in height between the wooden planks will be leveled out.
Screed, self-leveling mixtures and wood scraps are also used. The last method is suitable for those who want to save on purchasing timber.
Leveling a wooden floor under linoleum
A wet screed made of cement and sand after drying becomes very strong and does not undergo deformation. Wood, on the contrary, has the ability to expand and dry out. Therefore, when creating an intermediate layer of concrete, it is necessary that the solution does not touch the natural material. It must be reinforced and the base covered with a layer of sand. The working mixture must be laid along the installed beacons. After laying, wipe down the surface and cover with film. After complete drying, begin finishing with linoleum as shown in the video.
Expanded clay is a biologically inert material: it does not rot, it is not affected by temperature changes, therefore it is suitable as a complement to the intermediate layer of concrete for wooden floors under linoleum. But it will only be possible to lay concrete mortar over wooden joists if the beams are installed on a stone platform at least 30 cm high.
Is it possible to pour a self-leveling floor onto a wooden one? Yes, if the manufacturer indicated on the label that the mixture is allowed to be used on chipboard and OSB boards, wood and plywood. After screeding, defects may appear on the wooden surface. Tile adhesive will help correct the situation, which can be used together with putty for small irregularities or gaps.
Leveling the floor under laminate
Laminate is a very demanding finish when it comes to the flatness of the base surface. Before installation, unevenness must be corrected. It is advisable to correct unevenness on a wooden floor only if the boards and joists are well preserved. If serious repairs are needed, open the floors to the rough screed and level them with concrete. The base must be very level, otherwise the laminate will begin to deform from the boards in places where there are distortions.
Leveling the floor with plywood
Correcting unevenness with wood laminated boards using joists is a great way to improve the condition of the floor and prepare it for finishing. In addition, installing plywood on bars will provide additional insulation on the balcony and noise insulation in the house or apartment. Compared to covering beams with tongue-and-groove boards, wood-laminated boards allow you to speed up the work process when there is a large difference in floor height. Laying them with penoplex is possible without the use of slats and frames. In this case, the base must be well leveled and sharp protrusions removed. Lay the plywood on the insulating material in two layers, overlapping, and secure with self-tapping screws. Seal the gaps with gypsum plaster. If you plan to lay laminate flooring in the future, you can use sealant instead of plaster.
Leveling floors for tiles
The method for correcting unevenness depends on the condition of the surface, the difference in height and the material used. You can use:
- self-leveling mixtures;
- dry method;
- correction using support bars.
If the surface of the subfloor has many bulges and dents, you need to use a cement-sand screed or a self-leveling compound. If the defects are minor, they can be smoothed out using tile adhesive.
Leveling old floors
It is possible to revive a floor surface without dismantling the old one even without major repairs. If wooden floors have been laid for a very long time, defects can be eliminated by sanding, self-leveling mixtures, chipboard backing or cement-sand screed. Be sure to complete the following activities:
- measure the level;
- prepare the subfloor: clear the floor of debris and vacuum it;
- use beacons, otherwise the screed will be uneven;
- even disperse liquid floors with a spatula;
- remove paint residues, cement laitance and dust from the surface, as they can cause the mixture to peel off.
A high-quality screed will provide a good appearance to the coating, which will be used for many years.
Viewed times: 8,802
Great article 2
Author's rating
Author of the article
Oleg Grishin
Flooring specialist with 10 years of experience. Oleg has something to share with our readers
Articles written
105
- Even more interesting:
- How to lay solid boards on screed, plywood and other surfaces
- Do you need plywood under linoleum and how to lay it correctly
- How to lay carpet tiles with your own hands
Video description
Video instructions for creating sound insulation from GVL on a concrete floor:
Laying on a wooden floor
Installation of gypsum fiber sheets on a wooden floor or joists must be carried out with leveling the surface and subsequent checking the level, as well as with preliminary antiseptic treatment of all wooden structures.
Often, the option under consideration involves laying gypsum fiber board on a wooden floor under the tiles. Then, after fixing the material, a special glue under the ceramics is applied to its surface, and then its stage-by-stage installation is carried out. In this case, there is no need to fill the gaps formed between the sheets during installation - since the adhesive base seals them.
Prefabricated Flooring on Cushion
Often, to level the surface with large differences in height or to give the ceiling maximum thermal insulation, granular materials are used, for example, expanded clay. The main advantage of the method is the maximum speed of installation and the absence of the need to work with solutions. In addition, this filler is quite lightweight and can be used on a wooden base.
Features of manufacturing DSP
The production of such plates is carried out in a certain sequence:
- A solution consisting of water, to which salts have been added, and components such as aluminum and liquid glass is poured into a container intended for mixing.
- Chips are poured there for mineralization.
- Then add water and cement and mix thoroughly.
- The finished composition is sent under a press, after which the material takes the form of cast slabs with a smooth surface. You can see how they look in the photo.
Video description
Video about installing gypsum plasterboard on expanded clay:
In this case, a lathing must be created to fix the gypsum fiber. Its depth will correspond to the thickness of the backfill layer. An important feature of using this method is maintaining a gap around the entire perimeter of the room - between the slabs and the walls. Its presence is due to the need for ventilation and the natural vapor permeability of wooden structures.
Laying tiles on GVL
In rooms with high humidity, tiles are usually installed using gypsum fiber board. In this case, the following conditions must be met:
- The floor must have additional waterproofing.
- If the slabs are laid on logs or a base made of boards, they should not sag during operation.
- It is necessary to use elastic glue as a fastening base for ceramics.
- The seams of the laid tiles and gypsum fiber sheets should not match.
Note! An improperly prepared base can cause poor-quality installation of gypsum fiber boards and their subsequent damage during operation. The smallest grains of sand, dirt stuck in cracks, and hidden irregularities can cause significant defects in the floor in the near future after its completion.
Ceramic tile
Tiles are often chosen for installation. Based on the purpose of the premises or simply at the request of the owner. This material is characterized by low abrasion and low water absorption coefficient.
Let's look at the stages of its installation:
- Using a notched trowel, apply a layer of diluted glue to the prepared surface.
- The tiles are embedded in the glue. To improve the fit, tap it with a mallet.
- The following tiles are laid side by side, with plastic crosses installed between them to form a gap. Periodically check the horizontal position with a level.
- If necessary, cut parts of the tiles using a tile cutter.
- After an hour, the crosses can be removed.
- Every other day, the seams between the tiles should be grouted.
- Use a damp sponge to remove excess grout and stains.
Laying tiles
Porcelain tiles
Porcelain stoneware is actively used to cover floors in homes, supermarkets, and public spaces. It is more durable than ceramic tiles, wear-resistant, durable.
Its installation is similar to that of ceramic tiles, with the only difference being that a different adhesive is selected and cutting of the slabs is a much more labor-intensive process due to the size of the material.
Laying porcelain tiles
Choosing a floor covering is extremely important and not easy. It needs to be taken responsibly, having analyzed all the pros and cons. Properly selected and installed coated concrete floors will serve you faithfully for many years.
Briefly about the main thing
Gypsum fiber boards are made from gypsum, cellulose and various fillers. They have a homogeneous structure, do not contain cardboard and are highly durable and moisture resistant.
Laying gypsum fiber board on the floor has the following purposes:
- Dry floor screed.
- Lining for finishing coat.
- Interior partitions.
- Rough floor.
- Heat and sound insulation.
- Formation of heated floors.
- Creation of fireproof structures and surfaces.
- Moisture resistant finish.
In this case, GVL can be standard, moisture-resistant, fire-resistant and moisture-fire-resistant. Gypsum fiber boards are durable, resistant to temperature changes, do not burn, are environmentally friendly, resistant to mechanical and weight loads, but require careful installation, are quite heavy and expensive.
They can be mounted in various ways - on a concrete base, wooden floor or logs, in a prefabricated structure on a pad of insulation and under ceramic tiles. The installation procedure is quite complex and requires strict adherence to technological requirements. Therefore, it is better to entrust it to professionals.
Ratings 0
General information
A level for tearing out a floor is used when it is necessary to lay:
Linoleum;- Laminate;
- Tiles;
- Carpet.
Advantages of self-leveling mortar:
- Allows you to work in small layers;
- Gives a durable and smooth coating;
- The poured floor dries quickly and hardens.
Despite the fact that this type of mixture makes it relatively easy to obtain a perfectly flat surface, they are very capricious - a high-quality base is necessary.
Therefore, before starting work, you need to familiarize yourself with the technical features and instructions.
Conclusion
As you can see, choosing moisture-resistant slabs allows people to create an interior and carry out renovations within their budget. At the same time, you do not need to buy specialized tools or be a professional builder for the work; almost every man can cope with this process on his own.
In the video presented in this article you will find additional information on this topic.
If you need to buy a hovercraft on the best terms in Moscow, you can do this in our online store! Call or write to us and we will definitely answer all your questions. The ideal option would be if you immediately put the item in your cart (after that, we will also contact you, and also call you again when the item is delivered to your location). Let's have mutually beneficial cooperation! See you in touch!