Articles
All photos from the article
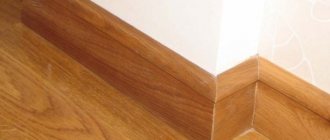
The topic of this article is connecting skirting boards in the corners. Despite the differences between ceiling and floor skirting boards and the variety of materials used, the number of solutions to this technical problem is quite limited.
We are about to get acquainted with these methods.
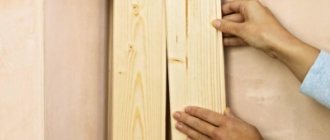
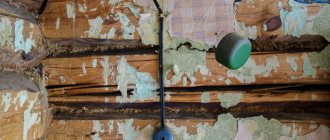
Adjusting the wooden ceiling plinth when decorating an outer corner.
Features of ceiling skirting boards
Ceiling skirting boards perform not a practical, but a decorative function, which is to mask the gaps between the walls and the ceiling. However, in the case of suspended ceilings, this function is a necessity - the distance between the canvas and the walls is initially quite large, so it has to be hidden somehow.
In addition to their masking capabilities, skirting boards can also be used for decorative lighting. This idea is very simple to implement, and the effect is extremely pleasant. Small LED bulbs are installed under the baguette, which create a soft light around the entire perimeter of the room or in a certain area, illuminating the stretched fabric. Of course, to install such a structure you need to know how to properly join the ceiling plinth.
Most often, polyurethane or polystyrene products are used for ceilings, but elements made of gypsum or natural wood can also be found on sale. Conventional skirting boards are produced in two-meter lengths, but various deviations from this standard are also possible. The surface of such products can be either smooth or with a certain volumetric texture. The color of the baseboard is usually matched to a specific interior - and the most popular option is white, which often matches the tone of the stretch fabric and light walls.
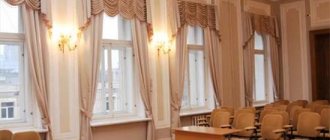
An important positive quality of skirting boards is the ability to combine with most materials used for finishing. Skirting boards look great together with, for example, plastic panels or wallpaper. You can also combine elaborate-looking ceiling plinths with stucco elements - this will complement the visual style of the room.
general information
We will begin, however, with a brief introduction to the materials used and the features of their processing.
Floor plinth is made from:
- polyvinyl chloride;
- solid wood (including those finished with precious wood veneer);
- MDF (pressed hardboard) – veneered or laminated.
When finishing ceilings, the requirements for strength are much lower: in fact, hardly anyone in their right mind would trip over a ceiling plinth.
That is why the list of materials used in the production of ceiling edging is supplemented by:
- polystyrene foam (expanded polystyrene);
Despite the cheapness, this material looks quite presentable.
Please note: you can find injection and extruded foam products on sale. The former are characterized by a complex relief and granular structure, the latter are dense and smooth. In addition, extruded polystyrene foam is noticeably stronger in bending.
- polyurethane. It again has significant mechanical strength (including compression) and, unlike foam, is flexible. The latter circumstance makes polyurethane an ideal material for finishing curved walls;
- gypsum. Gypsum stucco is distinguished by significant fragility and significant weight, which makes its use in ceiling decoration a non-trivial task.
The photo shows plaster stucco molding.
The need to install skirting boards
Installing ceiling plinths is not the last stage of arranging a room. Typically, skirting boards are installed before the ceiling is finished and wallpaper is hung on the walls. However, maintaining the installation sequence is not a problem - it is very easy to figure out. It is much more difficult to understand how to join the ceiling plinth, and to understand the technology for connecting individual moldings.
On sale you can find products of different lengths and widths. The width is selected individually, depending on the dimensions of the room itself and the finishing features. To determine the length of the skirting boards, you need to measure the room - but you need to understand that during the installation process the ceiling skirting boards will still be adjusted, so you can buy the longest products possible. The material of manufacture does not affect the choice at all.
When choosing, you can also use the opposite principle. In this case, you need to buy parts whose corners are already prepared for joining. You won’t have to cut the corners of such fillets yourself - you will need to cut the straight parts of the skirting boards, and the cut, accordingly, will be straight. Joining the ceiling plinth in the corners in this case will be easier, but they will also be more expensive.
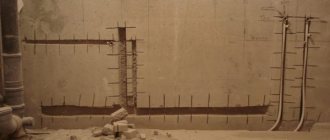
Before joining the ceiling plinth in the corners, and even before installing it, you need to thoroughly prepare the surfaces to which the product will be attached. The surface must be dried, brought to a smooth state and cleaned of various contaminants. In addition, if necessary, it is necessary to carry out work on leveling, puttying and priming the surface. When installing a plinth over plaster, it is recommended to pre-treat the product with water-based paint.
Even if the corners of the room itself are not very even, the skirting boards can still be installed correctly - all you need to do is follow the technology for this operation. Skirting boards should be laid from the corners located from the entrance to the room. To trim parts yourself, you need to use a miter box - a specialized tool that allows you to cut skirting boards at a certain angle (plinths most often have to be cut at an angle of 45 degrees).
MDF skirting boards
Everyone is probably familiar with MDF boards, used as a facing material and widely used in furniture production. They are produced in a wide range of thicknesses and shapes, most often decorated with a special polymer film with a pattern, usually imitating various wood textures. MDF skirting boards are their closest “relatives”.
What is MDF? No matter how hard they try to freely decipher this abbreviation! Some argue that this is a designation for “fine fraction” or “modified fiberboard.” Interestingly, both options are quite close to the truth.
Indeed, MDF is a step forward compared to the usual fiberboard. And in the production of this material, wood fibers are ground to very small sizes. But still, in fact, this is the Russified English abbreviation MDF: “Medium Density Fiberboard”, literally translated - “medium density fiberboard”.
MDF boards are made from crushed wood fibers, which, when heated and pressed, release natural glue - lignin, which is an excellent binder for the created mass. Manufacturers position MDF as an environmentally friendly material, but in fact, to bind fibers, some companies sometimes use formaldehyde resins, which are not at all beneficial to human health. This factor must be taken into account when choosing this material for finishing - it is better to give preference to manufacturers with a consistently high reputation.
MDF skirting board production line
MDF skirting boards are made from boards that are not yet decorated with film. The blanks are cut and processed on special milling equipment, where they are given the intended shape and relief pattern. After this, the skirting boards are cleaned of dust, and their front surface is laminated with a self-adhesive polymer film.
Taking into account the manufacturing technology, MDF skirting boards most often have the form of a profiled smooth board, which is sometimes also decorated with simple reliefs, without any special frills.
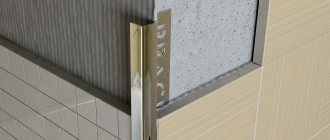
MDF plinth with an insert, which is designed to mask the points of its attachment to the wall.
Variants are produced with an insert-bar along the entire length of the plinth. This detail allows you to simplify installation as much as possible - it will perfectly hide all the heads of the fasteners after installing the plinth on the wall.
In addition to lamination, natural veneer and painting are used to decorate the front side of MDF skirting boards.
Prices for MDF plinths
their MDF plinth
Veneered MDF plinth - Italian walnut look
Veneered plinths, instead of PVC film, are covered with veneer made from natural wood of expensive species. Therefore, in appearance they are almost impossible to distinguish from real wooden ones.
Painted MDF plinth
Skirting boards can also be sold in painted form. For such decoration, special paints are used, which are designed to reliably protect the material from moisture, as well as from the effects of household chemicals. If you want to give the products individuality, that is, paint them yourself, you can purchase a baseboard primed with a neutral white or light gray color, prepared for painting.
MDF skirting boards, like products made from other materials, have their own advantages and disadvantages, which you need to know about before purchasing and installing them.
- The MDF plinth has an easy-to-install design, so even a novice craftsman who is inexperienced in construction can handle its installation.
- The products are very well fixed tightly to a flat wall surface.
- The aesthetic appearance of plinths made from this material brings neatness and sometimes exclusivity to the interior design. Especially if the products are made to order or painted independently.
- The fairly high moisture resistance of MDF allows the material to be used in rooms with slightly higher humidity levels. But direct ingress of water should still be excluded.
- The products have a certain flexibility, so they can be attached even to a slightly curved surface.
The disadvantages of products made from this material include instability to fracture, that is, they can easily be broken by hand. Therefore, during installation you should act carefully, without applying excessive force.
Although buyers are assured that MDF is an absolutely pure, harmless material, this statement should be treated with a certain degree of caution. In order to save money and speed up the manufacturing process of boards, some manufacturers (90% of the world production of this material comes from China) additionally use phenol-formaldehyde resins as a binder. And products may have a negative ability to emit toxic free phenol.
Cutting ceiling plinths
To trim skirting boards before installation, you need to prepare the following tools:
- A stationery knife or a hacksaw for metal (the choice depends on the material of the baseboard);
- Miter box;
- Square;
- Ruler;
- Pencil;
- Construction knife (optional if it is necessary to cut the baseboard at non-standard angles).
To successfully cut parts, in addition to carefully performing all the necessary operations, you also need to take into account various nuances. For example, when cutting planks normally, you need to cut not only the inner, but also the outer edge of the parts. If you need to arrange an external corner, then the parts, accordingly, also need to be cut inside.
For cutting, it is best to take good tools that can provide high quality and precision cuts. Of course, you can use a regular saw, but such tools are not very suitable for fine work. When using low-quality tools, there is always a risk of damaging the material during the cutting process, so it is better not to skimp on installation.
The best tool for cutting is an electric jigsaw - it provides high precision work and the greatest efficiency. In addition, it is very easy to work with such a tool, since it makes it possible to accurately set the direction of the cuts and make them as neat as possible.
The miter box, despite its versatility, may not be suitable in a number of situations. In addition, this tool is used extremely rarely in everyday life, and it is difficult to use it for its intended purpose - not every apartment has straight corners. In such situations, only a template made of cardboard or paper that completely follows the shape of the corner will help.
To simplify the process of cutting hollow baseboards, you will need to make a corner from scrap materials. You can put the cut plinth in such a corner, and it will be fixed. There are no special requirements for the quality of the corner - the main thing is that it securely holds the product throughout the entire work.
The corner is applied to the prepared template from above so that the edge of the corner coincides with the corner of the template. The plinth is inserted into the corner and cut according to the template. The advantage of this method is the fact that the blade of the tool can only rest against the corner itself, so there are no restrictions on the work.
For cutting foam parts, a regular construction knife will do. The only nuance that requires attention in this case is the sharpness of the blade. If the knife is poorly sharpened, then there may be delaminations and breaks in the cut, which are unacceptable when it comes to high-quality joining of skirting boards.
Technology for joining skirting boards
There are only two types of corners that require joining:
- Internal angles that occur most often are less than 180 degrees (most often 90);
- External angles, more rare - angles over 180 degrees (usually 270).
There are also sometimes non-standard configurations, but they can still be considered as a certain variety of external and internal angles. Regardless of the size of the angle, the joint always consists of a right and left strip, which need to be connected. The main differences are in the method of cutting the skirting boards for different angles, so it is worth understanding these differences before joining the skirting boards in the corner.
How to join internal corners
In the vast majority of cases, it is the internal corners that have to be cut - i.e. corners of the room. The part of the plinth, which during the cutting process is adjacent to the sides of the miter box, will subsequently be glued directly to the wall. The other part, located at the bottom of the miter box, is connected to the surface of the ceiling. When arranging internal corners, the bottom of the plinth should be higher than its upper part, in contrast to external corners - in this case, everything will look diametrically opposite.
Before adjusting the corners of the ceiling plinths, you need to accurately measure the angle between the walls of the room. For right angles, planks cut at an angle of 45 degrees are used. If the corners in the room itself are uneven, then the radius of the corner should be divided in half. During the cutting process, you need to ensure that the parts ultimately fit together - the left plinth is cut on the right side, and the right one, respectively, on the left.
In the case of cutting for internal corners, the technology will look like this:
- Fitting the ceiling plinths in the corners begins by inserting them into the miter box and pressing the part a little further than the slot marking the 45-degree angle;
- The plinth is cut according to the side where it should be located;
- Before connecting the plinth to the ceiling, you need to attach it to its place to check whether it is suitable for installation in a certain area (small deviations can be carefully cleaned up with a construction knife).
Cutting a corner using a miter box
We take a polyurethane ceiling plinth intended for the left or right side of the corner.
We lean it against the future installation location so that the end of the segment opposite from the corner is against the edge of the already glued molding. In the place where the bottom edge of the ceiling plinth touches the top of the wall corner, make a dot with a pencil or stick a piece of insulating tape. We repeat these steps with the second segment.
How to cut an external corner of a ceiling plinth:
- We place the left blank in the miter box from left to right, pressing it to the edge closest to us. The corner vertex mark should coincide with the leftmost slot in the same edge
- We place the right blank from right to left, pressing it to the near edge. The mark for the top of the corner is to the far right slot.
How to saw down a ceiling plinth at an internal corner? Everything is very simple, the actions will be exactly the same, only the location of the corner vertex mark changes.
Here it’s the other way around: for the left segment – the far right slot, and for the right – the far left. The finished ceiling fillets must be aligned, and then the joints should be held up to the light - there should be no gaps. If they are very small, then editing is not necessary; you can get by with sealing with putty material after installation.
How to make a corner of a ceiling plinth: positioning the workpiece in a miter box
Important: sometimes the angles deviate too much from the standard 45 degrees, and a simple miter box for the ceiling plinth becomes useless - you can cut off the excess. The solution would be to purchase a rotary tool, but it is not cheap and this “one-time” purchase will be irrational. In this case, you can use the intersecting point method.
External corners
You have to deal with external corners much less often, but you still need to know about them so that if you need to work in such conditions, you don’t get lost in how to properly connect the ceiling plinth in the corners. Cutting external corners is carried out using the reverse technology to the previous option: first of all, you need to find the starting point of the corner, then mark the product in the place where it will be cut, and after that you can start cutting the plinth directly.
Before marking, the plinth must be completely prepared for installation or direct joining. The prepared product is placed in a miter box and pressed. If the long part of the plinth protrudes from the left, then you need to cut it according to the left 45 degree designation. On the right side the situation is completely repeated. Before joining the plinth in the corners, the parts need to be checked on site and modified if necessary.
Floor plinth: internal and external corner “by hand”
Floor moldings, as a rule, are quite wide and thick, and therefore finding only two points here, as for ceiling moldings, is not enough. To trim an internal corner, first place a point at its top at a height equal to the width of the plinth - in the figure this is a green point. From it to the left and right we set aside a distance equal to the thickness of the plinth - points 1 and 2.
We apply the left segment to the wall, and from point 1 we draw a line along it, perpendicular to the wall and put a point on the edge. We repeat the action with the right segment, only draw from point 2.
In the figure, the point is marked with the number three. We draw a line from it across the plinth to its opposite edge - we get point 4. Now we connect the green dot with points 3 and 4 - we get a line and an angle along which the molding can be cut.
How to cut a plinth: make the necessary marks in the corners
Important: trimming external corners is easier than trimming internal ones. We set points on the left and right segments: A – mark of the top of the corner of the wall; C – the point of intersection of the lines, which is obtained by alternately drawing the left and right sections of the plinth along the floor; B – from point C across the molding a line is drawn to its opposite edge.
By connecting these points with one line, we get a line along which the cut will be made.
Non-standard angles
It is quite difficult to encounter angles of non-standard values in modern construction - they are practically not equipped. However, such angles also occur - for example, in individual design projects there may be round areas. In such cases, the connection between the ceiling and walls still needs to be masked, so you have to figure out how to join the ceiling plinth in corners with a non-standard bend.
Usually the problem is solved by cutting the baseboard into several small pieces, the size of which directly depends on the bend of the corner. It is from these pieces that the connection of the ceiling plinths in the curved corners will be made. Having removed the excess putty after installation, you can begin installing the straight parts of the skirting boards.
How to cut a plastic baseboard: a simple plastic miter box
If you have to make repairs in your own home, then perhaps it makes sense to purchase a more serious tool - a rotary single-plane miter box. It is designed for cutting at angles of 15, 22.5, 30, 36, 45 and 90 degrees.
The design of this miter box includes 2 clamps - for clamping in horizontal and vertical planes, as well as a limiter that will allow you to cut workpieces to the same length. The hacksaw will be built-in here. If it is not clear how to cut a ceiling plinth, the video review below will help you.
Joining straight sections of skirting boards
When all the questions about how to connect the ceiling plinth in the corners have been considered, all that remains is to understand the technology for connecting straight sections of decorative strips. The importance of this stage of work cannot be underestimated - the slightest defects and irregularities will spoil the interior of the room.
You can begin installing straight skirting boards only after all corner elements have already been cut and installed. Before work, the products themselves should be carefully inspected, measured and modified if necessary - often skirting boards are cut unevenly during the production process, so their edges have to be aligned yourself.
The joining of ceiling plinths on straight sections looks like this:
- When the corner strip is assembled, you need to attach straight skirting boards to it on both sides so that they are located close to each other. In the future, this operation will be repeated with the remaining parts.
- At a certain point, the straight bar will reach the corner opposite to the one from which the installation began. At this stage, the smooth plinth must be marked and cut in accordance with the mark. To ensure that individual parts match perfectly on straight sections, it is worth sanding their edges with fine sandpaper.
- When joining skirting boards, you must use an adhesive suitable for the specific material. The planks must be pressed well, but carefully during installation, so that excess adhesive composition protrudes outward. Excess glue can be removed with a dampened rag - just be careful not to smear it on the wall and ceiling.
- Having installed all the parts in their places, all that remains is to process all the cracks and gaps using a special sealant or putty. Ceiling plinths can be left in their original form, or they can be covered with a layer of paint.
It is important to know
A carpenter's miter box is a tool with which you can cut a fillet exactly at an angle of 45 °. The connected planks will form a right angle. A miter box of simple design is suitable for such work.
Miter box for joining skirting boards
If this tool is not available, you will have to mark using a ruler and a protractor. The cut lines are marked using a pencil. You need to understand that a fillet with internal cavities cannot be accurately cut in this way.
To make the cut perfectly even, you should use a jigsaw - when performing the operation with a hacksaw, the edges of the plinth will be torn.
The area where it is planned to install the plinth must first be leveled, cleaned of construction dust, and primed.