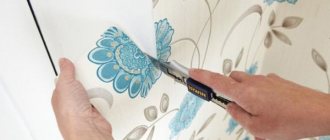
More than anything else, I hate wallpapering . This wet, dirty work has always been a burden to me. But not at all because I am afraid of dampness and dirt. Wallpapering is always a struggle between “good and evil”. On the one hand, there is a wet paper tape that slips out of your hands, constant glue bubbles, and a discrepancy in the design. On the other hand, you need to make sure that the texture is continuous, the surface is not stained with dirty fingerprints, and the edges and corners do not come off. This maneuvering between the desire to do everything perfectly or tear off and throw this “dumb” paper into the trash bin has always bothered me personally. I'm trying to do everything right. By an evil irony of fate, every now and then I have to glue wallpaper. Sometimes for myself, sometimes for my parents, sometimes for my friends. I didn't like wallpapering, but I acquired some specific knowledge and skills on how to make the job less unpleasant. Would you like to tell me...
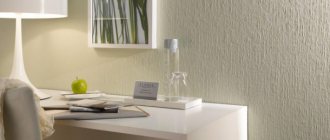
Wallpapering. Price per square meter
Usually people try to entrust someone else with work that they themselves do not like or do not know how to do. When we bought a country house, I had a dilemma. Either hire a “crew” to hang the wallpaper, giving them your hard earned money, or shove your pride to hell and deal with the wallpaper yourself.
As usually happens in such cases, everything was decided by the numbers and, partly, by my natural tight-fistedness. In response to the question “ how much does it cost to put up wallpaper ,” I heard different prices. But no one mentioned less than 150 rubles per square meter. On the one hand, it doesn’t seem like that much. But we must understand that we are not talking about the floor area of the room. We need to measure the walls.
For example, the length of the kitchen wall is 8 and the width is 3.6 meters. Ceiling height is 3 meters. If you calculate everything, the area of the surface to be pasted will be almost 70 meters. In reality, of course, it will be less, since the room has two windows and a door. But in any case, the cost of the work will be about 9,000 rubles. And this is the minimum.
But the kitchen is far from the only place where you need to hang wallpaper. And, please note, this is only the cost of the work. But you still have to spend money on materials.
So we have to decide a difficult question: either hire a crew, paying them a lot of money, or kill a couple of days of your own time, and use the saved money to buy something you need. After some thought, I decided to go with the second option.
What to do?
In order for non-woven or vinyl wallpaper to stick without problems, you must follow the following operating rules:
- Buy finishing material only in construction stores that work directly with the supplier or even the wallpaper manufacturer. It is best to verify the quality of the material from the seller by asking to see documents for the finishing products.
- Select an adhesive of the brand and manufacturer recommended by the company that produced the wallpaper. If the brand of glue is not specified exactly, take mixtures with the recommended composition and properties.
- Carefully prepare the surface to be pasted: there should be no obvious differences in plane level, defects, foreign debris and similar troubles. Prime the base and wait for the recommended time (usually from 6 to 12 hours).
- Follow all instructions on roll labels exactly. Any deviations from them may result in the appearance of blisters or wrinkles.
- Select tools that are suitable for a specific type of wallpaper. If the manufacturer specifies a rubber roller, a soft wallpaper spatula, or thick terry cloth without texture as a smoothing device, then you need to choose these items.
- Avoid drafts or temperature changes in the room while the glue is drying.
Non-woven base
Non-woven fabric is distinguished by its plasticity and strength, but as a result of contact with wet glue it can expand, losing its hardness. It is necessary to carefully apply the adhesive composition to the canvas so as not to damage the strip.
If, when hanging wallpaper on a non-woven basis, wrinkles begin to appear, they can be removed by straightening the canvas. It’s better to peel it off right away and redirect it in a new way than to deal with defects after the glue has dried.
On the other hand, you can continue gluing, but changing the size of the strip, cutting off the “unruly” parts along the entire length with a stationery or wallpaper knife. This method is rarely used, but it allows you to save material without throwing away the canvas completely, especially if the wallpaper has wrinkled in a corner or in an area no wider than 5-7 cm. On a meter-wide roll without a large pattern, this will not be noticeable. If wrinkles appear only in the corner, then gluing can be done so that the rolled material joins exactly in this area. To do this you need:
- Glue the first strip directly to the corner on the left or right side (depending on the movement from the starting point) so that about 2-3 cm protrudes.
- Using a 30cm metal spatula and an upholstery knife, trim off excess material. To do this, you need to attach the tool tightly with the metal part to the glued wallpaper, pressing it as much as possible against the wall with the decoration. Then, without lifting the knife and smoothly moving the spatula in 25 cm increments, move the blade along the material. From the bottom, in order not to lift the wallpaper, you need to cut it towards the top.
- Glue the second strip on the wall adjacent to the corner so that approximately 2-3 cm extends onto the glued wallpaper, carefully smoothing it out with a rubber or plastic soft spatula.
- In a similar way, cut off the protruding material, wipe the joint from the protruding glue with a damp sponge.
Attention
Attention! Non-woven wallpaper soaked in glue can be torn very easily, so you should only select a knife with a very sharp blade and cut using a metal spatula.
Vinyl
This type of roll material is heavier and is most often produced in meter rolls. Therefore, working with it is less convenient than with a 50-centimeter non-woven counterpart. Heavy vinyl is not so easy to lift to a height of up to 3 meters, taking into account the treatment with an adhesive composition. Careful preparation for gluing and the help of one more person are required (if workers are not hired).
If wrinkles appear when applying vinyl wallpaper, it is more difficult to eliminate them than with non-woven wallpaper. After joining and forming an even sheet on the wall, it is necessary to correct defects with smoothing devices.
If such unevenness appears after a day or more, you can try to correct it using a steam generator or a regular iron with a vertical steam function. After this procedure, very carefully smooth out the desired area with a rubber or plastic spatula, simply pressing it against the wall.
If steaming does not give an effect or the wallpaper is damaged due to strong impact on it, then you can seal it with an appropriate piece of rolled material. Therefore, you should try this method only with full awareness of the possible negative consequences.
Where to buy cheap wallpaper
Here's another interesting question. Many believe that wallpaper cheaper than 2,000 rubles per roll is just toilet paper, which is completely unacceptable to glue to walls. Even in a country house, not to mention a city apartment. People shell out considerable amounts of money, completely unaware that exactly the same wallpaper can be bought MUCH (that’s right - in capital letters) cheaper.
There is such a thing - joint purchase. Maybe you heard? There, goods (and services too) are bought in huge quantities, pooled at more than the wholesale price, and then everyone takes their share of the total purchase. If you are not in the know, then all this may seem confusing and not entirely reliable.
But my wife and I constantly use joint purchasing services. This allows us to save a lot of money. For example, we bought 12 rolls of wallpaper (53 cm wide) for only 2,300 rubles. If you buy them in a store, then each roll will cost about 800 rubles. The total will be 9600 rubles.
Buy the same thing for 2300 or 9600! Of course, you won't be able to receive your purchase right away. We had to wait almost a month for the wallpaper. But, if you're not in a hurry, why not save money?
Therefore, when we tell our friends that all the wallpaper for the entire country house cost only about 5,000 rubles, almost no one believes it.
Fine. If you don't like a joint purchase, I don't insist. Then go on a raid through wallpaper stores and sales guards. It depends on your luck. Sometimes they sell off the leftovers. For example, there are 6 rolls left in the store. They have been lying around for a long time, no one buys them, because everyone needs more. And then the price for them can be sharply reduced.
Or some wallpaper from last year’s collections is on sale. Unless you are used to always being on the cutting edge of progress and fashion, then last year’s wallpaper will probably do for you. And even the year before last. After all, if you think about it, you won’t re-paste the wallpaper every year just because it’s outdated and new, more fashionable ones have come on sale? There are probably such connoisseurs, but I hope you and I are practical people.
And in general, for that matter, you will notice the pattern on your new wallpaper literally for the first couple of days. Then it becomes so familiar that you won’t even pay attention. Therefore, maybe it’s not worth killing hundreds of hours to visit all the wallpaper stores and choose wallpaper with some particularly suitable pattern?
Causes of bubbles
If the wall with new wallpaper is not even and smooth, you need to find out the reason for the swelling of the canvas. Most often it appears due to the following reasons:
- incorrect gluing procedure;
- deformed building geometry.
Bubbles not only spoil the appearance of the interior, but also provoke the appearance of mold and mildew. They have a detrimental effect on the health of residents, causing allergies. Various insects can live in bubbles under the wallpaper.
First, you need to find out the cause of the problem in order to prevent it in the future. Perhaps air got under the wallpaper or the master applied too much adhesive to the material. There is no need to redo everything again, unless there are too many bubbles. Small irregularities can be removed quickly and without leaving any traces. It is best to do this immediately after gluing the canvases. The less time has passed, the easier it will be to hide unaesthetic marks.
Before gluing wallpaper, you need to carefully study the manufacturer’s instructions, since each type of material has its own requirements for installation.
When gluing paper wallpaper, you need to apply the sticky liquid directly to the material. If the fabric is non-woven, the glue is distributed over the wall.
Surfaces must be well prepared for work - clean them of fungus, old wallpaper, paint, mold. You should not hope for a satisfactory result if the wall is uneven. It is best to glue the coating to plasterboard, plastered, putty surfaces. Even small cracks, chips, holes can ruin the appearance of the surface
Particular attention should be paid to the corners. If there are large irregularities, they can be removed using a grinder, and folds and dips can be corrected with plaster
The walls need to be treated with a deep penetration primer and wait until it dries. This will reduce the likelihood of mold and mildew and also ensure good adhesion between the wall and the material.
It is necessary to stock up on high quality glue that sets quickly. It must match the type and density of the fabric. For thick wallpaper, it is ineffective to apply a weak adhesive, and vice versa. It is not recommended to use PVA glue. It leaves yellow marks on the walls and does not dissolve in water, which will complicate the removal of the coating in the future.
Stores sell special pink glue that, when dried, becomes invisible. It helps not to make mistakes in the process and remove excess in time, especially if you first illuminate the work area with side light.
When choosing glue, craftsmen prefer foreign products that dissolve well and hold materials firmly on the walls. You should not buy regular glue with starch, as it leaves bubbles, yellow spots and folds.
Each type of wallpaper requires a special glue. For paper coverings, universal compounds are suitable, for vinyl – special glue for vinyl materials. The non-woven covering can be installed using non-woven wallpaper adhesive. When gluing borders, you can choose either a universal composition or one designed for vinyl materials. Some self-adhesive borders can be attached without the use of additional substances.
Preparing walls for wallpapering
Before you start gluing wallpaper, you should take the preparation of the walls seriously. They, walls, are very different. On one side there are hewn logs of a wooden frame in a village house:
Please note: more than one layer of wallpaper has already been pasted onto these walls. It is not surprising that over time the walls became “soft”. That is, if you press on the surface of the wallpaper on the wall, it is pressed through. Of course, there are several more layers underneath them. And all this is like a puff pastry bun. An excellent environment for a variety of rodents and insects!
So, the old wallpaper should be removed and the walls should be leveled. For example, sheets of plywood or other similar material:
Ideally, it is advisable to plaster such walls altogether. But not every owner of a country house will agree to this. The costs are too high.
But if the walls are already plastered, it is very advisable to go over them with a primer. It will “bind” all the dust on the surface of the walls; the wallpaper will “grab” much better and will not fall off. You can read more about priming walls in this article: How to best apply primer so that the wallpaper does not fall off. Notes of an old painter
Why treat walls?
Many people don’t understand why the easy process of wallpapering needs to be complicated by carefully preparing the walls. In addition, this is a very time- and money-consuming, as well as a “dirty” event. The answer is simple. Wall cladding is needed in order to:
- the new decorative coating looked aesthetically pleasing;
- the trellises held firmly;
- protect against mold;
- glue without problems.
Housing, both in the secondary and in the new building, needs similar repair work, the only difference is in their quantity. Apartments on the primary market often already have a fine finish; in this case, you won’t have to bother with preparing the walls for long. Homes with history will require a lot more effort. In this case, the step-by-step preparation of surfaces for wallpaper must be strictly observed. Each stage has its own purpose. Finishing specialists do not recommend skipping any stage, as this will affect the final result.
Proper processing of walls before applying a new paper layer goes through 3 main stages:
- cleaning;
- alignment;
- primer.
Below is a step-by-step sequence of actions.
Wallpapering tools
Deciding to take the hit ourselves, we were puzzled by purchasing consumables and selecting the necessary tools.
Here are two alternative options: roller and brush. Sometimes you can get by with just one thing. But some wallpaper manufacturers recommend applying glue to both the wallpaper and the wall. It will be easier for you to “glue” the wall with a roller, while it is easier to apply wallpaper with a brush.
The bucket should be such that the entire length of the roller fits in there without interference. Otherwise, you will have to waste precious time trying to dip it either with the left or the right side.
There is one more thing that makes the job very easy. This is a plastic spatula. I admit, at first I was quite skeptical about it. In fact, it turned out to be much more convenient for them to smooth out the pasted wallpaper strips. Now I can’t even imagine how I used to manage without a spatula.
In order to reach the very top of the wall, you need to prepare a stool or even a stepladder. It all depends on the height of the ceilings. Some people put a “chair on a table”. It's also possible, but dangerous. In addition, you will have to constantly get down and get on again. You will get tired.
While wallpapering, your hands will always be covered in glue, so among other things, you should buy some cheap cotton shorts from the clothing store. Of course, you can work in any other pants, but such shorts are much more convenient for wiping your hands than constantly getting tangled with rags. Do not be surprised. I really encourage you to wipe your hands “on your pants” while working. Try it and you will understand how convenient it is. There is nothing to feel sorry for them - then you just wash them and the next morning they will be as good as new. Wallpaper glue washes off perfectly.
Methods for eliminating an unpleasant problem
It must be said right away that it is not at all necessary to remove such a finish and re-glue it, although if there are too many bubbles and they are large, it is better to do just that. In other cases, the problem can be easily dealt with without resorting to such a drastic solution. You just need to act quickly, otherwise the material for finishing the walls will delaminate even more, and dangerous places will increase in size. If you are working with vinyl wallpaper, take a spatula or brush and smoothly push excess glue or air towards the edge of the canvas. In the case of non-woven wallpaper, it is better to replace the spatula with a rubber roller, and when working with paper, arm yourself with an ordinary dry rag.
However, there is no need to worry if the accumulation of air under the canvas is insignificant. After all, drying wallpaper is characterized by “shrinkage”, that is, over time it will stretch spontaneously and the canvas will level out.
Step-by-step guide to eliminating air under wallpaper
If the previous advice did not solve the problem, you can do this: pierce the bubble with a needle and iron the problem area with a spatula or other improvised means so that all the air comes out of it and the fabric is stretched.
Video tutorial on removing bubbles from wallpaper
To use the following advice, you need to arm yourself with a regular syringe. Pour liquid glue into it, carefully pierce the problem area and squeeze the contents of the syringe inside. Go over the wallpaper again with a rag or spatula, evenly distributing the glue inside the hollow space. If its remains come to the surface through the hole made, they can be easily removed with a damp sponge.
Many take a more drastic route and cut the canvas across or along the bubble. If you are not sure how the wallpaper will behave after such an intervention, then it is better not to do this. The fact is that there is a danger of not connecting the ends of the cuts to each other due to the characteristics of the material. And even if the base soaked in glue lies on the wall as if its integrity had not been violated, the dried ends of the cuts will stretch and separate, forming a gap.
How to get rid of bubbles on wallpaper using special glue, such as PVA? This adhesive composition is less demanding on surface preparation, so you can be sure that it will firmly connect the materials, but won’t it ruin the appearance of the canvas? Quite possibly.
PVA glue will help get rid of bubbles on wallpaper
To prevent such a nuisance, before making a puncture in the wallpaper, the area around the future hole should be covered with tape. The tape will protect the canvas from glue residue. This method is worth adopting for those who glue paper or very light wallpaper. After filling the syringe with PVA glue, squeeze it under the wallpaper and spread it with a roller or rag, moving from bottom to top and to the sides.
Now you know how to eliminate bubbles on wallpaper and enjoy a fresh renovation.
Wallpaper glue
We used two options. The idea in both cases is approximately the same. For non-woven wallpaper we used Moment wallpaper glue , and for paper Metylan Universal :
It's impossible to say which is better. Each is designed for its own type of wallpaper. A common feature is quick preparation, long-term storage in liquid form, and the ability to move a strip of wallpaper already partially pasted on the wall.
We can only be glad that they are now selling such almost ready-made glue. You just need to add water and stir. After all, paste and other unpleasant substances were previously used for this.
Useful tips and how to fix errors
Before gluing the canvas, it is necessary to prepare the surface.
If the wall has undergone repairs and the application of gypsum putty, it is necessary to apply a primer, it is best to take ST17 or its equivalent. This will significantly reduce adhesion - reduce the absorption of the surface. The glue will not dry instantly or unevenly. If the walls have been cleaned of previous wallpaper, you also need to apply a primer only after thoroughly removing the previous material. Important: It is best to choose a glue with a composition that allows you to adjust the canvas when gluing. These data are indicated by the manufacturer on the packaging of the roll or the information can be provided by the salesperson in the store. If it is recommended to dilute the glue for glass wallpaper in a smaller proportion than for non-woven or vinyl, it is better to stick to this consistency
Thicker glue is always easier to adjust when gluing
If it is recommended to dilute glue for glass wallpaper in a smaller proportion than for non-woven or vinyl, it is better to stick to this consistency. Thicker glue is always easier to adjust when gluing.
The first strip must be aligned in accordance with the marked landmark and in an area without corners or other openings. Leveling should be done using rubber or plastic spatulas, rollers or a soft cloth. In this case, movements should be from the center up and to the sides, and then from the center down. But not horizontally, but as a “herringbone” is drawn - this will more effectively expel the air and connect the canvas to the surface.
Do not allow the canvas to bend sharply, as this will make the problem area vulnerable to tearing and with a visible defect. If the bubble cannot be removed, then you need to peel off the strips to the required height and re-glue it, starting from the problem area.
Due to the slight expansion of non-woven fabric as a result of contact with liquid, it is best to glue the fabric with a slight overlap. It will then separate as the glue dries, and no gaps will be visible. The excess is cut off with a wallpaper knife using dry material.
It is very difficult for one person to paste wallpaper while noticing all the nuances in a timely manner. Therefore, if you have no experience in this matter, it is better to enlist help. If two people level the canvas (one on top and glues the first 20-30 cm, and the second simply does not allow the rest of the strip to stick to the wall), then the process is greatly simplified and the number of bubbles is reduced to a minimum.
If, as a result of gluing, several small bubbles still form, they can smooth out on their own after a couple of days. If this does not happen, then you can release the air without damaging the decorative layer by puncturing it with a needle or medical syringe. Excess air is simply sucked out of the defect cavity.
When gluing non-woven or vinyl wallpaper, bubbles or wrinkles may appear. To eliminate them, you don’t need to panic or immediately change the material. It is enough to peel off the canvas and try to adjust it so that the defects are eliminated.
High-quality material, following gluing technology and selecting the right adhesive composition will reduce the problem to a minimum. If, after gluing, the wallpaper wrinkles, the creases can be eliminated by trimming or puncturing and re-gluing the problem area.
Before starting work
Everything is almost ready. Morale is high. A stepladder, brushes, rollers and other available means are put into combat mode. Wearing the shorts I already mentioned. Time to start.
You understand that it is most convenient to work in a room where there is no furniture or other junk at all. Therefore, if possible, it is worth removing everything unnecessary from the room.
Unscrew all sockets and switches :)))
We remove door and window trim (if any) and baseboards.
It is better to glue wallpaper at a temperature of 15 to 25 degrees. If there is more, the glue will dry too quickly. For the same reason, air humidity should be 60% or more. True, laminate does not like excessive moisture, but we hope it will forgive us this short-term liberty.
Next we prepare the wallpaper strips. First you need to measure the height of all the walls of the room and identify the highest point in the room. Do not be surprised. Even in a perfectly renovated apartment, a height difference of one to one and a half centimeters is considered normal. To measure height, it is most convenient to use a laser rangefinder.
It is necessary to take measurements of the height of the walls in each corner of the room and, in particularly difficult cases, in the middle of each wall. I only measured the angles. You can see all the results in the photo above. As you can see, the room was not the crookedest in the world. The difference in heights in the corners was about 3 millimeters. The finishers hardly let us down.
This means that you can immediately cut pieces of wallpaper to the required length, so that you don’t have to return to this later. It is better to cut wallpaper with a knife. Don't be upset if you cut it a little crooked. All the same, the bottom and top of the wallpaper will be hidden by the baseboards.
It’s a completely different matter if you need to combine a pattern on the wallpaper. There are two strategies here. Or we combine the pattern on the floor, and then cut off the pieces. You can cut wallpaper with allowances based on the distance between repeating image fragments. In this case, you need to combine the wallpaper directly on the wall.
Many people do not approve of this method of fitting due to the excessive consumption of wallpaper and glue. But on the other hand, you save time on cutting and do not risk mixing up already cut pieces.
The wallpaper is cut and laid in a certain sequence (if you need to combine a pattern) or simply on top of each other. It is better to store the “cuts” in another room so that they do not get underfoot.
Why does this happen when gluing?
Most often, the reason for the appearance of air bubbles or wrinkles on wallpaper occurs due to inappropriate quality of the material. Nonwoven fabric tends to expand when wet. On good canvases it is almost imperceptible, but low-grade wallpaper strips can go “accordion-like” not only in the corners, but also along the even plane of the walls.
Advice
Non-woven wallpaper expands upon contact with the adhesive. This must be taken into account and appropriate adjustments must be made when gluing.
When sticking to the wall
There is only one way to check what quality of material you have found - by gluing a test strip. If it lays down perfectly, and no visible defects appear within 24 hours (while the glue has completely dried), then feel free to use the remaining rolls. If the canvas is swollen or very noticeable wrinkles appear, then it is better to exchange the remainder in the store for others, but of the same quality.
The only drawback of this method is that it takes a lot of time. But it is possible to get by with existing rolls if you glue the sheets using a special technique that reduces the likelihood of defects and prevents their occurrence.
In the corner
On the inside and very rarely due to tension on the outside corners, the appearance of wrinkles is possible due to poorly sealed joints between panel slabs or due to hidden cracks. Air passes through them, the temperature of which differs significantly from the microclimate established in the room.
As a result, part of the adhesive composition dries a little faster and peels off from the wall, and part of it holds on more tightly. This uneven distribution of sizing areas results in the formation of wrinkles.
Poor quality wallpaper results in uneven gluing due to stretching of parts of the canvas even at the moment of joining the strips, which can be corrected during gluing. But the wrinkles that appear on the glued wallpaper require a different approach to eliminating them.
We begin to dilute wallpaper glue
This process is not particularly difficult. You just need to read the instructions properly and understand how much water to pour. If you don't add enough, the glue will be thick. It will be uncomfortable to work with him. But this can easily be solved by adding additional water.
But if you overfill it... at best, you will have to urgently run to the store for an additional box. If this is not possible, then you will have to put up with the fact that the glue will be liquid, will drip off the wallpaper, will smear your floor, but will not stick the wallpaper as well as you would like.
In a word, if it says 9 liters, it means 9 liters. The instructions usually contain some variation in the amount of water, depending on what kind of wallpaper you have. For vinyl, the consistency should be denser than for paper. If you want to treat the walls with glue as a primer, then you need to add more water than for wallpaper. In the photos with boxes of glue that I showed above, there is a table for calculating the amount of water per pack.
When pouring the contents of the box into water, do not forget to stir it to avoid lumps. As a result, you will get a nasty white-gray liquid that looks like jelly.
During the stirring process, you, like me at one time, may get the impression that something has gone wrong. After all, you have already poured out the entire contents of the box, and what you get in the bucket is some kind of liquid slurry. However, don’t worry: in a couple of minutes everything will return to normal:
After preparation, some people immediately begin to furiously glue wallpaper, fearing that the glue may dry out. Believe me, you can take your time here. Even if you don't finish the job in one day, you can simply cover the glue bucket with a plastic bag and continue wallpapering tomorrow.
Of course, some experienced adhesive specialist can prepare wallpaper glue at home using improvised materials. Moreover, it will be much cheaper than purchased. However, we did not take risks. Indeed, in case of failure, you will have to buy not only new glue, but also the wallpaper itself.
How to avoid the formation of blisters?
If you strictly follow the recommendations on the packaging and strictly follow the installation technology, you can avoid swelling of the wallpaper. Do not neglect the preliminary preparation of the wall, which includes leveling and priming the surface. This will avoid the formation of voids and prevent loose material adhesion.
Particular attention should be paid to the corners. Strongly protruding irregularities must be removed using a grinder, and potholes, dips and raised folds must be plastered
You should also pay special attention to the choice of glue. You need to select the composition taking into account the thickness, texture and material from which the wallpaper is made
When using dry mixtures, you need to be very careful when diluting the composition and strictly adhere to the required dosage of water. A solution that is too thin will not provide reliable and uniform fixation of the canvases and will lead to the formation of blisters.
When diluting the glue, you should not allow air bubbles to appear, which can subsequently lead to bubbling of the wallpaper. This is facilitated by stirring too quickly and intensely.
When gluing corners and removing blisters, it is not recommended to use PVA glue. Even if there is no wallpaper glue left, it is better to purchase a new package. PVA leaves yellow spots after drying and does not allow the glued sheets to be removed during the next repair. With its help, you can only prime the wall, after mixing it with water in equal quantities. This will ensure very good adhesion of the canvas to the wall and prevent the appearance of bubbles in the future.
How to remove bubbles under wallpaper: recommendations for installing wallpaper
To prevent bubbles from appearing on the walls after wallpapering them, use these recommendations:
1. Prepare the surface thoroughly for wallpaper installation. Try to level the walls as efficiently as possible; be sure to apply a primer to them. The soil will not only protect the wall from the development of mold and mildew on it, but will also increase the adhesion between the wallpaper and the wall.
2. Choose glue in relation to the type and density of wallpaper.
3. When installing wallpaper, observe certain temperature conditions: room humidity no more than 50%, temperature 18-23 degrees.
4. If the temperature in the room is higher than normal, place a bucket of water in it; it is recommended to cover the windows with thick cloth. This will prevent the wallpaper from drying out too quickly.
5. Within two days after the start of installation work, do not create drafts in the room and do not turn on the air conditioning.
6. In the process of diluting glue, strictly follow the instructions, measure the water with special devices, and not by eye. There is no need to mix the glue too much; the presence of oxygen in its composition leads to the formation of bubbles.
7. Depending on the type of wallpaper, apply glue to the wall or canvas using a tool recommended by the manufacturer.
8. Watch the force of pressing on the wallpaper, try not to damage it during the alignment process. Do the work with at least two people. One person glues the wallpaper on top, and the second on the bottom.
Apply glue to wallpaper
Depending on the type of wallpaper, they need to be coated with glue in different ways. For example, while we had simple paper wallpaper, we applied the tape itself and at the same time the corresponding section of the wall. Then they literally immediately started gluing the wallpaper to the wall. If you hesitate, the paper will get wet and begin to unravel right in your hands. Therefore, we did not risk applying several tapes at once and then gluing them one after another.
If the wallpaper is vinyl, on the contrary, you need to first soak it a little with liquid. The instructions say that you first need to spread them and then roll them into a roll. In fact, after spreading, you need to stack the wet surfaces with each other so that the glue does not dry out and the base has time to soak in:
They should remain in this state for 10-12 minutes. This allows you to organize a kind of conveyor. But not at once. First you should get used to the wallpaper, learn how to smooth it and level it. It is better to do all this slowly.
In what cases is it necessary to update liquid wallpaper?
The need to restore or replace a certain area of liquid wallpaper arises quite often. As a rule, these are places near which various household items are most intensively used:
- The section of wall around an outlet or switch;
- If the furniture touches the wall either statically or as a result of transformation. For example, when unfolding a sofa;
- Areas on the corners that are most often touched when moving around the room;
- Various protruding elements of building structures or design objects: columns, porticoes, arched openings, etc.
Even with the most careful use and periodic cleaning, such areas lose their original appearance and significantly reduce the quality of the interior design.
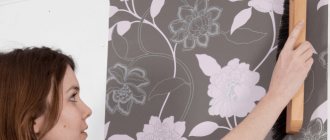
Let's start gluing wallpaper
Where should you start gluing wallpaper? Some go from the corner in different directions. Others from the door. We tried different options and came to the conclusion that we should start gluing the wallpaper from the window. In this case, you won’t have to deal with this problem later:
I agree, the excess can be cut off with a knife, but... why create a problem where there is no need to create one? It is much easier to start wallpapering from the window. Then the edge of the wallpaper will be even and you won’t have to cut anything:
This idea seemed more than successful to us. After all, when a person enters a room, the first thing that comes into his field of vision will be the window, and not the door through which he entered. This means that it’s better to do all the adjustments and gluing right at the door - it’s not so obvious. Moreover, the door lining can hide all the roughness. The window usually does not have a casing:
When gluing wallpaper, it is more convenient to be directly under the ceiling, rather than stretching out with all your might while standing on a stool. Having glued the sheet of wallpaper, we begin to smooth it with a spatula. This is a very convenient tool. With its help, you can not only make the surface perfectly flat by expelling all the glue bubbles, but also pry up the uncoated edges and corners of the tapes in order to go over them with a brush with glue:
The first 1-2 strips of wallpaper are considered the most difficult. You are not yet used to them (and they are not used to you), so you don’t know how they will behave when smoothed out, when partially torn off the wall when dispersing the folds. That’s why you shouldn’t push yourself by spreading glue on several strips at once. You will begin to rush and get nervous. It's better to do everything slowly.
Pay attention to the laser level . This is a very good help for wallpapering (and much more). The essence of the device’s operation: displaying a strictly vertical line on the wall (and horizontal too):
Be prepared for a situation where the very first strip of wallpaper will have to be removed and thrown away. For example, it may tear so badly that it will be impossible to repair it (small tears can usually be smoothed out). Or you won't be able to smooth it out properly; wrinkles will remain. Either you applied too much glue, or, on the contrary, very little. And if the first tape also lies in the corner of the room...
In a word, don't be upset. You'll see, your next tape will turn out much better. And by the end of the work, you will have accumulated so much invaluable experience that it will even be a pity that everything ended at the very moment when you were just starting to succeed.
Looking at the results of your work, it’s hard not to get depressed. I remember that I myself was not happy with the wallpaper in the first room. They seemed ugly to me, all with some dark spots:
My wife forcibly persuaded me to wait with conclusions and decisive actions until it was completely dry. Now they really look much better. I'll say more. Those wrinkles that still remained on the surface here and there miraculously smoothed out on their own after the wallpaper dried. The results were quite decent, smooth walls. No worse than if we invited a brigade.
And the fact that we pasted some stripes upside down is nonsense, right? I told you that in a couple of days we won’t even notice it. So, there is no reason for despondency and sadness. Plus, remember how much money you saved!
Preparatory stage
First, everything in the room that can be removed is removed, including door frames and baseboards, if possible. They also remove sockets and switches, closing the boxes with wires with plugs - plastic or wooden.
You also need to know how to glue wallpaper correctly
Turn off electrical outlets
When working with electricity, we de-energize the room and do not turn it on until we are finished. It is advisable to carry out all work, including wallpapering, with the power turned off. The work is “wet”, and water or glue can get on the wires and short out. If the wiring is done according to all the rules and there are protective circuit breakers, this is not a big deal. They'll just turn off the power and that's it.
If the wiring is still done in the old way, it can be dangerous. The worst part is that in this case there is often no way to turn off the power in a separate room. Only in the entire apartment or, at best, in half of it. Then the solution is to remove the power wires from the sockets and switches (with the power off, of course) and carefully insulate the ends, then hiding them under plugs. Then you will have to unwind them and put them back in place, but it will be safe.
Lighting during work is temporary - extension cords are pulled from other rooms and portable lamps are turned on. Once you have dealt with electricity, you can move on.
If the walls are just leveled and puttied, you don’t need to do anything other than primer. But if they have an old coating - wallpaper or paint - they will have to work. First, remove the previous finish.
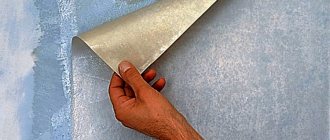
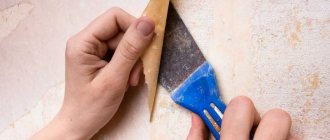
Cleaning off old wallpaper
If wallpaper is pasted on the walls, pry it up in a random place with the corner of a spatula, then pull it by the bent corner, tearing it off. If you're lucky, entire strips come off, sometimes several meters long in a single strip. But more often it comes out in small fragments. First, they remove everything that comes out “dry”. If it’s really difficult and in small parts, take a bowl of water and a roller and wet the walls in this way. To make them come off easier, you can add dishwashing detergent to the water.
Things don't always go so well
If the wallpaper is paper, water is simply applied to the surface. If they are vinyl or with some other durable film, first they break through the film. This can be done using a spiked roller, or with a brush with metal bristles. The main thing is to break through the film so that water can be absorbed into the base - paper or non-woven fabric - and soak the glue. Sometimes you need to wet the wallpaper several times to make it come off easier.
Next, the steps are the same as with paper ones: pry them with a spatula and tear them off. Sometimes this technique of tearing off pieces is ineffective. It works faster if you scrape off the soaked finish with a spatula. Then scrape the blade along the wall at an acute angle. In general, it doesn’t matter how, but the old wallpaper must be completely removed.
Removing paint and whitewash
You also have to work with a spatula, scraping off centimeter by centimeter. The work is monotonous and rather tedious, and also dirty. There are several ways to speed things up.
Oil paint on concrete
There are actually two options: chemical and mechanical. Chemical - these are special paint removers. The composition most often looks like a gel. They are applied to the surface and, after some time, (indicated on the packaging) it rises with bubbles or begins to shrink. The paint has softened and can be removed with any spatula.
This is what the paint looks like after the “work” of washing
Everything happens quite simply, but there are two “buts”. First, the price of the wash is quite high. Secondly, the fumes are clearly not useful. You need to work in a ventilated area, but do not let the remover dry, otherwise there will be no effect. And still, even with ventilation, sometimes my head hurts. So a respirator won’t hurt, and gloves are a must.
The mechanical method is not just a spatula. This will take a very long time to scrape. Use a grinder or hammer drill. The grinder has brushes made of metal wire. You can try to remove it like this. The method works, but not always or it is too slow. Then you can take a hammer drill and a chisel, and holding the chisel perpendicular to the surface, move it along the wall without deepening it. The paint bounces off quickly. After such a “shock” treatment, all that remains is to clean off the residue with a spatula.
Water-based emulsion, whitewash or paint on gypsum plaster
Removing this type of paint on walls is no easier. You can scrape it off, just very, very slowly. The solution is very simple: again water and a special paint scraper. You can buy it at a hardware store. Immediately take several spare blades: for example, the kitchen needs three or four of them.
Coat the wall well with water. Brush or roller, several times possible. Then you leave it to soak. And then you start cleaning with a scraper. The paint just pops off. It is only important that the wall is well wet.
Read how to choose wallpaper for the corridor and hallway here.
Sealing irregularities
Here you will first have to assess the condition of the walls. First you need to remove all the nails and screws, remove chips and repair cracks. Then examine the results. If the walls are more or less even, there are only small defects, you can get by with occasional leveling. Only cracks, dents and chips are repaired. They can be covered with finishing putty. Just before leveling, completely clean the wall of dust and pieces of wallpaper, and then cover it with a primer (with a wall roller and a brush in the corners).
If the wall has been “treated” with a hammer drill, you cannot do without full putty of the entire wall. Mostly today they use gypsum putty. First, apply a layer of primary or starting. It has a coarser grain and the layer can be up to 3-5 mm. This composition is used to level out the main unevenness, trying to achieve a smooth surface. After drying, they pass through a special mesh, removing any unevenness or sagging that may exist.
Afterwards finishing putty is used. It is very plastic and is applied in a thin layer - up to 1-2 mm. After this, the wall becomes smooth (after the irregularities have been smoothed out with a mesh, only with a smaller mesh).
Primer of walls
The second layer of primer is applied after puttying. It forms a film on the surface that reduces the absorption of the glue and also improves adhesion. For wallpapering, you can use a thinner wallpaper glue as a primer. Each pack has a table indicating the amount of water for gluing and priming. We dilute the glue in the required proportion, wait for it to be ready (also on the package) and cover the walls with the composition. The priming technique is the same: first go over the corners with a brush, then with a roller on smooth surfaces.
In the video, for some reason, the use of primary putty is called plaster, but otherwise the sequence of actions is presented correctly.
The rules and methods for combining wallpaper are described in this article.
How long does it take for wallpaper to dry after hanging?
Probably everyone knows that after wallpapering, doors and windows cannot be opened in a room. But how long is it? Some say a day, some say a week. Of course, I would like to believe in the lesser evil, but let’s see what it depends on.
If you have paper wallpaper, it will dry quickly. Within 24 hours you can use the premises as usual.
Vinyl wallpaper on paper takes a little longer to dry - from one and a half to two days.
Vinyl wallpaper on a non-woven backing takes 3-7 days to dry.
If you are the happy owner of non-woven wallpaper for painting, then you can apply the latter only after the wallpaper has completely dried for 7 days. Otherwise, wallpaper that is not completely dry may slide off under its own weight and the weight of the paint.
What is the best wallpaper to use?
Since wallpaper with a dense texture is needed for gluing to plaster, the choice is limited. It is advisable to stick wallpaper on a plastered surface:
- paper;
- non-woven;
- vinyl.
Types of wallpaper that can be pasted on a plastered surface
Paper canvases are the most budget-friendly and environmentally friendly option. During reconstruction, they can be easily removed after wetting with warm water. The only drawback is that they cannot be glued in all rooms, as they quickly get wet and fade from direct sunlight. Therefore, pasting with them is carried out only in dry rooms: bedrooms, living rooms. Alternative materials are used for kitchens, hallways and bathrooms.
When gluing to walls without putty, duplex type wallpaper is used, which consists of two or more layers. Their front part is usually covered with an additional product that protects the surface from rapid wetting and exposure to sunlight.
Duplex wallpaper is a type of paper covering that can be glued without prior preparation of the walls.
Non-woven wallpaper is either completely made from the main component, or partially. Non-woven fabric is a composite non-woven material similar to paper, which consists of natural (cellulose) or synthetic (polyester) fibers. The front side is structural, applied using hot stamping.
This type of wallpaper is relatively resistant to animal claws, stains of various origins, and fading from sunlight. Another important factor when gluing them is that only the wall is coated, which is very convenient.
Non-woven fabrics do not shrink, unlike paper ones.
Vinyl wallpaper is two-layer. The backing layer can be paper or non-woven. Such a base is necessary for strong adhesion. The top one is made of polyvinyl chloride or other polymer material that can withstand mechanical damage, dirt and ultraviolet radiation.
How to remove bubbles from wallpaper
They are large and almost invisible. But both of them equally spoil the mood of the home owner.
To begin with, it is worth noting that after complete drying, some irregularities smooth out by themselves. Therefore, it’s worth pulling your hair out after a week or two has passed, and for some reason the unevenness doesn’t seem to disappear.
The cause may be unsuitable glue. For example, we bought glue for paper wallpaper and used it for non-woven wallpaper. Or the glue was not mixed well enough. Or unevenly applied. Or they hung wallpaper with the windows open, or then left the window open. Or dried the wallpaper with a hairdryer 
As a result, the excess glue under the wallpaper dried out and an air bubble formed in its place. What to do?
We take a regular medical syringe and fill it with wallpaper glue. Next, we make a hole in the wallpaper (just not a very large one). First we expel the air, and then we put glue in there. Next, using a spatula or a clean dry cloth, we begin to expel the excess glue through the hole. The goal is to create a thin layer of wallpaper glue under the surface of the wallpaper, which will reliably stick the bubbling part of the paper to the wall.
Pros and cons of plaster coatings
The smoothness and wear resistance of the walls depend not only on the hands of the master, but also on the components of the plaster:
- cement with sand;
- cement with lime;
- silicone;
- polymer type;
- gypsum
Each type of plaster has individual properties, pros and cons.
The most unsuitable option for wallpapering walls is a cement-sand composition. Sand creates roughness, which reduces adhesion. The choice of other materials is a very good decision. But the best option is inexpensive plaster, because the refusal of craftsmen to putty directly depends on the reduction in cost of repairs.
Gypsum plaster for wallpaper is preferable to other options
conclusions
Wallpapering is an amateur job. But if you “got this role,” then remember a few useful tips: use a spatula, a stepladder, shorts to wipe your hands, and don’t forget to prime the walls before gluing. If bubbles appear on the wallpaper, you just need to expel the air and pour glue into it using a syringe. A laser rangefinder and a level will be useful tools. Don’t try to cut the wallpaper perfectly; the ends will still “go” under the baseboards. Well, that seems to be all. Wish you luck! And remember: it's just wallpaper!
Text author: Alexander Shishkin
- Back
- Forward
Preventing blisters
Preventing blisters
To avoid the appearance of bubbles when wallpapering, you need to follow simple rules:
- When preparing the adhesive solution, follow the manufacturer's instructions. The solution should not be stirred too intensively, otherwise there will be many oxygen bubbles in it;
- the density of the glue must correspond to the selected type of wallpaper;
- the glue should be applied evenly, without gaps - for this you can use a special foam roller;
- after applying the glue, a piece of wallpaper should be folded in half (with the glue facing in) and left in this position for several minutes;
- The wallpaper is applied first to the top of the wall, carefully monitoring the even position of the strip. To do this, you will need an assistant who will hold the lower part of the segment and ensure its strictly vertical placement;
- all actions should be performed quickly but carefully.
If after all the manipulations the wallpaper continues to bubble, you should move on to more radical methods.
Master's recommendations
Bubbles appeared on the wallpaper
If after the wallpaper has dried, bubbles still appear on it, do not panic - they can be eliminated without consequences.
To remove the bubble that appears, you will need a 10 cc injection syringe and a thin blade or scalpel. To begin, the air pocket (bubble) should be pierced with a needle or sharp blade to allow excess air to escape. You should not make a cut that is too large, because there is a high risk of ruining the wallpaper - you will not be able to seamlessly close the edges, since the material has changed its structure after applying the glue and drying.
Fill the syringe with wallpaper glue and squeeze it through the needle, filling the resulting cavity.
Then this area should be leveled, carefully ironing with a dry soft cloth, removing excess glue that may come to the surface. After removing the bubbles, even if there were only a small amount of them, the room should be closed for some time (ideally several days). Avoid exposure to drafts. To glue wallpaper you should use special wallpaper glue.
The problem of swelling and deformation of wallpaper can be easily eliminated if you strictly follow the pasting technology and be careful.
Selection and preparation of glue
The quality of wall decoration with trellises is primarily influenced by the type of wallpaper glue. The correct choice of composition allows you to glue walls without bubbles and air pockets, with invisible joints, and uncontaminated canvases.
When choosing an adhesive composition, it is necessary to take into account the type of wallpaper base. So, for paper wallpaper, glue KMC, “Moment”, etc. is suitable. For vinyl wallpaper, special types of glue are produced, as indicated on the packaging. Non-woven ones can be glued with a special adhesive for non-woven fabrics.
You can read about the types of glue, methods of their preparation and application, as well as their suitability for different types of wallpaper in the material “How to choose wallpaper glue.”
Wallpaper doesn't stick
In conclusion, it will be useful to cite a few common cases when wallpaper stubbornly refuses to stick from the very beginning of the process. Several reasons contributing to this trouble have already been given above. These are wet walls, dirt or dust, poor-quality or incorrectly prepared glue.
In order for the wallpaper to stick clearly and quickly, you need to follow all the rules for applying it. This includes wall preparation, priming, drying, absence of drafts, high-quality and properly diluted glue, and compliance with the special instructions of the wallpaper manufacturer. All these problems can be completely eliminated only when professionals get down to business.
Related articles:
- Gluing sound-absorbing wallpaper Very relevant today is gluing sound-absorbing wallpaper, sometimes they are called noise-absorbing. We offer our services...
- Pasting jute wallpaper Jute wallpaper is a rather exclusive finishing material among other types of fabrics. Using this wallpaper you...
- Pasting duplex wallpaper Not many people know about the existence of duplex wallpaper. However, many people glued just such wallpaper and even...
Why do they arise?
It is worth immediately reassuring readers - bubbles on wallpaper after gluing almost always form for everyone.
Another question is how large their number and size are, and how to quickly eliminate defects.
- The first reason is the expansion of the paper from the moisture contained in the glue. The wet fabric changes unevenly, hence the swelling in the most stretched places. Thin, inexpensive paper wallpapers suffer most from this “disease.” Heavy multi-layer strips swell less often and to a much lesser extent.
Immediately expel the air from under the wallpaper.
- The second most common reason why wallpaper bubbles after hanging is the haste of the owners. They ignore the need to carefully remove the air from under the canvases. Therefore, in order not to get a lumpy room the next day, you should immediately thoroughly smooth out the walls, even if it takes more time.
Choose the right glue.
- Another common mistake is a mismatch between the glue and the material. For example, you have glue for thin wallpaper lying around from a previous renovation, and you purchased a multi-layer or solid vinyl finish. Or vice versa - you are trying to glue a wall with inexpensive paper with a strong composition that is completely unsuitable for these purposes. Hence the bubbles when wallpapering.
- We often carry out repairs during the holidays, that is, mainly in the summer, in the heat. It’s clear that you want to work in comfort, so open windows and a draft make the process easier. But what helps us, to the detriment of wallpaper, is that they categorically do not accept changes in temperature and humidity.
Note! If you intend to do the pasting yourself, be patient and work only indoors. Even more important is to leave the room closed for a day or two, until the material on the walls has completely dried.
Otherwise, you will experience not only bubbles, but also partially fallen off stripes.
- Blisters can also appear from excess glue, as well as from keeping the canvas smeared with it for a long time. The longer the wallpaper lies wet on the floor, the more it gets wet and stretched. Therefore, do not cover the canvas with glue in reserve. Apply it only to each strip one at a time, immediately applying it to the wall.
Walls should be carefully prepared for wallpapering.
- An improperly prepared base often causes the finish to swell. Uneven dents on the walls, loose putty. cracks will definitely have a negative effect.
- When spreading the strip that is still lying, be careful to ensure that there are no dry gaps. A very convenient category of adhesives that change color upon application. In this case, you will see the missed areas and correct the situation in time.
- There are times when the instructions included with the material recommend gluing both the wallpaper and the wall. Carefully read the text on the packaging and follow this kind of advice, then you will reduce the risk of panels falling behind.
Wallpapering technology
Many apartment owners, when replacing the trellises themselves, believe that they know how to properly glue wallpaper. Indeed, they can stick simple single-layer paper wallpaper on the wall without any problems. However, when working with other types and types of wallpaper, questions begin to arise. So how to hang wallpaper yourself?
The technology of covering walls with modern wallpaper is not complicated and consists of several interrelated stages. It can be represented step by step as follows:
- the required amount of wallpaper is calculated;
- wallpaper and glue are purchased;
- the necessary tools and devices are prepared;
- select the location for gluing the first sheet of trellis;
- the pattern according to which the wallpaper should be glued is determined;
- wallpaper sheets are cut;
- the adhesive mass is prepared;
- the trellises are glued to the wall.
Materials and tools
For continuous and high-quality work, you will need materials and a set of tools with accessories.
Materials. To paste the walls you need to buy:
- wallpaper (non-woven, photo and glass wallpaper, paper, vinyl, etc.);
- wallpaper glue (preferably specialized).
Tools and accessories. You can apply wallpaper with a minimal set of tools. But in order for the job to be done quickly and beautifully, you need to have on hand:
- stepladder;
- plastic bucket - 2 pcs. (for glue and clean water);
- cuvette (bath) for glue;
- a roller 250 mm wide and a paint brush (brush for edging wallpaper and finishing corners) for applying adhesive;
- metal spatula for cutting wallpaper on the wall;
- plastic wallpaper spatula (wallpaper brush) for leveling thin wallpaper or trellises with a three-dimensional (relief) pattern;
- a plumb line or laser level to find the vertical;
- a ruler with a pencil for drawing a vertical starting line;
- construction knife (scissors) with replaceable blades for cutting wallpaper to length;
- roulette;
- rubber roller for pressing the wallpaper to the wall;
- rubber roller, narrow, cone-shaped, for smoothing seams (joints);
- foam sponge for removing glue from the front side of the wallpaper;
- napkin (towel) for hands;
- screwdriver for removing sockets and switches;
- electrical tape for working with electrical wires.
Buying wallpaper
When going to the store to buy wallpaper, you must strictly meet two conditions:
- buy the required number of tubes;
- purchase tubes of the same shade.
Calculation of material quantity
You can calculate the required amount of wallpaper in 2 ways.
1. The height of the wall surface to be pasted is measured (it may not coincide with the height of the ceiling due to the non-removable plinth and baguette). The length of the roll (10 m) is then divided by the measurement, resulting in the number of complete trellis panels in one roll.
After this, the length of all walls is measured, the measurement results are added up - the perimeter is obtained in meters. The resulting number is divided by the width of the wallpaper tube (0.53 m, 1.06 m) and the number of sheets in it. The measurements taken can be written by the formula:
T = P/L x H/K , where
- T - number of wallpaper tubes, pcs.
- P is the length of the perimeter of the walls, in m.
- L is the width of the wallpaper tube (0.53 m or 1.06 m).
- H - the height of the wall surface to be pasted (the length of the wallpaper sheet to be pasted).
- K is the length of the wallpaper roll (10 m, 15 m and 25 m).
Attention: professional finishers advise not to take into account windows and doors when calculating the amount of wallpaper to buy.
The result obtained must be rounded up and 1-2 tubes of wallpaper should be added to match the color, for unexpected defects and reserve (repair of trellis sheets damaged on the wall).
2. The length of the perimeter of the walls is measured, after which the required amount of wallpaper is taken from the prepared table below.
Attention! If the height of the pattern (rapport) is more than 0.6 cm, it is necessary to add 1 more roll of wallpaper for every 6 tubes to all calculations.
It already takes into account all the nuances of calculating the required amount of wallpaper, but without taking into account the adjustment of the pattern.
Wallpaper requirements
When producing wallpaper, machines are filled with paint for a specific batch. When refilling, the tonality may be disrupted. At the same time, at a retail outlet you may not be able to see the difference in shade, but on the wall it will be clearly visible.
Therefore, you need to buy trellises from the same production batch, the same production date and the same article number. You can view this data on the liner (label) that is wrapped around each tube of wallpaper, which is clearly visible in the photo. Practice shows that not everyone knows this, and many ignore it. The result is clearly visible on the walls - the different tones of the trellises are striking.
Label on a roll of wallpaper.
Wallpaper markings.
Buying glue
The adhesive mass is purchased according to the type of wallpaper purchased. The number of packs (containers) of wallpaper glue is easy to determine - the packaging indicates the consumption in rolls with a length of 10 m and a width of 0.53 m.
If the wallpaper has different sizes, the amount of consumption is adjusted. The number of packages is the result of dividing the total number of trellises purchased by the amount of consumption (in rolls).
Where to start gluing
All recommendations for choosing a place to start work on decorating walls with trellises state that it does not matter where you start gluing wallpaper in the room - you can start from any place you like: a door, window, corner or even from the middle of the wall (the main thing here is that the first piece should be glued strictly vertically). However, such advice is not entirely correct. Paper wallpaper, especially single-layer (simplex), should be glued away from the window, and in different directions - so the seams are not visible.
Determining the pasting scheme
Depending on the type of wallpaper, experts offer two pasting schemes. How to glue paper wallpaper is shown in the diagram. Here work starts from the window and proceeds in different directions.
Scheme for covering walls with paper wallpaper.
For other types of trellises, we can use both the option shown in the diagram and work in a circle, when the beginning and end meet. In this case, work can start from:
- windows (following long-standing traditions);
- doors - the frame serves as a guide (replaces the vertical line);
- angle - in this case, using a plumb line, a vertical line is drawn from which work will be carried out;
- a vertical line drawn on the wall in any randomly selected place.
Step-by-step instruction
You can wallpaper your walls yourself, without involving professionals. To do this, you must act strictly in accordance with the instructions.
- Using a plumb line, a pencil draws a vertical line on the wall from which work will begin.
- The height of the wall to be pasted is measured and the first sheet of wallpaper is cut to size. Experts advise non-professionals to make an allowance of 10 cm, although those with even minimal experience working with trellises cut them immediately to size.
- The remaining panels are cut, matching the pattern on the floor, and not on the wall, as some authors of works on this topic recommend. Tapestries without a pattern are simply cut to size.
- The glue is diluted according to the instructions printed on the package.
- The adhesive mass is applied to the wallpaper (on the wall in the case of non-woven wallpaper) with a roller or a special brush. The edges are coated with a brush. First, spread the first (any) half (a little more than half) and fold it in half. The fold should not be fixed. Then the other half is spread and also folded in half (the correct folding method is shown in the figure below).
Scheme of folding wallpaper coated with glue.
The folded wallpaper is kept in this state until the impregnation process is completed - the approximate time is given in the table below.
| Wallpaper type | Time for impregnation, min. |
| Paper | 5 |
| Double-layer paper: | |
| dense | 7-8 |
| very dense | 10 |
| Vinyl | 8-10 |
- The upper half of the wallpaper sheet is opened and pasted on the wall (the lower part remains folded all this time). You need to orient yourself not by the ceiling, but by the drawn vertical line (if the upper half is glued correctly, the second half will easily follow the drawn line).
Having attached the top part of the wallpaper sheet, proceed to the bottom.
Attention: if the wallpaper is cut with an overlap, a margin of 4-6 cm is left at the top of the wall.
The wallpaper is smoothed with a wallpaper roller (plastic spatula) from top to bottom, from the center to the edges (see photo).
Smoothing the wallpaper with a spatula.
- The second half of the panel is revealed and also glued to the wall.
- The overlaps at the top and bottom are cut with a knife using a metal spatula.
The wallpaper is cut with a knife.
- The second and subsequent sheets are glued in the same way, according to the accepted scheme.
The recommendations given are considered universal, but are subject to adjustment for a specific type and type of wallpaper. More detailed information can be found on our website, where each type of wallpaper is dedicated to a separate work.
How to make joints invisible
During the work process, it is important to ensure that the joint remains invisible. Errors occur for 3 reasons:
- the consistency of the glue is incorrect (more liquid than required), as a result of which in some places the edge of the wallpaper bubbles (falls behind);
- wallpaper, by its nature, stretches under the influence of moisture from the adhesive mass, and when dry, contracts, forming a visible butt seam;
- An error was made when aligning the wallpaper - the sheets were glued overlapping.
The problem is solved by rolling the joint with a special narrow wallpaper roller. If an error is discovered after the trellis has dried, the visible seam is painted over with special corrective paint.
The places where the pasting was done with an overlap using a metal ruler and a construction knife are cut in the middle 10 hours after completion of the work (the wallpaper has shrunk, but the glue has not completely dried and allows you to remove both the lower and upper pieces of the cut trellis).
How to hang wallpaper in corners correctly
There are several secrets here that allow you to get the job done quickly and efficiently.
- You cannot glue a whole sheet on a corner because of a possible violation of its geometry, as a result of which the vertical line at the second part of the wallpaper disappears.
- Wallpaper in the corners is always cut off. It is necessary to leave 2-3 cm on the second wall. The next sheet is glued to the left overlap strip. Then, using a knife with removable blades and a metal ruler, a continuous cut is made in the middle of the seam. Strips of wallpaper from both the bottom and top are removed, and the seam is rolled with a narrow roller. If you wish, you can even choose a picture.
- External corners are covered using a similar technology.
Pasting of internal corners.
How to glue near windows and doors
The greatest inconvenience when covering walls with wallpaper occurs when encountering obstacles. You can avoid troubles by following the technology of gluing trellises near doors and windows. You can glue the trellises near the doorway using the following algorithm:
- wallpaper is glued to the wall over the doorway;
- the pasted sheet is joined to the previous one;
- The wallpaper is pressed tightly against the wall with a roller;
- scissors make a diagonal cut of the wallpaper towards the upper corner of the door casing;
- the wallpaper is rolled tightly to the side and top trim;
- the strongly protruding part of the wallpaper is trimmed with scissors;
- Using a metal spatula, the left strip of wallpaper is placed under the casing.
Attention: if the platbands sit tightly on the wall and it is impossible to put wallpaper under them, trimming is done with a knife using a metal spatula.
Covering the doorway.
Gluing near a window is much easier - the wallpaper is glued to the wall using conventional technology. After they have completely dried, the unnecessary part of the trellis is cut off along the edge of the window with a knife.
Why does wallpaper wrinkle when applied to walls and corners? Best ways to fix defects
The choice of wallpaper is huge in terms of colors and colors; they are easy to glue on prepared walls. Wallpapering is one of the final stages of interior decoration. But sometimes the wallpaper wrinkles, air bubbles and other troubles appear that confuse even experienced craftsmen. The problem is completely solvable and you just need to show calm and restraint. There are several ways to troubleshoot problems.
The wallpaper doesn't match the pattern
Why don't the wallpaper patterns match? To avoid this problem, you need to know two things. Firstly, wallpaper with a complex pattern can only be hung correctly by a specialist with extensive experience and patience. Secondly, when wallpaper of this type is purchased, a small reserve is taken into account, which will simply be spent on adjusting adjacent paintings. Well, it’s very rare, but it still happens when a cut piece of fabric is simply glued upside down. This is most often the result of inattention or a too abstract drawing, the general structure of which cannot be immediately noticed by an inexperienced eye.