As a rule, one of the most difficult tasks of cosmetic renovation is wallpapering walls in hard-to-reach places (on external and internal corners, places where pipes pass, etc.). However, if you use special techniques and suitable materials, the question of how will be resolved. Let's look at several ways to glue wallpaper in corners. Let's start with a simple task - consider the technique of wallpapering even corners. And then we will explore various options for working with uneven joints.
How to remove joints on wallpaper after drying
The result after wallpapering a room does not always live up to expectations. The cause of disappointment is the appearance of seams between the canvases after drying. They can be removed without the use of radical measures.
- Why do joints appear?
- How to fix joints on wallpaper
- How to remove overlap
- How to fit a drawing
- How to clean glue strips
- How is removal done?
- How to glue wallpaper so that the joints are invisible
- How to join wallpaper in corners
- Which wallpapers do not have seams visible?
Smooth corners
Happy owners of high-quality overhauls, as a rule, do not have problems with distortions on the walls. Wallpapering a smooth joint is much simpler and does not require extra costs.
Internal and external (protruding) wall junctions are covered equally. Let's look at the whole process step by step.
First of all, you need to decide where to start. If thin paper strips are used that will overlap each other (usually up to 0.5 mm), then you should start from the window (so that the seams are not noticeable). If the wallpaper is denser, then it will be glued end to end. In the second case, you should start from the door.
Once you have decided on the direction, you can start taking measurements. It is necessary to note how many strips of wallpaper it will take to reach the nearest corner. The fact is that the final strip should lie evenly on the adjacent wall by about 2-5 cm. It is better to trim off the excess.
Using a plumb line or laser level, you should mark a straight line perpendicular to the ceiling, and start gluing from there. This way, as you move towards the corner, the trellises will not shift (tilt).
Now you need to apply the next sheet, but starting next to the corner (no matter how even it may seem) is undesirable. For the same reason, an overlap of several centimeters is left on the adjacent wall. Otherwise, there is a high probability of holes and an unaesthetic appearance, which will be difficult to correct.
It is necessary to smooth out the glued panel at the junction of the walls very carefully. It’s not so bad if the edge of the strip, which goes around the corner, protrudes somewhere by 3 cm, and somewhere by all 5. It is much more important that at the junction of two walls the wallpaper fits tightly to the surface without creases, swelling and excess tension.
Advice! If you are too lazy to press the wallpaper tightly in the corners during repairs, then later the pleasure of picking holes in the sagging wallpaper will become a very exciting activity for the child.
The next strip of light paper or thin wallpaper on a non-woven basis can be glued on top of the previous one, focusing on a straight perpendicular line, passing as close as possible to the junction of the two walls. Before you start covering a new wall, you can trim off the excess if the edge of the spade is uneven, or leave the bottom layer as is.
Wallpaper that is glued end-to-end (that is, dense and does not stretch after being coated with glue) in the corner is processed using the following technology:
As in the case of paper wallpaper, there is already a small strip of width left after gluing the trellis on the adjacent wall. Apply glue to it, press it and carefully smooth out the entire corner.
On top of this strip - the spade - mount, focusing on the perpendicular line, a new wide strip. All that remains is to make an even joint (after all, the material is dense, possibly embossed, you cannot leave an overlap).
Along the perpendicular line, using a building rule or a fairly long ruler, you need to make a deep cut in the wallpaper from the ceiling to the floor. It should go through both layers, making a straight edge on each side. It is most convenient to do this with a very sharp stationery or construction knife (the second is preferable, since its blade does not bend so much).
Now you need to carefully remove all the excess trim, re-glue the edges of the opposing strips and straighten the joint. It should turn out perfectly smooth, at a distance of 1-2 cm from the corner.
Advice! You should not overlap or join the wallpaper directly in the corner. There will always be holes or cracks that will ruin a smooth edge. 1-2 cm from the corner is the optimal distance for both internal and external walls.
How to glue wallpaper with a pattern in the corners
The joint of wallpaper in the corner can be almost unnoticeable if the canvas has a clear geometric pattern or the wall collapse does not exceed 2 cm vertically.
However, you need to try to keep the pattern shift to a minimum. Below are recommendations from professionals on how to achieve this:
- Cut and joined according to the pattern with the outer glued canvas, place the trellis on the floor with the side with the pattern facing up.
- Measure the distance from the edge of the last sheet to the corner above and below.
- The difference can reach several centimeters. Mark the points on the spread sheet using a pencil or small cuts. It is important to make a mark where the top or bottom is.
- Add 5 cm to the resulting dimensions and cut a piece of wallpaper of the required width.
- Join the wallpaper canvas with the cut sheet and lay it overlapping, overlapping the minimum point from our measurement.
- The part that overlaps the mark must be cut off. Cut the sheet to length.
- Coat the sheet with wallpaper glue and glue it end-to-end with the last sheet, gluing the overlap at the final stage. It is necessary to eliminate the formation of folds by working the corner and seam.
- Using a plumb line, we draw several vertical lines at a distance from the corner to the edge of the sheet. The step between the lines is 5 mm.
- Coat the next sheet with glue and fold it for impregnation.
- Glue the canvas in such a way that the central pattern matches perfectly. We glue the wallpaper, smoothing it towards the corner, focusing on the vertical lines.
- Once the overlap is complete, cut the connected parts using a metal profile and a sharp knife.
- Remove excess strips and roll the joint with a rubber roller.
If the wallpaper has a pattern
Wallpaper with a monotonous small pattern, for example, checkered or striped, does not need to be adjusted to the pattern. The joints will not be visible to the naked eye. The situation is different with a more pronounced pattern, when the entire wall forms a full-fledged image or, if there is no pattern at all.
In this case, it is better to join the wallpaper end-to-end rather than overlapping. Non-woven wallpaper, which is always glued end-to-end, is perfect.
It is better to cut the sheets immediately before work on the floor covered with clean oilcloth. This way you can immediately cut strips that will match the pattern.
Choosing a corner design option
To ensure that the decoration of the room is in harmony with its contents, it is important to take into account various factors when choosing a profile. It is important to pay attention:
- On surface materials. If the walls are covered with clapboard, the ends covered with a white plastic profile will look ridiculous.
- For the color of the finish. A red profile will ruin the overall impression if the room is made in pastel colors.
- On the design style. The metal profile is not suitable for interiors in a classic style, but it can emphasize the concept of hi-tech.
- On the function of the room. A plastic profile is ideal for kitchens and baths; for children's rooms it is better to choose silicone corners. Wooden with chamfers will be appropriate for decorating cabinets.
Design options may vary. The easiest way is to match the color of the profile to the color of the walls. He will merge with him and will not attract attention to himself. This decision is justified when the surface often catches the eye, this could be, for example, the corner between the hallway and the room.
If the choice falls on wooden corners, designers advise matching the colors and textures of the doors or floor finishes. Then it will look organic. If you want to save money, you can purchase plastic corners that look like wood.
When creating laconic interiors with a minimalist style, the choice of metal corners becomes justified. They look good in high-tech, in a loft. The width of the shelf must be chosen so that it completely covers the end of the corner. You need to pay attention to this if the walls are covered with panels, plasterboard, if insulation and sound insulation are additionally performed. Such designs always have uneven edges; the decorative angle covers all defects well.
Usually the angle between the slope and the wall is more than 90 degrees. In order for the selected profile to fit well on it, it must be slightly bent. This can be done with both a metal and plastic corner. To do this, experts advise placing the product on a flat surface with one edge, and then lightly pressing on top with your hands and using a brush to push along the entire length of the corner. In the cold season, this procedure should be done after the product has been in the room for a day and has reached room temperature.
Cross cutting wallpaper
Cross cutting
At first glance, the whole cutting process is incredibly simple - measure the distance in height, mark it and cut off a piece of wallpaper. But it was not there! If the first cut is made crooked, then the remaining cuts will be crooked!
Note!
In addition to the length of the blade, it is very important to observe the cutting angle. The ideal angle is 90°, otherwise there will be great difficulties when wallpapering.
In view of this, a protractor is needed to cut the canvas. It does not necessarily have to be a school protractor. Here you can get by with any object that has an angle of 90°. For example, this could be a CD case. Alternatively, you can use a drawing square. Each time you should align the edge of the blade with the edge of the workpiece. This way you will have 2 angles, each 90°.
How to join in corners?
It would seem that such a trifle as gluing corners in a room can completely ruin the entire job if done incorrectly. And if the wallpaper also has a pattern that needs to be adjusted, then you should approach the finishing responsibly.
- The strip is glued in such a way that it extends onto the adjacent side. The width of the entry should not be more than 5 centimeters.
Using a plastic spatula, the angle is leveled.
- The next segment is glued with an overlap.
- In order to evenly trim the excess overlap, a rule is applied to the middle of the overlap and in one movement the excess edge is cut off with a utility knife. To ensure that the cutting strip is even, you should use a level.
Preparing the walls
So, the materials have been purchased, the tools have been prepared. Now you can get to work. We start by preparing the walls.
Removing old coating
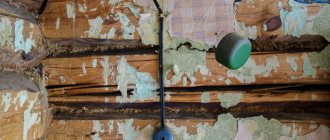
If wallpaper was pasted on the walls, remove it. In order for old wallpaper to be easily removed, you need to wet it thoroughly. We take a rag or sponge in our hands and wet the wallpaper generously. You can use a special water sprayer - the kind you use to spray indoor plants or moisten clothes while ironing. Washable wallpaper needs to be cut a little so that moisture gets into the bottom layer. Attention: before removing old wallpaper with water, be sure to turn off the power so that moisture does not get into working sockets and switches.
How decorative corners are attached
In order to perform fastening, different types of adhesive compositions are used. Glue is considered the best option, since the slots from metal fasteners will need to be additionally decorated, which is not always possible in relation to the design and expected appearance of the finished surface.
Nails, self-tapping screws and the like are used in cases where the material for making the corners is quite heavy and does not allow the use of an adhesive composition.
What to glue plastic ones to?
It is possible to decorate a room with plastic using the following fastening methods:
"Liquid nails", construction PVA.
Materials and tools
To glue wallpaper in the corners, you will additionally need the following materials and tools (the basic materials and tools for decorating walls with trellises are listed in the work “How to properly hang wallpaper with your own hands”):
- gypsum putty;
- corner spatula;
- metal profile for a lighthouse (any) 2.5 m long;
- a grinder or a hacksaw for cutting the profile to the height of the wall to be pasted;
- hammer drill for installing dowels;
- dowels with self-tapping screws;
- Phillips screwdriver or screwdriver.
The most common beginner mistakes
First of all, let's look at how not to glue wallpaper. The most common mistakes newbies make are:
- Poorly prepared surface. The level of complexity of pasting the joint of planes depends on their quality. If the apartment has crooked corners, then it will not be easy even for a specialist to complete the finishing properly. Of course, it is not always possible to make the wall joints ideal, strictly at 90 degrees, but there should be no deviations from the vertical. Therefore, spare no time and effort in preparing the surface - putty the walls or even plaster them;
The photo shows a plaster corner, which allows you to quickly and efficiently level the outer joint of the walls
Plaster corners will help you quickly and easily align external wall joints. During installation, they are leveled and then glued with plaster or putty. The price of corners starts from 30 rubles per 2 meters.
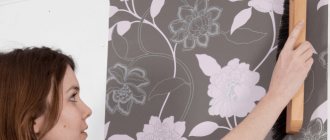
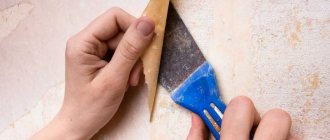
- Cutting wallpaper. As a result of this decision, the edges of the canvases may diverge or, on the contrary, overlap each other unevenly, and accordingly, the gluing looks sloppy. Therefore, according to the technology, it is necessary to provide a slight turn onto the adjacent plane.
When gluing paper wallpaper end-to-end, strips are placed under it
The exception is paper sheets that can be cut vertically. The only thing is that in this case, you first need to stick a thin strip of wallpaper onto the joint of the walls in case the joints come apart;
- Big twist. If the joints of the walls are even, then such a mistake is not terrible, but in crooked corners a large turn will cause the strip to deviate from the vertical. As a result, all subsequent canvases will be glued crookedly;
The canvas must be carefully pressed
- The canvases are not completely glued. When gluing the canvas, many beginners do not push it all the way, as a result of which a small area located opposite the inner corner hangs in the air. This leads to the fact that over time the coating begins to peel off and even tear;
- Poorly applied glue. If wallpaper on a non-woven basis is pasted, then the glue is applied to the surface of the walls, and not the canvas. In this case, it is a mistake to work with a roller, which does not always allow you to completely coat hard-to-reach places.
Beginners are often interested in what angle should they start gluing wallpaper? If they are all level, then it doesn’t matter where you start gluing. Otherwise, start gluing from an even angle to avoid distortion of the stripes on the walls.
Conclusion
We got acquainted with all the most important nuances of wallpapering corners. Before you get started, watch another video in this article. If any of your questions on this topic remain unanswered, write a comment and I will be happy to answer you.
Did you like the article? Subscribe to our Yandex.Zen channel
July 11, 2021
Wallpaper, Finishing materials
If you want to express gratitude, add a clarification or objection, or ask the author something, add a comment or say thank you!
Where are they used?
There are many options for using corners in the interior. They can be used to decorate both external and internal corners of walls. Some difficulties arise when finishing corners other than 90°; this requires special, so-called. folding, corners. To finish the curved surface of the corner, flexible, “arched” corner profiles are used.
The most common ways to use decorative corners:
- The connection of the window slope to the wall. It is extremely rare to see a slope whose near edge is not covered by a corner. Their use in this case protects the end of the slope from damage and prevents the wallpaper from peeling off, which quite often happens on external corners. In addition to technical, the corner profile also carries an aesthetic load. The use of a white corner completes the window opening. A profile that contrasts with the slope and wall decoration can create the desired color accent or become an independent original interior detail.
- Doorway design. Corners can also be used when decorating a doorway when the wall thickness is greater than the width of the door frame. In this case, additional trim strips are installed on the door, the junction of the end of which with the wall is covered with a corner element matched to the color of the door.
- Protection of external corners of walls, columns, ledges. In this case, the corner protects the wall decoration from mechanical damage, for example, an accidental blow from a heavy oversized object. It helps preserve the finish and layers of putty and plaster. Also, the use of a corner profile simplifies room cleaning. Often, hand marks remain on the outer corners, which are easier to remove from plastic than from wallpaper. Properly selected contrasting corners help avoid boring and monotonous interiors.
- Design of openings. In interior design, instead of doors, a simple opening is often left, for example, between the kitchen and the living room. Corners serve to decorate and protect corners.
- External corners of walls covered with tiles or wall panels. The corner profile covers the ends of the tiles, because they differ in color from the front surface of the tile. If the tile is cut to size and the edge of the cut is not polished, it is easy to cut yourself on such a corner. When installing a corner on a panel, they cover the corner joint. Using a special corner profile for these purposes is not always convenient, so decorative corners are used.
- Decorating and protecting the corners of gypsum plasterboard structures, for example, racks or shelves.
- Furniture decoration, mirror framing. In addition to decorative functions, it protects edges from chipping.
Basic provisions
Corners are far from the most visible place in the interior of any room, but it is the quality of their finishing that determines the real class of work
Here we will just determine, for starters, what situations we may encounter.
The latter consist of a base and decor, the decor is torn off easily and with another wallpaper you can glue, the glued one is easier Single, which is larger and tears. Usually white vinyl wallpaper is suitable and the ceilings are painted and glued. Fiberglass - they are used as wallpaper on the surface of the ground and paint, they are also suitable for ceilings, they hide wall defects well. It is necessary to adhere to gloves and painted. Non-woven fibers - easy to glue, durable, strong wallpaper. Woven fiber wallpaper is stain-resistant, breathable and very easy to wash.
Acrylic is thicker and more durable than paper wallpaper, but it must be applied very carefully because friction can damage acrylic decorations. You can choose photo wallpaper from the offer or make it from a selected image or photographs
They can stick not only to walls, but also to ceilings, furniture, doors and so on. Wallpaper is one way to quickly update your home.
Types of angles
The order of work will largely depend on what angle awaits us:
- internal between two vertical walls - there are such in any room, there are almost always at least four of them;
- external, also between two walls - these may not exist at all, they can be avoided by finishing the window slopes to the corner; but if there is an outer corner, that is the one that will require the most work;
- internal horizontal below, between the floor and the wall;
- internal horizontal at the top, between the wall and the ceiling - the last two types could not be taken into account if you take a prudent approach to the organization of these corners.
About materials and tools
Before we get started, let's look at what we'll be dealing with:
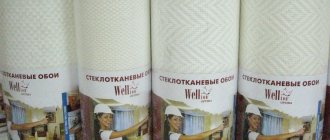
Non-woven wallpaper is the main reason for all our actions, the most famous finishing material for walls. Wallpaper is made on the basis of old paper - 70% of it is a cellulose layer, but with the addition of synthetic components that strengthen and give more flexibility, which provide the remarkable qualities of this material. For working on corners, the paper provides good flexibility, and the additives provide greater strength, which will prevent the material from tearing at the most inopportune moment. When it comes to wallpaper, its dimensions are especially important:
- the width should be calculated at 53 or 106 cm,
- and in length (height) - by 10.05 meters.
- Glue – you can use universal glue for wallpaper, but we still recommend a special one for non-woven wallpaper, which, by the way, is not suitable for any others.
- Rollers - it is advisable to stock up on a whole set for all occasions: for applying glue;
- for smoothing wallpaper already on the working surface;
- for working at joints, and,
- for working on corners.
A plumb line, a ruler, a level, a pencil, scissors - you will have to measure and cut a lot, but the most important thing is that from the very beginning you will need to get an ideal vertical line on the wall, from which all further work will begin.
- The cutting tool must be comfortable with a well-honed edge;
- A trowel, a trowel, a convenient wide ruler - anything that will allow you to obtain and control the cutting line.
Nuances of preliminary preparation
This stage is preceded by very important steps to prepare the rough working surface.
Regarding angles, it will be very important:
when working above and below - provide for the installation of skirting boards last, after the wallpaper, then:
- the task of adjusting the joint simply disappears by itself, the edges will be covered with skirting boards, ensuring a perfect joint;
- in this situation, if we take into account the standard room height of 2.5 meters, the length of the wallpaper is 10, and the height of the baseboard along the wall is 5 cm, then the roll is cut into 4 pieces of 2.5, which is enough for four verticals, and without any waste ; otherwise, taking into account the allowances, you will have to cut in pieces of more than 2.5, which means that 3 pieces will be used and one shortened piece will remain neither for the village nor for the city;
- It is very useful to use removable skirting boards - this will solve the problem of joining if you want to change the wallpaper in the future;
- when working on internal corners, they must be reinforced with non-woven paper tape, which is glued directly to the putty, and also putty on top;
- on external corners - it is better to carry out more thorough reinforcement using metal or plastic corners, which are secured with screws; The corners are attached to putty, and the top is also puttied.
- thoroughly dried
- aligned
- primed,
- puttied and
- sanded - at least with sandpaper by hand, but better with a machine.
How to effectively hide the joints between wallpaper
Most often, the following problems arise with joints:
- The divergence of the canvases, which causes a gap to appear between them. This problem can be eliminated by painting the wallpaper. A more budget-friendly method would be to use tile grout in the joint area, to which a suitable color is added. You can fill in the gap with a marker or pencil. A more complicated method is to add crumbs removed from the wallpaper to PVA glue and apply this solution to the crack. If the wallpaper has come apart slightly, you can soak the edges of the strips with warm water and try to pull them together.
If the gap between the wallpaper joints is wide, it is sealed with special decorative strips - Glue gets on the front side of the wallpaper. Before drying, you can wipe it with a clean white cloth or napkin. On paper wallpaper, this should be done carefully, simply blotting the area. On dark panels, traces of glue are well masked with a retouching pencil.
The procedure is performed carefully and slowly - Curling and lifting the edge of the wallpaper. This drawback can be easily eliminated with wallpaper glue. The edges of the strips are put back in place; for reliability, it is better to roll the seams with a rubber roller.
The rubber roller not only smoothes the wallpaper when gluing, but also carefully removes excess glue and air bubbles