Icer
8151 0 0
Icer November 16, 2017Specialization: master in the construction of plasterboard structures, finishing work and laying floor coverings. Installation of door and window units, finishing of facades, installation of electrical, plumbing and heating - I can give detailed advice on all types of work.
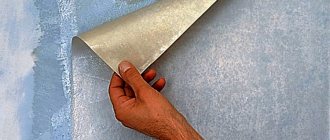
Very often I hear the question, is it possible to turn on the air conditioner when wallpapering? In this short review, we will look at all the nuances so that you understand this topic once and for all. In fact, everything is simple, but some pseudo-specialists give incorrect recommendations, which is why inexperienced professionals have problems.
It is highly undesirable to use conditioner when wallpapering.
Preparatory stage
The preparation of walls in a new building and a residential apartment are somewhat different from each other. In a residential apartment, work begins with dismantling the old type of finishing: paint, whitewash, old wallpaper. After this, the walls are inspected. If necessary, the old plaster is removed and the walls are repaired.
In the new building, installation work is being completed on installing door and window units, wiring, pouring floor screed, and whitewashing the ceiling. After this, the work in both the new apartment and the old one is the same:
- the surface of the walls is prepared for applying plaster: notches are made, primed, beacons are mounted;
- the walls are plastered with gypsum (cement-sand) mortar or dry plaster (OSB board, plasterboard, plywood);
Attention: rooms with high humidity - bathroom, kitchen and toilet - are prohibited from being plastered with a solution containing gypsum.
- the plaster layer is puttied (if the finishing grouting is done at a high level, and the wallpaper is planned with a relief pattern, the operation can be skipped);
Important: a thin layer of putty must be applied to the plasterboard, which will allow you to subsequently remove the pasted wallpaper without destroying the plasterboard sheet.
- a primer is applied to ensure adhesion of the wallpaper glue to the wall.
The entire process of preparing walls for wallpaper is discussed step by step in the articles “How to prepare walls for wallpapering” and “How and what is the best way to prime walls before wallpapering.”
Offset pattern
It often happens that the picture on the edge does not always converge relative to the height. So it is necessary to make a shift. If you take adjacent lanes, you get a large overrun. But there is a trick that allows you to adjust the pattern and glue the wallpaper without extra costs:
- Take the rolls and unwind them. Spread around the room.
- We combine the stripes of one roll and the other.
- We cut the sheets, laying them out into two groups.
- Now the image on the cut out wallpaper will be identical.
- During the gluing process, take a piece from one group, and then from the second (so that the picture is the same).
Selection and preparation of glue
The quality of wall decoration with trellises is primarily influenced by the type of wallpaper glue. The correct choice of composition allows you to glue walls without bubbles and air pockets, with invisible joints, and uncontaminated canvases.
When choosing an adhesive composition, it is necessary to take into account the type of wallpaper base. So, for paper wallpaper, glue KMC, “Moment”, etc. is suitable. For vinyl wallpaper, special types of glue are produced, as indicated on the packaging. Non-woven ones can be glued with a special adhesive for non-woven fabrics.
You can read about the types of glue, methods of their preparation and application, as well as their suitability for different types of wallpaper in the material “How to choose wallpaper glue.”
Decoding the markings on the wallpaper
There are special markings on the wallpaper in the form of letters and symbols that help the buyer understand what type of wallpaper is in front of him. Knowing their meanings gives you an understanding of what rooms they are suitable for, how they will need to be looked after, and what properties are typical. So there are the following marking divisions of wallpaper:
- By constituent elements;
- According to the specifics of gluing;
- According to light resistance;
- By water resistance;
- According to the specifics of removal.
The letter marking below indicates the materials from which the canvases were made:
- A- acrylic;
- B – paper;
- BB – foamed vinyl;
- PV – flat vinyl;
- RV – relief type of vinyl;
- TKS – textiles;
- STR – structural, which should be painted afterwards;
- STL – glass fiber type.
There are special markings on the wallpaper in the form of letters and symbols that help the buyer understand what type of wallpaper is in front of him.
Choosing wallpaper depending on the room
A huge range of wallpaper allows you to choose them both for the type of wall and for a specific room in the apartment. For example, for a concrete wall base that is smooth and without flaws, smooth wallpaper is suitable. Volumetric (embossed) are suitable for all types of wall materials. They mask small bulges and depressions well, and hide slightly unraveling seams.
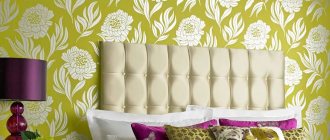
In rooms on the south side of the building, it is best to use cool colors: gray, blue or green. By the way, they visually enlarge the rooms in Khrushchev-era buildings, with their small dimensions - area and ceiling height.
Warm colors.
On the north side, you need to choose trellises in warm colors (beige with variations) or golden color. In the hallway and corridor, dark washable wallpaper in rich shades is suitable. The living room looks great in both light and dark colors. Here the main idea in choosing trellises is to maintain the overall style of the interior.
The bedroom should have calm undertones.
The harsh color is annoying and prevents you from falling asleep. Photo wallpapers with views of nature look good here and fulfill their role functionally.
Ways to work with multiple rolls simultaneously
To reduce consumption, it is easier to cut webs from several rolls at once . To do this, 3-4 packages are opened and the main fabric is measured from the first. Subsequent calculations should consist of choosing the roll whose pattern diverges least from the first strip.
It should be borne in mind that it is easier to carry out these operations by subtracting the portion of the report that should be cut off. If it is 0.5 of the width of the element, two rolls will be enough; if it is approximately 1/3 of the pattern pitch, you will need to cut 3 rolls one by one. If 0.25 from the report, then 4 rolls will give the lowest consumption. In this case, it is best to substitute the previous canvases for each of them. This way you can avoid mistakes and take measurements as accurately as possible.
Fitting a pattern from several rolls saves up to 25% of the required material.
Wallpapering technology
Many apartment owners, when replacing the trellises themselves, believe that they know how to properly glue wallpaper. Indeed, they can stick simple single-layer paper wallpaper on the wall without any problems. However, when working with other types and types of wallpaper, questions begin to arise. So how to hang wallpaper yourself?
The technology of covering walls with modern wallpaper is not complicated and consists of several interrelated stages. It can be represented step by step as follows:
- the required amount of wallpaper is calculated;
- wallpaper and glue are purchased;
- the necessary tools and devices are prepared;
- select the location for gluing the first sheet of trellis;
- the pattern according to which the wallpaper should be glued is determined;
- wallpaper sheets are cut;
- the adhesive mass is prepared;
- the trellises are glued to the wall.
Materials and tools
For continuous and high-quality work, you will need materials and a set of tools with accessories.
Materials. To paste the walls you need to buy:
- wallpaper (non-woven, photo and glass wallpaper, paper, vinyl, etc.);
- wallpaper glue (preferably specialized).
Tools and accessories. You can apply wallpaper with a minimal set of tools. But in order for the job to be done quickly and beautifully, you need to have on hand:
- stepladder;
- plastic bucket - 2 pcs. (for glue and clean water);
- cuvette (bath) for glue;
- a roller 250 mm wide and a paint brush (brush for edging wallpaper and finishing corners) for applying adhesive;
- metal spatula for cutting wallpaper on the wall;
- plastic wallpaper spatula (wallpaper brush) for leveling thin wallpaper or trellises with a three-dimensional (relief) pattern;
- a plumb line or laser level to find the vertical;
- a ruler with a pencil for drawing a vertical starting line;
- construction knife (scissors) with replaceable blades for cutting wallpaper to length;
- roulette;
- rubber roller for pressing the wallpaper to the wall;
- rubber roller, narrow, cone-shaped, for smoothing seams (joints);
- foam sponge for removing glue from the front side of the wallpaper;
- napkin (towel) for hands;
- screwdriver for removing sockets and switches;
- electrical tape for working with electrical wires.
Buying wallpaper
When going to the store to buy wallpaper, you must strictly meet two conditions:
- buy the required number of tubes;
- purchase tubes of the same shade.
Calculation of material quantity
You can calculate the required amount of wallpaper in 2 ways.
1. The height of the wall surface to be pasted is measured (it may not coincide with the height of the ceiling due to the non-removable plinth and baguette). The length of the roll (10 m) is then divided by the measurement, resulting in the number of complete trellis panels in one roll.
After this, the length of all walls is measured, the measurement results are added up - the perimeter is obtained in meters. The resulting number is divided by the width of the wallpaper tube (0.53 m, 1.06 m) and the number of sheets in it. The measurements taken can be written by the formula:
T = P/L x H/K , where
- T - number of wallpaper tubes, pcs.
- P is the length of the perimeter of the walls, in m.
- L is the width of the wallpaper tube (0.53 m or 1.06 m).
- H - the height of the wall surface to be pasted (the length of the wallpaper sheet to be pasted).
- K is the length of the wallpaper roll (10 m, 15 m and 25 m).
Attention: professional finishers advise not to take into account windows and doors when calculating the amount of wallpaper to buy.
The result obtained must be rounded up and 1-2 tubes of wallpaper should be added to match the color, for unexpected defects and reserve (repair of trellis sheets damaged on the wall).
2. The length of the perimeter of the walls is measured, after which the required amount of wallpaper is taken from the prepared table below.
Attention! If the height of the pattern (rapport) is more than 0.6 cm, it is necessary to add 1 more roll of wallpaper for every 6 tubes to all calculations.
It already takes into account all the nuances of calculating the required amount of wallpaper, but without taking into account the adjustment of the pattern.
Wallpaper requirements
When producing wallpaper, machines are filled with paint for a specific batch. When refilling, the tonality may be disrupted. At the same time, at a retail outlet you may not be able to see the difference in shade, but on the wall it will be clearly visible.
Therefore, you need to buy trellises from the same production batch, the same production date and the same article number. You can view this data on the liner (label) that is wrapped around each tube of wallpaper, which is clearly visible in the photo. Practice shows that not everyone knows this, and many ignore it. The result is clearly visible on the walls - the different tones of the trellises are striking.
Label on a roll of wallpaper.
Wallpaper markings.
Buying glue
The adhesive mass is purchased according to the type of wallpaper purchased. The number of packs (containers) of wallpaper glue is easy to determine - the packaging indicates the consumption in rolls with a length of 10 m and a width of 0.53 m.
If the wallpaper has different sizes, the amount of consumption is adjusted. The number of packages is the result of dividing the total number of trellises purchased by the amount of consumption (in rolls).
Where to start gluing
All recommendations for choosing a place to start work on decorating walls with trellises state that it does not matter where you start gluing wallpaper in the room - you can start from any place you like: a door, window, corner or even from the middle of the wall (the main thing here is that the first piece should be glued strictly vertically). However, such advice is not entirely correct. Paper wallpaper, especially single-layer (simplex), should be glued away from the window, and in different directions - so the seams are not visible.
Determining the pasting scheme
Depending on the type of wallpaper, experts offer two pasting schemes. How to glue paper wallpaper is shown in the diagram. Here work starts from the window and proceeds in different directions.
Scheme for covering walls with paper wallpaper.
For other types of trellises, we can use both the option shown in the diagram and work in a circle, when the beginning and end meet. In this case, work can start from:
- windows (following long-standing traditions);
- doors - the frame serves as a guide (replaces the vertical line);
- angle - in this case, using a plumb line, a vertical line is drawn from which work will be carried out;
- a vertical line drawn on the wall in any randomly selected place.
Step-by-step instruction
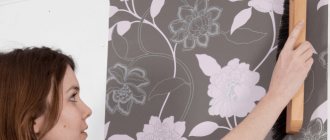
You can wallpaper your walls yourself, without involving professionals. To do this, you must act strictly in accordance with the instructions.
- Using a plumb line, a pencil draws a vertical line on the wall from which work will begin.
- The height of the wall to be pasted is measured and the first sheet of wallpaper is cut to size. Experts advise non-professionals to make an allowance of 10 cm, although those with even minimal experience working with trellises cut them immediately to size.
- The remaining panels are cut, matching the pattern on the floor, and not on the wall, as some authors of works on this topic recommend. Tapestries without a pattern are simply cut to size.
- The glue is diluted according to the instructions printed on the package.
- The adhesive mass is applied to the wallpaper (on the wall in the case of non-woven wallpaper) with a roller or a special brush. The edges are coated with a brush. First, spread the first (any) half (a little more than half) and fold it in half. The fold should not be fixed. Then the other half is spread and also folded in half (the correct folding method is shown in the figure below).
Scheme of folding wallpaper coated with glue.
The folded wallpaper is kept in this state until the impregnation process is completed - the approximate time is given in the table below.
| Wallpaper type | Time for impregnation, min. |
| Paper | 5 |
| Double-layer paper: | |
| dense | 7-8 |
| very dense | 10 |
| Vinyl | 8-10 |
- The upper half of the wallpaper sheet is opened and pasted on the wall (the lower part remains folded all this time). You need to orient yourself not by the ceiling, but by the drawn vertical line (if the upper half is glued correctly, the second half will easily follow the drawn line).
Having attached the top part of the wallpaper sheet, proceed to the bottom.
Attention: if the wallpaper is cut with an overlap, a margin of 4-6 cm is left at the top of the wall.
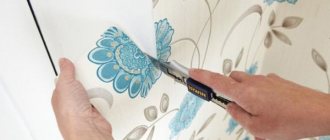
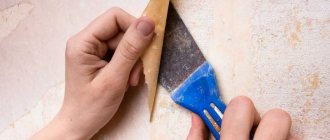
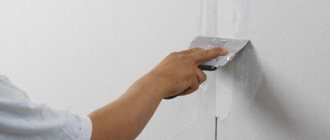
The wallpaper is smoothed with a wallpaper roller (plastic spatula) from top to bottom, from the center to the edges (see photo).
Smoothing the wallpaper with a spatula.
- The second half of the panel is revealed and also glued to the wall.
- The overlaps at the top and bottom are cut with a knife using a metal spatula.
The wallpaper is cut with a knife.
- The second and subsequent sheets are glued in the same way, according to the accepted scheme.
The recommendations given are considered universal, but are subject to adjustment for a specific type and type of wallpaper. More detailed information can be found on our website, where each type of wallpaper is dedicated to a separate work.
How to make joints invisible
During the work process, it is important to ensure that the joint remains invisible. Errors occur for 3 reasons:
- the consistency of the glue is incorrect (more liquid than required), as a result of which in some places the edge of the wallpaper bubbles (falls behind);
- wallpaper, by its nature, stretches under the influence of moisture from the adhesive mass, and when dry, contracts, forming a visible butt seam;
- An error was made when aligning the wallpaper - the sheets were glued overlapping.
The problem is solved by rolling the joint with a special narrow wallpaper roller. If an error is discovered after the trellis has dried, the visible seam is painted over with special corrective paint.
The places where the pasting was done with an overlap using a metal ruler and a construction knife are cut in the middle 10 hours after completion of the work (the wallpaper has shrunk, but the glue has not completely dried and allows you to remove both the lower and upper pieces of the cut trellis).
How to hang wallpaper in corners correctly
There are several secrets here that allow you to get the job done quickly and efficiently.
- You cannot glue a whole sheet on a corner because of a possible violation of its geometry, as a result of which the vertical line at the second part of the wallpaper disappears.
- Wallpaper in the corners is always cut off. It is necessary to leave 2-3 cm on the second wall. The next sheet is glued to the left overlap strip. Then, using a knife with removable blades and a metal ruler, a continuous cut is made in the middle of the seam. Strips of wallpaper from both the bottom and top are removed, and the seam is rolled with a narrow roller. If you wish, you can even choose a picture.
- External corners are covered using a similar technology.
Pasting of internal corners.
How to glue near windows and doors
The greatest inconvenience when covering walls with wallpaper occurs when encountering obstacles. You can avoid troubles by following the technology of gluing trellises near doors and windows. You can glue the trellises near the doorway using the following algorithm:
- wallpaper is glued to the wall over the doorway;
- the pasted sheet is joined to the previous one;
- The wallpaper is pressed tightly against the wall with a roller;
- scissors make a diagonal cut of the wallpaper towards the upper corner of the door casing;
- the wallpaper is rolled tightly to the side and top trim;
- the strongly protruding part of the wallpaper is trimmed with scissors;
- Using a metal spatula, the left strip of wallpaper is placed under the casing.
Attention: if the platbands sit tightly on the wall and it is impossible to put wallpaper under them, trimming is done with a knife using a metal spatula.
Covering the doorway.
Gluing near a window is much easier - the wallpaper is glued to the wall using conventional technology. After they have completely dried, the unnecessary part of the trellis is cut off along the edge of the window with a knife.
Drawing without offset
When gluing canvases without changing the position of the pattern, do the following:
- According to calculations, we cut the roll into strips. It is important that they exceed the wall in length and are multiples of the rapport.
- When gluing, pay attention to the rapport. We glue the wallpaper so that the beginning of the print is the same. When installing strips from the second roll, the edges are reduced.
- The coating is glued, joining according to the pattern. We start from the corner that is next to the window to hide the overlaps.
- Glue the first strip of coating. A line made near the corner will help us.
- As soon as we have finished with the opposite corner, we return to the original place (the beginning of the report), and glue it there.
FAQ
At what temperature to glue wallpaper
Many recommendations indicate that wallpaper should be glued at a temperature of 23-25°C. However, this temperature regime can only be achieved in summer. Winter, when heating is needed, does not allow working in such conditions (in most Russian cities in winter the temperature in the apartment is 18-20°C).
So at what temperature can you wallpaper walls? Manufacturers of trellises and glue have taken this point into account and recommend finishing work at a temperature of 10-25°C. Therefore, it is not recommended to glue wallpaper in unheated rooms (dacha, veranda) in winter.
When can you open windows after pasting?
Impatient apartment owners try to quickly get rid of the smells of glue and wallpaper. But open windows mean drafts. And in drafts, the glue dries quickly and unevenly, as a result of which the adhesive mass does not have time to create the necessary adhesion to the wall. The result is that the seams come apart or the wallpaper peels off.
When can you open windows? You can open the windows after the pasted wallpaper has completely dried - after 1-3 days (the time for complete drying is usually indicated in the instructions printed on the packaging with the glue). For insurance purposes, it is better to add one day to the specified time.
What to do if the wallpaper bubbles
In practice, a situation often occurs, even among professional finishers, when minor violations of technology lead to the appearance of bubbles and air cavities on the surface of glued walls. This is both unsightly and a potential breeding ground for mold and mildew. How to get rid of bubbles on wallpaper?
Depending on the size of the lagging area, we can advise:
First, re-glue the canvas if there are very large air cavities. All attempts to fix the problem without tearing the wallpaper off the wall will be noticeable.
Secondly, for medium-sized pockets, it is also better to re-glue plain trellises (the mark of the cut will be very clearly visible). Wallpaper with a pattern is cut with a construction knife in the middle of the resulting cavity. The edges are carefully pulled away from the wall using a spatula and the adhesive mass is delivered into the resulting space using a brush. It is not necessary to coat the entire dry surface.
You can disperse the glue with a dry cloth while pressing the seam of the cut tightly. Allow the base of the trellis to soak in glue for 5-10 minutes, and then roll the lagging area with a wallpaper roller to remove excess mites and air. It should be remembered that paper wallpaper stretches from the glue and decreases in size after drying. Therefore, the edges of the cut should overlap. Vinyl and non-woven wallpapers have butt joints.
Thirdly, small bubbles are eliminated using a syringe. The needle must be taken according to the thickness of the glue - the thicker it is, the thicker the needle. The bubble is pierced in a circle, from the edges to the center, at an angle of about 30 degrees relative to the wall.
This pattern of punctures allows you to cover the entire loose surface of the wallpaper, as well as release excess adhesive mass through the punctures when smoothing the problem area. If large folds form, they need to be smoothed out. Small wrinkles will disappear on their own after the glue dries.
What to do if the wallpaper is see-through
The problem of translucent wallpaper after it has completely dried is solved in the only way - by redoing the work done. Therefore, at the preparatory stage it is necessary to try to avoid this headache:
- prime the walls with a special primer (as a last resort, whitewash them with water-based paint);
- buy thick trellises;
- check medium and thin wallpaper for transparency - place a piece of sheet on a bright spot and evaluate the degree of density.
How long does it take for wallpaper to dry?
No one will give a definite answer to this question. There are a lot of factors here. And the type of wallpaper, and the adhesive mass used, and the temperature conditions of the room, and air humidity, etc. The maximum delay is from 12 to 72 hours.
Duplex and paper-based non-woven wallpapers take the longest to dry - up to 3 days. Non-woven wallpaper on a different base (not paper) needs about a day to dry completely, vinyl wallpaper - about 48 hours.
Double-layer paper wallpaper.
You can determine the degree of drying of the pasted wall with your palm - pressing it against the wallpaper. If you feel warm - the wall is completely dry, there is a chill - you still need to wait. In passing, we note that it is strictly forbidden to speed up the drying process with heating devices.
How to glue meter-long wallpaper alone
The technique of gluing meter-long wallpaper alone does not have any special techniques that differ from the above instructions for gluing wallpaper.
Some tips from the professionals
Good quality work can be achieved if you take advice from specialists with extensive experience.
- Before starting work, the room where the work is planned is ventilated and then tightly closed for a day.
- It is better to dismantle the plinth - it can be easily removed (gluing the trellises will become faster and easier). In order not to look for the dowel holes under the wallpaper later, self-tapping screws are screwed back into them.
- It is better to cover the floor with cardboard or newsprint, but not with plastic film (on the film, glue easily gets under the wallpaper when coating the edges of the sheet, as a result of which it stains them).
- Use a stepladder. The table and trestles often leave marks on papered walls when moved to another location. In addition, it is more difficult to install the bottom of the wallpaper using them.
- Use specialized wallpaper glue - universal adhesive does not hold trellises on the wall well.
- Do not join the trellises at the corners - glue them with an overlap (1-2 cm), and then cut with a knife, forming a seam.
- Constantly dry (wash) your hands.
- Do not correct uneven cuts of wallpaper along the top and bottom of the walls. At the bottom, errors can be hidden with a plinth, at the top with a frieze or baguette.
Tools
To cut wallpaper, you can use a knife with a segment blade, which is commonly used for cutting drywall, plastic, and stripping electrical wires. With this tool you can cut the wallpaper lengthwise and crosswise without much difficulty.
To cut the wallpaper as accurately as possible, you will also need to purchase a 1.2-1.5 m long spirit level, which will be used as a ruler. However, it is easier and cheaper to use an ordinary rule or wedge. To trim the edges of the wallpaper, you will need sharp, medium-length scissors (up to 200 mm).
Advice from professionals
Professionals will always tell you how best to carry out repairs, what nuances need to be taken into account when performing the work. We've put together some tips for you:
- Be sure to clean the wall of old material.
- Walls can be treated not with a special primer, but with glue, diluted according to the instructions.
- Glue end to end, avoiding overlaps.
- The room temperature should be maintained at approximately 20 degrees.
- Maintain optimal humidity.
- Drying should occur naturally.
- For bedrooms and children's rooms, buy environmentally friendly and breathable material.
- Strictly follow the instructions for the adhesives.
- Good surface preparation will ensure ease of gluing.
- Avoid drafts (all openings must be closed until the surfaces are completely dry).
- If a gap has formed between the canvases, you can dip a spatula in paint of that color and run it over it or use a felt-tip pen.
- To correct defects, a syringe with glue is used.
What to do where there are a lot of door structures?
Advice
If there is more than one door in the room, then pasting will be significantly more complicated. In order for the result to be satisfactory, you need to start gluing the canvas either from the most inconspicuous place, or from several landmarks at the same time.
- If the measurements are taken correctly, then you can start with two points that are least noticeable. This is a place behind a closet or in the corner of a room. Even if the drawing doesn’t come together in the end, no one will see it.
- You can start gluing the canvas from the door that is visible to everyone, and finish at the one that is not so accessible to view.
- If the width of the roll corresponds to the distance from door to door, which is rare, then there is no difference where to start gluing.
Step-by-step instructions - what needs to be done?
To glue the walls, it is not at all necessary to turn to professionals. This can be done without outside help, following the appropriate instructions:
- Draw a vertical line using a plumb line and a pencil.
- Measure the height of the walls and cut the first piece. You can cut off 5-10 cm more in reserve.
- Cut the remaining strips taking into account the pattern, matching it on the floor, but in no case on the wall. If the wallpaper does not have a pattern, you just need to cut it.
- Prepare glue according to instructions.
- Apply the glue directly to the wallpaper. Walls should only be coated with non-woven wallpaper. First, one half of the canvas is lubricated and folded in half without fixing the seam. Then the second half is lubricated in the same way.
- When folded, the wallpaper should be left for about 5-10 minutes, depending on its density.
- Now you need to open the top half of the canvas and stick it on the wall, oriented vertically and not along the ceiling. The wallpaper should be smoothed well with a rubber roller from the center to the edges, from top to bottom.
- When one half is attached, you can straighten and stick the second.
- Excess wallpaper must be removed with a construction knife or scissors. The protruding layer must be wiped with a foam sponge or a clean rag.
- Using the same principle, glue the remaining canvases.
The instructions provided are suitable for most types of wallpaper and greatly simplify the task for beginners who have no experience in decorating walls.
Putty, primer
The next stage is sealing the unevenness. If they are minor, then you can solve the problem yourself. You will need a leveling mixture - putty. If the walls are hopelessly crooked, then it is better to turn to professionals who will level them with drywall or plaster.
First, remove all nails, screws, remove any remaining wallpaper and dust. If the walls are more or less even, then only dents and chips are repaired. Sometimes it is necessary to cover the entire wall with putty. Gypsum putty is taken and applied to the wall in a thick layer of up to 5 mm. When it dries, irregularities are removed using a special mesh. Then the second layer is applied, it is thin - about 1 mm.
A layer of primer is needed to create a film on the surface of the wall to reduce the absorption of the adhesive. You can use wallpaper glue as a primer, just in a different proportion. Typically, glue packages indicate how much of the substance should be used for gluing, and how much for primer. The walls are covered with the composition using a roller, the corners with a brush.
At what temperature should you glue wallpaper and why should you not open windows?
It’s always easier to call specialists who will do all the work, but for your laziness you will have to pay, at best, twice as much. But you can just study the issue and save a lot on it! In order not to be disappointed when we glue everything ourselves, consider not only the readiness of the walls, the quality of the glue and the type of wallpaper, but also the surrounding conditions. The result of the work largely depends on the temperature regime.
Important! Never glue wallpaper in a cold room.
If the temperature of the walls is below +5 degrees, they will quickly fall off. The optimal temperature is considered to be +15 degrees.
Wallpaper absolutely does not like drafts. Air flows dramatically change the temperature, disrupting the gluing and drying process. Therefore, all work must be carried out with the windows closed.
Advice! To obtain a lasting result, the room must be warmed up 2 days before gluing and for 10 days after. Is it possible to do wallpapering in winter? Yes, if the heating system is already running. If not, then you can use heating devices.
Start work at a humidity of no more than 60%. If the air humidity is high, the wallpaper may bubble and peel off.