Comfort in an apartment is important for any person. It allows you to relax after a busy day at work, forget about everyday worries for a while and simply have a pleasant leisure time. Creating a pleasing home environment begins with well-groomed walls. Wallpaper is still the most preferred cladding option. Many people know how to glue them. But only specialists know how to properly prepare a room for their application. In this article we will reveal all the secrets of the technological process of treating walls before decorating them with wallpaper.
What an ideal wall should look like
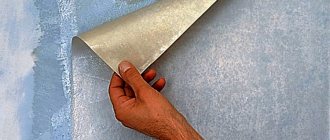
In Soviet times, when changing decorative coverings, it was often practiced to apply new wallpaper directly onto old ones or onto newspapers. Thick wall layers can be found in many “aged” houses and apartments. Modern society rejects the “it will do” principle, offering instead a rational approach and verified calculations. Competent and beautiful decoration of the room with new canvases depends on the condition of the walls. The quality of the base and the scope of repair work can only be determined by first removing the previous coating. Experienced craftsmen put forward the following requirements for surfaces for wallpapering:
- The base must be clean and free:
- from previous paintings, paint and other possible coatings;
- from screws, nails, etc.;
- from fungal infections is a very important factor that greatly influences not only the appearance of the home, but also the health of its owners.
- Without cracks and numerous pores, which will contribute to reliable adhesion of the material to the surface.
- The base must be level and smooth. The assumption that a new trellis will hide all defects is completely wrong.
- The wall must be well dried. Otherwise, wallpaper glue, which contains water, will not be able to firmly attach the canvas to the wall. Increasing the temperature in the room will generally lead to peeling of the trellises.
- The same color of the base is of great importance when choosing thin wallpaper in light colors, otherwise the difference in color schemes will be noticeable even after repairs.
Taking into account the above criteria for preparing the surface for gluing, you will create a solid, high-quality foundation and the most comfortable conditions for further work.
Question number two: what primer can be used before wallpapering?
Which primer to choose for walls under wallpaper? It’s quite easy to get confused in a hardware store, since the range of this product presented is simply dizzying.
Walls are treated with acrylic, alkyd, universal, latex, glyphthalic, mineral primers and even wallpaper glue.
Acrylic and alkyd compositions
The most popular is acrylic primer for wallpaper. It works great with putty, plaster and concrete, properly performing all its tasks.
You should not immediately buy a composition labeled “for wallpaper”; this refers to a marketing ploy PHOTO: oboi17.ru
Most likely, you will be handed highly diluted PVA glue at a high price. A good primer consists of a mixture of acrylic polymers; the word PVA should not be there. Product consumption: 100-200 ml per 1 m². The number is variable, since the porosity of the walls is different everywhere.
Alkyd primers resemble paint, since after they are applied, a film appears on the surface. Such primers are good for wooden and concrete surfaces. They fill the pores of the top layer. As a result, the wood does not swell, and moisture does not penetrate into the concrete.
After applying alkyd mixtures, the surface becomes moisture resistant and resistant to attempts to colonize mold and mildew.
You can use this type of primer as a base for subsequent processing with latex or acrylic, or acrylic paint PHOTO: sdelaipotolok.com
Alkyd primer does not penetrate deep into the walls, but it can perfectly prepare the surface for further work. This primer is good for coating reinforced concrete structures.
But surfaces with plaster, gypsum or drywall are not particularly well fixed with alkyd primers.
Product consumption is about 100-150 g per 1 m².
Latex and mineral primer
Latex has a number of useful qualities, such as strength, elasticity, water resistance, resistance to compression and stretching. Now a primer has similar qualities - there is a primer based on latex, which, after drying, forms a film that increases adhesion.
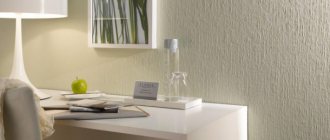
The product will be applied evenly to the wall and will dry quickly PHOTO: gidpokraske.ru
The purpose of such a coating is to strengthen loose surfaces that are prone to destruction. In addition, the waterproofing of the walls will be significantly improved.
This primer is ideal for precast concrete or fiberboard panels, natural stone and wall plastic. This is an excellent solution for rooms with high humidity levels. Consumption is high: 300-500 g per 1 m².
Mineral primer consists of lime, cement and gypsum. This composition is suitable for concrete, brick, expanded clay concrete blocks, plastered walls.
The packaging will indicate for which surface the proposed composition is used.
Glyphthalic and perchlorovinyl primer
If the wallpaper is to be hung in a garage, barn, on a wooden or metal surface in a room with a low level of humidity, then buy a glypthal primer.
The composition has a specific smell, the coating dries within a day PHOTO: deal.by
Wood, brick, metal and concrete are treated with perchlorovinyl primer both inside and outside. The mixture is not afraid of temperature changes, it is also quite resistant to humidity, and the coating dries in 1 hour at +20ºС.
Universal primer
The word “universal” itself will tell you a lot. This is a composition of acrylic copolymers, to which resins are also added. The primer is diluted with water and you get an excellent product with a deep penetration effect.
Walls with this primer can be treated in any room and outside the house. Thanks to the use of this composition, resistance to various influences increases, and the shelf life of the decorative coating will be increased PHOTO: zelest.ru
The product consumption is small, 100-120 g per 1 m².
Wallpaper glue
Some people just coat the walls with glue (casein based) for non-woven and other wallpapers and are satisfied. But such job satisfaction will only be temporary - defects will still manifest themselves. This is because there are no useful properties in this processing.
It is better to use wallpaper glue for its intended purpose PHOTO: zelest.ru
Related article:
How to glue wallpaper correctly : choosing a tool and glue, how to glue wallpaper on corners, around windows and behind radiators; nuances of gluing paper, non-woven, vinyl and self-adhesive canvases; how to select a pattern and mask the seams - read the publication.
Why treat walls?
Many people don’t understand why the easy process of wallpapering needs to be complicated by carefully preparing the walls. In addition, this is a very time- and money-consuming, as well as a “dirty” event. The answer is simple. Wall cladding is needed in order to:
- the new decorative coating looked aesthetically pleasing;
- the trellises held firmly;
- protect against mold;
- glue without problems.
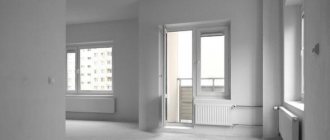
Housing, both in the secondary and in the new building, needs similar repair work, the only difference is in their quantity. Apartments on the primary market often already have a fine finish; in this case, you won’t have to bother with preparing the walls for long. Homes with history will require a lot more effort. In this case, the step-by-step preparation of surfaces for wallpaper must be strictly observed. Each stage has its own purpose. Finishing specialists do not recommend skipping any stage, as this will affect the final result.
Proper processing of walls before applying a new paper layer goes through 3 main stages:
- cleaning;
- alignment;
- primer.
Below is a step-by-step sequence of actions.
Application process
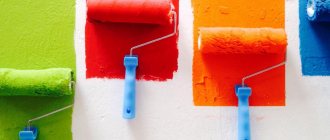
So, a suitable liquid primer has been selected, the surface of the walls has been prepared (cleaned of remnants of the old finish, all cracks have been repaired), and you can get to work. You should first make sure that you have the necessary tools - you will need a special roller with a long handle (to easily cover the entire height of the walls), and a plastic tray into which the liquid primer will be poured, with a special compartment to remove excess from the roller. You will also need special clothing and protection - the composition of priming preparations is quite complex, it can cause a variety of allergic reactions, so it is better to prevent accidental drops from getting on exposed skin.
When everything is ready, you can start working directly. Pour a little liquid primer mixture into the bath, dip the roller into it and roll it along the inclined part, pressing lightly on it - this is necessary so that the primer does not flow down the wall and all excess liquid returns to the bath. Apply the composition to the walls with smooth rolling movements, periodically dipping the roller into the primer. Try not to cover one area several times - this will not give a better effect, it will only increase the consumption of the composition.
After all the walls have been treated, the primer must be allowed to dry completely: if you start wallpapering the walls earlier, the expected effect from priming will not be achieved.
It is worth noting that sometimes, to reduce the cost of work, ordinary wallpaper glue is used as a primer. This option has the right to exist, but it will not give the expected effect: the glue does not have the ability to form an invisible protective film, does not contain antiseptics, and accordingly, your home will not be protected from fungal infections and other pathogenic microorganisms.
Flow calculation
To determine the amount of primer required, it is necessary to calculate the area of the walls minus the openings of doors and windows. Multiply the resulting amount by 2 (the number of passes) and multiply again by a factor of 1.1 (unforeseen losses of 10% are included).
Then, using the table below, calculate (approximately) the number of canisters or bags of primer. A more accurate figure can be obtained directly when purchasing a primer - the packaging indicates the consumption in g/m2 or ml/m2.
| Type of primer | Wall type | Consumption in g/m2 |
| Thinned acrylic | wood, iron | 40 |
| Unthinned acrylic | plywood, chipboard, OSB, sawn wood | 140 |
| Alkyd | brick, concrete | 135-150 |
| Acrylic | for all types of material except wood | 100 |
| Universal | for all types of walls | 65-100 |
Do I need to prime wallpaper before painting?
Experts advise that you must prime the wallpaper even before painting. Firstly, it removes unnecessary dust and protects it from moisture. You can also note its ability to prevent the appearance of streaks and stains.
If you want a really high-quality result, then you can prime the wall before painting
The primer takes about 3 hours to dry: it is important to wait until the mixture is completely dry. Then you can start painting: this should be done at a temperature of at least 25 degrees.
We use acrylic primer
Acrylic primer is used for processing plaster, putty, drywall and concrete. It is a mixture made from acrylic and latex. Its peculiarity is that it penetrates deeply into the surface, dries quickly, has no unpleasant odor and is ideal for wallpaper.
According to types, acrylic primers are divided into:
- strengthening. They strengthen the surface from gluing, but do not penetrate into the deeper layers. Used to work with high-quality and smooth walls and ceilings
- adhesive. Increase adhesion between finishing materials and the base
- deep penetration. Penetrates 10 cm into surfaces, thereby strengthening them. Most often they are used to treat low-quality surfaces (for example, if the walls are plastered with cement with a large amount of sand). Also suitable for surfaces that highly absorb moisture (plasterboard, foam concrete, gypsum boards)
Acrylic primers are also divided according to their composition into:
- water soluble. They are environmentally friendly and lack a strong odor. When dry, the material forms a transparent film on the surface
- organic. They are resistant to various contaminants, negative factors and prevent the formation of unfavorable microflora
The most common are universal compounds that are used to treat different types of surfaces (concrete, metal, wood). They are perfect not only for wallpapering walls, but also for painting them.
When we work with alkyds
Alkyd primers are resistant to negative factors. They are used to treat surfaces that need protection from increased moisture. Alkyd primers are used when working with metal and wood surfaces. This is an ideal option for processing wooden walls, as they swell the wooden structure and create ideal conditions for applying finishing material. This primer is based on alkyd resins diluted with a solvent. Consequently, the material emits a pungent odor.
Alkyd primers are not used for treating gypsum and plastered surfaces, since alkyds simply destroy these materials.
Alkyd primers have many advantages:
- improve adhesion of materials
- increase the moisture resistance of coatings
- have antiseptic properties
- reduce glue consumption
- protect treated surfaces from rotting, corrosion and various harmful microorganisms
It is necessary to work with alkyd compounds with gloves.
Preparing the priming mixture
Most primers are sold ready-made. But there are compositions that must be prepared before use:
- ready-made compositions do not require any additional manipulations. Before use, shake them well enough and you can start treating the walls.
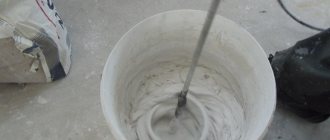
- concentrated primer is diluted in a bucket according to the manufacturer's instructions
- the dry mixture is diluted in a prepared container with water or a solvent (acrylic compositions are diluted with water, alkyd compositions with white spirit), mixed thoroughly so that there are no lumps in it. To do this, use a mixer attachment and a drill.
Preparatory work
Before applying primer to the walls, they must be prepared in advance:
- remove old decorative coating
- remove dust, various dirt and greasy stains from the surface
- level and clean with sandpaper (if there are bumps or other defects)
- seal all cracks and holes
- prepare the necessary materials and tools
If the whitewash crumbles
If the surface has yellowed, crumbled or shown other signs of aging, you need to remove it before wallpapering. Otherwise, after applying the glue, it will begin to peel off in large fragments, which can be dangerous.
Whitewash removal procedure:
- Cover the floor with plastic film or a thick layer of newspapers, cardboard, etc. This is necessary in order to protect the floors from the mixture of lime and water that will drain from the walls.
- Using a spray bottle, wet a small area.
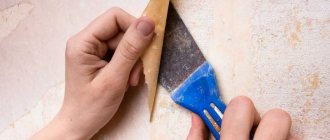
- Remove all whitewash. If the layer is thin, you can use a sponge or rag, otherwise you will have to work with a spatula.
With abundant wetting for half an hour, the lime whitewash can be easily scraped off with a spatula - After this, it is recommended to dry the walls for 2-3 days, apply a primer and begin wallpapering.
Of course, before pasting it is better to remove the old coating, be it lime whitewash or any other material. This is the only way to achieve a high quality coating. If you don’t have the time, energy or desire, you can bypass this procedure, but then you should be prepared that the coating will quickly fail.
Tips for carrying out work
Experts in the construction industry give beginners useful tips and recommendations:
- You should not use different types of primers to treat the same surface.
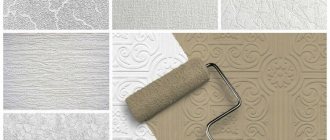
- It is recommended to treat raised areas, corners and joints with a brush
- A roller is used to process plasterboard, plywood and other sheet materials. It will ensure uniform and economical application of the material.
- the choice of primer is carried out only according to GOST
- When working with a spray gun, you must additionally protect your eyes, hands and respiratory tract (wear safety glasses, a respirator and gloves)
- After applying the primer to walls and ceilings, you must wait until it dries completely. Then you will see whether a second layer will be required or not.
In conclusion, it is worth noting that the process of priming the walls before wallpapering is one of the most important stages in the renovation. Here you need to correctly select the primer composition depending on the material of the wall surface, dilute it correctly and apply it to the walls. If you understand this process with full responsibility, then the process of priming walls and ceilings before gluing wallpaper will go quickly and quite easily.