Painting walls with various compositions used to be common in the USSR. Not only public institutions were painted, but also the premises of the house. Most often these were the bathroom and kitchen. Later, wallpaper came into fashion, and it became easier to buy tiles for bathrooms. It would seem that paint has completely become a thing of the past, remaining in memory as a relic of socialism. But it turned out that fashion is coming back, and painted walls are coming back with it.
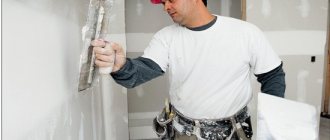
Of course, these are no longer those curved surfaces shiny with oil paint that we remember in kindergartens and public toilets. Now even in such places there are certain requirements for the quality of work. Therefore, putty for painting walls has become an integral part of painting work, and this procedure is painstaking .
How and with what can you paint surfaces after puttying?
Painting of putty surfaces is done with oil or some types of water-based paint. The preparation of walls for painting must be done efficiently to ensure an even coating with the dye.
The work is carried out in stages:
- The walls are inspected and the scope of repair work is assessed. The consumption of finishing materials is affected by the quality of the base. The deviation from the vertical of the wall is assessed using a rule.
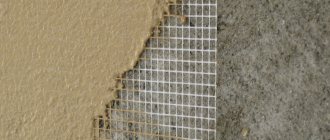
- Puttying is carried out with 2 compounds (starting, finishing), the work is carried out with a spatula, which is held at an angle of 30°.
- The starting putty is applied in a layer of 50 mm, the finishing putty is applied in a layer of 2 mm.
- The finished base is rubbed with fine-grained sandpaper.
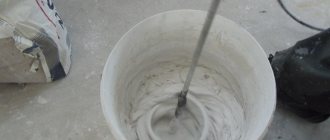
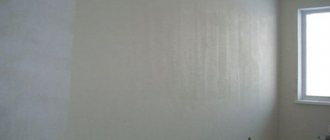
- After the putty has dried, the coloring composition is mixed in a container and applied with a roller to the wall.
- The first layer is dried, then the painted base is re-tinted.
- Corner areas are painted with a thin brush.
- The treated base is dried.
Determine what paint to paint the surfaces in accordance with the characteristics of the putty composition, which can be:
- polymer;
- plaster;
- cement.
Polymer compositions
Polymer putty is optimal for the finishing layer before painting. The composition is intended for interior work. Using the solution, the surface is smoothed, making it easier to paint the walls. The thin structure of the product helps eliminate minor deformations. This type of putty has high adhesion to the surface and does not peel off during use. It is necessary to take into account the high cost of polymer materials.
Surfaces are painted with polyvinyl acetate water-based paint. The material is easy to apply, comes in a wide range of colors, is environmentally friendly, fireproof, and dries quickly.
Plaster
Gypsum solutions are used for interior work; the product is suitable for eliminating cracks, small defects, and joints. Gypsum putty is painted with acrylic or polyvinyl acetate water-based paint.
The advantage of putty is its affordable cost, economical use, environmental friendliness of components, and ease of sanding. Gypsum putty hardens quickly, so work is carried out in small areas. The mass is not used for concrete bases and for finishing rooms with high levels of air humidity and building facades.
Cement
Cement mixtures for puttying before painting are strong, durable, resistant to temperature changes and air humidity. In addition to cement powder, the putty contains lime, which increases the plasticity of the mass. The putty mixture is affordable and easy to apply. The structure of cement putty is coarse-grained. Surfaces are painted with water-based and powder paints.
Alternative to soil
Drywall walls, for example, absorb very little primer, but more moisture-absorbing materials (such as concrete, brick, cinder block, wood, plaster) absorb a lot of primer.
Regular wallpaper glue will help you save on special primer. You need to use the same adhesive that will be used to glue the wallpaper. For non-woven wallpaper you need to choose a special glue.
The glue is diluted in water not according to the instructions, but to achieve the consistency of a weak solution. It should be a liquid mixture that slides between your fingers. Apply the composition to the walls in the same way as regular primer - with a brush or roller.
When using any primer, it is very important to thoroughly dry the walls. It is recommended to do this within 24 hours, but it is better to wait a few days. To speed up the process, you can open windows and doors, turn on the heating or heater - this does not affect the quality of the primer.
You can check the dryness of the walls in this way: a plastic film is glued to the surface with masking tape - a small rectangle is enough. The main thing is to stick the tape tightly so that no air gets under the film. Leave the polyethylene overnight and inspect it in the morning. If droplets of condensation appear on the inside of the film, the wall is still damp. If the film is dry, you can start gluing the wallpaper.
Preparing the walls is more important than directly installing the wallpaper. The outcome of the repair largely depends on the quality of the surface - only on even and smooth walls will wallpaper lay beautifully, without wrinkles or deformation
Wall painting options
You can paint the walls in your apartment using putty using tinted varnishes, waxes or paints. Some plasters are offered by manufacturers tinted, while other materials are colored during the preparation process using pigments.
Taking into account the texture of the putty and the design project, you can use the following painting options:
- plain tinting of wall panels;
- tinting surfaces in several shades;
- painting walls to resemble polished marble and Venetian plaster;
- the “dry brush” technique allows you to create artificially natural unevenness on the base;
- toning with the effect of highlighting individual areas.
Calculation of the required amount of putty
Before you purchase the best option and putty the wall, you need to determine the consumption of building material for the room being repaired. To do this you can use the formula:
R= N* k (( L1+L2+L3+L4)*H+(L5*H1)) N,
in which the designations L1, L2, L3, L4 indicate how long the walls in the room are. This does not take into account the doorway. The formula indicates L5 information, how long is the wall that is located above the door. The symbol H indicates how high the walls are. Also indicates in the formula the height of the wall section above the doorway with the correction factor k.
Before you purchase the best option and putty the wall, you need to determine the consumption of building material for the room being repaired.
Types of paints
You can determine which paint to use for putty by color, composition, texture, purpose, characteristics of water resistance, strength, layer density (hiding power), and wear resistance. Products must be environmentally friendly and safe for people. Paints for putty substrates are produced for interior and exterior (facade) work.
In the latter case, it is optimal to use the following paints:
- acrylic with high moisture resistance;
- silicone elastic;
- silicate moisture-resistant, easy to clean.
These coatings are durable and resistant to precipitation due to the presence of a film layer on the surface. Many compositions have a white tone, which can be changed through tinting. Several coloring pigments are added to the material to obtain the required tone. The mass is mixed using a construction mixer.
Coloring agents differ in the type of base.
For tinting putty surfaces, it is better to choose the following paints:
- Water-based
. Requires application in 2 layers. After drying, a matte film is formed.
- Acrylic
. Available in glossy, specialized and glyphthalic (with acrylic resin). This dye is non-toxic and has a creamy consistency that is easily distributed on the walls. The material dries quickly, maintaining a rich shade. The dye is also suitable for creating complex compositions with areas of painting, decoupage, and ornament.
- Latex
. Dry quickly and are aesthetically pleasing. However, the material is only suitable for rooms with stable air temperatures (living rooms, bedrooms) and is not used for kitchens.
Self-preparation of the solution
There are ready-made formulations on the market. Preparation for working with them is insignificant. Puttying the walls begins immediately after stirring the contents of the container. Do the work in full accordance with the instructions for use of the substance.
Wall putty can be made by yourself. To do this, take different components depending on the type. Let's present a detailed plan for the production of the substance:
- You can make putty from asbestos. To do this, mix the substance with kaolin, casein, chalk and quicklime. All dry ingredients are thoroughly mixed. Then add water little by little, mixing thoroughly each time. You should start applying when the product becomes paste-like;
- The oil-glue version is easy to prepare. To do this, take drying oil or varnish, mix it with wood glue and 3 kg of chalk. All ingredients are mixed until a homogeneous mass is obtained;
- The use of resin putty is popular. To prepare, take a sufficient amount of rosin and mix it with ozokerite and yellow ocher. The ingredients are placed on the fire and brought to a boil. Apply the substance immediately, hot;
- You can make your own putty from chalk, plaster and polymer glue. The latter can be replaced with any other. Stir the mixture with a construction mixer until the composition becomes homogeneous;
- To make oil, you should prepare the necessary ingredients. To do this, crush the pumice by mixing the powder with oil, gelatin, water, ammonia and casein. The product is prepared in a water bath for one and a half hours. Before application, cool and mix thoroughly.
To obtain the desired color, mix the composition with wood dust. It is poured in little by little until the desired shade is obtained. Each time the special substance is thoroughly mixed.
The Internet community contains a large number of various recipes for making putty. Everyone will choose the most suitable method for themselves, taking the available ingredients.
Puttying the walls begins immediately after stirring the contents of the container.
How to get the job done right
When performing staining, it is recommended to consider the following nuances:
- After puttying and sanding, it is recommended to prime the base and only then paint it. Surface treatment is required to increase the strength of the top finishing layer.
- The main tinting work is carried out only after the soil has dried.
- The paint is mixed and tinting is added. Experts recommend mixing the composition immediately onto the area of the room to create a single shade.
- The dye roller is selected in accordance with the level of density and composition of the dye. The water-based material is applied with a foam roller, the rest of the paints with velor.
- The paint is distributed in even movements from the left side of the wall to the right.
- The dye is applied in 2 layers, the first one is dried, then the next one is applied. If the dye is not allowed to dry within a certain period of time, when the composition is re-applied, there will be smudges and unevenness on the surface.
- Corner areas need to be painted with a brush.
- When creating a geometric pattern on the wall, use masking tape.
Scope of application of metal putties
Metal putties can be used for surfaces made of ferrous and non-ferrous metals, as well as galvanized products. Some types are also suitable for galvanized surfaces. Putties are used for the following operations:
- leveling: the composition fills dents, cracks and scratches;
- strengthening surfaces by increasing the thickness of the product;
- sealing holes;
- anti-corrosion treatment of surfaces, including those already affected by rust.
Metal putties are wear-resistant and can withstand weathering, moisture, frost and other adverse influences. They are usually applied before painting.
Metal putty is purchased for repair and protection against corrosion of metal building structures and elements: fences, railings, stairs, metal garages and gates, door hinges, etc. Such putties are also useful for processing metal pipelines.
Metal putties are in demand not only in construction. Thus, they are actively used in the repair of cars, water transport, industrial equipment, and restoration of the surface of various metal products.
Useful tips
Additional tips for high-quality painting on putty:
- It is unacceptable to paint wall panels damaged by mold and fungi. You will need to clean the base and treat it with antiseptic agents and moisture-resistant impregnation. Damaged areas are thoroughly dried before finishing.
- For comfortable painting, paint is poured into special paint trays with compartments. The roller is thoroughly washed between finishing works.
- Water-based paint can be used to finish a bathroom only if there is forced ventilation. In the absence of equipment from high humidity and steam, the painted surface will be short-lived.
- To decorate the kitchen, dyes that are resistant to mechanical damage and dirt are used. To increase durability, the painted layer is coated with a transparent water-based varnish. Experts recommend not painting areas of work areas (near the sink, electric stove), but laying them out with tiles.
- When choosing paint, the area of the room is taken into account. To visually reduce spacious rooms, you can choose dark and rich shades; light colors will visually expand compact spaces.
Whether it is worth using dye over putty and plaster depends on the design project. Design solutions are being developed with tint building mixtures, inserts of tiles, wood, stone, etc. Surface tinting is a more budget-friendly option and allows you to implement standard and custom projects.
Where to buy quality putty?
In the Remonstr online store you will find a wide selection of putties for wallpaper, painting and other finishing at the lowest prices in Samara. Our assortment includes putties from Russian and foreign manufacturers, the quality of their products is always high: Berg, Forman, Makroflex, Knauf, NOVBYTHIM, Isover, Henkel, Quelyd EK Dry Construction Mixes, Dufa, Belcolor, Ursa, Prestige ", Penosil, "Rogneda", Tikkurila, etc.
Our qualified and friendly staff will always help you choose the right putty for painting or wallpaper, and calculate how much it will be needed for work in your home. If you wish, you can perform this calculation yourself using the convenient calculator on our website.
Preparing the base for putty
Since we are talking about walls, preparing the base, in our case, means preparing the walls.
The final result depends 99.9% on the quality of foundation preparation and the thoroughness of the preparatory work. Novice finishers are often guilty of not taking preparatory work seriously. But we must understand that behind the beauty of the design lies, first of all, titanic work on basic preparatory work.
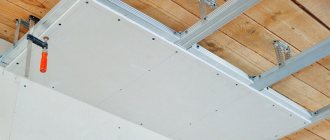
Brick, concrete or block walls of premises are first subjected to rough finishing - plaster. A common finishing material for walls in recent years is plasterboard. We’ll talk about it separately below, but for now we’ll cover issues related to puttying plastered walls.
For freshly plastered walls, you just need to scrape the entire surface with a large wide spatula to remove loose particles of plaster mortar and debris, sweep the walls with a soft brush and prime with a deep penetration primer for better adhesion of the putty mortar to the plaster and to prevent the plaster from intensively drawing moisture out of the putty mortar. These jobs are easy and enjoyable and won’t take much time.
Don’t forget that before putting putty on freshly plastered walls, you need to “stand” them for at least a week, but preferably a month. During this time, the plaster solution will gain the necessary strength, and defects will be revealed - cracks, holes, irregularities, which can be corrected before applying the putty.
With old plaster the process becomes more complicated. It is necessary to carefully inspect all the plaster; if it has crumbled or fallen off somewhere, remove it to the base. Cracks should be widened and thoroughly cleaned. All identified defects must be plastered with fresh plaster, namely plaster, not putty. Large defects cannot be eliminated with putty.
Traces of old paint, lime, and crumbled putty must be carefully scraped off, debris and dust must be swept away, and the surface must be primed.
Painting techniques for different types of plaster surfaces
Before you start painting plastered walls, you need to carefully prepare the base. The process looks like this step by step:
- The walls are cleaned of old coating. The whitewash is washed away with water, the wallpaper and paint are soaked and then removed with a spatula, the tiles and glue are torn off.
- Then the base is sanded with special coarse sandpaper, removing all irregularities.
- Small cracks are filled with putty, large cracks are filled with foam.
- After drying, excess foam and mixture is removed and the surface is sanded again.
- The smooth base is dusted with a damp cloth and covered with a deep penetration primer mixture. It will bind all small particles of dust and dirt and improve adhesion to the next layer of finish.
Note! Acrylic primer is optimal for interior work. It is advisable to apply two layers, allowing each to dry completely.
Next, painting of the plaster begins. To ensure quality work, it is important to consider what composition the walls were plastered with.