In the process of leveling the walls and ceiling, the question arises of how to plaster drywall and whether it is worth doing it at all. There is an opinion that drywall with its smooth surface does not need to be further leveled. But there are certain situations when the process of plastering drywall is necessary.
Which putty is best for drywall?
After you have covered a wall or ceiling with plasterboard sheets or made a plasterboard structure, you need to proceed to a very important step - putty.
In addition to the fact that the wall needs to be properly puttied, you also need to choose which putty is best for drywall in your apartment. There are many types of putty material, which differ in different parameters. Before choosing which putty to putty on drywall, it doesn’t hurt to familiarize yourself in detail with all the possible options in order to make the right choice, which you won’t have to regret after the renovation is completed. What is this article about?
Why do you need putty?
The ability to understand the types of putty for drywall will be useful not only to professionals and repairmen. Knowing about the types of putty mixtures, you will not have to turn to professionals for help, and will be able to carry out finishing repairs yourself.
Perhaps you are just planning a renovation and don’t yet know whether you will need putty. If you are installing a gypsum board wall, you will need to putty it in any case, at least once. There are often cases when it is necessary to apply two or three layers of putty. So in any repair using plasterboard sheets you will have to use putty.
To carry out puttying work you need putty. What is she like? This is a special fast-hardening material. It is intended, as a rule, to level the wall. And also putty is simply necessary in order to carry out the final finishing of the wall with decorative materials. Therefore, putty is a necessary element of finishing a plasterboard wall, which in no case can be excluded.
Advantages
Fiberglass wallpaper is considered environmentally friendly, since synthetic raw materials are not used in its production. Their advantages also include the following:
- Moisture resistance - due to their structure they do not absorb moisture.
- Fire resistance - the material does not burn.
- Strength - the tensile strength of glass wallpaper is several times better than that of a simple vinyl sheet.
- Durability – service life reaches 25 years.
- Practicality - installation will not cause any difficulties.
Fiberglass protects walls from the formation of fungi and mold. It can be painted more than once. Is it necessary to putty façade plaster before painting? The integrity of its structure is not compromised by such influences.
The cost of fiberglass is optimal, which further increases its popularity.
The scope of application of the material is quite extensive. It is effectively used in finishing rooms with high air humidity and low temperature conditions.
Types of putty
At the moment, in any country and in any city you can find a wide variety of putty materials of any kind. In addition to types and purpose, putty materials vary in price and quality. It all depends on your choice. Calculate based on your budget. As a rule, you should not trust cheap materials that pretend to be analogues of more expensive putties. It is much better to purchase material from a well-known brand that has already earned trust and respect. By the way, the cost of putty depends not only on the price, but also on the consumption per 1 m2. We will consider which putty to choose for drywall in a given situation will be most reasonable.
It is very important to remember that life does not stand still. If you are an experienced craftsman and are familiar with famous brands that were popular ten years ago, then keep in mind that all modern manufacturers are several times superior to the old ones in many ways.
So, there are several parameters by which types of putty are distinguished. Let's look at each one separately.
Types of putty by purpose
There are three types of putty mixtures, depending on the type of application.
- Leveling putties;
- Universal mixtures;
- Finishing putties.
Finishing putties for plasterboard walls are usually sold ready-made and do not require dilution of the powder. They are applied to the plasterboard wall as the final layer. All that remains to be done after finishing the wall with finishing putty is to wipe it with scratch paper. After this, they begin decorative finishing - painting, wallpapering, and the like. All variations of finishing putty do an excellent job, namely, they repair all errors, cracks and other defects on the wall.
Leveling mixtures are designed to seal all seams, holes from screws and similar irregularities on the wall. This putty is needed to level the wall and is not carried out at the finishing stage. Roughly speaking, this is rough work on processing the wall.
The universal putty can also be used to level other types of surfaces. The uniqueness of this variation is that it can be used both as a leveling putty and as a finishing putty. However, it is recommended to use putties of this type only for initial rough work. The reason lies in the fact that universal mixtures have a grainy consistency, due to which the putty is not suitable for preparing the wall for painting or wallpapering. However, this type of putty is perfect for subsequent installation of tiles or decorative plaster.
Types of putty by composition
Putties also differ from each other depending on the materials from which one or another mixture is made. There are three main types of putty based on composition.
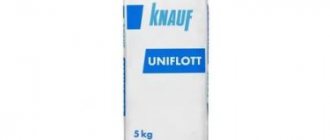
Gypsum putties have a high-quality composition and are superior to cement ones in that they are completely resistant to shrinkage. Gypsum putties include the well-known KNAUF, which is also used as an adhesive when installing plasterboard walls. This putty has a significant disadvantage - poor moisture resistance. Because of this, putty cannot be used in bathrooms and other rooms with high air humidity. In other cases, high-quality gypsum putty is an excellent option.
As a rule, when working with drywall, gypsum putty is used!
Cement putties are significantly inferior to gypsum putties due to the fact that they are highly susceptible to shrinkage. However, cement putty is more stable compared to gypsum analogues. In addition, cement putty easily withstands mechanical stress.
Polymer putties are better analogues in composition. These are the most universal mixtures that combine all the advantages of gypsum and cement options due to the combined structure of the composition. They are suitable for use in any room and under any conditions, are resistant to mechanical stress after complete hardening and are completely resistant to shrinkage. Thanks to all these advantages, the most reasonable choice would be polymer putty, however, the price of such a mixture is much higher than its cement and gypsum counterparts. Therefore, if you do not have an unlimited budget, you can choose a putty between gypsum and cement, based on the situation, rather than purchasing a polymer mixture.
It is worth reminding yourself that, despite the moisture resistance of the putty, you can never do without a primer. If you are renovating a bathroom and using a gypsum or polymer mixture, you will still need to prime the wall. In rooms where air humidity is low, you can use cement putty, but a primer is still needed.
Types of putties according to readiness for use
There are only two such types: dry and ready-made putty. Let's figure out how they differ from each other.
Dry putties are powder mixtures that must be diluted in water before use according to the instructions indicated on the package. The advantage of dry putties is that they can be stored for a long time. If you don’t dilute all the powder in water at once, then the remains can be saved for later to seal cracks whose appearance could not be foreseen, for example. The downside is that after dilution, the putty must be used immediately before it dries.
Ready-made putties are thick mixtures that need to be immediately applied to the wall. They do not require additional stirring and are sold immediately ready-made. The disadvantage of these putties is that they cannot be stored for a long time. But despite this, they have a longer shelf life in finished form, unlike dry powders. In addition, you do not have to dilute any powders. You can start working immediately after purchase.
It is worth noting one important detail. By purchasing a dry mixture, you can make it thicker or thinner, at your discretion. Although it is usually recommended to follow the instructions exactly, if you have enough experience in repair work, you can determine in which situation it is better to achieve a particular consistency.
The first stage of sealing seams: jointing
Before you proceed to sealing the joints on the ceiling using putty, you need to make the edges of the plasterboard sheets as suitable as possible for this process. For this purpose, jointing is done: processing the edges of the sheets with a plane and a painting knife.
First, the cut edges of the sheets must be processed with a drywall plane so that the gypsum boards fit as closely as possible to each other. After this, the chamfer of the sheet is cut at an angle of approximately 40 degrees, so that a letter V is formed between the gypsum boards when they are joined. The recess is about 5-10 mm. Then the sheets are hung and screwed with self-tapping screws. If they are already installed, you only need to do chamfering using a painting knife.
We open joints in drywall
It should be noted that many manufacturers produce gypsum boards with a specially thinned edge, which forms the desired recess without the need for jointing.
The priming process is sometimes considered optional because drywall already has a fairly high level of adhesion (adhesion) that allows the putty to set well. In fact, a primer is definitely needed, especially if, after completing the work on sealing the seams, you are going to paint the ceiling: without it, even two-layer paint will sooner or later begin to crumble.
The seams, like the entire surface, also need to be primed: the stronger the putty holds, the better. For this purpose, acrylic primer mixtures are usually chosen, which penetrate deep into the structure of the canvas. This material dries relatively quickly: from 1 to 3 hours, depending on the humidity in the room.
Tools for working with putty
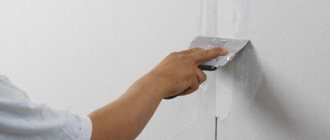
It is very important to use the right tools when working with different types of putty, which are best suited for a given situation. This may seem like a minor aspect at first glance, but it is actually very important.
There are two different types of spatula that are used in different situations during putty - wide and narrow. Branded spatulas are better suited for the job than others, they even make the work less labor-intensive. A wide spatula is used for basic work, and a narrow one is an auxiliary tool for situational situations.
And it’s also worth remembering that if you use dry putty, then in some cases you need to use water to dilute the mixture, and in others you need to use a primer. Be careful with this aspect and always follow the instructions carefully.
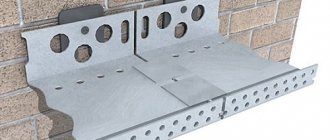
If, after leveling the wall with putty, it is still not level enough, you can use a special aluminum profile. It is used to straighten curved non-plasterboard walls. Together with putty, it can even out any unevenness in different walls. This same aluminum profile is frozen vertically along the primed surface along the entire wall, and after that a layer of putty is applied. In this process, the profile serves as a support.
Each seam has its own technology
The next step is sealing the seams. Keep in mind that there will be two types of seams on a plasterboard ceiling. Those that are formed by natural joints of sheets (factory), and those that appeared due to manual trimming to obtain the desired design.
Processing methods are slightly different.
Direct factory seams are filled with universal putty so that a small depression remains. It will serve as a guide for reinforcing the seams with serpyanka - a special construction tape. Is it possible to putty plywood on a ceiling before painting?
Otherwise, you can easily “lose the right course” and stick the tape next to the seam.
Serpyanka is glued to the seam, slightly embedded in the plaster. The mixture is applied to the tape in such a layer as to level the seam with the rest of the surface. It is convenient to work with a small spatula.
It will not be possible to reinforce cut seams: after this, bulges will form on them, which will require a thick layer of finishing putty. Therefore, they are first expanded and deepened, cutting them at an angle of 45°. Then fill with the mixture and level with a spatula. Do this in two passes, allowing each layer to dry.
Screw marks and seams have been repaired. Ahead - primer and plaster
You can’t leave more than one seam unattended.
The further course of work will be common to both types of seams - the dried surface is thoroughly sanded and cleaned of dust.
Before you start sanding the ceiling, keep in mind that this process is dusty and dirty. Therefore, it is correct and safe to wear goggles and a respirator to protect your eyes and respiratory tract, and cover doorways with a thick, damp cloth. Otherwise, cleaning after such repairs will take a long time.
Tip: if the project provides for a multi-tiered ceiling structure, it is more convenient to use an angled spatula to seal the seams. This work must be done efficiently and carefully, otherwise unevenness will appear both during the application of plaster and during the painting process.
Surface Condition Assessment
The complexity of the final stage of finishing directly depends on how well the installation work was carried out: how the seams between the sheets turned out, how well the screws were screwed in, etc.
By the way, puttying drywall begins with checking the quality of screwing in fasteners. If the cap sits more than 1 mm deeper than the cladding surface, then it is better to unscrew the self-tapping screw (the hole will subsequently be sealed with putty), and screw in a new fastener at a distance of 50 mm from the sealed hole. If the cap, on the contrary, sticks out from the plane of the wall or ceiling, then it needs to be tightened. It’s very easy to check - just run a spatula over the surface of the material: if it clings to the caps, you need to tighten it.
We hope that the installation process was not accompanied by unlawful actions in relation to the finishing material, and there are no prominent dents or scratches on the sheets. Otherwise, after priming, you will also have to work hard to seal the defects. This means that the final stage of work may be delayed.
Through holes up to 3 cm
For repairs you will need a minimum set of tools and materials:
- Sharp knife;
- Sealant or PVA glue;
- Any available material to fill the hole space. This could be crumpled paper or a piece of foam left over from the packaging of purchased household appliances;
- Putty;
- Sandpaper;
- Putty knife.
Before filling a hole in drywall of this size, you need to prepare the surface:
- Clean the edges so as to obtain a smooth inner surface without crumbling pieces and shreds of paper;
- Carefully prime the inner edge of the cleaned hole and the area around it at a distance of 5 - 10 cm;
- The prepared lump of paper or foam plastic is smeared along the edges with glue and the hole is closed with it. It is necessary to ensure that the edges of the homemade “plug” do not protrude above the plane of the wall;
- After the glue has dried, the sealed hole is puttied.
Further actions depend on the type of decorative wall covering: painting requires careful leveling, since the slightest flaw is noticeable on the painted surface. Therefore, another layer of putty and careful smoothing with fine-grit sandpaper may be necessary.
Primer
A primer layer can ensure minimal exposure of plasterboard sheets to changes in temperature and humidity conditions in the room. It also provides better adhesion for the subsequent layer of putty. The primer is used to cover all seams, places where the frame structure and cladding are connected with self-tapping screws, and areas that have undergone repair. It is best to apply the primer in two layers, making sure that the first layer has had time to dry. The primer composition is applied in thin layers with any convenient brush.
There really is plenty to choose from, fortunately the manufacturers have taken care of this. The only thing we don’t recommend doing is giving preference to the cheapest options. Choose a primer for highly absorbent surfaces!
putty
Actually at this stage the stage of gypsum board putty begins. To do this, we will need putty, a 100 and 250 mm spatula, reinforcing tape, which is better to immediately cut into pieces of the required length, a hammer drill with an attachment that will replace the mixer, and fine-grained sandpaper.
Types of putty
- Gypsum putties. A convenient solution for most premises. The exception is the so-called “wet rooms” - gypsum putty in such rooms peels off quite quickly.
- Waterproof putties. Already from the name it is clear for which rooms they are best suited. Waterproof putties are used for bathrooms, kitchens, basements, etc.
- Polymer putties. Most often they are used to apply the final, finishing layer. Such compositions are interesting because after drying they do not require sandpaper treatment.
To seal joints between sheets, special putties are often used, which are characterized by excellent adhesion to the base and excellent elasticity. They are also used when applying the finishing layer, and special compounds cope best with finishing complex curved surfaces. How to putty drywall correctly so that this process takes a minimum of time? You can, for example, buy ready-made putty mixtures that do not need to be prepared from dry compounds in water, stirring with a hammer drill with an attachment. Everything is very simple: open the container and immediately get to work.
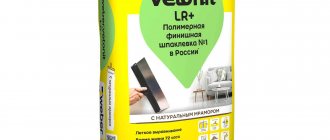
We recommend Rotband putty, the consumption of which can be found by reading the article at the link. Let us repeat that the cheapest compounds are not always the highest quality.
Application
Primary attention is paid to the joints. It is on them that the first layer of putty is applied. To do this, take a 100 mm spatula, a little putty and immediately get to work. It is quite natural that work begins from the ceiling. The joints are puttied in such a way that the cracks are sealed as much as possible with putty. Puttying plasterboard walls is a simple task, but it also requires some skill.
The first layer should be thin. After passing the joint between the sheets, an even 100 mm strip should form. A reinforcing mesh is applied to it, right in the middle. Moreover, this operation is carried out quickly, until the putty composition has hardened. The mesh is carefully embedded in a layer of putty, after which you need to wait until the composition hardens. It is important that there are no breaks or steps - the surface should be as smooth as possible. As a rule, a day is enough for the putty to dry. The same measures are carried out for walls and partitions inside premises made earlier. When the first layer has dried, carefully run a spatula over it and remove small hardened particles that may interfere with us in the future. At the same stage, we seal the holes formed when attaching the plasterboard sheets to the frame: apply just a little putty to the spatula and move it over the holes. There should not be any residues of the composition on the surface.
Apply a second layer of putty so that the width of the applied strip is approximately 150 mm. The new strip should completely cover the previously applied one, thereby smoothing out the boundaries of the 100 mm strip. Next, using a 250 mm spatula, we evenly level the putty composition along the strip. There should be no “washboards” formed. Apply a second layer, again wait 24 hours until the putty is completely dry.
Next, we repeat the procedure for getting rid of small irregularities again: take a wide spatula and move it over the treated surfaces. All debris should fall off easily. If you find a place where you can feel the bumpy surface, then remove the unevenness using the same spatula, carefully moving it along the bumps.
The following layers are already of the finishing type, so it is best to use fine-grained compounds that are ready for use. At this stage, the main thing is not to overdo it with the amount of putty and be moderate. We wait until the layer dries, and again we go over the surface with a spatula, removing small irregularities. We pick up a portable lamp and observe the quality of the work done. With spot lighting, all the flaws will be immediately noticeable, which will have to be corrected with new layers of putty. Just don’t overdo it, in case you somehow attached the gypsum board incorrectly and it falls on you - the weight of a sheet of drywall is not that small (more on that here). And you can get carried away and apply one layer of putty after another, making the structure heavier.
Important! It is better to use a point source at each stage for maximum surface quality control.
Grinding
This is done using a grinder or fine-grained sandpaper. You will have to arm yourself with a respirator - there will be a lot of dust from the putty. When the surface of the ceiling or wall acquires a perfectly smooth appearance, you can begin to apply the very last layer of latex primer.
Do I need to plaster?
In the process of creating plasterboard structures, the question arises whether it is necessary to plaster the plasterboard before the final decorative finishing. It would seem that drywall levels the walls, creates a smooth surface, which does not make much sense to plaster. But professional craftsmen note several important reasons why plasterboard surfaces can and should be plastered:
- A thin layer of plaster allows you to hide minor defects and the slightest curvature of the plasterboard sheet.
- Plaster allows you to hide the caps of fasteners and joints connecting several plasterboard sheets.
- Plaster helps hide surface defects that may appear as a result of long-term use of a plasterboard structure.
- Plasterboard surfaces must be puttied before painting.
- Plaster on a plasterboard wall can be an interesting decorative coating.
Do not try to hide frame installation errors under a layer of plaster. The result of such actions will be a damaged drywall surface and falling off pieces of dried leveling mixture.
Plasterboard putty
Preparing drywall for puttying includes such stages of work as puttingtying corners, slopes and screws. This work is not difficult, but it requires maximum care and a lot of time. You should be patient and distribute the work so as to avoid forced downtime, when, for example, you need to wait for the putty to dry. The technology for puttingtying the ceiling is no different from working with walls, but it is important to take into account the fact that you need to start from the ceiling. For this, two spatulas are used - 45 -70 cm wide and 10 -15 cm wide. A spatula is also useful for processing corners. The tape is glued so that it equally covers the joining sheets of drywall. The seams are puttied in the longitudinal direction relative to the seam. Two spatulas of different widths are used. First, the putty is applied narrowly, then the wide one is smoothed along the length of the seam. The materials required are a dry putty composition for the plane of the sheet and, separately, for sealing the seams. Specialized stores sell ready-made putties in jars, but this is a material for professionals. At our qualification stage it is too early to use them. When using polymer compounds, you can limit yourself to a weight of half a kilogram. But each brand of putty has its own characteristics, so it is best to calculate consumption using the instructions on the packaging of the material. To obtain a smooth surface of the walls before gluing, they need to be puttied. This way we get a flat surface that is ideal for wallpapering. After the putty has completely dried, they begin the process of grinding the surface; grinding is done with a block, fine sandpaper, and the main thing is not to overdo it, so that instead of a smooth wall you don’t end up with a hole at the seam site. They are plastic, since the thickness of the first layer is quite large.
- Finishers. They are applied in a thin layer, which is rubbed down after drying, after which the surface is ready for further finishing. They are not used for leveling, but only for adjusting the base covered with starting compounds.
Among the manufacturers of putties (as well as primers and plaster mixtures), the following should be highlighted - Knauf, Jobi, Dufa, Tikkurila, Atlas, Lacrisil, and domestic ones - Prospectors, Svyatozar, Consolit.
Repairing damage 3 - 6 cm
Repairing holes in drywall measuring from 3 to 6 cm or more is done using patches made from the same material. That's why you shouldn't throw away drywall scraps after repairs - you should leave a few pieces just in case. Otherwise, you will have to ask around from familiar builders who work with gypsum boards.
The easiest way is to cut a round hole in the damaged area using a drill with a drywall attachment (crown). The hole has smooth edges. Next, they begin to make the patch using that “crown”:
- Cut out a square with sides 4-5 cm larger than the diameter;
- A circle is drilled from the wrong side, not reaching the front paper layer;
- Use a knife, chisel or any available tool to clean the plaster. The result should be a round insert with a square paper front;
- Prime the patch and the surface of the drywall, not excluding the inside of the hole and the edges of the liner;
- After the primer has dried, gypsum putty is applied to the edges of the hole and the patch is inserted into the hole;
- Excess putty is spread over the surface with a spatula, and the square part of the patch is pressed against the wall.
Further steps consist of puttying and finishing with decorative material using conventional technology.
Note: if you don’t have a drill or special attachments, you can make the patch square. To do this, you will have to arm yourself with a pencil and a ruler so that the fragments match as accurately as possible.
DIY drywall putty
In order for the plasterboard structure to acquire a finished look, it must be puttied. How to putty drywall, remove corners, seal joints - everything in this article. Paper and sickle are most often used to finish internal corners - the junction of walls, as well as walls and ceilings.
The technology is similar to seam sealing. A certain amount of putty is applied to the corner, paper or sickle is glued onto it, the reinforcing strip is pressed into the composition with a narrow spatula, and excess putty is removed. After this, they go through the corner again, applying a thin layer of putty on top.
To summarize, it is worth saying that priming is a necessary operation. It allows you to get good results and reduce material consumption. The Knauf company, one of the leaders in the production of drywall, allows the entire surface of the sheets not to be puttied under tiles and wallpaper. Only joints, corners and screws.
No one uses putty for laying tiles, but yes, for wallpaper. And all because wallpaper pasted without pre-treatment sometimes comes off along with the cardboard and sometimes even down to the plaster. So the second time, putty is simply inevitable.
Sanding plasterboard walls
Before starting work, you need to put on a mask or goggles. It is advisable to protect the respiratory system from gypsum dust.
For sanding, beginners can use a regular construction float , on which they put sandpaper or a sanding mesh. The mesh is softer than sandpaper and does not collect dust. If a piece of dry putty gets caught in the sandpaper, it can scratch the wall.
To process the finishing layer, the sanding paper should be fine-grained, for the starting layer – coarse-grained.
To sand corners, you need a special sponge with beveled edges. If you don't have it, you can fold the sandpaper in half and work in the corners.
Valera
The voice of the construction guru
Ask a Question
Corner structures - external and internal - do not need to be sanded if you plan to glue thick vinyl or liquid wallpaper on them. If you plan to paint the wall, not a single unevenness can be left here. You need to use a construction spotlight or flashlight aimed at the wall and sand it until it is perfectly smooth.
What is the maximum layer of putty that can be applied to drywall?
When you are thinking about renovating your home, many questions always arise. For example, how to install drywall correctly, whether you can do it yourself, whether it needs to be primed, and what putty to buy. The drywall itself is smooth and even, but it comes in certain sizes, so it is impossible to avoid joints between them.
These irregularities, as well as the screw heads that are visible, must be sealed with putty. For drywall, gypsum plaster is best suited. Polymer has also proven itself well. If you can afford it in the price category, then you can take it. Large construction stores usually have a huge selection of everything - not only putty, but also other accessories for repairs.
Therefore, it is very easy to make a mistake and buy something that is not exactly what you need. How to choose the right putty? First you need to understand what it is.
Firstly, among the many types of putties, you will immediately understand that not all are suitable for your purposes. There are putties for ceilings and floors, there are those for covering up cracks and chips, and there are generally purely decorative ones that will not fulfill either the first or the second task 100%. This work is not difficult, but it takes quite a lot of time. First you need to decide on the putty.
Putty is a white powder-like substance that is used in construction. Using this material, smooth walls, floors and ceilings are created. You can apply paint or wallpaper over the dried putty.
Important nuances
When the ceiling in the house is already covered with plasterboard and you need to putty the coating, you need to remember the following nuances:
putty must be selected of high quality, because this directly determines how complete and durable the repair will be. And when it comes to the ceiling, special attention should be paid to the quality factor of the materials preparing for painting; It is worth considering in which room the renovation will be done
If this is a room with a high level of humidity in the air, for example, in the kitchen, bathroom, then you should buy waterproof putty; it is important not to miss a single microcrack or seam. Only a perfectly flat surface will look aesthetically pleasing and beautiful.. It is important to want to create a cozy and harmonious atmosphere in which high-quality repairs will be done in the best possible way
It is important to want to create a cozy and harmonious atmosphere in which high-quality repairs will be done in the best possible way
Plastering drywall: what and how to do it
- ready-made dry or paste mixture;
- container for preparing dry formulations;
- primer;
- spatulas with narrow and wide blades;
- mesh for painting work;
- paint brush (preferably several different lengths);
- construction knife;
- devices for grouting.
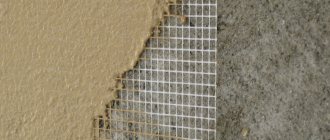
The seams of plasterboard sheets must be filled with putty and leveled along the entire length. To do this, it is recommended to use narrow spatulas. Then the solution is covered with a reinforcing mesh, which needs to be pressed a little. Then the mesh needs to be completely covered with an additional layer of putty.
A spatula with a wide blade is already used here. When applying the primer mixture, any omissions are unacceptable, and the joints are glued with tapes (serpyankas), and then covered with special reinforcing compounds. On a dry surface, such lines are erased, removing slight deformations and sagging. The actual difference between putty and plaster comes down to the grain size of the material. By reducing it, developers make the applied layer thinner, and it also becomes less rough.
It should be taken into account that in any finishing material the actual size of the fractions is less than the maximum specified by the manufacturer. But at the same time, when producing putty, the raw materials are sifted more thoroughly than when producing plaster.
Properties of fiberglass
Painting fiberglass outwardly creates the impression of an absolutely fragile material that can tear with careless movements. However, when glued, it creates an excellent reinforcing layer that prevents existing cracks from spreading and prevents the formation of new ones.
Given the different densities of the material, it is divided into certain classes. Accordingly, the cost of such a web is based on thickness. For gluing to the ceiling, a thickness of 26 g/m2 is sufficient. This will create a light but durable reinforcing layer.
In addition, the material has a number of advantages:
- thanks to the use of natural raw materials, fiberglass is environmentally friendly;
- high breathability helps maintain an optimal microclimate;
- the composition of the material does not contribute to the formation of fungi and mold;
- perfectly amenable to wet cleaning;
- the strength of the material prevents the formation of microcracks;
- being absolutely non-flammable, the material does not emit harmful fumes when in contact with fire;
- The fiberglass ceiling can be glued to any materials, including natural and polymers.
Thanks to the interesting weave pattern, the fiberglass-covered ceiling looks original.
Cobweb to strengthen the ceiling
Is it possible to putty drywall directly with finishing putty?
Puttying the mounted surface is not difficult at all. Look at the photos and video materials that are on our website and feel free to get to work. It is not surprising that the question arises as to which putty is best to putty on drywall, because not only the final appearance of the surface depends on the quality of the putty.
The adhesion and strength of the layer also depend on the type of material. Some craftsmen suggest sealing only the joints and screw heads when processing for painting or before wallpapering. However, just look at the Knauf technical documentation, where it is written that the entire plane of the sheet needs to be puttied. Construction practice has shown that the paper surface of gypsum boards is far from flawless.
To verify this, it is enough to make one stroke with a spatula.
- A powdery substance as a binder, turning into a paste after mixing with water.
- Fillers in the form of limestone, chalk and other materials.
- Modified additives to improve the properties of the mixture.
- Water.
- The corner is coated with finishing or starting putty along its entire length.
- Now the contra-shultz is pressed tightly against the corner of the structure and leveled.
- Excess putty is carefully removed with a spatula.
- After drying, you need to finally putty (preferably in 2-3 layers) the installed profile.
- Now you can putty the entire remaining surface of the arch or niche.
Causes of connecting seam defects
Cracks can appear if the putty mixture is prepared incorrectly.
The main defects in gypsum board joints include:
- visible joints;
- dips and cracks in seams;
- small cracks throughout the entire sheet area.
The causes of defects lie in the wrong choice of putty or preparation.
The use of poor quality fastening materials can lead to sagging of the structure during operation. Massive structures require a powerful aluminum frame.
The absence of reinforcing paper tape or serpyanka worsens the appearance of the joints.
Maximum layer of putty
For leveling with layer-by-layer application of the composition, putties with the finest grain (0.15 mm) are used first, then a mixture with a slightly larger grain (0.8 mm), and the last layer is putty, the grain size of which is no more than 0.1 mm .If leveling needs to be continued, the second layer of putty does not exceed 5 mm. The treated surface can be sanded after the composition has completely dried.
In most cases, calcite filler is added to such mixtures and the surface shines after drying. It clearly shows all even the most minor defects in the work, which can be corrected with the same putty, bringing it to zero. For this, cement putties are used to fill all existing voids and small cracks.
If there are significant differences, this composition can be used to eliminate them and level the walls. To level the walls, a structure is constructed from plasterboard, which hides the most significant defects. And it needs to be puttied, especially if paint is used as a finishing coat.
All other materials must be puttied, applying several layers of the mixture.
Do I need to prime ceilings before painting with water-based paint?
Coating ceilings and walls with water-based emulsion is environmentally friendly, does not cause allergic reactions and has no negative impact on humans. And the addition of pigment gives the surface the desired color. For painting with water-based emulsion, a universal acrylic-based primer is used.
It is suitable for preparing most ceiling surfaces. Mineral compositions are acceptable. Special primers are used only to perform work in specific cases indicated on the packaging.
- The mixture itself.
- A spray bottle that will ensure optimal application of the foundation. If the sprayer is missing, it can be replaced by a regular paint roller, preferably one with a long handle.
- Paint brushes for applying product in corners. In small areas you can get by with just them.
- The primer tray will make the job much easier when using a roller.
- Is it necessary to prime the ceiling before painting if the frame is made of gypsum plasterboard? Of course, after installation, a plasterboard structure must be puttied and leveled.
- Is it possible to do without a primer when using wallpaper for painting or applying a new layer to an old water-based paint? Yes, you can. But the primer will reduce paint consumption. If the previous layer is significantly different in color, then application is necessary.
- Removing old coating (paint, wallpaper, damaged plaster).
- Leveling the surface by applying a layer of putty (ideally using the starting putty first and then the finishing putty). Before filling, the ceiling must also be treated with a primer.
- Sanding the putty surface for final leveling.
- Remove accumulated dust with a vacuum cleaner or brush.
Putty layer: 8 questions on wall putty technology
The starting one differs from the finishing one in the coarse grinding of the filler and, accordingly, slight shrinkage. It is designed to eliminate relatively serious foundation defects (cracks, seams, potholes, small blockages). The thickness of the putty layer can reach 5 millimeters. Apply it with a narrow spatula to a wide one and apply it to the wall with sliding movements.
Periodically change the direction of movement to perpendicular: this way you can remove stripes from the spatula. Not necessary, but desirable. The fact is that the seams between the additional gypsum board sheets cut in place are thick and make the wall uneven.
Puttying the entire sheet with a millimeter layer will completely hide the seams.
- Nitro enamels, oil and alkyd paints are removed with a spatula after softening with a remover or heating the surface area with a construction hairdryer;
- Whitewash and weak plaster can be removed without dust with the same spatula, having first moistened it generously with water twice at an interval of 10-15 minutes;
- Water-based paints can be removed by sanding.
Let's first separate the flies from the cutlets. The putty is intended for finishing the surface and preparing it for painting or wallpapering. To level out significant defects, there is another material - plaster.