Why glue drywall to the wall?
If you ask a trivial question in this section of the article, you will have to give a trivial answer. You need to glue drywall to the wall to quickly level it and carry out further painting work.
I can’t say because I don’t think that gluing drywall to a wall is better than high-quality plastering of the wall. However, it is not always and not everywhere possible to use plaster to prepare walls.
In addition, when you are short on time, frameless wall cladding saves a lot of time. Let me remind you that the cement plaster of the wall will dry (gain full strength) for 28-30 days, gypsum plaster dries at the rate of 2 mm layer - one day, that is, a 2 cm layer will dry in 10 days, in a heated and not humid room.
You can glue drywall to the wall of a living room in a day. It will take a day for the glue to dry. Next, you can begin painting the drywall.
Completion of work
After the adhesive has completely dried, after 2-3 days, start filling the joints: apply putty for leveling, then press the reinforcing tape into it. Once everything is dry, apply another leveling coat of joint compound to the joints and any protruding nail heads (if used).
Advice! For leveling, you can use the same mixture that was used for gluing the plasterboard.
Seal gaps along the floor with caulk. Finishing work can begin only after the joints have completely dried.
Option 1, flat wall
If you have a concrete wall of a monolithic or panel house, then most likely it is quite smooth. In this version, for work you will need:
- KNAUF-Fugen putty mixture;
- Notched and plain spatula;
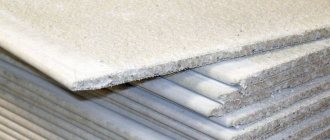
- Plasterboard sheets 12.5 mm thick. Select the moisture resistance of the sheets according to the type of room;
- Deep penetration primer;
- The construction level is long, bubble.
Note: GK sheets are glued vertically, end-to-end. End joining of sheets is undesirable.
Stages of work
- Prepare the wall for pasting. Clean it and prime it. Well-absorbing surfaces (gypsum, brick) are primed twice;
- Prepare the sheets, clean them from dust;
- Apply glue with a notched trowel onto the sheet along its perimeter and 1-2 stripes along its center (as in the picture);
- Place the sheet against the wall and, using light pressure, level the sheet vertically;
- After gluing the second sheet, to the vertical level check, add a horizontal plane check of two sheets at once;
- Continue pasting until work is completed.
What glue should I use?
The choice of substance depends on the surface on which the drywall needs to be glued. Perflix is a unique drywall adhesive because it is suitable for all cases. Ceresit SM 11 is well suited for ceramic tiles. Silicone can be used for it and mirror surfaces. Liquid nails and polyurethane foam are also used for brick and concrete walls. Both materials will hold up better than glue. But in the first case it will cost more, and in the second it will take a lot of time and patience, since the sheets need to be pressed every 15 minutes for 1 hour. What material to use depends on you and your goals.
Option 2, wall unevenness up to 2 cm
If the wall is not very smooth, brick, and you are measuring irregularities up to 20 mm, for the work you will need:
- KNAUF Perlfix mounting mixture;
- Simple spatula;
- Drywall sheets 12.5 mm thick, 9 mm possible;
- Deep penetration primer;
- The construction level is long, bubble.
In this, the most common version of the work, the adhesive mixture is applied to the sheet in voluminous piles at intervals of 30-35 cm. Next, the sheet is lifted and glued to the wall level.
With all options for installing sheets, it is important that the bottom edge of the sheet does not “drown” in the future screed after installation. Therefore, if after installation of the sheets it is planned to screed the floor or self-leveling floors, it is necessary that the sheet retreats from the subfloor by 10-15 mm. To do this, place strips of HA of the required thickness under the sheet.
Useful tips
Recommendations for working with adhesive and drywall will help you complete all the work efficiently - the walls will be perfectly smooth, and the fastening of the sheets will be very strong:
- Finish all work with electrical wiring before starting to level the walls using plasterboard.
- Drywall cannot be glued to lime plaster.
- Glue the sheets exclusively to the supporting base, and it should not delaminate or crumble.
- Dowels will provide additional fastening strength. Use 4-5 pieces per stove.
- Glue plasterboard to the walls at a temperature of +10˚ C.
- Leave the drywall to sit in the room where it will be attached to the wall for 2-3 days.
- Cut the plasterboard so that there is a gap of 10 mm at the bottom. This will protect the drywall from absorbing moisture from the floor.
- You can use different gluing techniques even on the same wall.
- If the base is made of gas silicate blocks, then apply the glue not to the plasterboard, but directly to the surface of the wall.
Option 3, very uneven wall
If the wall unevenness exceeds 20-30 mm you will need:
- KNAUF-Fugen putty mixture;
- KNAUF Perlfix mounting mixture;
- Notched and plain spatula;
- Sheets of plasterboard 12.5 mm thick;
- Deep penetration primer;
- The construction level is long, bubble.
Stages of work
- Clean and prime the wall;
- Cut strips 20-30 cm wide from HA sheets;
- Glue these strips to the wall using KNAUF Perlfix mounting compound using a level. They will serve as a base for gluing the sheets. The step between the centers of the strips is a multiple of half the width of the sheet.
- Glue the drywall sheets onto the KNAUF-Fugen mixture, as in option No. 1.
How to prepare the solution correctly
To obtain a reliable and durable fixation of the material with the base, you should not only pay attention to the choice of product, but also prepare the solution correctly. You should always carefully read the instructions from the manufacturer, which are written on the packaging. There are general principles of preparation, as well as the proportions of stirring the mixture with water.
It is better to choose a drill with a special attachment as a mixing tool, if you have a construction mixer. The mixture is introduced into the prepared water, working gradually so that lumps do not form.
You can also use not ready-made mixtures, but mix PVA glue with gypsum putty. The second component should be similar in consistency to sour cream. The elements should be mixed until smooth, wait five minutes for the composition to infuse, after which you can apply it to the surface.
It is better to choose a drill with a special attachment as a mixing tool, if you have a construction mixer.
Conclusion
In the article I showed how to glue drywall to a wall on your own. Everything is simple, but I do not recommend using gypsum plaster mixtures for gluing.
More articles
- Architectural terms
- Types of wall cladding on a metal frame
- Soundproofing tape
- How to cover a curved wall with plasterboard
- How to connect drywall profiles
- Frame made of metal profiles for plasterboard
- Plasterboard structures in wet areas
Cladding with plasterboard sheets: advantages
Facing with HA sheets is carried out in the following cases:
- surface leveling;
- improved heat and sound insulation;
- hide wires and pipes;
- surface decoration - creating niches, shelves, design with figured elements.
The plasterboard sheet has a flat surface; when mounted on a wall, it does not deform, but remains flat. This is convenient for subsequent painting, laying tiles, and wallpapering.
In various rooms with high humidity and high temperatures, the following types of gypsum boards are used:
- An ordinary room with moderate temperature changes is a gray gypsum board sheet.
- Wet room: bathroom, corridor in a private house, balcony, attic, kitchen - green sheet of plasterboard.
- A room with a working fireplace, a Russian stove, with a rough stove - pink gypsum board.
On the construction market there are types of floor plasterboard and facade plasterboard for outdoor work.
There are methods for attaching sheets to the surface - frame and without frame. In the first case, profiles are applicable. For the second method, you need to choose the right adhesive composition.
Advantages of gluing gypsum board to the surface:
- installation is easy and quick;
- less expensive method compared to frame;
- this method does not take away extra centimeters.
The negative side is the inability to hide wires and communications behind the casing.
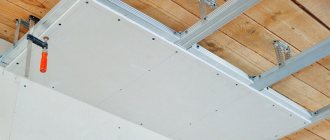
Required tools for installation
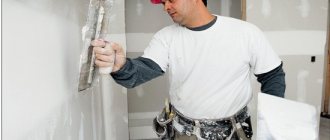
To mix the glue, you will need a large plastic container (you can take a bucket with a lid), a construction mixer or a drill with a whisk attachment. Manual mixing is also allowed, but the quality of the solution may be lower, and lumps often remain in it. The plasterboard sheets should be glued using a trowel and a notched trowel. You will also need:
- building level;
- knife;
- pencil;
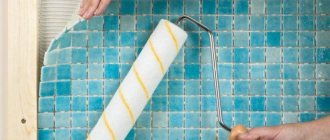
- brush, roller for primer;
- if necessary - reinforcing tape, sealant.
Finishing
Of course, installation of gypsum boards is not the final stage of interior finishing. Usually the walls are painted or wallpapered. Despite the smooth surface of drywall, the sheets need preparation before final coating.
Here is a step-by-step diagram of the work:
- If there are no factory chamfers on the edges of the sheets, they are cut out with a knife. The joints between the sheets are filled with a special putty for gypsum board joints. To do this, the composition is mixed in accordance with the manufacturer's instructions, and the joints are evenly coated using a narrow spatula.
- While the composition retains its plasticity, a reinforcing tape is pressed into it, which will be covered with a second layer. Read more about sealing seams here.
- Repeated puttying is carried out after 10–12 hours, when the first layer hardens. After this, the protruding surfaces are cleaned with sandpaper.
- Now the sheets need to be primed and wait for the composition to dry completely.
- Then the first layer of putty is applied, which must also dry.
- If the surface does not meet the requirements, priming is performed again and a second layer of the mixture is applied.
- After drying, the surface is treated with fine-grained sandpaper.
- At the final stage, another layer of primer is applied to the putty, wait until it dries and begin finishing the room.
You can learn in detail about all the stages of gluing drywall to the base by watching the video. The workflow is clearly presented here, which will be useful for novice craftsmen.
If after reading the article, viewing photos and videos, you still have questions, ask them in the comments: a gypsum board installation specialist will answer you.
Ceiling finishing
The base must satisfy the following conditions.
- Not made of wood. You cannot stick it on a wooden base, since the material can change its size, which will cause the sheets to quickly fall off.
- The base is level. If it is difficult to make a perfectly flat ceiling, you can level it with plasterboard beacons. The guides glued in advance will serve as a leveled frame.
- The concrete ceiling should have notches for better adhesion.
- There should be no condensation on the ceiling, it should not freeze or become damp. If the apartment is regularly flooded from above, this finishing method is not suitable.
- There are no greasy stains, the ceiling is not painted with oil paint. The base must be cleared of elements poorly fixed to it.
For the ceiling, plasterboard of minimal thickness and Perlfix glue are selected.
You can prepare a homemade composition from alabaster (58%) and bone glue (2%), diluted with water (40%).
First, the evenness of the ceiling is checked, and areas of strong differences are tapped with a mallet. To avoid the formation of cross seams, it is better to paste the ceiling in a checkerboard pattern. When gluing near door or window openings, the entire surface of the drywall is coated.