- home
- Construction and renovation
- Walls
>
>
⬎
Many finishers and “not so many” are familiar with such a wonderful dry putty “fugen” (formerly it was called fugenfühler). It is usually used for sealing drywall joints, puttying holes and corners. For continuous puttying of walls, it is used much less often - it does not have the proper “ductility”, it is difficult to sand, does not have a white color and in general, it is harder for it to work. However, after understanding it a little, it becomes clear that the putty is very versatile, it can replace several types of other putties in repairs, it is much stronger than “its polymer counterparts,” and the consumption of this material is very pleasing. To putty a standard room in a panel, a 25-kilogram bag is enough.
Preparing the walls
The walls must be cleaned as much as possible of whitewash, paint, and crumbling parts. Often it is not possible to clean the walls of Soviet-era paint; in this case, what is removed is removed, and the wall, after being treated with a regular primer, is additionally treated with a concrete contact primer. Concrete contact has proven itself to be excellent, it exhibits good adhesion even to alkyd paints, the drawback is that it takes a long time to dry, subsequent work is recommended to be carried out no earlier than 12 hours after its application. These recommendations apply to concrete walls in panel houses; brick walls, as a rule, are not difficult to clean from paint and other things and you can get by with a regular primer. So, the walls are primed. Next, if plastering of the walls is not provided, you should tackle the corners.
Aligning corners
In general, this procedure does not apply to putty, but it is recommended to do this without plastering. If you want beautiful, right angles even if the walls are not level (not plumb) - forget about corner spatulas, a rule is needed here. The closer the height of the walls to the rule, the better. If the ceiling height is 2.5 meters, the rule is needed a little less so that it can be placed vertically in a corner and work with it freely. You can, of course, use a 1.5 meter one, but then you will have to spend more time and the result will be less impressive.
So, the corner consists of 2 adjacent walls; we will stretch each wall of one corner in turn. We apply a thick fugen to the wall along the entire height of the corner, so that there is at least a centimeter layer from the corner to the side of 30-40 cm. Next, we place the rule in the very corner and stretch it to the side along the applied putty. As a result, we get a vertical plane of putty mass, which must be eliminated as a rule after 30-40 cm from the corner. In order not to spread too much, while pulling the rule needs to be pressed into the wall, it will rest on the protruding sections of the wall and remove the excess, but in the places of the holes the mass will remain and become level with the protruding areas. Particular attention should be paid to the geometry of the resulting result; if various grooves have formed, there is no need to try to smooth them out with a spatula or trowel - after the mass has set, these defects will be eliminated with putty, the main thing is to make the angle in one line from floor to ceiling. Having trimmed half a corner in this way, move on to the next ones. It is recommended to go through the second wall of each corner using the same method after the first brushes have set. This is how we get unsightly corners due to the grooves, but their geometry is predetermined and it’s up to the putty.
In addition to the vertical corners, you can also trim the horizontal ones, where the ceiling or floor meet, so that the ceiling molding or plinth, when installed, does not show the curvature of the walls. However, then a reasonable question arises - if there is so much labor involved, wouldn’t it be more technologically advanced to plaster the walls along the lines so that all the corners are even and the walls themselves are also ideal? It's up to you to decide here, but I'll just say that pulling out the corners can be done with a fugen or a plaster gypsum mixture, for example a rotband from the same manufacturer. The advantage of rotband in this case is that it sets faster.
An important advantage of fugen is that it can be applied immediately after the rotband has set. There is no need to wait for complete drying.
Differences in fugen operation
Fugen, like other gypsum putties, differs significantly from polymer, oil-adhesive and other putties. These differences lie not only in the properties of the finished surfaces, but also some aspects of the work are fundamentally different. The most important thing, in my opinion, is that the hardening of gypsum mixtures does not directly depend on the presence of moisture in them; in this way they are similar to cement-based solutions. This means that after a period of time, which the manufacturer indicates as the “lifetime of the solution” (for fugen it is 30-50 minutes), the solution begins to harden (set). You can, of course, mix water and putty, extending the “life of the putty,” but the properties and strength of the putty deteriorate. From all of the above, you should understand that you need to apply putties exactly as much as you use during the specified “lifetime”.
The “lifetime” of applied putty greatly depends on the expiration date on the bag. For a completely fresh mixture, this period can be as long as an hour, while the mass from an expired bag can set within 5 minutes after mixing. The same statement applies to the Rotband.
This seemingly disadvantage turns out to be a significant advantage when a wall that has just been puttied can be puttyed a second time; you just need to wait until the first layer has set, although complete drying may take a longer time. I would like to note that the indicated working time of the putty should not be taken literally and begin to apply the second layer immediately after an hour has passed. Here you need to orient yourself on the spot; to apply the next layer, the first layer must be sufficiently strong so that subsequent actions do not damage it. The hardening time is significantly influenced by the thickness of the layer and the absorption of moisture by the surface. Usually the first layer takes the longest to set, but subsequent ones can usually be puttied immediately after applying the previous one.
When working with gypsum mixtures, it is important to wash the working tools immediately after making the next batch. If this is not done, the tool will quickly “overgrow” and become unusable. By the way, dirty tools and the container in which the gypsum mixture is applied shortens the life of the solution.
Putty for sealing drywall joints: which one to choose and which one is better
When creating plasterboard structures, leveling ceilings and walls using plasterboard, it is important to strictly follow the technology at all stages of work, from creating the frame to puttingtying the surface of the sheets. Particular attention should be paid to the joints of drywall, since improper processing of the seams will lead to the appearance of cracks in these places in the future, the joints will be noticeable through the finishing and the repair will be damaged. One of the important conditions for the correct processing of joints is the use not of ordinary finishing putty, but of a special putty for sealing drywall seams.
Types of putty mixtures
According to their purpose, putties are divided into several types:
- Starting – used for preliminary leveling. The main requirements for them are high adhesion to the base, strength and durability.
- Finishing – applied under the decorative coating. With their help, the smallest defects are eliminated, which allows you to get an ideal smooth surface.
- Universal - it is advisable to use by amateurs when they need to level the surface using one composition. There is no need to think about which putty to choose. Professionals prefer to use leveling compounds followed by finishing preparation.
Important! Conventional finishing and universal compounds are not suitable for sealing seams.
- Specialized - designed for specific purposes, for example, for sealing seams between sheets of drywall. It is recommended to use drywall and putty mixture, which are produced by one manufacturer.
Important! If for some reason you do not have the opportunity to use a special putty to seal the seams between the gypsum boards, you can use a high-quality starting compound.
Seam putties from well-known manufacturers
The difficulty in choosing putty is due to the wide variety and excess of advertising. It is advisable to systematize brands in order to select the desired composition in accordance with requirements and financial capabilities.
Specialized putties for sealing joints are produced in the form of dry mixtures. They are stored in bags for a long time and are prepared only before use.
"Knauf Fugen"
A relatively inexpensive putty that allows you to solve many problems when finishing premises.
The composition “Knauf Fugen” (the old name is “Fugenfüller”) is considered a putty, but can act as an adhesive repair mixture. It was developed specifically for sealing joints between sheets of drywall, but soon began to be used for gluing it to walls, repairing damage to drywall, installing corners, thin-layer puttying and other types of work.
It should be taken into account that Fugen putty is a quick-drying putty and it is advisable to prepare it in small portions.
Technical characteristics of Knauf Fugen putty:
- Composition: gypsum with additives to increase plasticity and slow down setting.
- It has a fine-grained structure with fractions up to 0.15 mm.
- The thickness of the applied layer is 1–3 mm. When sealing seams, putty is applied twice.
- Does not crack or shrink.
To prepare a composition for sealing joints and screw heads, take the dry mixture in an amount of 250 g and dilute it with water. This amount is enough for 1 sq. m of treated surface.
There are 3 varieties of this mixture:
- universal;
- “Fugen GV” - intended for sealing seams between gypsum fiber sheets;
- Fugen Hudro is a moisture-resistant variety, suitable for working with moisture-resistant drywall and additional protection of joints.
Apply the putty composition in 2 layers:
- Before applying the solution, the surface is primed.
- A reinforcing sickle mesh or paper tape is applied to the first layer and pressed in with a spatula.
- The second layer is applied to the dried surface.
Attention! The prepared solution should be used within 30–40 minutes.
"Knauf Uniflot"
Knauf Uniflot putty is a specialized super-strong waterproof mixture for plasterboard joints, its properties superior to all analogues.
- The increased strength brings it to the same level as the cement composition, however, the putty in question is significantly superior to it in ductility.
- Good adhesion, which brings this type of putty closer to synthetic glue, makes it possible to seal gypsum board joints with a semicircular thinned edge (PLUK) without the use of reinforcing tape.
- The composition does not shrink and does not crack.
- Perfect for sealing the most problematic transverse joints between gypsum boards.
- Suitable for rooms with any humidity. Despite the fact that the base of the mixture is gypsum, the putty does not absorb water after drying, acquiring hydrophobic properties.
The color of the powder can vary from snow-white to gray and even pink: this factor is associated with the location of gypsum extraction and does not affect the quality of the mixture.
Knauf Uniflot putty is designed to work no longer than 25–30 minutes. After this, the solution hardens. Hardened putty forms a durable coating, and it is difficult to sand it with sandpaper. The composition should be applied without calculating shrinkage, since the protrusions will then have to be ground down for a long time.
- the joints are filled, the composition is pressed in with a 150 mm wide spatula;
- after 50 minutes, excess material is removed, the surface is smoothed with fresh putty;
- the recesses from the screws are also processed in 2 passes.
When chamfering yourself at joints, you should use reinforcing paper tape, as for other compounds.
The high cost of the Knauf Uniflot putty mixture is compensated by the quality of the material. In addition, the sealed seam does not require much consumption.
"Volma Shov"
The dry solution contains gypsum as a base, enriched with mineral and chemical fillers. The putty has good adhesion. The working time of the diluted solution is 40 minutes.
- sealing gypsum board and gypsum board seams;
- eliminating cracks and potholes;
- eliminating micro-irregularities and obtaining a glossy surface.
- the joint is primed;
- then the first layer of putty is applied and the reinforcing tape is pressed in;
- after hardening, a second layer is applied;
- After hardening, it should be polished, for which a grater with a mesh is used.
The material is suitable for application to the entire plane of the sheet. Small graininess requires further application of a finishing layer.
"GENFIR PG 35 MW"
Dry gypsum mixture with additives. Before use, the base must be primed, otherwise the layer will settle. The solution retains its working properties for 2 hours. After hardening, cracks do not form. The putty is intended for dry rooms. The dry mixture is stored for 6 months.
Conclusion
When choosing putty for drywall joints, you need to focus on the conditions of use, your skills and expected costs. In some cases, a gypsum composition is suitable, in others it is waterproof. If you intend to solve a wide range of problems, it makes sense to choose Fugen from KNAUF; if you rely on quality and durability, it is better to purchase Uniflot.
Puttying with fugen
The whole process differs from the usual in that the applied putty is removed with a spatula located perpendicular to the surface to be putty. Layers should be alternated in directions: if the previous layer was applied from bottom to top, then the next layer should be applied as desired, but try to remove the mass from left to right or from right to left. This method is also called “tear up” putty. Some authors argue that this method is only appropriate when the walls are initially very smooth, but I will answer this way: very curved walls can also be puttied this way, just 2 layers are not enough. In this way you will have to putty at least 4 times.
Most of the material goes into the first layer; in fact, the purpose of the following layers is to tidy up the first one. You can also putty with fugen in the usual way - by smoothing the mass at a slight angle, the essence is simple - the closer the surface of the entire spatula is to the wall, the smoother the result will be. But the more attractive the wall looks after one coat, the more ripples and unevenness you will add to the wall. You should putty with fugen so that when removing the applied mass, the spatula is approximately 90 degrees to the wall. The first layer will give the impression of being “not very good”, but after the second and subsequent layers you will understand that you are on the right track. An excellent result on curved walls can be achieved by plastering the first 1-2 layers with a short meter rule, using it as a spatula.
When one or more layers have already been applied to the wall, an unpleasant phenomenon occurs: when removing the applied mass, particles from the previous layer get into the putty, the old particles leave grooves, because of this, the putty begins to harden faster on the putty and you have to throw out small portions from the putty when puttingty it gets hard. To minimize this phenomenon, before application you should cut off the “snot” remaining from the previous layer with a spatula. And you should try to putty immediately after the previous layer has hardened - the surface is still wet and absorbs moisture less actively, this will significantly increase the life of the putty on the spatula.
Features of the work
Sheetrock gypsum is applied to a stable, hard, clean and dry substrate. Remove all substances that negatively affect adhesion. These are resin, chalk, dust, paint coatings, etc. Hygroscopic bases are pre-primed.
Perfect surface with Sheetrock
Apply the putty mixture mechanically or manually. Each subsequent layer is applied after the previous layer has completely hardened. This requires at least 3 hours, preferably 5. After final hardening, the surface is sanded. To do this, you will need abrasive paper, the size of which does not exceed 240 units.
How to aim a fugen
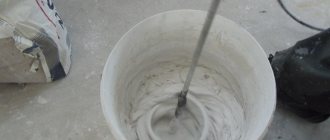
The putty should be applied manually by adding the dry mixture to the water and then stirring it with a trowel. For the first layer, you don’t have to worry too much about laying it out, but subsequent layers need to be layered without lumps. This is done like this: water is poured into a container, and the dry mixture is slowly poured over the surface of the water with a trowel or directly by hand. You need to pour it slowly so that the dry mixture is completely saturated with water. Continue pouring until dry islands appear and there are practically no holes with water left. There is no need to stir while falling asleep!
Next, wait a few minutes, the dry islands will almost disappear, stir, the putty is ready. The density can be adjusted within small limits, without adding a little to the dry islands or pouring in so that there are more of them. Everything is achieved experimentally!
Fugen shrinkage
Some authors claim that the putty not only does not shrink, but also expands in volume when drying. Fugen has a slight shrinkage; with continuous putty this effect does not manifest itself in any way; when puttying grooves and pits, the shrinkage is noticeable. Therefore, in order to putty the groove, you will have to go through a thin layer a second time. Regarding expansion, this is complete nonsense, most likely due to the “sinking” effect, when the layer is too thick or the mass is too liquid, it floats under its own weight and begins to bulge a little out of the plane. By the way, this phenomenon also occurs, as with most all kinds of putties: the putty groove sticks a little out of the plane, this happens due to the ductility of the mixture. This problem is solved by applying in one direction and removing in the other. You need to remove it by holding the spatula perpendicular to the wall. In addition, you need to wait until the putty begins to rise and go along the groove with a spatula, holding it in the same way, at a right angle to the wall. Experienced finishers are familiar with this phenomenon; it also occurs when constructing screeds with special mixtures.
The grooves must be covered with fugen in two passes. In the first pass we apply the main layer, in the second pass we even out possible shrinkage.
Does fugen crack?
I confess that in more than ten years of practice I do not remember such cases, even when the putty was stuffed into holes more than 5 centimeters deep, the most that could happen was that the putty gave a slight shrinkage. However, cracks may appear, for example, if the surface absorbs moisture very actively. For example, red brick takes up moisture like a sponge, so it must first be primed and the entire surface covered with the same fugen with a layer of less than 1 mm in order to clog the pores.
When covering deep holes up to 5 cm or more, to avoid cracks, the dry mixture must be applied with a minimum amount of water. For large layers, the consistency of soft plasticine will be just right. Naturally, the “lifetime” of the mixture is very short, so you need to have time to produce it.
If the putty cracks, it is most likely due to the mobility of the base itself. On various seams, joints and other places that raise doubts about the strength, you should glue the serpyanka mesh before puttingtying. Serpyanka can be from 5 cm wide or more, there are canvases more than a meter wide.
Application of Knauf Fugenfüller putty
The putty's composition is based on gypsum, and Knauf-Fugenfüller GV with various polymer and hydrophobic additives, which in tandem with reinforcing tape is used to seal seams, has a wide range of applications:
- between sheets of plasterboard, in other words, at the junction of plasterboard with thinned edges;
- filling defects and cracks on plasterboard sheets;
- to glue plasterboard sheets and combined panels to a flat surface, in other words, due to its properties, the building material serves as a substitute for assembly adhesive;
- in precast concrete elements, unevenness or seams can be sealed;
- for leveling the base, any wall surface immediately before painting;
- for puttying and gluing other gypsum elements together.
Sanding walls
It is recommended to sand the walls after applying the last layer, and in the intermediate stages it is best to cut off various bumps and defects with a spatula. If you sand between layers, the sanding dust will cause the putty to quickly set on the putty knife and cause grooves to appear on the surface. To eliminate this unpleasant phenomenon, you will have to prime the walls again every time after sanding. And on a primed wall, the newly laid layer will take longer to set. In general, this procedure is not prohibited, it simply increases the total time of work.
Many people claim that this putty is very difficult to sand. There is a lot of truth in this, but it’s worth noting that a surface that has been puttied to “scrape off” practically does not require cleaning, just knocking down rare bumps. All sorts of fancy meshes are not entirely suitable for sanding - regular sandpaper is more effective.
During grinding, the advantage of this wonderful material is revealed: there is much less dust, provided that the puttying was done as a “stripping”.
Characteristics of the best putties from Sheetrock, Knauf and other brands
Manufacturers of leveling mixtures have simply bombarded the modern market with their products. Here are Sheetrock and Knauf putties, and Vetonit and Yunis compositions. There are quite a few of them, and each has its own advantages, and understanding them is not always easy.
The variety is so huge that the question constantly hovers among consumers, which putty for drywall is better? To understand this, it is necessary to consider the proposed types.
Advantages of walls plastered with fugen
The surface is very durable, breathable and absorbs moisture, and in general acquires the natural properties of gypsum. The surface is almost not softened by water, unlike some popular polymer putties; it cannot be simply washed off the wall with a damp rag. At the same time, if during work the doors, tiles, etc. are a little smeared, the fugen can be easily washed off from them, provided that the “smear” is within reason. Walls plastered with fugen will be ready for wallpaper again in a few years, provided that the previous wallpaper is removed with due care. With some skill, you can use this putty to putty the walls and ceiling before painting; to do this, the last layer must be applied with a liquid, kefir-like mass.
Don't be confused by the grayness of this material; after gluing most wallpaper, no stains are visible. In order to make sure that the stains will not be visible through the wallpaper, just apply the dry wallpaper to the dry wall. If the grayness still shows through, you can tint the walls with thin water-emulsion at a time. Gray also works well when painting walls or ceilings. But you should take on finishing putty for painting after you have gained enough experience. If you are new to this business, it is recommended that the surfaces to be painted be treated with a finishing plaster coat
mixture.
Fugenfüller can be “covered” not only with gypsum mixtures, but also with any other putties. The only thing that is not recommended is to putty this putty over polymer, oil-adhesive and acrylic putties. That is, as a base it is suitable for any putty mixture.
Also, one of the advantages of this putty is the absence of odors.
During application there is a slight smell, after drying there is no smell at all! This property will be very useful for people who cannot tolerate the smell of polymer putties.
Where is putty used?
The universal mixture from Knauf is only suitable for interior decoration of an apartment, since it has a gypsum base that is not waterproof. It also contains special additives designed to retain moisture and slow down setting.
Having an environmental certificate and completely harmless to humans and the environment, Fugen putty does not crack and almost does not “shrink”, and is intended for joining perfectly smooth surfaces.
Scope of application of Fugenfüller putty (Fugen):
- Sealing joints between concrete floors.
- Filling joints between plasterboard sheets.
- Grouting small cracks or small irregularities on plasterboard, concrete and tongue-and-groove slabs.
- Complete puttying of concrete, plasterboard and plastered substrates.
- Installation of reinforcing corners.
- Use as an adhesive when attaching gypsum boards to a flat base.
