Anyone who chooses laminate flooring should be prepared for the fact that sooner or later scratches will appear on it that will have to be masked. For this purpose, a special putty is produced for the laminate, with the help of which its cosmetic repairs are carried out.
Putty for laminate
Whatever one may say, such a floor covering cannot be called absolutely reliable, since it is not completely resistant to mechanical influences, especially abrasive and scratching ones. Even minor damage can be clearly visible. Moreover, a violation of the integrity of the coating in one place can often lead to further serious damage to the material over time. Therefore, if scratches or chips appear, they must be repaired immediately. In addition, in order to preserve the original condition of the laminated coating, it is advisable to treat it with a special agent immediately after installation.
Possible causes of laminate damage
Laminate is a very aesthetically pleasing, but rather “capricious” floor covering that requires careful use. The fact is that its protective top layer, although designed for a certain mechanical load, is very unstable to some external influences. When purchasing this material, you need to know what effects are detrimental to it.
- Most often, damage to laminate flooring occurs if it is laid in rooms with high levels of human traffic. At home, this is the hallway and corridor, since this is where dirt and sand are carried in from the street on shoes. And this not only stains the coating - small hard particles of dirt act as a very aggressive abrasive, abrading and scratching the surface of the laminate floor.
- Overmoistening of the coating plays a destructive role. Water seeping into the seams between the boards leads to damage to their structure - they can begin to delaminate or swell. Moisture also has a negative effect on the design of locking joints. The entire coating may become noticeably deformed at the seams or even go into waves.
- Rearranging pieces of furniture is one of the most common causes of deep scratches on laminate flooring. Such defects can expand over time, which can lead to deep damage to the board and the need to replace it.
The wheels of an office chair, especially if they are faulty, can leave scratches and abrasions on the surface of the laminate.
- The wheels of an office chair are also the “sworn enemy” of this coating, as they can completely erase the protective layer of the laminate over a fairly large area.
- Heels, especially those with metal heels, can also cause serious damage to laminate flooring. They can cause not only abrasions on the coating, but also serious scratches and even chips. This is another reason why it is undesirable to use laminate flooring in the hallway.
- The claws of large pets can also cause deep scratches on the surface.
- Falling objects can damage not only the protective coating, but also the hard layer of the board, leaving a dent in it. Heavy or sharp objects are especially dangerous for this material.
Grouting cracks between parquet staves
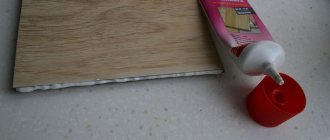
Having prepared the putty, you can move on to solving the next question: how to seal the cracks with your own hands. To work, you will need a minimum of tools - several spatulas of different widths, sandpaper and a scraper. The last components can be replaced by a grinder. Before puttying, the parquet should be leveled by scraping or sanding. It is advisable to vacuum the cracks - the presence of dust will negatively affect the adhesion of the putty to the wood. The floor surface is wiped with a damp cloth.
Only cracks with a width of more than 2-5 mm need to be putty separately - a thick layer of putty will sag and crack when dried. Having previously filled and dried such cracks, the resulting defects are eliminated during subsequent grouting. As an option, in problem areas the parquet is caulked with slats of appropriate thickness, lubricating them with glue and recessing them 1-1.5 mm deeper than the parquet level.
Large gap between boards
General grouting is done using putty with the consistency of liquid sour cream, pouring it onto the surface of the parquet and rubbing it evenly with a spatula. To best seal the cracks in the parquet floor, the operation is repeated in each area several times, moving the tool in different directions. As consumption progresses, the putty is added, without allowing a significant reduction in the volume of the composition dispersed by the spatula.
Drying parquet treated with solvent-based fillers only takes a few hours. It is better to give water-soluble compounds a day to set, and only then proceed to final sanding of the floor surface. All additional information about the features of working with a specific type of putty can be obtained by carefully reading the manufacturer’s recommendations, and answers to the remaining questions can be easily found in thematic videos.
Floor sanding tool, small and handy
How to protect laminate?
Is it possible to protect laminate flooring from the threats that lie in wait for it? Manufacturers of various protective products claim that yes, this is possible if special compounds are periodically applied to the floor covering.
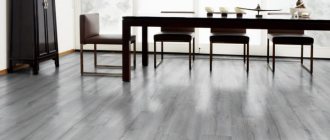
Laminate coated with a special protective mastic shows higher resistance to abrasive and scratching loads on it
On sale you can find various types of mastics that are designed to extend the life of this coating while maintaining external decorative qualities.
One example of high-quality protective mastic for laminate flooring
The mastic is applied immediately after installing the coating on the base. Having completed laying the laminate, it should be cleaned of dust using a vacuum cleaner, and then a layer of protective composition should be applied to the surface. This treatment of laminate flooring should be done two to three times a year. In this case, the coating will acquire the following qualities:
- The joints between adjacent boards will become more resistant to moisture penetration.
- The strength of the laminate joints will increase.
- The surface will not accumulate static electricity, which means it will not attract dust and dirt. That is, contaminants will not linger on the coating.
- The laminate will be protected to a certain extent from abrasion and minor mechanical influences.
- Mastic can also restore the former shine to worn out old surfaces.
Mastic is produced in a colorless version or in different color shades. Therefore, it will not be difficult to choose the right color or even, if desired, make the coating a shade darker.
A product based on natural wax for treating the joints of parquet, natural boards or laminate.
Wax is used to strengthen the joints of the laminate, and is applied to the locks when installing the flooring. Using a wax composition will prevent moisture from entering the seams between the boards.
In addition, wax and wax-based putties are also used to repair chips and cracks.
The most difficult method of eliminating a gap
If there is a large discrepancy between the individual planks, professionals recommend re-laying the floor. This is true for coatings that are laid on an uneven base. Under the current circumstances, there is no other choice but to re-install it.
Stages of re-laying the coating
- First, the planks are dismantled. They do this extremely carefully, because it is not necessary to buy new boards.
- The base is cleaned of dirt and treated with a primer.
- Using self-leveling mixtures, correct the base;
- After complete drying, a new substrate is laid. This is a must, the old one is no longer good;
- At the last stage, they begin laying the laminated planks.
Important! When installing laminate flooring, do not forget about deformation gaps. If the shape of individual boards is changed, this will ensure the normal appearance of the floor.
Now you know how to remove cracks in laminate flooring. But in this case, as in medical practice, it is better to prevent than to treat later. Therefore, let's figure out what to do to prevent gaps from appearing on the floor surface in the future.
Types of putties for laminate repair
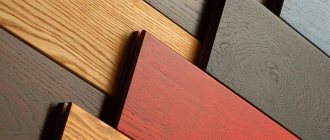
In stores you can find a lot of products for masking cracks and chips in laminate flooring. Moreover, they are produced in different forms. All such materials can have different shades, which can differ by one or two tones or even differ significantly from each other.
An assortment of colors of wax bars for masking defects on laminate flooring.
Therefore, when going to the store, it is recommended to take a small fragment of the board with you so that the sales assistant can choose the exact shade to fill the crack. As a last resort, if a sample piece has not survived, you can take a high-resolution photograph, although such an image can often be deceptive.
The simplest remedy is a wax pencil. But it is only suitable for shallow surface defects.
- Wax pencil is used to mask cracks, crevices or shallow scratches. A restorative pencil is made from wax and polymers, which increase the adhesive properties of the composition when it adheres to the protective layer of the laminate. The crack must be thoroughly cleaned of dust, and then pressed over it with a pencil. The wax will fill the depression, after which the repaired area is polished until the coating returns to its original appearance.
Hard wax, usually sold in stick form, can be used to repair deeper defects in a laminate surface.
- Hard wax is sold in the form of bars that resemble plasticine. This material is convenient in that it can be used both in solid and molten form. In this case, different colors of wax can be combined with each other to achieve the desired shade, or, if necessary, darker colors can be applied to light putty. This type of wax can be used to repair deep scratches and chips in the decorative top layer of laminate flooring. In addition to wax, the bars may contain materials such as silicone, paraffin, various polymers, and dye.
- Mastic for laminate is used in cases where the surface is not fundamentally damaged, but has serious abrasions. It is applied with a brush and then rubbed with a soft cloth, or a small amount is poured onto the surface and then rubbed with a napkin.
Repair paste-mastic for laminate
- Laminate repair paste containing wax. This version of the formulations is sold in transparent tubes, which makes it easy to choose the desired shade. The convenience of this form of putty is that it does not have to be brought into the state necessary for application, since it already has the desired consistency. The paste is also produced in various shades.
Distribution of mastic or polish over the laminate.
- The polish, intended for tidying up the laminate, is used if abrasions appear on the surface of the coating, as well as after restoring the boards using a wax pencil, solid or molten putty. This restorative composition is sold in paste or liquid form.
Kit for deeper laminate repairs.
- To eliminate serious damage to the laminate, special kits are used, which may include putty, latex or acrylic compounds, wax pencil, etc. The composition of the kits may vary, so it is possible to choose the most suitable one.
The process of repairing a scratched area of laminate flooring
The procedure for repairing the laminate surface is completely simple and does not require special skills or expensive tools. However, in order for the result to be positive, when purchasing any of the products presented in construction stores, you must consult with the seller and also carefully read the instructions from the manufacturer.
For work, it is convenient to use the following devices: a wax melter, a special varnish with which the “felt-tip pen” container is filled, a wax spatula, the set of which includes additional devices - sponges, napkins, as well as a spatula cleaner.
A special tool for repairing laminated surfaces with hard wax - wax melter
The wax melter can have different designs and shapes. Homeowners whose floors are predominantly covered with laminate would do well to have this tool in their arsenal. By the way, it is useful not only for repairing floor coverings, but also for laminated surfaces of furniture.
Laminate repair kit.
The following will provide a step-by-step process for repairing a scratch on laminate flooring using Konig Super Hard Wax.
| Illustration | Brief description of the operations performed |
| Initial condition of the coating. In this case, a fairly deep scratch appeared on the laminate. Not only the protective layer of the board is damaged, but also the upper part of the base. | |
| In order for the putty to have good adhesion to the laminate, small fragments must be removed from the crack using a wax spatula with its sharp edge. At the same time, the scratch expands slightly. After which the recess and the surface around it must be degreased, for example, with alcohol, since the repair site must have good adhesion. Next, the scratch needs to be dried. | |
| The next step is to select the putty according to the color scheme. For this purpose, take several wax bars similar in color to the laminate. First of all, the base, lightest shade is selected, and to it one or two bars that match the tone. | |
| Now the wax melter comes into operation - this is a special tool that is convenient for repairing coatings. The device operates on batteries. | |
| The wax melter is equipped with a metal nozzle, made in the form of a spatula, which is temporarily protected by a cap. Before starting work, the cap is removed. | |
| Next, the button that activates the heating of the metal tip is pressed and held in this state for approximately 10÷12 seconds. | |
| Using a heated nozzle, the base wax putty melts. For such a scratch you will need a small amount. If the color of the putty is slightly different from the shade of the surface, then it is necessary to mix two or three colors of wax. As a rule, laminate does not have a single color, so sometimes the length of one scratch even requires changing the shade of wax several times when filling it. | |
| Fill the scratch with small portions of heated wax. Fill the scratch with excess, since the wax will shrink as it cools. If the tip of the wax melter gets very hot and the wax starts to smoke, you should release the heat-activating button to reduce the temperature. | |
| After each application of wax of a certain shade, the working tip must be cleaned with a clean cloth. | |
| After the wax hardens, after about 30-50 seconds, excess putty that protrudes above the surface of the coating should be removed using a wax spatula. | |
| To do this, use its ribbed side, which will not damage the main coating, but will gently remove excess wax. | |
| This operation is performed with rubbing movements across the repaired scratch. Do not press the spatula too hard. | |
| The result of the work will be a scratch covered with putty, which should look approximately as shown in the photo. | |
| If the scratch passes through darker or lighter veins, then putty bars of a suitable color are taken. The selection is also made by location so that the color is perfect. | |
| Next, a textured pattern imitating the structure of wood is applied over the filled scratch using the same heated tip of a wax melter. This stage of work requires care and high precision, since using a working tip you will have to try to recreate the original pattern of the laminate surface. | |
| After the putty hardens, its excess is also removed using a spatula. To do this, the protruding wax is wiped with the ribbed side of the instrument. | |
| Here the master shows what marks can remain on the spatula. After treating the surface, the spatula comb must be immediately cleaned with a napkin or a special device included in the kit, which is stored in the tool body. If the wax on the putty knife hardens, it will be difficult to clean and will interfere with subsequent work or when repairing other areas of the coating. | |
| The next step is to sand the repaired scratch with a gray sponge, which is also included in the spatula kit. | |
| Further, if necessary, the surface is additionally cleaned with the pointed side of the spatula. | |
| The next step is to coat the surface with a special varnish. It will protect the putty from dust and give the repair area the desired shine. A cylindrical container similar to a marker or felt-tip pen is filled with varnish. It is equipped with a brush, which is convenient for applying varnish to a small area of the coating. | |
| Before using the varnish, the pencil container must be shaken for 30-40 seconds, so that the knocking of the balls located in the container with the varnish and intended for stirring it can be heard. In order to ensure the purity of the applied varnish, it is necessary to remove the cap from the pencil and dip the brush in water. This is necessary to remove dust and loose fibers from the brush. A wet brush must be wiped with a clean cloth. Next, you need to press on the walls of the container to remove air from it. | |
| The pencil container must be held vertically and gently pressed in the area of the “PRESS” inscription. It is better to carry out this process over a napkin so that splashes of varnish do not fall on the surface of the floor covering. Then, if the varnish does not enter the tip, the container must be turned over with the brush down, placing a napkin under it, and press “PRESS” again. Excess varnish that appears must be wiped off with a napkin. Now a thin layer of varnish can be applied to the repaired lamella. When applying varnish, the brush must be periodically wiped on a napkin. | |
| To ensure that the shine of the area is commensurate with the main surface, it can be corrected using a polishing and sanding pad. | |
| The pad has two sides - white and green. Green adds shine to the surface, and white, on the contrary, serves to create a matte effect. Therefore, the surface is first treated with the white side of the material, and then, to give it a natural look, it is sanded with the green part of the pillow. | |
| These illustrations show the result of the work carried out. So that it could be assessed, the master showed nearby a scratch that had formed on the coating before it was repaired and after it was sealed with a complex of putties of different shades. |
It should be noted that some Internet users, accustomed to relying on their own ideas, offer other budget options for repairs. For example, using ordinary felt-tip pens or markers, you can give the scratch the desired shade, and fill the indentation with natural wax, melting it with a soldering iron. If necessary, the wax is melted and dye is added to it, and then applied to the damaged area of the coating. After hardening, the repaired scratch is sanded and varnished.
There are quite a lot of other home recipes, but all of them do not guarantee that the desired result will be achieved. Using untested means can completely damage the coating, which will lead to the need to replace several boards.
Industrially produced laminate repair products are designed taking into account the characteristics of protective coating materials. Therefore, they have excellent adhesion to the laminated surface, making the resulting defects almost invisible for a long time.
Find out about the reasons why laminate flooring creaks and methods for eliminating them from our new article on our portal.
However, each master chooses the most convenient and affordable method of repairing surfaces. Therefore, if you want to experiment, it is better to do it on a fragment of the laminate left after its installation, or, as a last resort, in an inconspicuous area of the coating.
How to repair cracks in parquet flooring
The appearance of cracks in laminated parquet can be due to various reasons:
- The initial choice is low-quality parquet. A cheap board or lining can lead to defects from temperature fluctuations or loads;
- Slats from different manufacturers may differ in size or shape of the locks. This incompatibility significantly affects the connection, which over time can weaken or stop fastening. When trying to join such lamellas, small gaps may occur.
- The most popular reason is installation on an uneven surface. Defects are not immediately detected, since the substrate softens and cushions for some time. But over time, it becomes denser and stops shock-absorbing, and the panels diverge.
Gaps between boards are not just a cosmetic defect. Their presence can deform the entire coating. Due to the fact that the protective film is broken and free access to the internal structure of the board is opened, without moisture-proof impregnation, the insides quickly become wet and deform along with the surface of the laminate.
Sealing cracks is carried out in several ways, depending on the number of cracks and sizes
How to eliminate cracks. If a gap forms due to unevenness of the base, it is necessary to replace the substrate. At the location of the defect, one or two boards are dismantled and the old substrate is carefully cut out. Unevenness of the substrate is eliminated, and wrinkles are removed. If the volume of the damaged substrate is large, then the entire lining should be replaced.
No less important information on the topic: Chips on the parquet
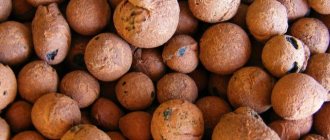
Not everyone knows that the durability and quality of the coating is, first of all, the merit of proper preparation and installation, as well as wisely chosen auxiliary material. There are many options to choose from:
- environmentally friendly and durable cork;
- polypropylene;
- polystyrene foam (for increased load);
- coniferous substrate, with good ventilation;
- on a foil base;
- polyethylene film;
- combined.
It is difficult to answer unequivocally which type of substrate is better. This depends on the conditions in which the coating is laid: humidity, subfloor (concrete or board), horizontal floor, etc.
Replacing the underlay will help eliminate the cause of the uneven floor.In cases where a radical method of replacing the substrate is not required, you can get by with cosmetic repairs. The cracks must be sealed to prevent liquid from getting inside. To do this, you can use a special putty paste, the procedure is as follows:
- It is necessary to remove debris and dust from the crack,
- tape around the edges,
- choose the color and apply putty,
- level with a spatula and dry,
- then remove the tape and wipe with a damp cloth.
You can do cosmetic repairs to scratches on laminated parquet yourself
Which putty is better?
The domestic market offers a sufficient range of various materials for repairing and maintaining the laminate surface. Almost all of them do an excellent job. One of the most important points to achieve the desired result is choosing the right shades of wax or other repair products.
The most popular materials for laminate restoration are German and Dutch “Quick-Step” products. Both companies produce putty in the form of paste, wax bars and pencils, as well as in special kits.
Repair kit “Quick-Step Mix & Fix” for repairing scratches on laminate and parquet.
Companies present on the market 24 shades of wax putties that mix well with each other. Therefore, if desired, you can achieve any color that will effectively mask the flaws that have appeared.
A mixture of sawdust and gypsum
A good option for repairing a chip is a composition of sawdust and gypsum. Both components are mixed with water in equal quantities to a homogeneous paste. A large chip can be preliminarily repaired with a tab, the role of which can be perfectly fulfilled by a wooden sliver of a certain size. The inserted wood chips are carefully covered and rubbed with a composition of sawdust and gypsum.
Instead of plaster, you can use PVA glue:
- sawdust is mixed with glue until a homogeneous mass is obtained;
- the mixture is applied to the chip;
- after complete drying, it is necessary to remove excess;
- level the repair site with putty matched to the color of the laminate;
- If desired, the laminate can be varnished.
Epoxy resin has two components: a resin and a hardener. They need to be mixed, following the proportions according to the instructions, until an elastic, homogeneous mass, using a drill with an attachment. Mixing must be carried out for at least 5 minutes at a temperature of at least 15 degrees. The resulting composition is evenly applied to the pre-treated chip.
How to avoid defects on a laminated floor surface?
Having chosen a laminated covering for flooring in an apartment or house, you should immediately provide for its protection. It would be a good idea to do this after the surface has been repaired, so that you don’t have to work on scratches and chips again.
These activities are simple and consist of the following steps:
- When cleaning the coating, do not use detergents containing abrasive ingredients.
- If laminate is laid in the hallway, then you should definitely lay rugs on both sides of the front door, that is, outside and inside the home.
- To protect the laminated covering from the wheels of the office chair, it is recommended to lay a thin but durable flooring that fits well to the surface in the area where it moves. This can be a rubber-based mat or acrylic glass.
Acrylic glass as protection of the floor covering from abrasion by the wheels of an office chair
- It is also necessary to protect the laminate from the legs of furniture, especially those that are frequently moved (chairs, tables, stools, etc.). To do this, felt, vinyl or polyamide pads are glued to the ends of the legs.
- You must remember to periodically use polish or mastic for laminate flooring to treat the surface. These products create a protective film on the coating, which additionally protects it from minor mechanical influences.
Check out the tips for homeowners on how to choose a laminate flooring class from our new article on our portal.
* * * * * * *
As you can see, there is nothing complicated about preventive measures - they are easy to implement. If you don’t want to make certain efforts to preserve the laminate flooring, then you should immediately abandon the idea of choosing this particular material. Without proper care, it will quickly become unsightly or even completely unusable.
At the end of the publication, there is a video in which the master shows a slightly different method of repairing a laminated surface.
How to remove or disguise cracks
After finding out the causes of damage to the laminate, you can safely begin to choose a method for eliminating them. The first situation to consider is the most common, namely, after a couple of months, gaps between the laminate panels became noticeable on the floor. What to do in this case?
There are several ways to solve the problem. Each option differs in its effectiveness, but has differences in the complexity of the process:
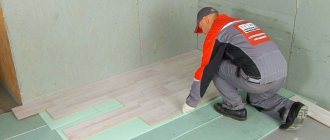
- If it turns out that the cracks arose due to an uneven base, then you can do something drastic and level the floor.
- To do this, it will be necessary to disassemble the laminate and remove the backing, which has probably already become worn out and cannot be reused. Next you need to level the floor under the laminate. To ensure quick leveling, you can use a self-leveling mixture. After it dries, a new substrate is laid on top and the laminate is re-laid.
Note. This method is only suitable if the panels were not coated with special glue or sealant during initial installation.
If there is no opportunity or desire for global work, you can use a partial solution, but you will still have to dismantle the laminate. Next, a denser underlay is immediately laid under the laminate and the floor covering is installed. This will only bear fruit in case of minor unevenness.
What is the optimal size
The manufacturer often indicates the dimensions of the maximum area possible for laying a particular coating. A gap is also established between parts of the coating if the area of the surface to be coated is larger than permissible. It is equal to at least 1.5 cm.
The width of the gap between the wall and the edge of the covering most often corresponds to the area . The optimal gap width is a distance of 1 cm. If the humidity in the room increases, the gap can be increased by 0.5 cm. If there is a gap between the pipe and the door latch, then the gap should also be about 1.5 cm.
IMPORTANT!
If the room is more than 12 m in length and more than 8 m in width, then it is necessary to calculate the gap width at the rate of 15 mm per linear meter.
When the chip is covered
Repairing chips on laminate flooring does not end with the use of special compounds. There are no longer any cracks in the coating, but it doesn't look very stylish. And some materials that are used to repair minor damage or mask plaster or acrylic sealant are completely erased after the first cleaning.
What to do? Of course, you need a protective layer. Buy a special varnish at a hardware store and apply it to the place you restored. The pencil and marker will not be erased, so the floor will retain its attractiveness for a long time.
Preparing the Inserts
An equal gap between the wall and the laminated boards ensures uniformity throughout the entire covering. This can be done using pegs of equal thickness. To save time, some professionals use scraps or parts of the same laminate that they lay.
However, you can also use metal or plastic inserts.
The inserts must be placed vertically along the entire perimeter of the room. Pegs are always placed in the center of each element.
Source ytimg.com
Installing the outer corner
This option, like the very first one, is considered the most budget-friendly. Moreover, it is advisable to choose a monochromatic corner itself.
Of all the variety of corners, it is best to choose corners that are made of plastic. They are easy to cut with a knife and therefore do not require the use of any additional tool.
To get a neat corner joint, the edges of the plastic corner will need to be cut at an angle of 45 degrees.
If everything is done correctly, the end result will be a simple, but quite worthy design of the joint. And most importantly - inexpensive.