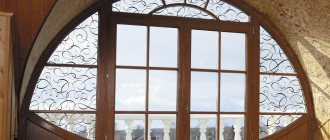
The final stage of the process of installing modern windows is finishing the slopes. A thick profile, multi-chamber double-glazed windows and reliable fittings provide excellent thermal insulation, but the interface between the window frame and the apartment wall remains a cold and unattractive place. If this area is not given proper attention, condensation, mold, and wall destruction may occur. Therefore, let's find out which slopes are best suited for plastic windows.
What are window slopes made of?
Hello, dear blog readers!
Unfortunately, lately I have begun to write rarely, because a really gigantic amount of work has piled up since the summer, and I want to be on time everywhere. So I work 12 hours a day, and on rare weekends I sleep in, do housework... In short, I don’t have much time either. But now, I have a few hours, and today I would like to tell you what I personally think about different types of window slopes. As you know, there are three main types of them: plaster, plasterboard slopes and plastic. Plastic slopes are made from sandwich panels, and not from plastic panels, as some people think. For those who are not in the know, a sandwich panel (in this case) is a sheet material consisting of 2 layers of plastic and a foam filler between them. Something like drywall, but not as environmentally friendly.
Let's see what advantages and disadvantages these three types have?
Required set of tools
Having chosen what to paint the slopes with, you should first prepare the tools and materials for the work. This way you will speed up the dyeing process, ensuring a positive result. You won't need a lot of tools:
- brush and/or roller;
- paint container;
- masking tape;
- primer;
- latex gloves.
Also keep in mind that painting window slopes is carried out only on a flat surface, so if the wall has defects, prepare additional materials and tools to eliminate them (putty, drywall, etc. - depends on the coating). First, pay attention to the choice of roller for applying the composition. You should not use large tools, as this is often inconvenient when painting slopes. It is better to choose a small pile to prevent the formation of splashes and smudges around the treated area.
Types of slopes: their pros and cons
PVC window structures are so versatile that slopes to them are finished in several ways, but not all are of equal quality and durability. We analyze the advantages and disadvantages of the materials used to install slopes.
Plaster
A universal and cheap way to finish slopes, suitable for all buildings and types of windows. But there are several nuances:
- finishing requires a craftsman and high-quality plaster;
- poor thermal insulation, so in the winter season, due to hypothermia, moisture settles on the window unit, and over time it becomes moldy, and the plaster cracks due to the low coefficient of expansion.
Drywall
The second most popular material after plaster. Features of plasterboard slopes:
- high thermal insulation due to insulation and durability;
- low resistance to mechanical damage, therefore, if you damage a plasterboard slope, you will have to seal it with plaster or completely replace it;
- labor-intensive installation that will take several days. It is necessary to lay a heat insulator between the wall and the drywall, cover the outer surface with primer and several other mixtures, and then paint it;
- at high humidity the material swells;
Natural or artificial stone
The choice of materials is large: marble, granite, limestone, sandstone. These are premium slopes, and they have their own nuances:
- high price compared to all types of slopes;
- resistance to temperature changes, humidity, ultraviolet radiation, mechanical damage, durability;
- demanding care: natural stone cannot be washed with chemicals, they destroy the surface and make it porous, so wipe only with water;
- Some types of stone have increased background radiation, so check with sellers for certificates. Environmentally friendly raw materials must have a first class radiation assessment.
PVC (seamless sheet)
A material that best meets consumer qualities, but has its pros and cons:
- simple and quick installation without special tools;
- homogeneous design due to the characteristics of polyvinyl chloride. When installing plastic slopes, a surface without dents or unevenness is obtained;
- reliable and low maintenance. They can be washed with any means, excluding alkaline ones, which destroy the surface;
- a seamless PVC panel is not suitable for finishing wide slopes: it creates an unstable structure and there is a risk that the seam will come apart over time;
- A structure not insulated with thermal insulation or polyurethane foam may become deformed over time.
If you want to make plastic slopes, but you are put off by the disadvantages of this material, there are PVC sandwich panels that do not have the disadvantages of conventional plastic panels. Advantages of warm PVC sandwich panels:
- retain heat in the room thanks to a complex design of two plates and a layer of polystyrene foam insulation between them;
- are sealed and resistant to moisture and steam even in the cold season, and mold will not appear on the windows over time;
- allow the installation of slopes 50 cm deep;
- environmentally friendly: the insulation is made of polystyrene, which is safe for the environment and the human body, unlike polystyrene foam.
There are also premium PVC slopes from the manufacturer Crystallit. The peculiarity of these components is that they are covered with a special Elesgo acrylic film. Slopes for Crystallit windows are reliable because:
- resistant to mechanical damage, alkaline detergents, high temperature, moisture;
- do not turn yellow when exposed to ultraviolet rays;
- laminated, so during installation there will be no protruding white mass at the joints.
Buy sandwich panels from Crystallit or other manufacturers, complete with or without windows. We deliver free of charge in Minsk, Gomel and other cities of Belarus.
Let's start painting
Regardless of the type of surface you plan to paint, use masking tape to seal the frame first. To do this, cut a strip equal to the length of the frame and carefully glue it. It is important to do this as evenly as possible to prevent staining of the frame, since after this it is almost impossible to wash it. Also, before work, prepare a container for paint - check whether the roller fits it and whether it will be convenient for you to work. After that, you can pour dye into it.
Painting drywall trim
After preparing the paint and putting on rubber gloves, you can begin painting. To do this, follow the step-by-step instructions:
- To do this, you first need to paint hard-to-reach places and joints, corners with a brush. It is recommended to use a brush that is not too wide for this; you need to base it on the standard width of your slopes.
- After painting the corners, use a roller to paint the main part of the wall. You should not go over one place several times with a roller, since due to the glossy surface, this can only spoil the aesthetics of the paint - it will form smudges and stains.
- Let the first layer dry. This will take from ten to twenty minutes, depending on the thickness of the layer you apply. After this, you can apply a second layer according to the same scheme - first hard-to-reach places with a brush, and then the main part with a roller. It is recommended to do this in one or two touches of the roller to one place so that the dye spreads evenly.
If you choose the right paint, it will dry in no more than four hours. But it is recommended not to subject the surface to mechanical stress within 24 hours after painting in order to prevent damage to its integrity.
Painting the plaster finish
Before starting work, you also need to take all measures to prepare the surface and materials. If there are traces of polyurethane foam left at the junction of the windows from their replacement, they must be removed using a utility knife. Be careful not to damage the coating. Also, if there are defects in the plaster, remove part of it and fill it with fresh mortar to form a completely smooth wall. This is the only way the paint will apply evenly. After using the plaster, you need to give it time to dry - about a day, and then cover it with a primer. The technology for applying paint to plaster is standard. First, hard-to-reach places, corners, joints are painted with a brush, and then the main surface is painted with a roller. It’s better to do two layers so that the coating lasts longer and looks neater.
Drywall
Installation, just like plastic, takes a couple of hours. But unlike plastic, gypsum board has a number of advantages in appearance and in further operation.
Firstly, with proper installation and painting, the slope has a noble appearance without a plastic sheen.
Secondly , its further operation is much simpler.
Even if the slopes have faded in the sun, it is enough to simply repaint them with any water-based paint.
If dents occur, we simply putty on the damaged area and paint again.
Installation of slopes from gypsum plasterboard can be done in several ways:
The first is polyurethane foam. Apply to pre-cut pieces around the perimeter. It is pressed and fixed with supports. It requires some experience from the performer, since it is necessary to apply a slightly larger layer of foam to the edge that will be adjacent to the window.
Gypsum fiber
The installation technology is almost similar to the work on plasterboard boards. Gypsum fiber does not have the disadvantages of gypsum plasterboard. It is characterized by high strength, rigidity and moisture resistance.
Important! When installed correctly, they are significantly superior in appearance and performance to other options.
- high degree of resistance to any percentage of humidity;
- ease of installation;
- suitability for repair (if one or another element is damaged, it can be quickly tinted or a layer of putty applied);
- there is the possibility of high-quality insulation;
- long-term (lasts up to 10 years);
- has an ideal geometric shape.
If you apply high quality latex paint after installation, you can wash it without fear of spoiling it. They will need to be re-painted after 6-9 years.
- difficulty in cutting;
- undemocratic pricing;
- need for finishing.
Features of gypsum fiber finishing
Sandwich panel slopes
Sandwich panel slopes are ideal for maintaining heat and sound insulation. The material is a sheet of plastic combined with insulation. Thanks to these qualities, this type of slope is very popular. Also, with such slopes you will forever forget about the formation of condensation.
Advantages and disadvantages of sandwich panels
Pros:
- There is no need for additional decor. The material is identical to plastic and looks quite beautiful; if necessary, you can laminate the slopes and window sill.
- Sandwich panels are more durable and do not crack like plastic.
- The material is not afraid of moisture.
- Does not let cold into the room, as the material has insulating properties. Some, to increase these characteristics, glue the slopes with polyurethane foam.
- They do not cause problems in care, which is very popular among housewives. Even old stains can be easily washed off the surface.
- Even inexperienced people can handle the installation of such slopes, and the result will exceed your expectations.
Sandwich panels have negative qualities, but they are associated only with the quality of the material itself. Low-grade panels react strongly to direct sunlight, which leads to the formation of yellow spots on a snow-white surface. Also, the strength of the material decreases significantly, which leads to a short service life. After installation, cracks may form, but this depends on the professionalism of the craftsman performing the work. In general, there are no specific disadvantages to slopes made of sandwich panels, and the reason to refuse them can only be individual preferences.
You are presented with the main types of slopes, their positive and negative qualities, and only you can choose what will look best in your home. We hope our advice helped you decide on the ideal option.
Varieties
Before we look at how to finish window slopes inside an apartment, we should consider all existing types of finishing. The classification of types implies the material used, as well as the execution technique that depends on it, while the final decorative appearance of the structure very often will not coincide with the materials used. For example, the design of a window opening can be presented in the form of brickwork, natural stone, ceramic tiles, marble surface, gypsum stucco or rough texture from stone chips. Also, slopes can be finished using wallpaper, paint and varnish material. But under any layer of decorative material, the slopes will consist of several materials, most often used in modern construction. For this reason, we have compiled a classification of slopes.
Plastered
Plaster is a traditional material for finishing a window opening. In its original version, the method was used to save money and in conditions of shortage of finishing materials. The process consists of leveling part of the wall using a primer, applying plasters and then painting the slopes. Thus, the slopes could become a full-fledged continuation of the walls, but at the same time they did not have a tight connection with the window frame. Because of this, after some time, cracks formed, and the thermal insulation was practically zero. The windows needed to be insulated from the outside, and not always using aesthetic methods - cotton wool, moss and even plasticine. At the moment, the technology for applying plaster mortar has changed a lot, and now this type of slopes is considered the best and most stylish option.
Drywall slopes
This method is quite economical, and also modern for cladding a window opening. Drywall retains heat perfectly, is inexpensive in itself, and its texture will be an excellent basis for applying any type of decor. Pieces of drywall are often left over after a modern renovation of a room has been carried out, and to save money they can be used as materials for slopes. Among the disadvantages, it is worth noting that this type of finish is unstable to dampness (if you use the usual option), and also has a tendency to deform at the junction of the wall and window.
Plastic slopes
This type of cladding is the most popular today. The plastic used for slopes can have different textures and modifications, and can also be used as decoration, or stylized to resemble any other material. Plastic panels are practical and durable, easy to install. Using thin sheets, you can hide all the ugly “insides” of the window opening - insulation, foam and missing pieces of the wall.
In addition, plastic can be easily washed using household products that are found in any home, and the material is not afraid of moisture and prevents drafts. Among the disadvantages, it is worth highlighting that it is expensive and also fragile at low temperatures in an unheated room. In the construction materials market, plastic panels are presented in variety and different shades. It will not be difficult for you to choose any shade of beige, white, milky color to match the frame, as well as any other pattern or color to match the wall, wallpaper or accent in home design.
Wooden slopes
What is even better for finishing the slopes of plastic windows inside? It is not for nothing that wood is considered an elite type for slopes, but also has a high cost and requires high-quality care. As a rule, wood panels are left in their original natural color, and then simply coated with a varnish. It makes sense to install wooden slopes as a continuation of a frame made of wood material, which in themselves will be indicators of respectability, or as a continuation of a brightly accented log wall. For example, this is an excellent option if the interior is made in a chalet, country or rustic style.
The main advantage of wood is its environmental friendliness, beautiful appearance, which is often called “warm,” and durability. Among the disadvantages, it is worth noting the high cost, as well as the requirement to follow special rules for caring for wood.
Cork slopes
Cork as a facing material has a number of advantages in the form of a high level of thermal and noise insulation, and it is also available in various natural shades and is very pleasant to the touch. But the high price of cork panels in combination with not very good durability, simple appearance and difficulty in maintenance is a huge disadvantage. Due to such circumstances, cork slopes are not so popular and therefore are extremely rare. But they can be taken as a pencil to develop various style directions indoors.
Plaster slopes in general
The slopes can be made either at right angles or with a break (the slopes diverge at a certain angle). Slopes are internal and external. External slopes are made of moisture-resistant and frost-resistant materials, such as DSP and special solutions for external plaster. Also, when calculating the cost of work, slopes are usually considered to be the distance between two planes up to 50 cm wide.
Today, the modern construction market offers a large variety of materials for finishing slopes - wood, PVC, plasterboard, MDF, plaster mixtures. If wood is an environmentally friendly material, then the use of plastic slopes and sandwich panels is a controversial solution from an environmental point of view, although it is more practical in operation. Wooden slopes are used mainly for finishing door or arched openings, and plastic sandwich panels are most often used for finishing window openings. A compromise solution is plaster slopes, both from the point of view of environmental friendliness and durability, and visual characteristics (no joints, edgings, plastic corners). It should be noted that plastering slopes is most advisable in new buildings or non-residential premises during capital construction, in combination with plastering walls, since this type of work is quite dirty and time-consuming. If the windows in a residential apartment were replaced, then the most correct solution would be to make slopes from plastic sandwich panels - this method is much cleaner and takes no more than a day.
Plaster slopes are a classic way of finishing slopes today. Until recently, this type of slope was overwhelming due to the lack of alternatives. It has not exhausted itself even now, and sometimes you simply cannot do without it. Plaster slopes allow you to get excellent results in some situations. If we talk about the percentage of use of plaster slopes in the total share, then the absolute value will be small due to the emergence of new materials. But there are cases when the only alternative is plaster slopes. Almost all arched windows will be included in this list; for a classic arched window, it is almost impossible to make slopes from a sandwich panel or PVC panel.
Peculiarities
The slope is the space between the window frame and the load-bearing wall inside the room. It is so called because it is most often done at an obtuse angle relative to the window frame. Such a turn helps to maximize the penetration of daylight into the room. Finishing rules will depend on what material you have chosen to create the slope, and also that it does not differ from any other finishing work using the material. But there are specific subtleties that you should pay attention to, as well as installation methods that will make it possible to reduce work time. The technique will be selected individually depending on the preferences of the apartment owner and his capabilities.
Previously, back in ancient times, a wooden box was used as a slope, which was covered with a platband. In modern times, glass packages are used to make windows, which help improve light permeability and increase the width of the slope, since only one window frame will be used instead of a frame. It can be made of plastic, wood or metal. The uniformity of the material used in the manufacture of the slope and frame helps to give the structure a holistic look, so most often metal will go to metal, wood to wood, and plastic to plastic.
Please note that, on the other hand, the room with a window opening can be brick, concrete, iron or wood. This factor should definitely be taken into account when selecting the material from which the slope will be made, since it can become a continuation of the wall itself, and not the window frame.
Modern window systems are designed to minimize heat loss from the room. In order for this function to be successfully completed, the windows are isolated from the walls using a layer of polyurethane foam, which is resistant to moisture, ultraviolet rays and mechanical damage. Internal slopes are needed in order to maintain the integrity of this layer. The amount of work during installation of slopes will depend (not always, but most often) on the window measurer. During the dismantling of old boxes, hidden defects in the opening often become visible, which could not be detected before.
The walls may have cavities with air or be in terrible condition, which can lead to partial destruction. Plaster on old slopes may seem very strong; it is especially difficult to work if the walls are made of poured concrete. In wooden houses, the presence and condition of the deck becomes a complication. When starting work and ordering a window, the measurer must have excellent work experience and think about the future, even about slopes. The main feature of finishing internal slopes is that it can be done as simply as possible, and this will reduce installation time.
Subject to the need for the technological process of the material chosen for the work, it is almost impossible to make a slope in less than 3 hours. Installation time is reduced only when several slopes are installed at once at the same time, for example, to the entire apartment or throughout the house. Basically, they are made in the form of a single-color plane and are not subject to mechanical loads.
Please note that it should be noted that in the vast majority of cases, the slopes are hidden from view with the help of drapes or curtains, and you remember about them only when washing the windows 1-2 times a year. For this reason, preference should be given to plain material that can be easily washed.
Installation of plastic slopes - step-by-step instructions
Installation is carried out in strict sequence:
- Measure the wall where the slopes will be installed: change two lengths - closer to the window and along the outside. The width also needs to be measured in several places in case you have uneven walls;
- Clean off any protruding excess foam around the perimeter;
- Apply vapor barrier tape;
- Attach the starting U-shaped profile to the window frame along the entire perimeter, first on the sides, then on top;
- Place a wooden strip along the outer perimeter, adjust using a level and secure with dowels;
- Attach the F-shaped profile to the wooden batten with a stapler;
- Insert the PVC panel into the P-profile, on the other hand insert it into the F-profile;
- Treat joints with sealant;
- Before final fastening, introduce mineral wool into the space between the slope and the wall for insulation and sound insulation.
Additional work on the decoration of the panels is not carried out. The slopes are ready for use.
Possible difficulties and errors
Mistakes when installing plasterboard slopes:
- The joints along the edges are poorly sealed, which allows moisture and dirt access to the gap between the finish and the internal filling of the sheet.
- It is not advisable to make the frame from wooden guides - they become deformed and dry out.
- Do not reinforce the corners of the wall near the slope with a profile.
- The joints between the panels must be puttied (however, this is done for finishing cladding), and the gaps between them and the frame must be sealed with sealant.
- The sides are confused: the front side should be facing the room (it is a little rough, usually without markings, on it the factory edges point in the same direction).
- With the frame method of fastening, the heads of the hardware should not stick out - this will make puttying difficult. If you pass it with a spatula and it catches this element, then the self-tapping screw must be tightened.
- Using a hacksaw with large teeth to cut sheets will lead to loose edges, jagged edges, and the quality of the joint will deteriorate.
- Neglect of putty and primer. It is necessary to process the entire sheet, not just the joints.
- Finishing with plaster and paint is important, as it will prevent the penetration of moisture and contamination. If it is not there, then, for example, the upper slope may sag.
Important! If you do not reliably foam the gaps between the frame, seal them poorly, or install a vapor-permeable gasket, the insulation will get wet.
But condensation is not always caused by poor-quality insulation - it often occurs when the windows are poorly adjusted, the sealing elements in the double-glazed windows themselves are damaged, or the ventilation in the room is impaired.
The process of installing gypsum boards is simple: using screws on the frame or using glue. Calculations and cutting of sheets and profiles will also not be difficult to do.
But there are such difficulties :
- Situations where the adhesive method is difficult to apply, for example, when the gap between the window frame and the wall is too narrow to place a panel there. Then they use fixation on the frame, one side of the profile of which is attached with thin screws to the window frame.
- Additional and final finishing significantly increases labor intensity. If leveling the base can be neglected, then these manipulations are mandatory, and it is advisable to do them efficiently.
How to make slopes
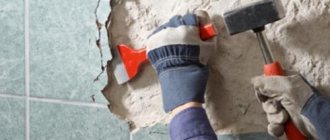
Before you make plasterboard slopes with your own hands, you need to prepare the wall. It is cleaned of excess layers of plaster and foam. It is very important to ensure that there are no falling pieces of concrete mortar on the surface that will be covered with cardboard, otherwise you will not be able to properly install the profiles.
Step-by-step instruction:
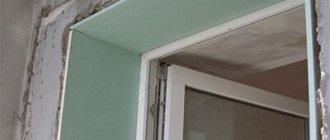
- Window slopes made of plasterboard must be connected to the window. To do this, you can use different technologies. For example, laying under a window frame or blowing in with sealant or foam. Both options are quite convenient. Let's look at each of them.
Photo - example of a slope- Laying cardboard under the frame involves installing a plasterboard sheet directly into the hole between the window and the wall. To do this, the gap is prepared in advance, cleared of excess building material, and, if necessary, additionally plastered. A sheet of drywall is inserted directly into the hole, and the remaining gap is blown in with foam or reinforced with special supports. The top wall of the window is installed first; without strengthening it with plaster, you need to move to the side. We install the material in the same way, after which we insulate both sides;
- The second option is to blow the holes with foam or fill them with mineral wool. This method may seem simpler. You need to prepare a hole on the wall as indicated above and fill it with mineral wool or blow it out with foam solution. After waiting for the mixture to harden, cut off the excess areas and cover the material with a layer of concrete mortar to level the surface. The result will be a smooth and insulated wall;
- The technology for installing drywall involves painting it; in order to save time, the material can be processed immediately. To do this, cover the cardboard with a layer of primer, then apply the prepared paint. You can paint the drywall later, directly on the window, but you will need to seal the glass with masking tape;
- Pieces of cardboard are immediately cut out with a small margin, this will help to align the material immediately with the wall. We admit that there may be unevenness on the surface, so be sure to use a level and a protractor to create even angles;
- After this, a special assembly adhesive is applied to the walls and openings, and a mesh is attached to it, which will serve as a kind of reinforcement;
- To glue the mesh yourself, you will need to use a spatula to ensure the tightest possible fit;
- Afterwards, the entire surface of the wall is covered with an antifungal compound (if you need to sheathe a door slope made of plasterboard, then you don’t need to spray it with an antifungal spray);
- Now you need to install the drywall. First, secure it with masking tape - this will help to immediately level the surface;
- Next, you need to blow foam under the slopes of the plastic windows. Be careful not to overdo it so the masking tape doesn't come off the wall. If it is inconvenient to work with adhesive tape, you can install special dowels or control nails;
Photo - insulation of slopes
- When the mixture has hardened, cut off the protruding areas of the foam, treat the mixture with a primer and plaster.
The main advantages of this technique are that it is easy to do it yourself, and it also saves a significant part of the budget that could have been spent on metal profiles. But the system also has disadvantages: it is not as reliable as attaching drywall to a metal frame. In addition, there are often holes left in the foam that will be blown out even under the insulation.
Why do you need window treatments?
The finishing of the slopes of plastic windows is carried out in order to prevent the effects of high humidity on the materials. In addition, it is also protection against condensation, which will certainly form due to temperature differences. Internal cladding is carried out in order to fit the structure into the interior of the room, but external work is necessary to protect the polyurethane foam with which frames are usually installed. This material cannot be left open in any way, since it is afraid of almost all influences, from the sun to precipitation. Foam provides sound and heat insulation properties, but deteriorates over time, which is why external slopes are needed.
Installation on polyurethane foam
You can seal the slope by fixing the drywall with foam. The sealing is very simple, but it is used if there are few defects on the slopes and the holes are small in size, up to 3 cm. For larger sizes, the defects need to be sealed with foam before installation; the correct method for sealing potholes is using cement mortar or a starting type of plaster. You need to sew it like this:
- Dismantle the old coating, remnants of plaster and foam. Next, large potholes are filled.
- When the holes are dry, polyurethane foam is applied to the drywall from the back side of the material. The foam layer is no more than 1 cm. The material is applied in the form of a snake.
- The plasterboard material is placed on the slope and pressed against it. The pressure on the drywall must be strong so that the foam adheres to the slope.
- After this, the drywall comes off, leaving foam on the slope and finishing material. After 10 minutes the foam will increase in size.
- The drywall is again mounted into the slope and pressed against the wall. If necessary, fix the material with spacers and leave it for up to 24 hours without continuing work.
- The next stage is sealing the drywall seams on the slopes using plaster.
Puttying a window slope
The disadvantages of this design of door and window slopes are quite large. The biggest disadvantage is that the surface will first need to be leveled, otherwise the sheet of drywall will not work. Drywall on slopes may bend during installation. There are voids left on the door/window slope, making the fixation not very reliable. But this is the fastest method for finishing slopes with plasterboard. When a window or doorway is covered with plasterboard, using any described method, the opening is finished with various materials. But before finishing the slopes, you need to do the following:
- The slope is puttyed with a thin layer.
- On the outside of the opening, protection is placed and a corner is formed using a plastic perforated corner, which is covered with putty.
- Another layer of putty is laid down to completely level the surface.
- Finishing material is selected.
Advice! Painting is used for decoration; you can paint it in any color, for example, the color of a door or window, wallpaper in a room, or use standard white paint. Photos on the Internet will help you decide on your choice; a bay window in an apartment in different colors looks very nice.
Painting is not durable, so for part of the slopes a panel type of material is used, for example, plastic for slopes, instead of plasterboard, PVC panels and other materials, this is a good material, made according to GOST, and is distinguished by its durability. The video shows step-by-step work with drywall; you can use the method for doors and windows:
Preparing for coloring
Begin your preparation by inspecting the entire surface, since slopes for painting often have irregularities and dents that can ruin the result. To do this, look at the area from different angles and under different lighting, use a level. If there are defects, eliminate them with putty. After inspecting and eliminating irregularities on the surface, it needs to be cleaned. To do this, use a soap solution; if there are old formations, you can apply sandpaper, carefully peeling off unnecessary layers. To ensure that the slope paint is light evenly, you must first apply a small layer of primer to the surface. This way the dye will not highlight all the imperfections of the surface that were missed during its inspection. You can also use a container and a roller to apply the primer, and after applying it, wait about an hour for it to dry. If there is a carelessly applied primer, you can apply a second coat, after which you wait again for about an hour and a half. After applying the above measures, you can proceed to painting the slopes.
We offer to buy crushed stone with delivery in Moscow. Your own transshipment base!