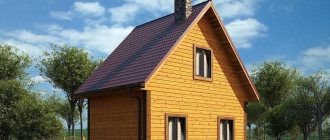
Modern window craftsmanship works not only on the quality of windows, but also on their aesthetics. Windows are acquiring more and more unusual shapes, but the arch remains a classic of the genre among non-standard forms to this day.
Most often, arched windows decorate country houses. Window openings in high-rise buildings rarely allow you to experiment with non-standard window shapes. In a new article I will talk about different types of arched windows, production and design features.
How to draw correctly
Each task presupposes certain canons and basic principles for its implementation. Wherever we go, we encounter this everywhere. Dance? Body positioning and movement efficiency. Music? The canons of composing musical phrases and the principles of forming a set of instruments. So is drawing. What are the most important principles of this “science”?
- The first principle of drawing is the principle of integrity. A drawing is a kind of large system that is formed from small parts. Each such detail carries functions that are inextricably linked with other functions of other elements. This is why the drawing should begin by outlining on a canvas or sheet of paper a plan and an idea of how the drawing will be located and what it should represent. This principle is otherwise called “from the general to the specific.” After the general diagram is applied to the working surface, it is necessary to outline the main elements of the drawing. Well, only then move on to the details of the picture.
- The second principle is the principle of particularity. This provision states that it is necessary to develop the details of the drawing as finely as possible, but do not forget that every small detail must correspond to the general idea and spirit of the picture that you are painting. Here's how to draw correctly.
Well, now let's talk about the technical part of the issue, or rather the technological one. What does a beginner or professional artist need? What tools will allow him to express his vision of the world on canvas? A pencil is perhaps one of the most important tools of an artist. Why does any painter need a pencil? The pencil has the unique property of disappearing from the sheet or canvas with the help of an eraser. This is very convenient when forming a future drawing, that is, when applying the base, which we talked about when talking about the first principle of drawing. Many artists often do not remove pencil strokes, since they simply will not be visible in the final version of the painting.
Paints are another tool for drawing. There are a whole variety of different types of paints for painting on various surfaces. Watercolor, acrylic, gouache and much, much more. It should be noted that each type of paint requires a special approach and painting technique. For example, the use of acrylic paint for fabrics and the use of oil paints for portraits involves the actualization of different artist techniques.
Ink is often used to create paintings in a single color. This material has unique properties that require careful attention.
Chalk can also very often be found as the main drawing tool of many masters. The unique properties of chalk allow you to create interesting works of fine art.
Here, perhaps, are all the basic materials for drawing. Using these tools, you will understand how to draw correctly!
I would also like to mention what exactly artists draw with, that is, what do they hold in their hands? These are brushes, of course. There are a very large number of brushes, and a professional artist, as a rule, has all types in his arsenal. Why so many? Everything is very simple. The second principle of drawing comes into force. Every detail must be worked out to the smallest detail. How to achieve this? You need to use different brushes. Brushes for bold strokes, brushes for making the finest lines. All this is of great importance for the final result.
The art of drawing or fine art is difficult to master. Although this statement is true for any business. To achieve a certain level in something you need to have, firstly, a great desire to do this business, secondly, deep knowledge about this matter, and thirdly, a lot of practice in doing this matter.
How to make a window slope
In order to level the slopes using this method, you will need thin wooden slats or a metal profile, polyurethane foam, small dowels and drywall itself. Before you begin, it is better to cover the windows with plastic film or newspapers, securing them with tape or adhesive masking tape. Then you won’t have to scrub off the solution, glue, impregnation and polyurethane foam after finishing the work. In order for the result to be truly high-quality, you need to very carefully make all calculations and measurements, and also always use a building level, with which you determine the verticality and horizontality of the surface. However, it is better to cut the drywall sheets a couple of centimeters larger. This way you can guarantee dimensional accuracy, as well as perfect fit of parts to the slopes. Then it’s easy to remove the excess with a hacksaw or a sharp knife.
Drywall slope
So, to secure the drywall, first attach wooden planks to the slopes using ordinary plastic dowels. But you need to leave a gap so that you can easily fill the space between the drywall and the window opening with foam. When the planks are screwed, pre-prepared plasterboard parts are screwed to them using self-tapping screws. At the same time, the caps are pressed in a little so that they are flush with the surface. After puttying they will not be visible. Now all that remains is to blow out the space between the gypsum board and the window opening with polyurethane foam. You should not use too much foam, as it expands greatly and can, in some cases, simply squeeze out the workpieces or bend their position. For reliability, sometimes wooden spacers are placed between the slopes so that the foam cannot move the drywall when expanding. When the polyurethane foam hardens, cut off the excess with a sharp knife.
Since initially the drywall blanks were cut with a reserve “just in case,” now they should be trimmed, removing the excess. This can be done conveniently using a fine-toothed hacksaw or a sharp knife. After this, the slopes are puttied, covering all unprotected places and joints with the solution, and the screw heads are also covered. At the end, when the putty has dried, it is sanded with fine sandpaper. Now the slopes can be painted. It is recommended to use water-based paint for this, which dries very quickly, is safe, reliable and does not emit unpleasant odors during use.
Why do you need window treatments?
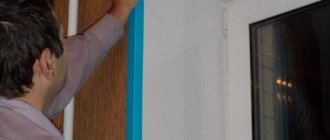
The interior decoration of plastic windows has not only a decorative function, but also a protective one. The installation seam must be reliably protected from the influences exerted on it so that the window system as a whole functions correctly: the glass does not fog up or freeze, and condensation does not accumulate on the slopes .
The installation seam on the outside must also be reliably protected from exposure to precipitation, wind and sunlight, under the influence of which the polystyrene foam is destroyed. You can effectively protect it by installing metal slopes and trims on plastic windows for exterior decoration, which will give the window a neat, finished look.
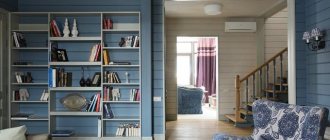
For the interior decoration of a window opening in a house, different types of material are used. This could be decorative plaster, do-it-yourself installation of PVC panels or drywall on the slopes of plastic windows. The finishing of internal slopes with decorative artificial stone looks impressive. To understand which of these methods is better, it is worth considering each of them separately.
Plastering the slope
Finishing the doorway of the entrance door with plaster begins with the installation of beacons, which can be used to navigate when leveling the surface. They are set according to the level, and it is best to attach them to a gypsum solution. You need to install 2-3 beacons on the sides and top.
After the plaster under the beacons has set, you should begin applying the plaster itself. To do this, you will need to prepare a solution of water and sand with cement (in a ratio of 1:4), you can also add a little gypsum to the plaster. Then the mixture is thoroughly kneaded using a special attachment on a drill and brought to the consistency of thick sour cream.
Make sure the mixture is evenly distributed
The prepared mixture is distributed over the surface of the slopes with a plaster trowel and leveled along the beacons. First of all, the upper slope is plastered, and then the side slopes. After applying and leveling the solution, it must be allowed to dry for at least 24 hours.
Next, perforated corners made of plastic or metal are attached to the outer corners of the slopes. If the room has high humidity, then the first option is preferable, since the metal in such conditions can rust over time and ruin the appearance of the structure. Then a layer of starting putty is applied, a reinforcing mesh is placed on top of it and finishing putty is performed. After drying, the coating can be painted or left in its original form.
Platbands
Platbands or casing for internal slopes for PVC windows can be made of different materials, but its functional purpose is the same - protecting the installation seam from destruction and giving the window opening an aesthetic appearance.
Types of platbands
Platbands differ in appearance and functionality:
| Flat platbands. This is the easiest and most inexpensive type of cash withdrawal. | |
| Profiled platbands have a convex surface of different profiles, aimed at enhancing the decorative function of cashing. | |
| Shaped platbands can have a complex relief and imitate natural wood. | |
| Carved platband is the most expensive type of cash, made to order according to individual sizes. |
Materials for production
The most common material for making cash is sheet plastic. It is used for the manufacture of budget flat platbands, which can be used for finishing windows indoors and outdoors .
This material is not afraid of temperature changes, exposure to moisture or sunlight. Its surface can be laminated and take on any color or imitate various types of natural wood. Therefore, choosing cash to match the color of the window facade will not be difficult.
Plastic cash can be made to match any façade
Plastic platbands are not prone to deformation due to temperature changes and exposure to moisture.
Profiled PVC trims have the same properties, but may have a shaped surface. They are also used for interior and exterior window decoration.
MDF trims can also be flat or profiled, but they are used exclusively indoors, since the properties of MDF do not allow them to be used outdoors under the influence of surrounding natural phenomena.
For external use, dense foam casing can be used. This material is easy to process and install. The most intricate and complex shapes can be cut from polystyrene foam. It can be decorated with any finishing materials. It has negligible weight, so it does not put any load on the wall.
Foam trim can be used for exterior window decoration
The most expensive window design option is the installation of wooden carved cash. Carving can be done manually or mechanized. Handmade is very expensive due to its individuality and exclusivity.
Profiled and shaped platbands made of natural wood, made on a machine, will cost less.
Wooden platbands require careful care, since wood, when used in conditions of exposure to the external environment, has some disadvantages:
- wood can become deformed when absorbing moisture or crack as a result of drying out;
- Such cashing looks harmonious on wooden windows or on timber facades. On modern facades such cashing will look ridiculous.
How to make slopes on windows
To obtain a high-quality result, it is necessary to carefully prepare the surfaces:
- We fill the cracks with foam, cut off the excess, it is recommended to apply silicone sealant on top;
- Cover the frames and fittings with paper or polyethylene.
- We clean the slopes from the old finish to a durable layer, knock down any bulges, remove dirt, dust, and greasy stains.
- We prime.
- If a thin layer is planned, we glue a fine reinforcing fiberglass mesh onto the solution; a layer of more than 30 mm is recommended to use a chain-link, which we fasten with dowels.
Marking
In order for plastering window slopes with your own hands to have strict geometry, it is necessary to make markings. Using a plumb line on the window frame, we mark a line that will determine the thickness of the layer. Then, using a quick-drying solution or self-tapping screws, we install a corner beacon at the opening/slope interface. At the outer corner of the slope/wall we attach a batten
It is important that the beacon and the rack are in the same plane, we check with a level or spatula, and make corrections if necessary
Prepare the upper slope in the same way.
Good to know: In order to maintain the correct geometry, it is better to make a template - this will facilitate the leveling work and help to process the corners and slopes according to the same standard.
Plastering window slopes
We wet the surface generously with water so that the wall does not absorb liquid from the solution. We put on the first thin, rough layer, let it sit until the solution sets, this measure is necessary so that the mixture does not “float.” In the second stage, we again throw in a solution, slightly larger than the thickness of the beacons. We straighten and level with a spatula or a small spoon, make sure that there are no gaps, remove the excess or redistribute it over the surface. When the mixture has dried, apply a thin layer of a more liquid composition to the slopes and carefully rub over all the irregularities.
Remove the plank at the wall/slope interface and carefully cut off the sagging edges using a spatula blade. Using a thin solution using a float and float, we form the outer corner. We press one tool to the surface, and move the other tightly along the adjacent slope. After drying, the finish should be treated with a waterproofing primer.
Watch the video, which tells the secrets of the masters, how to plaster window slopes, the video will help you do the work yourself.
https://youtube.com/watch?v=IiNqLgyVCLY
The cost of making an arched window compared to a regular window
The cost of an arched window includes work on bending the profile, so such products per square meter are more expensive than standard rectangular windows.
If you want to make an arched window that opens, be prepared to spend about 3,000 rubles for special fittings that secure the narthex of the arched part. But there is a way not to overpay: divide the arch into simple elements in which pressing the arched part is not needed. The final price of the arch can be significantly reduced in this simple way.
The cost of arches, window blocks with arched elements produced by the Business-M plant can be viewed in the catalog of plastic windows or calculated during business hours by calling +7 (495) 718-9595. After business hours, please submit your request by mail.
How to level slopes
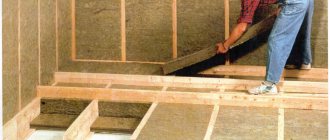
After replacing a window with a new one, it often becomes necessary to trim and level the slopes. At the same time, it is advisable to additionally insulate them in order to subsequently prevent condensation and fogging of the windows. This can be done in different ways, for example, using plasterboard sheets. For window slopes, it is better to purchase not ordinary drywall, but waterproof one; after all, these are windows and high humidity is not uncommon here. If you decide to use regular drywall, then you will have to purchase special protective compounds or impregnations that will allow it to withstand moisture throughout its entire service life.
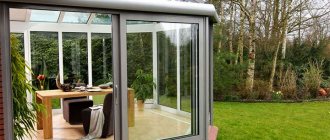
Where is it used?
Nowadays, double-glazed windows are more often used, which have a long service life. In terms of operational characteristics they do not differ from standard blocks. In addition to design, the advantage is that they help fill the room with natural light and visually increase the space.
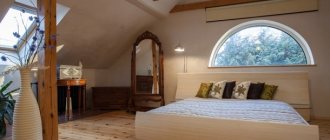
They are used in both private and multi-storey buildings. Suitable for living spaces in the loft, modern, and minimalist styles. They fit perfectly into the architecture of railway stations, theaters and other public places.
They are in great demand when restoring ancient city objects. After all, when carrying out work, the main condition is to preserve the appearance and style of the building.
They look original in the attics and second floors of private houses. Even in houses built by Stalin, old windows are often replaced with structures of this type.
What is a door jamb
A door jamb is a frame secured to a doorway. This structure is stationary and serves as a platform for rigidly fixing the door leaf on its hinges.
The door jamb is needed to attach the door to it
A door block without a special frame is a rarity. However, this is quite possible if it is necessary to insert a sliding structure or a door into the opening, which folds like an accordion when opened. In a frameless doorway, the leaf is secured with awnings.
When you want to do without a door jamb, you can fix decorative panels in the opening. These structures are almost identical in appearance to the beams of a special box and are fixed in the passage in the wall in almost the same way. Another alternative to a door jamb is slats on a slatted frame.
Varieties
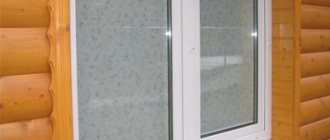
There are several types of window frames in a wooden house, and each of them is intended for a specific case, has its own characteristics and factors under which it can feel comfortable.
Let's look at what main types of joints exist:
- Massive complete product. It is made using various machines and tools that allow the production of parts from solid wood, preserving its structure and naturalness.
- Glued parts. It is made using the technology of gluing various pieces of wood through a system of tenons, while their material is completely removed and the knots are cut out.
- A mixed version, it is quite common and leads in comparison with each of the above. With this option, both integral elements and glued ones are used. For example, the main load-bearing and facade elements are made from natural solid wood, and the window sill can be made from various glued pieces of wood.
Lathing
It is necessary to ensure smooth cladding, especially if the slopes of a building are finished from cement or stone material.
Features of the lathing:
- It is better to pre-select areas for fixing rack components;
- parts can be vertical or horizontal, it all depends on the position of the siding;
- The size of the sheathing is calculated taking into account the thickness of the siding.
Installation of accessories
In most cases, ready-made MDF boards covered with decorative film are used as additional elements in the manufacture of a door jamb. In the standard version, their size is 80x550 mm.
Additions allow you to make the door frame more aesthetically pleasing and stronger.
According to traditional technology, additional elements are installed “in a quarter”, that is, they are inserted into a special groove on the inside of the door frame. Therefore, such a device visually enlarges the door frame.
When additional elements need to be mounted on a door already fixed in the opening, add-on (adjacent to the frame) and underlay (substituted under the door frame) extensions are used.
To attach extensions to the door frame, proceed as follows:
1. Place the door frame with the inside facing up on 4 chairs. We align the corners to rectangularity, checking with the diagonals: they must be the same length. To do this, we temporarily nail to the bottom with small nails a wooden strip with a length equal to the length of the top strip of the door.
2. If the jamb does not have a quarter for the extensions, then we cut out the quarter with a milling machine. The depth of the quarter should be equal to the thickness of the additional board, and its width should be equal to the depth. For example, we have an additional board with a thickness of 16 mm (standard MDF thickness). Then you need to choose a quarter 16x16 mm.
3. Along the perimeter of the door frame, we attach strips of plywood or drywall to the outside so that they protrude upward to the width of the additional board. A continuous frame is not needed; two scraps are enough for the top bar and 3-4 for the sides. We nail the plywood with nails, and the drywall with self-tapping screws.
Drywall is attached to the outside of the door frame
4.Cut the extensions to size. The top trim strip should lie between the side ones, so we cut it to the size of the top quarter, and the side strips to the size of the sides of the box. Apply liquid nails or any wood mounting adhesive to both edges of the quarter.
5. We insert the additional boards into place and wait for the glue to set. We remove the temporary bottom strip that kept the extensions from falling out of the plywood, and put the door frame in place. We align it in width using wooden spacers, and check the verticality of the sidewalls with a plumb line.
6. Under the sidewalls of the wedges, we ensure that the top door strip is horizontal. We fill the cracks with foam and plaster them flush with the wall surface. We nail the baseboards, cut them to size and glue the platbands with liquid nails - the door with extensions is ready.
Since the box can be called a door lock on hinges, its manufacture must be done with all diligence. Even minor deviations from the rules will result in the door frame being too small for the opening.
We produce a standard window frame
To make high-quality and beautiful jambs on a regular window, you must follow the installation rules and adhere to the technologically correct installation process. We have developed small instructions for you that will allow you to carry out installation quickly and without much difficulty.
So, here's how to frame windows:
- Cut a groove in the wall or log of the house. It is necessary for further installation of the side elements.
- Then we install the lower element; it acts as a lock and prevents the side parts from moving.
- It is necessary to place and secure a seal in advance under the lower part, which will promote a tighter fit and help improve the tightness of the window.
- We also place and secure our seal in the side grooves and install the side posts. They are fixed in prepared grooves.
- After installing the side parts, the entire structure is fixed by the top element.
- A special inter-crown hole is made on top of the entire structure, and we also envelop it with our sealant.
The process of making a pigtail
It is not recommended to use polyurethane foam as a sealant or sealant. It will only interfere with the natural shrinkage process and interfere with the natural flow of wood in the structure.
Making jambs for the doorway
It is somewhat more difficult to frame doors yourself without proper experience than windows, since the entire process is completely different and the amount of work required is much greater.
Let's walk through the whole process, following the same step-by-step instructions:
- Using measuring tools and a level or plumb line, you must accurately draw the installation location for the future casing of your door.
- Using any saw that is convenient for you, cut out the doorway, with the expectation that the casing will take up part of the space, and the additional door frame will also take up a considerable amount of width.
- We make a recess on the side walls of the opening to fix the side elements.
- On the side elements themselves, it is necessary to make protrusions that will correspond to the recesses and are ideal for them.
- The side elements are installed and expanded by the upper and lower jumpers. It is worth noting that the upper part cannot be pushed all the way, it is necessary to leave a ten-centimeter gap for further shrinkage.
- Any resulting gaps and cracks are sealed with a sealant; linen is perfect for this purpose.
- Using platbands, you close the ends and sealed gaps, after which the entire casing will take on a rather presentable appearance.
- Finally, you cover the surface with septic tanks and special wood products to significantly increase the service life and resistance to various natural influences on the material.
The cost of such a product
The price of material and work may vary greatly. It all depends on what material you will use. If you decide to make everything from oak, then the price of the wood itself and its processing will be much more expensive than if you want to make a Christmas tree frame. Also, the cost will increase or decrease depending on the design features and manufacturer.
Sandwich panels, PVC panels
So, a good option for finishing gentle slopes would be PVC or sandwich panels. They have special properties that allow the panels to be bent at a slight angle, which is great for finishing arches with a smooth bend. However, such materials cannot be used for elliptical arches with a small radius, since they may burst during installation. For such work, the flexibility of sandwich panels is increased by separating one of the plastic layers. For operation, a layer of panel with insulation remains, which bends very easily. Making an incision from the back is not a solution to the situation, because... the result will be a curve with edges, and not a smooth arc.
Also, in the decoration of arched windows, a structure created from several parts of plastic panels is used. In this case, it will be necessary to carefully process the joints.
Preparatory work
Regardless of the chosen method of decorating the slopes, finishing the front door with your own hands should begin with preparing the door structure and walls. First, you need to cover the surface of the frame and the door itself with masking tape or protective film to protect their coating from damage. Then the slope is leveled, eliminating too protruding fragments that may interfere with plastering or installation of the frame.
Next, the jambs should be cleaned of dust and small debris using a brush or vacuum cleaner and a primer should be applied. For priming it is better to use deep penetration compounds. To improve the thermal insulation properties at this stage, you can attach sheets of insulation. They can be polystyrene foam or polystyrene foam, which is mounted with special glue.
List of sources
- small-house.ru
- UnasBalcon.ru
- samstroy.com
- SetRoom.ru
- elhow.ru
- gipsari.com
conclusions
Arched windows are stylish and luxurious. They take time to select the optimal shape and dimensions, as well as select and install cornices or curtains, but the result is worth it! Share your ideas in the comments - what styles can be decorated with arched structures, and tell us if there are such solutions in your home? You will find more interesting information in the video in this article.
Did you like the article? Subscribe to our Yandex.Zen channel
October 5, 2021
Design,Windows
If you want to express gratitude, add a clarification or objection, or ask the author something, add a comment or say thank you!