When renovating old premises, the owner has a question about whether it is possible to paint with water-based paint over whitewash, what is needed for this, how to do the work correctly so that the old plaster does not fall off the walls and ceiling.
Experts advise to first get rid of the whitewash and then start painting, but you must take into account that when washing the plaster a lot of dust will accumulate, so you will need polyethylene to pre-cover the surfaces to be treated before work.
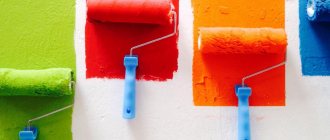
Painting over whitewash.
Is it possible to paint over whitewash
There is no prohibition on painting old plaster. Water-based emulsion is easily applied to whitewash using a roller or spray gun. But how long the paint will last on the plaster depends on the quality of the old coating.
Therefore, when renovating an apartment, many owners prefer not to undertake such work, but choose the following alternative options:
- installing suspended ceilings in an apartment over whitewash allows you not to modernize the old surface;
- Various plastic panels are introduced into the design of the kitchen and other auxiliary rooms, which are separated from the old lime at some distance.
But if a person does not have the opportunity to use modern repair methods, then all that remains is to use paints.
Then you must first make sure that there is a thin layer of whitewash on the ceiling and walls. Then the surfaces are examined for the presence of defects, cracks, and various stains. If all this is missing, then you can start painting without washing off the lime. The same actions must be performed if it is decided to use a water-based composition after whitewashing. You just need to wait for the applied lime to dry.
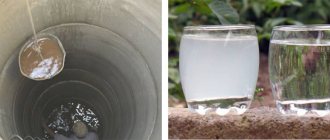
If the walls are covered with lime
Of course, it will not be possible to obtain a perfectly smooth coating without first removing the previous layer and plastering. But as a temporary measure, this method is quite suitable.
If the whitewash layer is small, and the surface is fairly smooth and does not crumble, you don’t have to rush to clean it. Water emulsion works well on lime. But it’s still better to play it safe and, to prevent the paint from crumbling, coat the wall with a primer. Cracks and potholes must first be plastered. You can get the desired color by adding colored pigment to the water emulsion.
In what cases is it better not to paint the ceiling and walls over whitewash?
Do not paint with water-based paint over uneven whitewash.
The demand from specialists to dismantle the old coating in most cases is not caused by a desire to complicate life or add work, but by the need to protect people from future problems.
Pay attention to: How to paint a bike yourself
A whitewashed ceiling and walls, after treating them with water-based or acrylic paint, may simply lose their attractiveness, since under the lime coating the condition of the base, which has various defects, such as cracks and chips, depressions, is not visible.
When painting whitewashed surfaces, deformation of the new coating is possible due to unevenness of the old layer. The whitewash gets wet under the influence of the absorbed paint and then becomes sticky. In this case, lime sticks to the roller or brush and is then spread over the surface to be treated.
In addition, you will have to wash off the old whitewash in the following cases:
- There is a thick layer of plaster on the ceiling and walls. Due to its hygroscopicity, it will absorb paint, then swell, crack and collapse. In this case, the paint will bubble and become covered with cracks.
- If there are traces of leaked water on the surfaces being treated, then the paint, despite the selection of colors and textures, will stand out sharply in these places. Any attempts to correct the situation will not be successful.
- Old walls and ceilings have defects such as microscopic cracks and pits. Painting such a surface will sharply highlight these imperfections. Therefore, first you will have to work with a spatula and putty.
- Traces of mold and fungal infection appear. If you paint over them, these simple organisms quickly spread over all surfaces. Therefore, when this danger is identified, it is necessary not only to wash off the whitewash, but also to treat the room with antiseptics.
- The old coating begins to crumble spontaneously. Adding paint will speed up this process.
If at least one of these factors is identified before starting the repair, you will have to remove the old lime and then start painting.
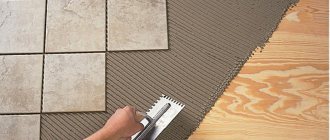
Surface preparation
To create a high-quality paint coating, the old paint must be completely removed. Each material degrades over time, changing its structure and applying new paint over the old one can lead to unpredictable consequences.
The technical characteristics of the new layer will fully acquire all the shortcomings of the rough base, which will ultimately lead to a significant reduction in the service life of the future coating.
Peeling coating should be completely removed
Removing old paint guarantees the quality of the future coating, since all technical characteristics of paint and varnish products are calculated by the manufacturer for application to a cleaned surface. Below we will look at the process of removing paint from various surfaces.
Water-based paint for whitewash
In order to evenly paint surfaces over old whitewash, it is recommended to treat the ceiling and walls with a primer before applying the base layer. This can be ceiling paint diluted in water at least 5 times. If high quality work is required, then it is advisable to purchase a special primer mixture that will ensure normal adhesion of whitewash and water-based paint.
For this purpose, compositions such as ST17 are used. Such primers prevent delamination of whitewash and eliminate its cracking.
After this work, water-based paint will adhere well to the whitewash. Any type of dye of this class that is non-toxic is suitable. To ensure that the new coating does not stand out, it is advisable to consult a specialist when choosing a paint color. Most often they purchase the option with a matte tint. This allows you to better hide minor coating defects.
Pay attention to: Painting walls over plaster: choosing paint and step-by-step instructions for performing the work
Let's sum it up
There is a technology that allows you to paint your bumper yourself. But it is better to entrust this work to specialists. It is necessary for the paintwork to dry under suitable conditions, and for the materials to be applied with a certain pressure and spray quality. So it is important to take into account all the subtleties of applying new paints and varnishes. If these subtleties are not taken into account, then the painted parts will delight you much less with their quality and integrity. It is best to use professional painting technologies in a good chamber.
The bumper often indicates problems during vehicle operation. Many people bump into various obstacles with plastic parts while traveling, and elements often suffer in minor accidents. Poor quality restoration also causes peeling paint. To prevent the problem from reoccurring in the future, simply do the painting well and get a reliable layer of paint on the plastic part. Have you ever felt the need to paint the bumpers on your car?
How to paint with water-based paint over whitewash
First, it is recommended to prepare all surfaces for further processing. Then a primer is applied. After its layer has dried, the main actions begin. The paint is used 3 times if a spray gun is used, since it produces relatively thin layers. When doing work at home with a roller or wide brush, painting is done in 2 layers. It is recommended to take breaks of 7-8 hours while working so that the layers have time to dry.
Surface preparation
Surface grinding.
In order for the ceiling and walls to be painted well, they must first be prepared. To do this, it is recommended to remove the top layer of whitewash. To make it come off faster, you need to moisten it with water, and then clean it off with a spatula after 15-20 minutes.
After this, the treated slabs are washed with clean water and then dried for several hours.
In this case, all defects appear, which are eliminated with a spatula and putty. It is necessary to pay attention to the joints of the slabs, where the whitewash crumbles more and crumbles faster. Using fine sandpaper, all overlaps are sanded until smooth. Then use a damp cloth or vacuum cleaner to remove the accumulated dust.
Most popular means
Immediately before carrying out work, every novice craftsman thinks about how to paint wooden windows outside and inside. On the one hand, they are affected by ultraviolet radiation, moisture and other external factors, on the other hand, conditions are more favorable.
It is recommended to make a choice of coatings in favor of sustainable coatings that are safe for human health.
So, it’s time to find out which paint is best to paint wooden windows, based on the majority opinion.
- Alkyd enamels for wood have an unpleasant odor, which makes adjustments during the work. However, after drying, they are safe for the human body. In addition, such compositions form a glossy film that can withstand not very favorable conditions. Their price is low.
- Acrylic paints for wood contain polymers, so they are quite resistant to fading and exposure to precipitation. If necessary, the composition can be diluted with plain water. To obtain a specific color shade, a special tint is used.
Example of frequently used products.
Note! When you decide what paint to paint wooden windows with, you need to think about purchasing a primer. It will have a positive effect on the quality of adhesion to the surface.
Wallpaper
Regular painting of old wallpaper is considered acceptable only if we are talking about non-woven or fiberglass wallpaper. The same type of paint can be applied in several layers; non-woven fabric allows up to 5-6 paintings, fiberglass - up to 10.
Fiberglass wallpaper for painting.
With paper wallpaper the situation is somewhat more complicated. The main problem with them is that when painting, the paper gets wet and moves away from the base. A strip of wallpaper either peels off completely or swells with untidy bubbles.
Solution
It can be a primer - a penetrating primer based on acrylic resins. Penetrating into the structure of the paper and the base, acrylic resin reliably binds them. Further painting is no different from putty work.
Penetrating primer.
Technology
- Try applying the primer to a small area of the wallpapered wall and wait until it dries completely. If the wallpaper does not come off or swell, it makes sense to continue the work. If this happens, the paper will have to be completely removed from the walls.
Tip: before removing, it is better to soak paper wallpaper with water using a sponge or sprayer. Some of the strips, once wet, will be removed entirely; the remaining areas can be easily cleaned with a steel spatula.
- Prime the entire surface of the walls and wait until they dry.
- Sand down any unevenness or wrinkles that appear. It is better to use medium-grain sandpaper on a hand grater or block: it is easy to remove excess with a sander.
- Paint it.
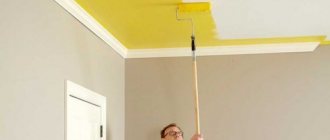
Renovation starts from the ceiling
The first thing we start any renovation with is finishing the ceiling. It is no coincidence that one starts with this area; this allows one to subsequently avoid contamination of the fresh floor covering and calmly carry out painting without fear of staining or ruining something. However, at this stage many people have a choice between lime and staining, since each of these finishing options has its pros and cons.
Many, when carrying out repair work with their own hands, prefer to update the whitewashed ceiling with lime, because they do not know that it can be painted. In fact, decorating with paint is not at all difficult if you have a perfectly flat surface at your disposal, without scratches, depressions or chips.
If you decide to paint over existing whitewash, you need to take into account one important point - when applying paint, the whitewash may fall off and stick to the roller. If this does not happen immediately, then during the drying process the paint begins to “pull off” the whitewashed layer, as a result of which a large piece of paint may fall off along with the whitewash.
Tree
How and with what to paint an old tree?
Solutions
You can use absolutely any wood dyes and varnishes. The quality of the coating is determined only by the painting technology.
Technology
- If you plan to apply transparent or translucent varnish, the wood is pre-lightened with any oxygen or chlorine-containing bleach. Even ordinary whiteness is suitable for washing plumbing fixtures.
The photo shows the result of bleaching old wood.
- The next stage is treatment with antiseptic primer. It will prevent the appearance of rot and woodworm attacks.
- After drying, the wood is sanded until the surface is smooth to the touch. Sanding – strictly along the grain.
- Then - regular painting or varnishing in several layers.
An important point: after applying the first layer, the surface of the wood is sanded again with fine-grained paper. The operation is necessary to remove the lint that has risen when moistened.
Pile raised after varnishing.
Why prime your car before painting?
Vehicle owners often want to save money when selecting materials for upgrading the body. Painting a car without primer means violating technology. This is due not only to savings, but also to the attitude towards the car. After minor accidents and damage, the value of transport decreases. Car owners believe that they can do without a primer if they immediately apply new paint to the car. This manipulation will save from 15 to 25% of money, but this is fraught with consequences. Painting a car over old paint without a primer is a common practice for resellers. They own approximately 40% of the secondary market, which is why this method is popular.
It is impossible to understand the quality of the work done by looking at a fresh coating. Have all technological steps been followed? If a car was painted over old paint without a primer, then after 6 months the coating will begin to flake off.
It is advisable not to skimp on materials and choose the best. Then the coating will last a long time - from 7 to 10 years.
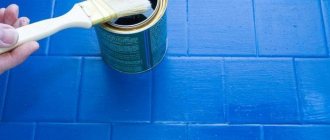
Tile
Is it possible to paint old tiles?
Yes - provided that it is not glazed. No paint will adhere strongly enough to glass-like glaze.
Solutions
After cleaning from lime and other deposits, the tiles can be painted without prior priming. In this case, you will have to use wear-resistant, highly adhesive paints based on urethane or epoxy. It is acceptable to use acrylic-latex rubber paints: at a moderate cost, they, like the two types of dyes mentioned above, will provide complete waterproofing of the surface.
Two-component epoxy paint.
Technology
How to do the work of preparing and painting tiles yourself?
- To remove deposits, it is better to use acidic agents - Sillit, solutions of hydrochloric or oxalic acids. The product is applied to the surface and washed off after 10-20 minutes. If necessary, processing is repeated several times.
Oxalic acid is an effective means for removing lime deposits.
Interestingly, acid solutions, among other things, break down fats. No degreasing is required.
- Two-component dyes are mixed with a hardener immediately before use.
- The wall and plumbing adjacent to the tile are protected with masking tape.
- The paint is applied with a brush or roller in one or two layers.
Note: it is better to remove the masking tape after the paint has lost its fluidity, but before it sets. When painting in several layers, the tape is glued again.
Useful tips
When removing the limescale layer and when using water-based paint, you must adhere to basic safety rules.
Don't forget to prepare:
- a specialized suit that prevents the composition from getting on exposed skin;
- a respirator that protects the respiratory system from lime or chalk dust and small paint particles;
- glasses for eye protection.
By following all the recommendations and safety rules, you can paint the walls in 2-3 days, taking into account the time required for each layer to dry completely.
If you want to make high-quality cosmetic repairs, get rid of the old layer of lime, no matter how well it adheres. When exposed to moisture, the whitewash is often deformed and leads to damage to the new material. Don't be lazy, and before painting, try to completely get rid of the old finish, and pay special attention to preparing the walls. This way you can achieve 100% results, and you won’t have to think about buying new materials or upcoming repairs in the near future.
For tips on applying water-based emulsion to whitewash, see the following video.
Tools and materials
To paint walls or ceilings with water-based paint, you will need:
- Water emulsion. Any type of composition is suitable: acrylic, silicate, mineral. The most important thing is to choose the composition in accordance with the type of room. For example, it is not advisable to use paint with poor water resistance in bathrooms or bathrooms. Any options are suitable for decorating bedrooms or living rooms.
- Color. It is recommended to immediately mix as much paint as needed to finish the surface, since it will be difficult to obtain exactly the same shade during subsequent painting.
- Roller and brush for applying paint to the surface.
- Capacity (cuvette).
If you wish, you can use a spray gun (if you know how to use it).
If you have no experience using a sprayer, it is better to work “the old fashioned way” with a brush and roller.
Otherwise, there is a high risk of uneven painting of the walls or ceiling.