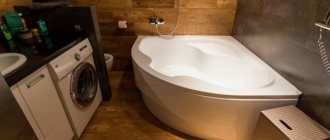
Most new apartments in houses are sold with very uneven foundations; unfortunately, owners of private buildings also face this problem. In order for the furniture to stand level, equipment not to deteriorate, and the floor covering to serve faithfully throughout the warranty period, it is necessary to level the floors. This is usually done using screeds, levelers or self-leveling mixtures. The latter will be discussed in this article.
Of course, every builder knows that working with self-leveling floors is one of the most difficult. They crack, swell, become covered with blisters or a whitish coating, and move away from the base. Unfortunately, very often such problems arise not because low-quality material was chosen, but because the installation was carried out with critical errors.
Why does this happen? What subtleties must be observed to ensure that the self-leveling floor turns out perfect? Before answering all these questions, you need to understand the theoretical information about this type of dry building mixtures.
Latex acrylic paints
The composition includes special polymers and acrylic resins. Such two-component products are popular due to their advantages:
- have toxic and chemical safety, so they are suitable for indoor work;
- quick drying and complete setting;
- ease of application to the surface;
- moisture resistance;
- resistance to direct sunlight;
- strength;
- the ability to choose colors, and they are bright and saturated, and do not fade quickly.
In addition to these advantages, you need to consider that acrylic paints are expensive. Another disadvantage is that the compositions do not tolerate low temperatures well. The third drawback is that they are difficult to remove from the surface later if repairs are planned in the future.
Polyurethane enamel
Polyurethane is used in shoe repair. It is used to make durable soles and heel caps that can withstand long-term friction on asphalt and other surfaces. Therefore, paint on a similar basis has also become popular as a floor option.
It is wear-resistant and durable. In addition, the advantages of such impregnation include the following:
- Beautiful appearance. The surface will be glossy, but not too slippery.
- Strength and resistance to various chemical compounds.
But you also need to take into account the disadvantages. The main one is the long period of complete drying. For the paint to dry completely and become durable, you need to wait 2 weeks. In addition, this composition is quite expensive, so many people prefer to choose cheaper options.
Epoxy paints
Such paints can be used not only for interior decoration of rooms, but also for exterior finishing of concrete surfaces. This is due to the fact that such material can withstand sudden changes in temperature and bad weather conditions. The surface after painting with these compounds becomes the most durable.
The paint is not susceptible to radiation, withstands constant friction and exposure to aggressive chemicals. The advantages include bright, rich shades. Moreover, the color will not fade. Adhesion to concrete surfaces is also good.
As for the disadvantages, they highlight the possibility of the formation of small cracks, as well as a small range of shades. It is recommended to do 2 layers of paint. The second one is applied after the first one has dried, which takes about 13 hours.
Alkyd-urethane enamels
This option for a concrete floor in a garage is also interesting. After painting, a beautiful glossy surface is obtained.
The product is suitable for interior work. The surface does not wear out and remains beautiful and shiny for a long time. But you need to keep in mind that this material is not the most durable. It is not highly resistant to various influences, so this coating is used less frequently than other types of paint.
You can apply enamel to a concrete floor using various tools, including spraying it from a professional spray bottle. The service life of the product is about 15 years.
Rubber paint
This paint dries quickly compared to other options - just 25 minutes is enough for 1 layer. The service life is about 10 years.
The composition is suitable for different temperatures. It can even withstand a decrease to -50°C and an increase to 60°C. After painting and drying, a durable polymer coating is obtained.
The layer is durable and can withstand various frequent loads. The coating protects the floor well from the formation of chips and screeds. If you add pigments to the composition, you get beautiful colors.
Anti-dust primers
Primers are used to prepare surfaces before painting, although some are used as a replacement for paint when it is necessary to prevent dust from forming on a concrete floor. Examples are epoxy and polyurethane. Primers are used when painting is not required.
The polyurethane variety fills the pores and small chips of concrete, making the surface as durable as possible. You can apply this product with a roller or brush - whichever is more convenient for you.
The mass has a high level of adhesion to the concrete base. It will protect the floor from the negative impacts that are typical for a garage. The layer dries quickly.
As for epoxy primer, it also has its own characteristics. After its application, a dense film is formed on the surface, which carefully closes all pores. No moisture passes through it. After drying, the surface will shine. Thanks to this treatment, the concrete floor becomes more durable, wear-resistant, and can withstand friction and other impacts.
Why is dust removal necessary?
Dust on a concrete base is caused by erosion of the material. First, the upper layers are subjected to this process, then the lower ones, and then not far from the destruction of the structure itself. In addition, concrete dust itself is harmful to humans. It causes diseases such as allergies, asthma and others similar to them.
But that's not all. Strong dust clogs the equipment, causing rapid abrasion of rotating parts and assemblies. The floor itself loses its original appearance due to dust, making the room less attractive in terms of aesthetics. Here you can add constant and frequent cleaning, and not only of the floor base, but of ceiling and wall surfaces. That is, concrete dust is a big problem. Therefore, dust removal from concrete is a necessary process, regardless of whether such a floor is the main base in the room or is a surface for further cladding.
Concrete dust is very harmful Source userapi.com
What paint is suitable
Abrasion-resistant paints are suitable for covering the floor:
- Epoxy enamel;
- Rubber paint;
- Acrylic paint;
- Polyurethane solutions;
- Alkyd-urethane enamels.
Let us give an overview of the main characteristics of solutions.
Epoxy enamel
The most affordable and easy-to-use two-component epoxy resin paint. It can be applied to both dry floors and wet concrete after laying and initial setting of the cement mortar.
Advantages:
- Affordable price - from 270 rubles per 1 kg;
- Abrasion resistance;
- Neutrality to chemical media;
- Does not fade in light or in the sun;
- Fast setting and drying speed speeds up the repair process.
Flaws:
The high drying speed can also be a disadvantage - the paint must be mixed and applied over a large area quickly so that transitions of the painted areas do not form and the coating is uniform.
Rubber paint
The solution is made on the basis of dissolved rubber, therefore it has a number of properties of this material:
- High elasticity;
- Impact resistance;
- Waterproofing, resistance to humidity and oil products;
- Quick drying - the floor can be walked on in 30-60 minutes;
- Long service life – up to 10 years;
- One coat is sufficient.
Flaw:
High price. A good solution costs from 500 rubles per 1 kg.
Acrylic paint
The coloring composition based on polyacrylate dissolved in water is environmentally friendly and reliable. Acrylic paint is odorless and completely non-toxic, forms a waterproof protective film.
Advantages:
- The coloring solution is easily applied to the concrete surface;
- Dry coating is impervious to moisture and aggressive chemicals;
- UV resistance;
- Dyes can be added to the base solution to obtain paint of the desired color;
- Affordable price - from 190 rubles per 1 kilogram.
Flaw:
Acrylic paint does not resist abrasion as well as rubber or epoxy, so it should be used in regular garages - it is not suitable for workshops.
Polyurethane paint
Polyurethane is a universal, high-strength polymer. Paints based on it penetrate the structure of concrete and strengthen the top layers, reliably clogging the pores of the surface.
Advantages:
- Resistance to humidity and oil products;
- Resistance to temperature changes;
- Polyurethane is not afraid of abrasion and scratches;
- The paint forms a glossy, aesthetic finish.
Flaws:
- High cost - more than 300 rubles per 1 kg;
- The glossy coating is absolutely smooth, which reduces the grip of the car's wheels on the floor. There is a need to install stoppers or lay rubber mats under the car.
Alkyd-urethane enamels
Alkyd-urethane paints are a composite of alkyd and polyurethane, so the solution has the advantages and disadvantages of these components.
The coating is resistant to abrasion, but is not suitable for garages with heavy vehicle traffic (workshops, car services). The floor surface is glossy. The cost of a kilogram of solution is about 290 rubles or more.
Differences from usual
Photo of self-leveling floor:
To begin with, let's remember how the floor is leveled with a regular cement-sand screed.
To do this, the base is prepared, the necessary measurements and calculations are made, and then a system of beacons - guides is created that set the required horizontal plane of the floor.
Then, between the beacons, a plastic concrete solution is laid out with a slight excess, which is leveled by moving the rule along the guides.
The result is a surface that repeats the plane defined by the beacons.
It seems that everything is simple, and there is no need to “fence the garden.” Indeed, this scheme has been tested by time, and still remains the most popular in construction. What is attractive about it is its clarity, accessibility, and low costs of raw materials.
But it also has certain disadvantages:
- Firstly, it is very difficult to achieve optimal smoothness of the concrete surface with this action. For laying ceramic tiles - just right, but for many other floor coverings the resulting quality is not enough. And we have to, one way or another, modify the surface.
- Secondly, a screed with a thickness of less than 20 mm (and even 30 mm is considered optimal) will not have the necessary strength. And in many cases, such a thick layer for leveling becomes absolutely unnecessary, that is, leading to unnecessary weighting of the structure and unjustified costs.
- Thirdly, when laying a plastic, but still quite dense mortar, if special tools (vibrator or vibrating screed) are not used, small air cavities may remain in the thickness of the screed. And this is a decrease in the strength qualities of the base.
- And fourthly, installing a beacon system correctly can also be a difficult task. And any error in setting the guides or their insufficient fixation will certainly affect the quality of the resulting base.
Self-leveling floor
Now let's remember the properties of ordinary liquid.
Poured into any vessel, regardless of the complexity of its shape (as an option - poured over the surface of the floor), water under the influence of gravitational forces always “calms down” in such a position that its surface becomes perfectly horizontal.
And at the same time it fills the entire volume, that is, it leaves no voids.
It is on this ability of the liquid that the technology of using self-leveling compounds is based.
Technologists have developed special compositions that are given a liquid consistency when preparing for work.
After they are poured onto the base of the floor and distributed over the entire area, the surface of this solution takes on a horizontal plane.
Optimally selected components of the mixture ensure its rapid hardening. And the result is a hard layer with a perfectly flat surface, which very often does not require even minimal “finishing”.
Moreover, some types of self-leveling floors themselves become the finishing coating.
Coloring
Before you start painting, you need to decide on the type of paint.
Alkyd and epoxy paints are usually used for painting. The paint is selected depending on the characteristics of the room. In places with increased mechanical loads, it is recommended to use special wear-resistant paints.
Paint Types:
- Acrylic paint.
- Epoxy paint.
- Polyurethane enamel.
Acrylic paint, due to the acrylic resin it contains, creates a thin protective layer on the surface that protects it from corrosion, mechanical and chemical damage. Since acrylic paint is waterproof and moisture-resistant, it is best suited for painting in garages, balconies, basements and stairwells. Acrylic paint is applied with a regular roller and brush. Although one layer is enough, you can apply several layers to the floor for greater confidence. Drying time does not exceed 12-14 hours.
Epoxy paint adheres well to concrete, so it is the most durable and practical to use. This paint is practically indestructible, so it is suitable for large industrial premises. The main advantage of epoxy paint is that it does not require complete drying to paint concrete. The only downside is that it is a two-part product and needs to be mixed thoroughly before use.
Polyurethane enamel is the most expensive, due to its high resistance to atmospheric influences and the possibility of its use outdoors. Along with this, its main drawback is the long drying time, which ranges within two weeks.
Video description
This video shows how to properly paint concrete floors with polyurethane paint:
Urethane-alkyd
Used only for those concrete floors that are subject to minor loads, both mechanical and chemical. Therefore, if you are faced with the problem of how to paint the concrete floor in the garage so as not to create dust, then this paint is not for your situation. Because the garage floor is subjected to quite serious loads of both types.
A composition of this type must be applied to the concrete base in two layers. In this case, the first of them should be diluted with white spirit, and after application, dry thoroughly. Drying may take 3-4 hours or more, it all depends on the air temperature. The second layer will also dry, but it is recommended to use it only a day after application.
Attention! If the concrete screed was constructed recently, then it can be painted with urethane-alkyd paint only after a month.
And a few more recommendations. This type of paint is flammable. They cause an allergic reaction in people. That is, when working with them, you need to wear respirators and protective gloves, and also ensure that the room is well ventilated.
Urethane-alkyd based concrete paint Source beton-house.com
Floor dust removal methods
Of course, the question is: “What can I do to prevent the concrete floor from collecting dust?” relevant for those who have chosen this type of flooring. Today, specially developed paint compositions, primers and impregnations are available for sale.
Regardless of the chosen method, how to cover a concrete floor to avoid dust, after treatment the surface becomes:
- more durable;
- having anti-slip characteristics;
- antistatic;
- durable;
- aesthetic;
- hygienic;
- without defects.
To strengthen the concrete surface, a topping-dry mixture is used. In addition, home craftsmen often treat concrete floors in utility rooms with a composition of PVA glue diluted with water in a ratio of 1:10 or 1:7.
Nuances of a poured floor with a pattern
The technology for laying floors with a decorative pattern is, by and large, not particularly complicated. We treat the floor with a primer and wait for the surface to dry. Next, we lay the leveling base for our floor. After the finishing layer has dried, we lay down the decorative pattern.
Layers for decorative flooring with a pattern
The first important task of this stage is to find a drawing of the required size with the required resolution (high quality), the second is to glue the fabric without bubbles
A thin layer of 1 mm or so of transparent is applied to the dried base polymer layer, quickly rolled with a needle roller to avoid bubbles.
This is what your floor could look like after the work is done
The entire 3D floor technology is demonstrated in the video. After viewing, all ambiguities should disappear completely.
Watch this video on YouTube
Previous RepairStrengths and weaknesses of fabric stretch ceilings: options and features of do-it-yourself installation Next RepairFinishing the inside of a wooden house: photos of finished projects and recommendations for craftsmen
Strengthening primers and impregnations
The compositions are used to bind concrete particles, to enhance the strength of the base, wear resistance, water repellency, and to increase resistance to cracking. They are produced:
- liquid formulations. They are based on acrylic, bitumen, styrene-butadiene, epoxy and other synthetic polymers with high elasticity and viscosity;
- dry mixtures. They are used in industrial warehouses, parking lots, aircraft hangars, supermarkets, museums and other premises. Manufacturers pack the material in paper bags and buckets starting from 10 kg.
Liquid compositions include deep penetration primer, dust impregnation for concrete floors, primers: Protexil hardening impregnation of concrete and concrete floors 20 l, price 195 rub./l; Plitonite Grunt-3 strengthening (concentrate 1:3) 3 l, price 481.0 rubles; Deep penetration primer Uzin PE 425 for floors, combined packaging 3 l plus 3 l, price 10,258 rubles. Treating a concrete floor to remove dust with liquid compounds minimizes the problem, but does not completely eliminate its formation.
Dust-removing impregnation for concrete in a liquid state is the simplest option for treating a concrete surface. Impregnation with mineral or polymer compounds is applied to a clean base. The smallest pores of concrete are closed with mineral impregnations. Organic impregnations based on acrylic, polyurethane, and epoxy are used. The coating is carried out in 2 layers.
Acrylic impregnation for concrete against dust protects the concrete base under intense loads. Polyurethane impregnations give concrete strength and a long service life (more than 10 years). The downside of the material is that it produces an unpleasant odor when applied. Epoxy compounds are also durable. But they have a high price.
After rubbing dry mixtures into the surface with a spatula or other tool, the top layer of the concrete base is compacted, its wear resistance increases, and its strength increases 3 times. Dust removal coating for concrete is formed by the following materials: Floor topping Sikafloor 2 SynTop, 25 kg bag, price 1375 rubles, Russia; Neodur HE2 1 kg for 75 rubles, Germany; Weber.floor HB plus/Cerinol HB Korund Plus (25 kg bag), Germany, average price 10 euros.
The big disadvantage of dry compounds is the high cost of materials.
Dry composition - topping
Toppings are applied to a damp, fresh screed at the time of pouring the coating. Powder is poured onto the base in an even layer. To work, you need special equipment - a trowel, which is known as a “helicopter”. If the composition is manually scattered, the process will be labor-intensive. Material consumption – from 3 kg per 1 m2.
Topping technology
Work begins after the poured screed stops being pressed under the weight of a person when walking. 3-4 hours pass.
- The dry topping powder is poured into the cart to be evenly distributed over the entire floor.
- The powder absorbs moisture from fresh concrete.
- In this state, the topping is rubbed into the base with a trowel without any residue. There is no trace of dry powder left on the concrete.
- The procedure of uniformly applying the topping to the entire area is repeated, soaking it with concrete milk.
- The surface is sanded again.
- When the screed has hardened, finishing grouting is carried out. After this, the surface is treated with impregnation.
How to choose a floor depending on the room, base or final finish
All brands of flooring are different. To choose the most suitable one, it is better to consider in advance exactly where the floor will be poured:
- In residential apartments and houses. It is better to choose mineral poured coatings; epoxy or polyurethane are also suitable (they can be used without finishing).
- In the kitchen, mineral mixtures are suitable under laminate, tile or linoleum.
- In the bathroom and toilet where the tiles will lie, a cement-based floor or polymer compositions are required. In baths it is also worth using cement, but without gypsum impurities.
- When sealing a balcony, porch and any external areas, it is important to choose frost-resistant mixtures. Polymer grades are suitable, but gypsum should not be used at all.
- It is better to pour a polyurethane floor in the garage. You can make a cement screed and cover it with a thin layer of polyurethane.
It is also important what basis the self-leveling floor will be on:
- Concrete (floor slab). Any composition can be poured onto it.
- Waterproofing (bitumen) or old tiles. You will first need to fill it with a floating cement-sand screed about 4 cm thick, then apply a thin layer of the final fill onto it. You can use a self-leveling floor for screeding.
- Wood or insulation. First the cement screed, then the final finishing.
Exterior decoration also matters:
- You can pour any mineral mixture under the tiles.
- Any floors are suitable for linoleum, parquet, carpet and other coverings.
Floor dust removal methods
Of course, the question is: “What can I do to prevent the concrete floor from collecting dust?” relevant for those who have chosen this type of flooring. Today, specially developed paint compositions, primers and impregnations are available for sale.
Regardless of the chosen method, how to cover a concrete floor to avoid dust, after treatment the surface becomes:
- more durable;
- having anti-slip characteristics;
- antistatic;
- durable;
- aesthetic;
- hygienic;
- without defects.
To strengthen the concrete surface, a topping-dry mixture is used. In addition, home craftsmen often treat concrete floors in utility rooms with a composition of PVA glue diluted with water in a ratio of 1:10 or 1:7.
How to do it yourself?
In addition to bags of mixture, you will need some tools and equipment:
- The mixing capacity is at least 20 liters.
- Water - according to the instructions, but usually tap water can be used.
- Drill with a power of at least 800 W, kneading attachment.
- The rule is 2 m long.
- Wide spatula with teeth.
- Plastic roller with needles.
- Primer.
- Paintshoes.
Let's look at how the floors are poured in a small bathroom where the floors were previously covered with tiles:
Step 1. The first step is to dismantle all the old covering. In any case, the self-leveling floor is poured only onto a concrete base. Moreover, from the base, as well as along the walls, you need to remove all those elements that could interfere with the smooth, reliable and neat pouring of the floors.
Step 2. Next, you need to thoroughly clean the base from debris and dust. For dust, it is best to use a powerful construction vacuum cleaner.
Step 3. After this, all cracks and gaps that can be repaired must be filled with cement mixture. This applies not only to cracks in the concrete screed, but also to places where risers pass, where there was a joint between the wall and the floor, etc.
Step 4
It is then important to coat the base with a primer mixture. It is applied to the base using a brush or roller
It is important to coat the floors well and let them dry before proceeding to further stages of work.
Step 5. Next, you need to glue damper tape along the perimeter walls. To attach it to the walls, you can use sealant.
Step 6. According to the instructions indicated on the package, you need to prepare the mixture for the self-leveling base. To do this, you will need the mixture itself, a container for mixing and a construction mixer or a special attachment for a drill.
Step 7. Next, the mixture must be poured onto the prepared base and distributed evenly using a squeegee.
Step 8. After this, putting paint shoes on your feet, you need to roll the entire surface of the poured floor with a needle roller. This procedure is necessary in order to remove any air bubbles that may have gotten into it from the poured mixture. After this, the floors just need to dry.
How to make a self-leveling floor with a pattern?
Step by step it looks like this:
Level the base. At this stage, a perfectly flat floor surface is achieved. Concrete floors can be leveled using the self-leveling floor technology described above. Polymer floors can also be made on a wooden base.
The main task is to make them stable and perfectly smooth. This can be done using a sanding disc. The quality and effect of the floor depends 90% on the preparation of the base. Therefore, the best results should be achieved here.
Waiting for the floor to be dry
It is very important. The maximum humidity of a cement base is 4%, wood – 8%.
Apply a polymer primer to a dry, leveled and cleaned floor.
For this technology, it is better to distribute it with a wide spatula: this will further level out the existing unevenness.
We pour a polymer layer. The color is usually light gray or another, depending on the main background of the design: the base will be visible through the fabric. Any of the polymers can be used. They say the best ones are polyurethane ones, but they are very expensive. Epoxy is cheaper, but the transparent layer turns yellowish after a while.
We find and order printing on two-layer banner fabric. The first layer is paper, the top layer is mesh fabric. There is such a mesh with a width of 1.37-1.67 m, a roll length of 35 meters, the price is 8-10 euros per square meter. Therefore, wider drawings are made up of several pieces.
The design is applied to the fabric. When gluing, the paper is removed, the mesh fabric is glued to the prepared base. It is glued onto a thin layer of the same composition that will then be applied on top.
The first important task of this stage is to find a drawing of the required size with the required resolution (high quality), the second is to glue the fabric without bubbles.
When laying, the paper layer is removed. A thin layer of transparent is applied to the dried layer of base polymer - 1 mm or so, quickly rolled with a needle roller to avoid bubbles.
A film is spread over it. The main task is to make sure that there are no air bubbles under it. To do this, you need to lay it out starting from the edge, gradually gluing it onto the applied layer.
Since the fabric is mesh, if you lay it out carefully, there are no problems - bubbles come out through the holes in the mesh. Fill with a transparent finishing layer.
Main causes of destruction
The main factors of deformation of concrete structures:
- Moisture entering the voids of building materials. Every person knows from school physics lessons that water can take 3 states: steam, liquid, ice. After freezing, water crystallizes and expands. Accordingly, water that gets into the voids of the structure expands in winter and destroys it. Sudden changes in external temperatures. If during the pouring process a low-quality building mixture was used, the composition of which did not comply with building standards. To ensure the mobility of the cement mortar during its production, a water binder was additionally added, rather than using special additives. The structures are not provided with proper care at the stage of hardening and strengthening of the solution. In order for the solution to achieve the required level of strength, it must set gradually over several days. To do this, in hot weather, the poured foundation is sprinkled with water and covered with film, and in winter it is heated with special devices (mats, electrical cables).
Preparing the base
The matte self-leveling floor is applied to a specially prepared base. Optimal compliance is created by a concrete screed. If a room or office previously used a different type of covering that is difficult to dismantle, you can concrete the floor with cement-sand mortar. For a perfect fit it is necessary to create a flat horizontal surface. If there are cracks or depressions, they must be filled with repair compound. Next, all irregularities are removed by grinding. This procedure also allows for better penetration of the primer. After completing all repair work, it is necessary to remove dust, and if there are oil stains, degrease the surface.
At this stage it is also necessary to create optimal humidity in the screed (3-4%, no more). If these are recently poured concrete floors, then complete drying occurs only after 4 weeks. Therefore, it is impossible to proceed with further actions earlier.
Floor dust removal methods
To achieve an ideal result, you can use deep penetration impregnations on an organic basis. In such compositions, in addition to epoxy resin, reinforcing polyurethane fibers are used. Liquid compositions penetrate deeply into the concrete structure, thus closing all microscopic voids, which helps to significantly reduce porosity.
This technique ensures that the entire surface acquires increased structural density, so the concrete screed becomes an incredibly durable, monolithic coating
It is also important to note that such a surface ideally resists the penetration of moisture and is practically not afraid of sudden temperature changes, which ultimately significantly extends the service life of the entire floor surface
Polymer anti-dust coating has the following advantages:
Treatment with impregnations is carried out only once, so such floors retain an unchanged appearance throughout their entire service life. The entire surface can withstand significantly increased loads than the initial values declared by the manufacturer of the concrete screed. Absence of dust throughout the entire service life of the coating, which significantly increases the hygiene of the room. Ideal resistance to moisture and low temperatures in winter. Simple installation (no special qualifications required). Increasing the shock and vibration resistance of the floor (an important condition for mechanical assembly shops and car repair shops). Resistance against the effects of active chemical reagents used in production during cleaning operations.
Advantages of the most common floor coverings
The most common brands of “liquid” floors have a number of advantages:
- They are strong, wear-resistant and durable.
- Easy to apply and does not require special knowledge or technique.
- Thanks to the large selection of colors and decor, they can be used in almost any room and interior.
- Self-leveling floors are easy to clean and repair, tolerate chemicals well and are hygienic.
- In case of fire, they do not burn, but melt at temperatures above +100 degrees. However, when melted, toxic smoke is produced.
Classification
Depending on the composition, existing types of impregnations are divided into 2 groups:
- Based on polymers - organic.
- Based on silicate components - inorganic.
Impregnations of the first type work on the following principle: astringent additives enter the pores and isolate the material from the negative influence of an aggressive environment, giving it water-repellent properties. The composition also prevents the appearance of cement dust and increases the strength of the coating.
Silicate products do not envelop micropores, but trigger a chemical reaction with molecular compounds. Due to this, the pores become resistant to all kinds of influences and become waterproof.
Acrylic compounds
Acrylic impregnation of concrete floors is characterized by affordable cost and good quality. It provides enhanced protection of the material from chlorides and moisture, and also insulates it from ultraviolet radiation. The treated surface retains its presentable appearance for a long time and does not fade.
Such products are necessary to remove cement dust from the floor covering. Their service life is short, so the impregnation needs to be renewed every 2-3 years.
Polyurethane
Unlike the previous type, polyurethane impregnation has higher efficiency. She performs the following tasks:
- Removes dust from the surface.
- Gives resistance to chemicals.
- Increases the degree of water resistance.
- Improves strength.
- Extends the service life of the coating.
With the help of such compositions you can treat concrete floors, cement screeds, tiles and brick products. Active substances are able to penetrate to a depth of 6 mm, providing maximum protection against negative factors. Impregnation is suitable for both interior and exterior use.
After treating the floor with the product, it receives the following performance characteristics:
- The strength of the concrete surface increases to the M600 standard, even if lower series were initially used.
- Wear resistance increases by 8-10 times, impact resistance by 2 times.
- The material becomes moisture resistant and is not afraid of direct contact with chemical reagents.
- The problem of cement dust is completely eliminated.
- Surface care becomes simple and quick.
The high popularity of polyurethane-based impregnations is also explained by the following advantages:
- Easy to apply.
- Affordable cost of equipment for surface treatment.
- Fast drying times.
Epoxy
Epoxy impregnations for concrete floors are colorless or colored. They are used for interior work, since during exterior finishing the surface becomes covered with yellowish spots. These products contain 2 components:
- Hardener.
- Epoxy resin.
The role of a hardener is performed by phenols, tertiary amines and similar additives. Depending on the scope of application of the impregnation, the proportions and formulation may vary.
Unlike previous types, the epoxy version has the following advantages:
- Increased strength.
- Resistance to abrasive processes.
- Lack of water permeability.
- Minimal shrinkage.
- Possibility of organizing durable floor coverings with an attractive appearance.
Epoxy products do not emit an unpleasant odor during operation, but they are characterized by instability to chemical reagents. The main areas of use of such impregnations are swimming pools, basement walls, food industry buildings and buildings located in areas with high groundwater levels.
Features of the technology
When considering the possibility of doing the work yourself, you need to take into account the fact that with a decorative floor covering with a pattern or a 3D effect, a very large number of difficulties can arise. It is recommended that such work be entrusted exclusively to professionals. As for mixtures based on a concrete or polymer base, you can do the work yourself. To do this, let’s look at the process of pouring the mixture in more detail:
Floor casting can be done on a concrete screed or old chipboards. In both cases, it is necessary to clean the surface from debris and dust and perform priming using materials intended for this purpose. In the case of casting on boards, the base should be strengthened and the cracks caulked. The next step is to lay the insulation material. To ensure that the mixture does not go into the cracks, a special damper tape is installed around the perimeter. It also reduces the likelihood of cracks appearing on the surface due to slight movement of the walls. Beacons are placed along which the surface will be leveled. The recommended distance between beacons is 1 meter. The process for preparing the mixture may vary slightly. Among the main recommendations, it can be noted that it is recommended to prepare the concrete solution in a concrete mixer. Mixing the solution for one room can be done in a regular barrel, but for this you will need a special mixer. The mixture is prepared in accordance with the specified recommendations. Work is being carried out that directly concerns pouring the mixture over the surface. Particular attention is paid to the fact that the solution should flow into cracks and corners
The mixture for pouring should be prepared in stages, but not with a long interval. A good mixture will spread over the surface itself, but it is also important to prepare it correctly.
After this, the structure is compacted using a roller. Its use makes it possible to remove air bubbles from the structure, which subsequently lead to deformation of the structure and the appearance of cracks.
In conclusion, we will pay attention to the process of creating 3D floors. Experts say that the procedure is not much different from the one discussed above.
However, there are certain nuances. An example is that more attention is paid to the base: the surface is not just primed, but covered with a special putty, which takes about 3 days to dry. The image, which creates the unusual effect, is applied after the putty has dried. As a rule, it is represented by a fabric with a pattern on it. When laying out the image, care is taken to avoid strong folds, as they will cause bubbles to appear. After this, a finishing layer is applied, which creates an unusual effect. It is worth considering that without special knowledge, skills and tools, it is difficult to carry out such work efficiently. That is why it is recommended to trust the work of creating 3D coating to professionals who know all the nuances.
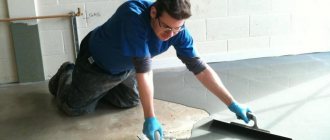
Sanding and polishing the base
When using a solution with the addition of dyes and plasticizers, there is no need to use impregnations. To prevent the screed from collecting dust, it is ground and polished. During this process, all defects that were formed during the screed filling process are eliminated, and all the beauty of the solid colored floor is revealed. All work on leveling the floor mechanically is carried out only after the flooring is removed from it, preventing damage to the screed during the period of its hardening.
For work in small areas, hand tools are used. As a rule, craftsmen use a grinder with a set of abrasive attachments. The use of portable equipment allows grinding in the most inaccessible places where mobile units cannot reach. As a rule, fine, medium and coarse nozzles are used for grinding and polishing. Mechanical dust removal is carried out by devices powered by an internal combustion engine or electricity. Their work is performed using wet or dry technology.
Dry processing is more common and requires less effort and material costs. Gradually changing the abrasive attachments, the craftsmen bring the floor to a perfectly smooth state. The disadvantage of this method of floor dust removal is the loud noise and abundance of dust produced by the installation.
After leveling, it is recommended to cover the treated surface with paint, varnish or primer. This will give the concrete even greater strength.
How to apply?
Inspect the floor, clean if necessary, and repair with epoxy putties. Vacuum the surface.
Next, the impregnation should be distributed over the floor as evenly as possible, without “puddles” or unfilled areas. Level the liquid using a soft roller or brush.
If silicate impregnation is used, it will have to dry for about an hour. After it has become viscous, the composition is diluted with water, and the surface is covered with a new one again. To better rub the impregnation into the base, trowels can be used. After twenty minutes, the floor should be thoroughly rinsed with clean water.
With lithium impregnations everything is simpler. They are simply carefully distributed over the surface and allowed to dry.
What reasons lead to dust formation?
During the operation of a concrete floor covering, its top layer takes on various loads, chemical and mechanical influences, because of this, the destruction of concrete begins, resulting in the formation of cement dust.
- violation of concrete pouring technology.
- improperly prepared mixture.
- adding poor quality components to the solution.
Even if concrete has high strength properties, without proper processing and the use of reinforcing compounds it will be subject to the negative effects of abrasive substances, which will lead to surface abrasion, reduced strength and dust formation. If the concrete is of poor quality, it will be subject to corrosion processes, which also leads to dust formation.
There are other reasons why a concrete floor becomes dusty, but those described above are the most common. However, there is a solution to the problem - treating the surface of concrete floors using special compounds. But why to do this is another question, we will answer it below.
Which is better: screed or self-leveling floor
Self-leveling floor or screed
Many users equate these two compositions. But in reality it is wrong to compare them.
The screed is a base coat that needs a finishing coat. It is poured in a thick layer and can level out serious defects. But the work requires skills and special tools.
Self-leveling flooring is rather a finishing coating. In some cases it can be used as a base, but only if there are no significant defects. It is very expensive and can be filled by people without experience. The fill layer is insignificant and in case of damage cannot be restored.
Self-leveling flooring is an excellent “tool” for leveling floors and creating a beautiful decorative coating. With the right choice and adherence to filling technologies, the composition will be strong and durable. This means that the owners of the premises can forget about repairs for a long time.
The best self-leveling floors Video rating
The foundation has crumbled - what to do?
When the first signs of deformation of the foundation are detected, so that it does not crumble further, it is recommended to repair the structure in the near future.
Reasons why the foundation begins to crumble:
- wet base;
- uneven subsidence of the building;
- peeling of the finish due to poor quality mortar;
- violation of the horizontal base;
- the ground level has changed.
After determining the circumstances of the destruction of the base, an option to eliminate the problem is selected and the damaged areas are directly repaired.
Foundation destruction.
If the foundation has suffered significant deformation, which led to the destruction of the walls of the building, then it is completely refilled. This is done in stages. First of all, replacement of base elements subject to maximum loads is carried out. The concrete screed is reinforced to increase the strength of the new base.
Key nuances in the work process
The use of self-leveling floors requires, as already noted above, serious preliminary work with the surface.
The basis follows:
- Prime with a special compound;
- Fill all hidden potholes;
- Correct significant differences.
The “procedures” should be performed exactly in this sequence - after all, this is the only way to achieve full adhesion of the solution to the base.
The solution must be applied very quickly!
Another mandatory condition is the absolute dryness of the surface under the self-leveling floor. Otherwise, the composition risks peeling and cracking after drying. Do not try to level significant differences in the base using self-leveling floors. The recommended layer thickness is from 5 to 30 millimeters.
Now regarding the solution itself. Or rather, its preparations
It is very important that the components are mixed efficiently and a high degree of homogeneity of the mixture is achieved!
Only professional tools should be used - mixing with the first device that comes to hand is unacceptable.
How to coat a concrete screed to avoid dust: features of topping compositions
When deciding how to cover a concrete floor to avoid dust, you should pay attention to innovative technology in the form of topping. This protective mixture consists of Portland cement, mineral additives, plasticizers and dyes.
The first component serves to bind all the elements of the mixture, which contributes to the effective filling of concrete pores and adhesion to the coating, eliminating peeling of the material.
provides increased strength and wear resistance of the concrete floor. This protective composition prevents the penetration of moisture into the thickness of concrete, which can cause destruction of its structure with subsequent leaching of the surface. A floor with a topping coating withstands the effects of chemical components, so it can be safely used in garages, production halls and workshops.
The composition penetrates deeply into the pores of concrete, clogging them, as a result of which the service life of the coating is extended, which is not destroyed by mechanical loads and other negative influences. Such a means for removing dust from a concrete floor has an acceptable cost, which makes it possible to inexpensively harden the coating. The cost of the process can be reduced to a greater extent by using low grades of cement to create the floor, the shortcomings of which can be compensated for by a heavy-duty protective composition.
The topping is available in the form of a dry powder or liquid composition. The powder is evenly scattered onto the surface, then compacted and sanded. When using dry substances on a concrete floor, seams are formed. This is a budget topping option. The liquid composition is evenly applied to the surface, forming a durable and reliable protective film that is resistant to moisture and chemical compounds. It turns out homogeneous, even and smooth.
The topping can be either in the form of a dry powder or a liquid composition.
Methods for removing dust from a concrete surface
Construction companies offer three methods for removing dust from a concrete floor:
- strengthening the concrete surface with topping;
- grinding;
- covering the floor with special impregnations.
An integrated approach to concrete floor dust removal helps solve the problem quickly and effectively.
What is topping
Topping is a special hardener for concrete surfaces. It consists of cement, binding additives, fine fillers and dyes. It is a dry mixture. High quality topping contains at least 6 additives (microfiber, ceramics and others). The topping, which contains a filler in the form of quartz sand, can withstand light and medium loads. Dyes give the topping floor a decorative effect.
Corundum filler is used for high traffic areas. The concrete screed is strengthened in this case by 1.8 times. In industrial production, metallized topping is used. The high concentration of metal shavings allows it to withstand the loads of vehicles and heavy equipment.
Advantages of topping floors
Thanks to topping, a concrete floor acquires a number of advantages:
- The strength of the floor surface increases, dust is generated in small quantities.
- Increases wear resistance. Concrete floors can withstand high abrasive loads.
- High impact resistance is manifested in resistance to mechanical damage; chips and potholes do not form on the surface.
- The durability of the surface increases the service life of the concrete floor.
- The topping prevents fire and flare-ups because it has antistatic properties.
- These floors are easy to clean and maintain.
- Dyes of different shades help make topping floors decorative, attractive not only with a palette of colors, but also with a variety of textures. Smooth, grainy or mirror surface texture, a rainbow of tones will satisfy the tastes of the most demanding consumer. There are toppings that will help lay out a mosaic composition on the surface of concrete floors, impressing guests of private homes and office visitors with its uniqueness and originality.
- Light shades of topping floors reflect light, so you can save money on lighting fixtures. Savings are also possible on concrete. Instead of expensive high-strength concrete, you can use a lower grade.
- The moisture resistance of the floors increases and they become waterproof.
Disadvantages of Topping
Despite the many advantages of topping, it also has disadvantages:
- Topping does not ensure complete dustlessness, which is unacceptable for some warehouses and production facilities.
- One of the important disadvantages of topping is its ability to absorb any liquids: oil, solvents, and with them dirt deposits.
- Reduced resistance to chemical influences makes it difficult to use in places exposed to aggressive substances: pharmaceutical, chemical industries.
Types of topping
The topping can be liquid or dry.
Liquid topping
It is an inorganic compound that dissolves in water. The pouring mixture with a high water content penetrates the concrete by 0.5 cm. A chemical reaction occurs: calcium carbonate combines with lime. As a result of the combination of chemicals, insoluble compounds are formed that compact the top layer of the floor surface.
Liquid topping increases the strength of a concrete floor in places with low humidity, but it should not be used in rooms with an aggressive environment.
Dry topping
It comes in powder or crumb form. It is scattered over the surface of the concrete floor in equal portions, then rubbed into the surface. Final sanding gives the coating an aesthetic appearance. Dry topping is the most popular. Quartz, corundum and metallized toppings are dry types of hardeners. The high quality of the hardener increases the service life of the concrete base.
Self-leveling mixtures
Self-leveling mixtures require human intervention: it is necessary to evenly distribute the mixture with a needle roller.
Synthetic coatings are usually called self-leveling. The main advantages of self-leveling floors are that they are resistant not only to mechanical stress, but also to friction and vibration. This coating is environmentally friendly and does not require special care, which makes it suitable for use in various exhibition halls, warehouses and retail premises. The main advantage of such a coating is not only its attractiveness, but also its durability and reliability, which makes it possible not to update it after a certain period of time. Such performance characteristics are achieved due to the fact that the composition is based on polyurethane and epoxy resins.
Currently, self-leveling floors are represented by two main types - epoxy-polyurethane and methyl methacrylate polymers, which have a variety of colors, which allows them to satisfy the requirements of the most demanding customers. Adding additional auxiliary mixtures for self-leveling floors will allow you to achieve fire-resistant, water-repellent and antistatic properties. The positive features of such floors also include the fact that even if some area is damaged, there is no need to replace the entire coating; it is enough to replace only the damaged area.
The choice of polymer mixture for coating concrete floors is primarily made depending on the following criteria:
- Condition of the concrete pavement.
- Planned loads.
- Climatic conditions (closed or open areas).
- Purpose of a room with a covered concrete floor.
Epoxy self-leveling floors will be the best solution if there is a possibility of exposure to chemicals. Well, an even and smooth floor will not only please the eye, but will also significantly increase labor productivity.
Defect No. 5. Small inclusions, roughness
If dust or small particles of debris get onto a non-dried self-leveling floor, then pimples, roughness, and small irregularities form on its surface. In this case, it is impossible to achieve a mirror-like, absolutely smooth surface.
Causes of the defect:
- An insufficiently cleaned concrete base, dirt from which has entered the bulk mixture and is distributed over its surface.
- Dust floating in the air and settling on a pouring surface that has not yet hardened.
Elimination of small roughness:
- The floor surface is cleaned of dust.
- A thin finishing layer of coating is applied to cover the defects.
How to remove construction dust from a concrete floor
Remains of construction debris can be swept away with a brush or broom. If there is a lot of dirt, then a manual device – a high-pressure washer – is used for cleaning. After such cleaning, the level of dust removal is approximately the same as in a residential area.
When applying silicone or epoxy coatings, the surface is cleaned to a sterile level. There should be no dust and, especially, no traces of moisture. Therefore, the preparation process is carried out in three stages:
- Cleaning from dust with a broom on a damp floor;
- The next stage is washing the concrete floor using liquid soap;
- Drying floors using IR heaters.
If an even higher level of dust removal is required, for example, before final painting of the body, then the floor is simply covered with strips of polyethylene film. In specialized workshops, the floor is sometimes treated with an aqueous solution of PVA, this is enough for several weeks of work.
Results
When using impregnations, it is important to carefully study the instructions. Inspect the floor and repair small chips and gouges with epoxy putties. Dust the room using a vacuum cleaner. Pour the impregnation onto the floor in strips, distributing evenly with a brush or roller. Cover the concrete floor 2-3 times with organic impregnations so that it completely absorbs moisture.
Today we talked about the importance of dust removal from concrete floors. We told you why the floor is dusty and what harm cement dust does to humans. We have revealed ways to remove dust from a concrete floor. We hope that you will consider whether you should dedust your concrete screed and make the right decision.
Selection rules
Sometimes choosing the right product for your concrete floor can be a little challenging. Simple rules come to the rescue.
- Surface color and texture. When polymer is needed for high-tech residential premises, you can take glossy surfaces. If we talk about the Provence style, then it is better to take matte options.
- Application environment. When a polyurethane floor will suffer from heavy loads, it is best to take a two-component product. Due to this, the coatings are dense and do not suffer from abrasion. The most important thing is not to forget that this specificity is related to the thickness of the polymer itself. Each type of floor is suitable for different load forces.
- Price. The cost of products is directly related to their technical properties. It varies over a wide range, so you can choose the best variations to solve various problems.
- Firm. Here you need to look exclusively at the reviews of people who have already tried such products. Only they allow us to really judge how good a specific type of polymer is.