- home
- Construction and renovation
- Bathroom and toilet
>
>
⬎
In this publication we will look at making a shower tray for tiling.
Sometimes this idea is found in a different formulation: “pallet in construction design.” Let’s not talk about how relevant or convenient this is - there is no desire to pour useless water into reasoning, because there is plenty of similar information on other sites, the content for which is written by armchair theorists. Let's get straight to the point.
Determining the height of the future pallet
The very first question that should be asked is the height of the horizontal outlet from the sewer riser. Since this height directly affects the height of the future pallet, you should estimate this very level at the ladder.
About pipe slopes: in the article on sewerage I mentioned SP 30.13330.2016, where for pipes with a diameter of 50 and 40 mm. a slope of 2-2.5 centimeters per meter of pipe is prescribed. In practice, this is a big bias and often cannot be implemented. Therefore, I completely allow this standard to be neglected, and I make a slope (when it is really necessary) of 1-1.5 cm per meter of pipe.
It may turn out that while observing all the slopes of the drain pipes, you will have to make the pan very high and this will be inconvenient for use. In short, in the process of assessing all the slopes of sewer pipes, the idea may clearly arise that it is necessary to interfere with the design of the riser and lower the horizontal outlet below the existing one.
As for the weight of a structure that is too thick, this issue can be completely resolved by using expanded clay concrete or other techniques. In my practice, there were showers that were 30 centimeters higher than the main floor.
Types of door designs for booths
| Door design | Description |
| Swing | A door with standard hinges is used similarly to any interior or entrance door. Of course, it is a familiar and therefore popular option, but it requires free space in the room, since it always opens to the outside. |
| Articulated | Rotary hinges are mounted at the ends, thanks to which the door opens along a trajectory identical to the previous version. Possible opening angles: 90°,135°,180°. Used on doors with an accordion in 2-3 folds, inward and outward. Safe, functional and very aesthetically pleasing. |
| Sliding | A true classic of ergonomics. The movement of the panels is provided by roller mechanisms that slide along metal guides. A practical, reliable and time-tested option widely used in corner booths. |
| Rotary | The door opens and “slides” to the side. Designed for small spaces, and it would seem that this mechanism should be popular in our latitudes, but today the choice of such a design is rather the exception than the rule. |
| Folding | A popular door is the accordion door, which is also relevant for small spaces. A classic and logical attribute of rectangular cabins. |
Side and fencing: to be or not to be?
The next point that needs to be considered is whether there will be a shower with a glass enclosure or just covering it with a curtain. Why is it important:
1.
When using a fence, there is no urgent need for sides of the tray; the glass partition will prevent water from overflowing outside the shower. At least most guards prevent water from overflowing over a pan without sides.
2.
The presence of a glass partition will allow you to use the area of the pallet to the maximum, because the fence can be placed along the outer edge of the pallet. When using a curtain, it should be located behind the sides inside the structure to prevent water from flowing down it onto the main floor of the bathroom. In addition, the presence of a curtain requires more internal space, since in cramped conditions this curtain will tend to jump overboard and pour water on the floor.
3.
Glass shower doors are quite expensive.
4.
Also, the disadvantages of the fence include the difficulty of cleaning: if the glass itself can be washed well with special cleaning agents, then perfectly washing all the connections and rubber bands is an unrealistic task.
5.
To use a curtain, you need a side of at least 4-5 centimeters in height. If, according to the results of the sewer drain assessment, the pan is too high, then the side will make the entire structure even higher.
The width of the side is chosen arbitrarily, if it is planned. You can make it at least 5 cm in its finished form (this is less than 3 cm without tiles), here you should focus on the space occupied and convenience. If space allows, it is better to make the side wider. For example, a 12.5 cm board (finished) is very comfortable and you can confidently stand on it with your feet. Standing on a narrow side of 5-6 cm is very inconvenient, so you will have to step over it all the time.
Therefore, when designing a pallet, you should weigh the pros and cons of the presence/absence of a fence. I’ll tell you my opinion: if it’s possible to make a larger shower, it’s better to opt for a curtain - it will be a better option. If there is a shortage of space, fencing is more acceptable.
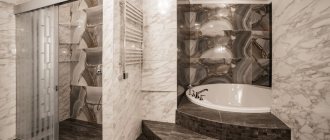
What is a shower cabin in a construction version?
A corner made of tiles, with a tray made of tiles or in a finished design, with a drain in the floor and often a small border - this is a shower cabin in a construction design, which, by the way, can be made with your own hands.
Let's consider what such a solution consists of. The walls are made of moisture-resistant materials, the base and walls are equipped with reliable waterproofing, pipes for supplying hot and cold water are placed in the wall, and a drainage system is located in the floor. The walls are finished with tiles, and the pallet is a choice of ready-made or also tiles. A siphon for drainage is installed in the tray area, and the cabin is equipped with a shower with a mixer and is enclosed with doors or curtains if necessary.
There are many nuances in such a seemingly simple task, so if you thought that building such a booth was as easy as shelling pears, then this is not entirely true. At a minimum, you need to take into account a number of details for each stage, which we will now consider.
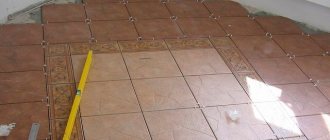
Deciding on the tiles for the bottom of the pallet and the geometry of the slopes
It is necessary to decide on the tiles for the bottom before pouring the pallet, and this also applies to the drain. In other words, the chosen ladder and tiles will give an understanding of the shape of the slopes.
A few words about the slope itself: it should be 1-2 centimeters per meter of one plane. Some experts recommend slopes of less than a centimeter - the master is the boss here. If we focus on the standards, then the figure is stated in the same SP 30.13330.2016:
8.5.4 The slope of the floor in public shower rooms should be 0.01-0.02 towards the tray or drain.
When forming slopes, there will inevitably be fractures of the planes - the actual task is to determine the location of the fractures, and this greatly depends on the ladder and the shape of the tiles.
The simplest thing in this task will be to line the bottom with mosaics: no matter what shape the ladder is and no matter where on the pallet it is located, the fractures can be formed in any way you like, the main thing is that all slopes are reduced to the ladder. Moreover, it is not even necessary to form clear planes with clear edges for the mosaic.
When facing with mosaics, the location of the planes and fractures does not play a special role, as does the location of the ladder. On the left side of the photo you can see that the edges converging to the ladder have a rather unattractive shape, if they were noticeable in the finished version. On the right side we see that the fractures are invisible.
But if you plan to lay tiles of regular or large sizes, then the role of planes and fractures is significant. As a standard, all four fractures are brought together at the corners of a square or rectangular ladder. It follows from this that the tiles will have to be cut at the fracture edges, with the exception of the square bottom of the pallet with a square drain clearly in the middle.
This example can be considered ideal: the planes are suitable for tiling with square and rectangular tiles, as well as mosaics. There is no need to trim the tiles along the edges of the planes.
If we move the ladder to any side from the center or make the pallet in a shape other than square, then the tiles will have to be cut along the edges of the planes. The same applies to a rectangular ladder, even if it is clearly in the center of a perfect square. A different orientation of the tiles, be it diagonally or straight, will not correct the situation. But the mosaic will fit well on any of the schemes.
High-quality trimming at fracture sites is possible, but it requires great care from the tiler.
And this option with a rectangular tray the entire width of the pallet allows you to do without any fractures at all!
In general, with an understanding of the geometry, various variations in ladder positions and slopes are possible. The examples above only show the most typical situations.
Square or rectangular showers are common. However, in our realities of cramped bathrooms, there is often a need for a semicircular or beveled shape. In this case, it is best to opt for a mosaic. Whatever shape the pallet has, you need to bring four (or more) beacons from one level from the corners to the side of the ladder (as in the photo above with the mosaic). This is a fairly universal rule. A slope of 1-2 centimeters per meter is created along the longest beacon; for shorter beacons the slope will be greater, but the entire perimeter will be of the same level.
But if you really want to, then you can get smart with ordinary tiles, but you need to understand that this will be more difficult to implement. The point is to “catch” the correct square in a complex form.
The planes on the left and below extend from an imaginary square, so they will be higher near the border of the pallet than the “correct” planes on the top and right. Also, these planes will require additional beacons when pouring. Not a very good option, in my opinion.
Optimal shower sizes
The size of the shower depends on two factors: the size of the room in which the cabin will be installed and the height/weight of its visitors.
If the size of the room allows, the cabin can be fenced off by more than a meter in length and width. You can install two shower heads or a shower plus a sink there. It all depends on the needs and wishes.
For a large bathroom, you can install a shower cabin with several shower heads.
If the bathroom is small and the cabin is planned to be installed in place of the former bathtub, then there is not much choice here; they even install a glass corner cabin in order to save space.
A standard shower stall takes up little space.
In addition, in order to install a stack, you need to raise the floor in the shower area by at least 10 cm. At the same time, the cabin itself will rise, which is difficult in apartments with low ceilings.
The height of the cabin can be different - up to the ceiling or covering a person’s head.
The shower stall does not have to be up to the ceiling.
Installation of a drain ladder
Whatever the design of the drain and pan, the best option would be to “rigidly” install the drain before pouring the pan/screed. Rigid installation is when the drain, tray or channel is securely fixed with a solution. Trays and channels usually have special fasteners included, but they do not fix the structure rigidly enough and the design position can easily be disturbed when pouring the screed.
Therefore, it is best to first install the drain on the kit (if available) or homemade fasteners, and then fill the entire space under the drain with cement mortar or tile adhesive. This will not only allow us to securely fasten the structure, but we will also have a clear idea of the lowest point of the pallet.
As a last resort, rigid fasteners can be made before forming the finishing layer of the screed, if the pouring is carried out in two layers.
In this photo, the shower tray, in addition to the complete fasteners in the form of legs, is additionally secured with cement mortar. This was done while pouring the first rough layer of screed.
I want to say right away that drain designs without a flange are not even considered. If you need high-quality waterproofing of the shower, and in most cases it is necessary, then the presence of a flange in the design of the drain is a must!
A flange is a border of several centimeters around the drain, specially designed for reliable connection with waterproofing.
To set the ladder to the desired level, four studs are used, screwed into suitable dowels. The studs support the structure by the flange, and the height of each stud is adjusted by tightening and unscrewing it using two locknuts.
The drain design in the photo above is made in such a way that the level of the flange will inevitably be lower than the finishing screed. Therefore, in the future it is necessary to form the screed only up to the flange, leaving a recess around the drain. An example in the photo below.
The recess around the drain is sealed with tile adhesive after applying the coating waterproofing (of course, after the latter has dried).
The drain itself is connected to the sewer with a 40 or 50 mm pipe. I prefer to use the 50th pipe, although I think that this is not essential and the 40th will also do its job perfectly. If the drain outlet is 40 mm, which is often the case, then when installing the 50th pipe, an adapter is used immediately behind the drain.
As with any sewer installation, it is best to avoid 90-degree angles and use two 45-degree angles. I do not recommend using corrugated sewer pipes - as practice has shown, they are quite unreliable.
Good to know: if the sewer riser is poorly ventilated, then there is a high probability that the drain water seal will often break. In general, “grunting” sounds will often be heard from the pan. Therefore, for such cases, it is better to choose a ladder with a high-quality combined shutter. For example, a “dry” shutter mechanism should not contain springs - this is an a priori unreliable technical solution.
Also, in the absence of ventilation of the riser (this occurs in old houses), an aerator (a valve that allows air into the sewer, but restrains odors) will help solve the problem. However, you should not rely entirely on the valve, because it will serve the entire riser (all apartments) with its work. If only we could agree with most of our neighbors to install the same ones for ourselves...
Curtains
You can buy various components for the future cabin, guided by necessity and your own taste. Combined cabins look very original and attractive, but they are much more expensive. The choice depends only on the taste of the designer and on his ability to create diverse compositions. A homemade base with tiled perimeter looks interesting, but you can also install regular shower curtains yourself.
Modern materials and the ease of their installation make it quite easy to create structures such as a shower cabin made of polycarbonate with your own hands, and instead of polycarbonate, glass, plastic or fiberglass parts are often used.
Filling the pan
Since in most cases the thickness of the pallet screed exceeds 10 centimeters, it is preferable to divide it into two layers. Make the first, rough layer as thick as possible, and the finishing layer as minimal as possible.
Although if the height of the bottom of the pan is less than 8 cm, it will be more convenient to fill it in one stage.
Through trial and error, I developed the following sequence for myself: first, a thick rough layer is poured, not reaching the design height of 4-5 cm, and then a finishing layer of screed is formed from the missing 4-5 centimeters.
Why exactly 4-5 cm? This thickness was chosen in case of poor adhesion between layers and to make it possible to safely use ordinary cement-sand mortar for finishing. Even if the top layer does not adhere well to the bottom one, it will have sufficient load-bearing capacity. Moreover, this approach will allow the use of a base layer of expanded clay concrete with a minimum amount of sand.
As you know, ordinary DSP is not recommended for screeds thinner than 3 cm. In fact, thinner layers can be formed with ordinary mortar, but a separate article is needed to cover this topic. Therefore, we will conventionally assume that cement-sand mortar without additives should not be laid in layers less than 3 centimeters.
It is recommended to reinforce both layers: the bottom one is usually very thick and by default requires reinforcement, and the top one has some chance of not sticking well to the top one and therefore must have load-bearing capacity. In fact, if everything is done correctly, the probability of the top screed peeling off is almost zero, but more on that below.
For the bottom layer, construction (masonry mesh) is used, and for the top layer, either the same mesh or fiber is used. When laying red brick as a base layer, naturally it will not be possible to use a mesh.
The metal mesh is laid approximately in the middle of the first layer. The main thing is not to pause and immediately cover the reinforcement with the top layer, then the first layer will be monolithic and reinforced.
Since there is at least a sewer drain pipe in the pan (and quite possibly other communications), it will be difficult to lay the mesh in one piece. Therefore, the mesh can be cut into many small pieces, the main thing is that these scraps overlap each other by 5-10 cm.
If you have a laser level, it is very convenient to control the base layer using a stick with a control mark. The accuracy is of course low, but for a rough layer this is enough.
The density of this particular layer of expanded clay concrete, according to approximate calculations, is 1100 kg/m³ versus the density of 1700 kg/m³ for a conventional CFRP. In this case, this made it possible to reduce the weight of the pallet by 46 kg. with a layer thickness of 8 cm and an area of 1 m² (actual weight is about 90 kg, from the DSP it would be approximately 136 kg).
Regarding the density of expanded clay concrete. I’m not sure of the absolute veracity of the information found, because unfortunately, 99% of the Internet is littered with crap... Expanded clay concrete has a density from 800 kg/m³ to 1800 kg/m³. Particularly lightweight can have a density of 600 kg/m³.
The weight is affected by both the fraction of expanded clay itself and the amount of sand. In practice, the less sand, the more difficult it is to lay the solution without voids. But we are not afraid of small local voids, because the load-bearing finishing layer will lie on top.
The photo above shows an example with expanded clay concrete with a density of approximately 1100 (calculation was carried out by the weight of the components used). I can say with confidence that the amount of sand in the batch can be reduced and the density can be reduced to at least 850-900 kg/m³. In other words, make the base layer twice as light as a regular solution.
I can’t give the exact proportions of the components, because expanded clay can be different, and you need to be guided by the sensations of the finished mixture (is it possible to lay it with a minimum amount of sand). However, I will give an approximate algorithm: cement is mixed in water, equal in weight to the weight of the introduced expanded clay, then expanded clay is mixed with water and cement, and then sand (and water, if necessary) is added in small portions. Sand is added until the mixture has a workable consistency.
As for the side, there seem to be two main options: lay it out of brick or lay it (fill it) together with a finishing layer.
The inner part of the side formwork with its lower part repeats the finishing plane with slopes. Thanks to this approach, the finishing screed and the side will be one monolithic whole.
Long self-tapping screws screwed into the rough screed will additionally strengthen the adhesion of the bead to the bottom layer. This is an additional measure and is not necessary.
For finishing screed, it is best to use the semi-dry method. I’ll explain why: the pallet will dry out faster, at least the upper part, and there’s almost zero chance of shrinkage cracks forming. This approach will allow you to quickly begin waterproofing.
As a last resort, if for some reason a semi-dry screed is not suitable, then the top layer should be poured with a minimum amount of water in the batch.
For beacons, you can use any available method. I prefer the PN profile on the screw heads. After forming the planes from the semi-dry solution, the profiles are removed, the support screws are recessed deeper and the strips are sealed. With the “wet” technology, the profiles are taken out after the screed has set and the locations of the beacons are covered.
I prefer beacons made from a couple of self-tapping screws and a piece of PN profile on top. In this particular case, the second pair of beacons is the tray flange
The extreme support points of the profile are the flange of the ladder
For good adhesion to the previous layer, there is a simple technique. Forget about primer!
If the first layer has had time to dry fairly well (the filling was done more than a few days ago), then it needs to be well moistened. As an adhesive layer, you can use a thin layer of tile adhesive or a 1:1 liquid mixture of cement and sand.
The adhesive layer is spread over the surface with a trowel, and then the mixture for the finishing layer is laid on top. In hard-to-reach places, you can use a brush to apply liquid cement.
When using “slurry” made of cement, the main thing is not to overdo it and apply layers of no more than 2-5 mm, so that the bulk of the screed does not become more liquid. This method is quite simple, but it eliminates detachment. When using a primer, there are many cases where the top layer begins to sag after 2-4 weeks. The method is relevant for the semi-dry method and for the “wet” one.
If you use too thin a mixture for the finishing layer, the adhesive layer may not help! A minimum of water in the batch is the main rule.
If there is formwork, it is better to remove it after 2-3 days.
After pouring, the next and subsequent 2-3 days it is useful to water the screed with water and cover it with plastic wrap.
Installation of a simple country shower on the site
Installing a summer shower of the simplest design takes just a couple of hours. The main thing is to know the main components of this structure:
- closed cabin;
- flooring or full floor underfoot;
- water container.
In principle, installing such a simple structure is not difficult - put up a booth, put the prepared flooring on the floor and put a water tank on top. But there are some features of the work that must be taken into account:
a tank intended for water always has a lot of weight - the booth racks must be durable; It is advisable to dig the pillars of the building into the ground (they will first need to be treated with special protective agents), ideally, these same pillars should be poured into the ground with cement mortar, which will ensure the reliability and stability of the entire structure; You need to install a small platform/pedestal on top of the shower stall - this is where the water container will be placed; the floor can be made from an ordinary wooden ladder - the water will drain away almost instantly; the walls of the cabin can be made of any opaque material (wooden panels, dark film) - it is important to complete the task of completely concealing the bather from prying eyes; if you plan to use the shower too often, it is advisable to equip a forced water drainage - a pipe is dug under the floor of the shower stall with an outlet at a certain distance from the building at an angle.
As for the water container, it can be plastic or metal, and the second option is preferable in terms of how quickly the water heats up under the rays of the sun. But it should be borne in mind that metal under constant exposure to water quickly becomes corrosive. If you want to speed up the process of heating water, then paint the container black or “wrap” it in foil and black film - this will ensure not only rapid heating of the water, but also the effect of a thermos.
You can pour water into the tank manually - to do this, the back/side wall of the shower stall must be equipped with a ladder. Or you can make this process easier - you just need to run a hose from the water supply point to the shower stall, but in this case, carefully calculate the location of this building so as not to pull kilometers of hose across the entire area.
Please note: if you have already decided to equip a temporary place for water procedures, then you can limit yourself to fixing a metal arc into a concrete wall or a wooden board, or in general into any vertically located plane. A small flooring (light) and a water container are installed on top of it.
True, you need to understand that the water container should have a minimum volume, because a regular frame will not support a large mass. Well, you can close yourself off from others with an ordinary oilcloth curtain.
Waterproofing
As I already wrote in the article on waterproofing a shower, it is very advisable to keep the pan flooded for at least a couple of weeks. With the semi-dry finishing screed method, the time can be reduced. This statement is not an axiom, but just logic: often cracks in the screed do not appear in the first days after pouring.
On the other hand, if the waterproofing is sufficiently elastic after drying, then hairline cracks in the base will not damage it.
In any case, you need to choose a coating waterproofing that has the ability to stretch. There are a lot of cheap compounds that have no elasticity at all. Such a layer will crack along with the base - it is better not to use such compounds.
It is mandatory to use reinforcing tape for the corners, and I also highly recommend laying façade fiberglass mesh on the bottom (between layers). The junction of the drain flange with the screed must also be taped with tape - if it is not included with the drain, then use the same tape as for the corners.
If there are sinkholes and recesses on the screed, the pallet can be puttied with tile adhesive. This will reduce the consumption of waterproofing and eliminate untreated areas.
Regarding the question of the height of the waterproofing layer: the main thing is to provide a “bowl” with edges of 10-15 centimeters, and higher - according to desire and finances.
Why is such a cabin with a shower the best option?
Homemade tile construction has a number of advantages:
- Tiles are an environmentally friendly and safe material that does not conduct electricity and is not susceptible to fire.
- The tiles are easy to care for using simple cleaning products.
- Compared to factory cabins, which have a limited color choice, the use of ceramic tiles allows you to turn any color fantasy into reality.
- A tiled shower will fit into a room of any size.
- Ceramics allows you to hide repair errors and level the surface of the walls.
- The price of plumbing fixtures made from tiles will be significantly cheaper than the factory version.
Such plumbing has one drawback - low sound insulation. This problem can be solved by additionally laying a soundproofing layer under the screed.
Laying tiles
Whatever the shape of the shower, there will be a lot of trimming. How to make a high-quality cut of tiles or porcelain stoneware is described here.
One of the frequently asked questions: How to join the tiles to the drain
. I will not pretend to be true, but I will say what I think: the tiles should be 2-3 millimeters higher than the grating. The same applies to mosaics.
In fact, this question needs to be asked while pouring the pallet in order to lay the tiles without layers, on a fine comb.
You can control porcelain tiles with a level only across the slope. The plane of the slope can be controlled by a rule.
I would also like to recommend choosing the least slippery porcelain stoneware or mosaic tiles possible, although this is quite difficult...
Any cement-based grout for tiles is suitable, preferably hydrophobic. There is an opinion that epoxy grout is necessary in the shower. Of course, such grout is good, durable and can provide additional waterproofing. However, grouts on cement binders also perform well.
That's all. Later I plan to add higher quality photos, which are not yet available.
The semi-circular shape is the epitome of minimalist chic
Unfortunately, in this area there is some confusion in terminology and often a semicircular shower stall is called the “quarter circle” option, therefore in all dialogues (especially telephone) with sellers you should clarify the number of angles in the form of the proposed option.
However, in the case of dimensions, you can focus on the dimensions for the “quarter circle” shape given in the table above.
Description
The new “tropical” shower is simply a wide watering can in various designs, located fixedly above the person. Unlike inexpensive options, high-quality products allow you to distribute the water flow evenly over the entire area of the shower head. Formally, a tropical shower is a whole plumbing system consisting of not only a watering can, but also a mixer. A real rain shower is equipped with a system for mixing water with air inside the shower head; this effect is achieved using special grilles or other structural elements inside the plumbing element.
Varieties
The shower stand and other necessary components should be selected only after you have decided on the type of built-in structure, and also selected a suitable place for it in the bathroom. The size of the cabin will depend on this.
The designs of prefabricated shower cabins are:
- with a flat pallet (it can be purchased or made of brick);
- without a tray (in this case, the drain is installed in the floor).
Flat trays are good because they do not allow water to spread throughout the room. However, low sides cannot be called safe parts - you can hit or trip on them. In addition, these elements make the cabin more difficult to clean.
A safer option is without a pallet. It is considered convenient and practical; cleaning it is much easier. If an elderly person lives in a house/apartment, then such a design will be the most successful option, because you can install a comfortable seat in it.
Water pressure
Before installing equipment such as a tropical shower in your bathroom, you need to calculate the efficiency of water flow. As is clear from the size of the shower head, the consumption can be significant. The plumbing system must provide a sufficient amount of water for the tropical shower system to fully operate. As practice shows, the pressure requirements of wide shower heads are not too different from ordinary ones. There are water consumption standards for manufacturers of plumbing equipment, both Russian and foreign, which are not too different. The maximum water flow is regulated by filters or limiters built into the equipment, but what about the minimum values? For a high-quality rain shower system to fully operate, a pressure of at least 2 atmospheres is required, but you do not need complex measuring equipment. You just need to take a stopwatch and a container with a volume you know. For a soft shower, depending on the size of the nozzle, a flow of 5-7 liters per minute is sufficient, while for powerful jets you will need 9-15. If your system can provide such volumes, you can safely proceed to installing shower equipment. Otherwise, you need to increase the water pressure in the system by cleaning and replacing pipes, removing restrictors or installing special pressure pumps. In city apartments, such issues must be resolved by building management structures or water suppliers; water supply standards established by the state are quite capable of coping with a tropical rain shower system.
How to choose?
With a variety of choices for hidden shower systems, experts recommend paying attention to the following important factors:
Basic design
Attention to the overhead shower: the length of the hose through which water enters the watering can, and the possibility of adjusting it to the required height. The usual size is from 90 to 200 cm.
Top watering can circumference
The diameter in wide models can be 40 cm, but remember that this increases water consumption.
Bottom shower head or hand shower. Here it is better to choose a model with a diameter of no more than 15 cm. If the system is manual, then you can choose a watering can up to 20 cm. Experts recommend choosing designs made of chrome, bronze, brass or nickel alloy.
A very important nuance is the choice of mixer fittings. Find out from the seller what the cartridge is made of - ceramic or plastic. Ask how the lubricant of this element repels water. If your shower comes with an excessive number of nozzles or parts, there is a significant risk that the system may fail.
Models with an excessive variety of water supply options are often offered: hard jets, tropical rain, bubble aeration. As practice shows, only a couple of modes are used in everyday life, and the nozzles for other options are simply covered with lime.
A shower set, the price of which is not very high, should arouse suspicion - a durable and reliable system cannot cost a penny.
Thermostat for concealed mixer
There is an excellent tool that allows you to avoid adjusting the water every time you have to run a hygienic shower.
This device is called a thermostat and is quite affordable for everyone, so installing it to your shower should not pose any problems. Moreover, when installing such a product, water will be used very sparingly, which will also reduce the budget spent on such a bathroom. The reason is simple: you will no longer need to flush the water while waiting for its optimal temperature.
Thermostat installation is available for any type of faucet, both wall-mounted and connected to the sink, as well as hidden and built-in.