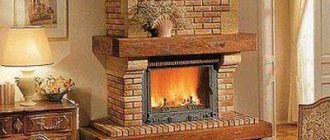
The presence of an attic allows you to optimize the living space, and also allows you to give the house a more original appearance, while reducing the consumption of thermal energy for heating.
If the strength of the foundation is designed for additional load, then a one-story house can easily be turned into a two-level one. It is not difficult to build a mansard roof with your own hands, without any special skills in such construction, provided, of course, that everything is done according to the rules, choosing the appropriate building materials. On the ground floor, windows are mounted in the walls, which cannot be said about the attic, since here the walls are replaced by a roof. In this case, the design of the windows on this floor is significantly different, since such windows must not only transmit a sufficient amount of light, but also withstand somewhat larger loads, especially snow.
Types of attic structures
Before building an attic, it is important to decide what type of device it will have.
Attics are divided into the following types:
- single-level;
- two-level.
In addition, attic roofs are:
- 1-slope;
- 2-slope;
- broken;
- 4-slope;
- hip;
- half-hip;
- with a balcony.
The simplest to install are single-pitched roofs , since they do not have a ridge. In such a roof, the walls have different heights, due to which a bevel is formed; its angle should be in the range from 35 to 45 degrees. 1-slope types are the cheapest.
2-slope - this is the most popular option; it has many different types of designs.
At low financial costs, you can create the required area of the room. Double-pitched roofs can be symmetrical, when the ridge is located strictly in the middle of the building, or asymmetrical, in which case the ridge is shifted from the center.
The gable attic has straight gables, the room is shaped like a trapezoid. Sloping roofs also have two slopes, but their design is much more complicated.
Advantages and disadvantages
The arrangement of living space in the attic is most often associated with the main advantage of the attic - an increase in living space: the presence of additional rooms for living.
Other advantages of the attic are:
- The decorative appeal of a building in connection with a specific roof design;
- The arrangement of the attic can be done not in a new house, but in an already inhabited one, without leaving the house;
- The ability to insulate a room on your own (without special equipment).
In addition, the costs of constructing an extension, if it is necessary to increase living space, will be more significant than the costs of arranging an attic space.
Disadvantages include equipment for additional attic heating, waterproofing and forced ventilation . In addition, it is necessary to install special windows.
The slope of the walls can also be attributed to the disadvantages of the attic space, since it reduces the additional area of the room , but it is possible to build an attic in several levels.
Projects for mansard roofs of private houses:
Sloping roof with balcony
Hip sloping mansard roof
Gable mansard roof
What materials are used to complete the attic?
To build any type of attic, you will need the following building materials:
- wooden bars, most often used with a cross-section of 50x80 millimeters, to create a rafter structure;
- boards from which the sheathing will be made;
- wall panels or other material used for cladding gables
- fasteners, such as: metal corners, screws, nails, metal profiles;
- thermal insulation material;
- vapor barrier;
- waterproofing;
- roofing material;
- interior finishing materials.
The type of materials depends on the preferences of the home owner, and the amount of building materials is influenced by the size of the attic space.
Requirements for mansard roofs
Mansard roofs are structurally more complex than conventional roofs with an attic, so they have different requirements:
- It is necessary to ensure complete waterproofing along the entire perimeter of the attic;
- It is important to take care of sound insulation, especially if the outer covering is metal;
- When designing a truss structure, it is necessary to carefully calculate the roof load taking into account natural loads ;
- Provide drainage;
- Take care of natural light;
- The overhang of the rafter legs should not be less than half a meter ;
- Pay special attention to insulation.
CAREFULLY!
When choosing materials, you should pay attention not only to their quality characteristics, but also to take into account their weight: the lighter the materials, the less the load.
Overloading the structure can lead to roof deformation and, in the worst case, to collapse. Therefore, when designing a roof, all factors should be taken into account.
Project
How to calculate whether an old house can withstand an attic
Before starting to build a new attic structure, it is important to correctly calculate its weight, because not every old house can withstand the additional load.
To calculate the mass of the attic, calculate how much all the components used for its construction weigh:
- rafters;
- sheathing;
- Decoration Materials;
- insulation;
- roofing material.
Log and aerated concrete houses can withstand a maximum load of 600 kilograms per square meter, for cinder block this figure is 1200 kg/m2, and for solid brick 1800 kg/m2.
If, after performing calculations, it was determined that the building will not support the weight of the attic, it is necessary to either lighten it or strengthen the foundation.
How to build an attic the first time or the main mistakes of beginners
When we build an attic with our own hands, the main task is strength and few people pay attention to thermal efficiency, durability, and practicality. But within a few years, or even months, these “shoals” will gradually appear, and their elimination will be very expensive. Let's look at the typical mistakes of beginners.
- Lack of anti-corrosion treatment. All materials, especially natural wood, must be treated with impregnations, special insect repellents and moisture-repellent suspensions. If this is not done, the service life of the wood will decrease many times.
- Fastening different boards of one rafter leg “by eye”, without a level, without taking into account the natural load on the roof in a snowy winter. As a result, the deflection of the rafters is ensured by 15-20%, therefore, the entire roof will “move.”
- The insulation is laid with gaps; there is no obligatory bandaging of layers. Some craftsmen initially lay a layer of insulation that is not at all suitable for our climate zone, so the thermal efficiency of the room immediately decreases significantly.
- There is no air cushion between the top layer of insulation and the roof . Thus, fungi can form, as well as condensation, which will not lead to anything good.
- Use of overly “light” materials. The strength characteristics of the walls are not the primary goal, but they should not be put on the back burner. It is better to install an OSB board with a thickness of 15 mm or more - it is not much more expensive, but the strength properties will be several times higher than the material with a thickness of 0.5 mm.
Pay attention to the environmental safety of materials, purchase wood and insulation materials only from well-known suppliers, since low-quality goods can cause a lot of harm to your health. You should also not use anti-corrosion agents for external use, which contain a lot of dangerous chemicals. It is necessary to use suspensions intended for interior decoration, having hazard class 3 (non-hazardous to humans). Preference should be given to well-established manufacturing companies.
What are the components of the price of adding an attic to an old house?
In order to correctly calculate the cost of building an attic, it is important to consider what building materials will be used and what dimensions the building will have.
The first step is to take accurate measurements, after which the following is calculated:
- length and width of the rafter system;
- attic height;
- skate length;
- rafter section;
- number of rafters;
- area of the attic room;
- the total number of rows of sheathing, the number of boards required for it;
- the amount of roofing materials, such as waterproofing and vapor barrier;
- roofing material area;
- volume of insulation material;
- the number of square meters of gable cladding material;
- the length of the boards that will be laid on the attic floor;
- window size.
This is a list of the main materials that will be used for the construction. Depending on the situation, other building materials may be required.
Organization of the rafter system
Independent construction of a private house, in most cases, involves the construction of a sloping roof, which allows optimizing the internal space underneath.
With the same width of the base (of the house), the attic space under a sloping roof is larger than under a regular gable roof. The rafter system is becoming more complex, but a gable roof with an attic under a sloping roof is still more popular
A broken attic roof can ultimately have a rather interesting appearance, since the overhangs can be lowered as low as possible. At the same time, long roof overhangs perform several important functions. One of them is to divert water as far as possible from the foundation, covering part of the wall from precipitation. Despite this, one should take into account the fact that long overhangs increase the windage of the entire structure. In this case, you should opt for more powerful roof structural elements. In this regard, at the design stage the main emphasis is on the weather conditions of a particular region.
Roof angle
The roof angle is chosen for a reason, based on personal considerations. Firstly, this angle depends on the roofing material, and secondly, on the weather conditions of the area. The figure below shows the classic version, when the lower part of the roof relative to the horizontal plane is inclined at an angle of 60 degrees, and the upper part of the roof has an inclination of about 30 degrees. Based on such indicators, it is not at all difficult to calculate all the elements of the roof. In this case, you need to pay attention to the fact that the ceiling height in this room cannot be less than 2 meters. If the ceiling height is less, then such a room is called an attic. When the ceiling height is more than 2 meters, a person feels more comfortable. Taking these factors into account, all structural elements are calculated.
Tilt angles in the classic version
The classic version allows for the loads from precipitation on the side and bottom surfaces not to be calculated. Although precipitation will be able to linger, it will only be in the upper part of the roof, where the angle of inclination is less than 45 degrees.
The inclination of the side surfaces can be within 45-80 degrees, and the greater this angle, the greater the windage of the structure. In regions where strong winds prevail, shallower roofs should be made. In this case, wind loads will not have a destructive effect on the roof elements.
Types of sloping roofs
The design of a sloping mansard roof is one of the options for the rafter system (the most common).
To make the frame of a sloping roof, you will need building structural elements made of pine, at least grade 2. Depending on the size of the roof, the cross-section of the building elements is selected. In addition, it is necessary to take into account the nature of the roofing, wind and snow loads, rafter installation spacing, etc. At the calculation stage, all factors must be taken into account.
One of the options for constructing a frame with hanging rafters
The figure above shows a drawing of a frame where hanging rafters are used. This option cannot be implemented if the base of the upper triangle is more than 4 and a half meters. In this case, inclined rafters are installed, which should rest on the load-bearing wall in the center. In short, such a design is divided into 2 parts.
The photo below shows another option, when the side rafters have struts that strengthen this structure, which allows the structure to withstand significant loads. A similar effect can be achieved by establishing contractions. In the figure they are represented by barely noticeable outlines. In this case, the length of the side rafter leg is divided by 3 and contractions are mounted in these places. This design can withstand a significant weight of roofing material.
Option for installing a sloping roof truss system - with struts that increase the rigidity of the system
If the building is small, then the roof can be made according to a simple design, as shown in the photo below. The upper part is made on the basis of 2 hanging rafter legs, tie rods, floor beams, racks and side rafter legs.
Construction of a rafter system for a broken mansard roof for a small house
Attic Part 1 - Design diagram, loads, DCS
The principle of calculating a sloping roof
The process of building a sloping mansard roof of a house, no more than 7 meters wide, is not associated with a number of difficulties. The main task is to ensure that the dimensions are interdependent on the dimensions of the building materials used. As a rule, the installation pitch of the rafters is adjusted to the dimensions of the insulation. Considering the fact that many types of insulation have a width of about 60 cm, and the pitch between the rafters is made such that the mineral wool densely fills the space (about 58 cm).
The width of the board is also taken taking into account the thickness of the insulation. The middle strip is characterized by the fact that it is necessary to use insulation with a thickness of 200 to 250 mm. In addition, it is necessary to provide a gap for ventilation of about 25 mm, otherwise condensation will quickly render the entire structure unusable. It turns out that the minimum width of the rafter system elements is about 230 mm, with a board thickness of at least 50 mm. It should be noted that such calculations are more suitable for regions with moderate wind and snow loads. In other words, a board with dimensions of 230x50mm, at a minimum, is required.
If, as a result of calculations, it turns out that this option is too expensive, then you can take a different route by laying part of the insulation along the rafters, and part of the insulation across it, installing additional sheathing. The minimum layer of basalt wool is about 100mm, so it is permissible to use a standard board with dimensions of 150x50mm. In this case, the ventilation gap is 50mm. If funds allow, you can order non-standard lumber with dimensions of 130x50mm.
Beams and racks can be mounted on the basis of timber, dimensions 80x80 or 100x100mm, if the house is being built in a region with difficult weather conditions.
If a more accurate calculation is required, it is better to seek help from specialists. As a rule, the calculation process takes a lot of time, since it is necessary to take into account many factors, the indicators of which are entered into certain formulas.
BC: Attic Part 2 - Calculation in SCAD, selection of sections of elements
How to make an attic on an old house
Removing the roof is the first stage. Before starting to build an attic, the first step is to dismantle the old roof.
Some people think that you can do without this process, but dismantling the old roof provides double benefits:
- the attic space will be reliable and will not leak;
- Saves money on repairing an old roof.
Dismantling work begins with the removal of roofing material, such as slate, tiles or other covering. It is important to carry out dismantling carefully and slowly.
You should not throw roofing material from a height; it is advisable to lower it carefully, because if there is no damage on it, then it will be used in the future when covering the attic.
When the roof is removed, they begin to remove the roofing felt, if any, it is usually placed as waterproofing. Then the sheathing is dismantled. If the planks are in good condition, they are suitable for creating a new roof sheathing.
After complete removal of the roofing materials, they begin to dismantle the old rafter system, if its height does not allow for an attic, or if the bars are unsuitable for further use.
It takes two or three people to dismantle heavy wooden beams; this work is difficult to handle alone.
The beams and rafter system begin to be disassembled from the ridge.
Interesting attic room design options
The attic can be made cozy by symmetrically arranging sofas on both sides
You can place a long sofa in the attic
In the attic you can create a place to relax by hanging a hammock
In the attic you can make not only a living space, but also a bathroom
You can even make a kitchen on the attic floor
If there is no possibility to place a hammock on the territory, then this can be done on the attic floor
One part of the attic can be completely glazed
The attic can be a great place to create a home library
The walls of the attic can be faced with bricks
You can create a full-fledged living room in the attic
On the attic floor you can arrange a relaxation room
If the house is located in a beautiful area, then the roof can be made panoramic
The bed can be positioned facing the window
In the attic you can make a bedroom with high ceilings
In the attic you can place a hanging chair. This will make the roof more comfortable
Attic design elements
Each attic has its own structural elements, however, in general, the attic space consists of the following elements:
- Mauerlat. These are wooden beams, they are laid along the perimeter of the walls, and then secured to the walls with reliable fasteners. It is to the Mauerlat that the rafter system is attached.
- Rafters are stiffening ribs; they are set at a certain angle.
- The ridge purlin is the top of the rafters.
- The sheathing is made of wooden boards; insulation materials and roofing material are fixed to the sheathing.
- Diagonal ties are used to give the attic additional strength; these ties connect rafters, posts and beams.
- Supports installed inside the attic make the structure more stable, especially when the attic area is large. Internal supports are used as supports for rafters and ridge girders.
- Insulating materials, including sound insulation, insulation, vapor and waterproofing.
Construction order
Regardless of the nature of the roof, the installation of the Mauerlat is no different from the classic installation. If the house is made of wood, then the upper crown is used as a mauerlat, which is previously impregnated with special protective compounds.
How to attach the mauerlat and rafter legs to it
Nowadays, houses are often built from foam blocks. To strengthen the entire structure, the upper part of the wall is fastened with a monolithic reinforced belt. On other designs, such a belt is optional. To lay the Mauerlat, the upper part of the wall is covered with 2 layers of waterproofing, after which a beam or log measuring 150x150 mm is laid around the entire perimeter. After this, the beam is attached to the wall using embedded studs. All elements are fastened together with long nails. The most critical places are fastened with double-sided threaded studs, using steel plates or corners.
First way
There are 2 options for constructing an attic roof. The first method is associated with the fact that the rafter system is assembled on the ground, after which it is lifted onto the building or structure in finished form. First of all, the side structural elements, called gables, are installed and fixed. Then, taking into account the installation step, the remaining elements of the rafter system are attached. All structural elements are first fixed temporarily, using long bars, slopes, etc. The fixation process must be accompanied by control, both horizontally and vertically. It is very important that all structural elements are on the same level, which will allow for better installation of the roofing material.
In the video below you can see how all the elements of such a rafter system are assembled into one whole.
Attic rafter system (broken roof)
Installation of the rafter system
Second way
The first method is available when the roof area is small. When the roof area is impressive, then they resort to the second method. This method is based on the fact that all structural elements are assembled on site, since their size and weight do not allow them to be lifted upward in assembled form. This method has its advantages.
First of all, floor beams are mounted, after which racks and tie rods, temporary spacers and other additional elements are attached to them to reliably hold the structural elements in a vertical position. After this, the structure is complemented by the side and upper legs of the rafter system, with the installation of tie rods and jibs.
The procedure is as follows: first, the outermost elements are mounted, after which they are securely fastened using temporary spacers. A rope is stretched between these elements, which will help to correctly mount the remaining elements of this structure. Despite this guideline, it is necessary to regularly check the angle of inclination, verticality and horizontality.
All racks are connected to each other using a block, to which the side legs of the rafter system are then attached, as well as the lower part of the upper triangle. Fastening is also carried out using metal corners. Since the beams are long, they begin to sag due to the installation of the upper rafter legs. Deflection can be eliminated by installing vertical posts of the required length. They are temporarily supported by racks to prevent sagging of the entire system. In order to constantly control the angle of inclination, it is better to make an appropriate template. This simplifies the process of installing the side rafter legs by making cuts of the appropriate configuration. As a rule, the geometry of buildings built on their own is far from ideal, so adjustments are made. The correct angle of inclination can be obtained by knocking down another template from the boards.
One of the stages of building a mansard roof with your own hands
The standard length of lumber is within 6 meters, although it is not always enough. Therefore, you have to either order lumber of the required length, which is not always justified from an economic point of view, or increase it. To do this, boards with a length of at least 60 cm are nailed to the joint on both sides, so that there is at least 30 cm on each side of the joint. The connection is made either with nails or with bolts.
A reliable way to build rafters. The length of the “patch” is at least 60 cm
Having installed the side rafters, proceed to installing the top ones. To install them, it is also better to make a template with which to make cuts, after which these elements are installed in place and secured.
Almost finished frame
There are several options for installing the upper rafters, especially since it depends on the size of the base.
The photo below shows the most commonly used methods of fastening the upper rafters.
How to make an upper triangle on a sloping roof
The attic sloping roof does not provide for a ridge, so fastening is carried out by means of a beam fixed in the middle. Miters are attached to this block, which fix the triangle in the desired position.
The upper part is fixed with bevels nailed to a beam laid in the middle
After such actions, we can assume that the attic roof frame is ready for further construction operations that involve insulation, as well as installation of roofing material.
Assemblies drawings
Installation of the rafter system is associated with some nuances that relate to the connection of some nodes. Basically, the problem concerns the intersections or fastenings of several structural elements. The photo below shows options for attaching key connections.
How to connect elements of a sloping roof rafter system
For more secure fastening, it is better to use bolts, as shown in the image below.
How to make a do-it-yourself fastening of the upper tee and rafter leg on an attic roof
The figure below shows options for attaching the rafter legs to the mauerlat or to the side beam. To make it easier to mount heavy elements of the system, a thrust element in the form of a short beam is attached to the bottom of the rafter leg, which limits the movement of the board, fixing it in the desired position.
Several options for attaching rafters to the Mauerlat
The procedure for performing installation work
The first step is to install the Mauerlat, these are wooden blocks that are located horizontally, they are placed on top of the walls, rafters and other load-bearing elements are attached to them.
Mauerlat allows you to evenly distribute the load along the entire length of the walls.
To secure the Mauerlat, you will need the following tools, materials and devices:
- wood saw, hammer;
- drill;
- anchor;
- roulette, level.
For the Mauerlat, wood blocks are most often used, the dimensions of which are 150x100 millimeters.
A mauerlat is installed along the perimeter of the walls; these wooden blocks are connected to the walls using mounting dowels.
After installing the Mauerlat, load-bearing beams are attached to it. Then vertical posts are attached to them with self-tapping screws or nails, and the posts are connected to each other from above with beams. Rafters made from wooden blocks are installed on these beams.
For rafters, bars are most often used, the dimensions of which are 50x180 millimeters. Their length depends on the slope of the bevel and the size of the house.
The rafters must be built rigidly; they are the frame that carries almost the entire load of the attic. To ensure that all the rafters are at the same angle, experts recommend first making a template that is applied to the bars being knocked down.
It is advisable to make rafters at an angle of 45-60 degrees. If you reduce this angle, this will significantly reduce the living space of the attic. And if you increase this angle by more than 60 degrees, then the attic will become vulnerable to gusts of wind.
After preparing the frame, it is important to determine what material will be used as the sheathing. The vapor barrier, waterproofing material and roofing will be attached to the sheathing.
If a soft roof is used, then OSB boards must be installed on the wooden frame.
And if the roofing is slate, corrugated sheets, tiles or any other material, wooden planks are used for the sheathing, their dimensions are 40x60 millimeters.
Let's watch a video on how to make an attic on an old house:
Construction of an attic superstructure
So, if a new house is being built or the roof of the old one does not meet modern operating requirements, then the attic superstructure can be built, as they say, “from scratch.” What does that require. First of all, the project. You can’t just buy building materials and start construction. The attic is not a heavy structure, but this does not mean that it should be treated with less responsibility.
It is better to order the project from professionals who will take into account the load-bearing capacity of the building walls, foundation and other building structures. And on the basis of this, they will create a project that will guarantee that an old or new house with an attic will serve faithfully for decades.
Installation of the attic begins with laying the Mauerlat on the walls of the house. This is a beam with a section of 150x200 or 200x200 mm. It is attached to the walls using anchors that were previously installed in the reinforcing belt. The latter is poured onto the external walls of a private house. How this turns out in the end result is very clearly visible in the photo below.
Mauerlat laid on anchors around the perimeter of a private house Source nauka-i-religia.ru
Attic projects
The first construction operation has been completed. It is carried out regardless of what configuration of the attic was planned by the project. As mentioned above, living quarters can be organized under any roof. For example, the photo below shows an attic under a pitched roof. It would seem that this is not a very successful example, but such projects exist, which means this confirms that it is possible to live under roofs of any configuration.
Attic under a pitched roof Source houzz.se
And yet there is one design that is called attic. It has a broken roof, which cannot be confused with any other.
Classic mansard roof Source favoritst.ru
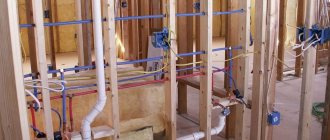
Waterproofing and insulation
Waterproofing material and thermal insulation are installed because warm air rising from the attic space can cause serious damage to the ceiling and rafters, over time it will destroy the wood.
To avoid this, waterproofing is installed during the construction of the attic. Insulation helps keep the room warm.
Waterproofing materials are made in the form of film or roll material, they are mounted on the sheathing.
Waterproofing can also be rolled, coated, sprayed or liquid. The waterproofing material is the substrate for the roof. The following is used as thermal insulation:
- mineral wool;
- fiberglass;
- expanded polystyrene;
- extruded polystyrene foam boards;
- penoizol;
- bulk materials.
The most common material for thermal insulation is mineral wool; it is simple and easy to install, is non-flammable, can withstand temperatures up to 800 degrees, has good thermal insulation characteristics and is inexpensive.
Expanded polystyrene is used less frequently because it cannot retain or transmit moisture, and its thermal insulation characteristics are no worse than mineral wool.
Loose insulation is great for a roof that has a lot of unevenness, where wool and polystyrene cannot fit tightly to all curved surfaces.
Thermal insulation with foam insulation is used when special equipment is available. Penoizol penetrates perfectly into any cracks and holes because it has a semi-liquid consistency.
The thermal insulation material must fit tightly to the rafters; there should be no cracks, voids or gaps.
For the heat-insulating layer, the lathing should have a pitch of about 50 centimeters, thanks to which the insulation will be tightly fixed.
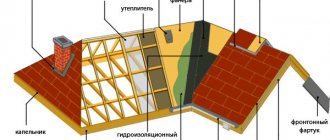
Roof features
Recently, the gable sloping roof has become increasingly present in the ladies of the “economy” class. It protects from precipitation and allows you to easily cope with the loads of heavy snowfall. In addition, the owner additionally has a comfortable living space, which he can arrange to his liking.
Unlike the usual triangular roof, it has a pentagonal shape. This figure is formed due to the location of the roof slopes and cornice. The name “broken line” arose due to the fact that there is a bend in the line of the slope that forms an edge.
The broken structure does not retain snow. Rain does not get inside the room. This geometry creates the most effective conditions for a convenient arrangement of living space.
Proper placement of windows in such an attic allows for the presence of natural light during the daytime. Electrical energy consumption is saved.
Roofing
Roofing materials are mounted on the sheathing.
Most often used as a roof:
- corrugated sheets,
- slate,
- ondulin,
- metal tiles,
- galvanized metal, and others.
The lathing is fixed in increments of 20-80 centimeters, depending on the angle of the roof.
The smaller the angle of inclination, the shorter the pitch of the sheathing will be. Roofing materials are installed starting from the bottom row. This row is fastened slowly, very carefully, so that the bottom line is without protrusions and perfectly smooth. Roofing material must be installed with an overlap.
The roofing material is secured with nails, self-tapping screws or screws, depending on the type of sheets. After installing the entire roof, a ridge is mounted on the top of the rafters.
Interior decoration
All kinds of materials are used for interior decoration of the attic.
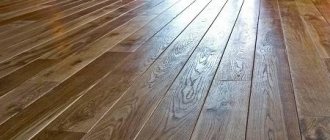
The following are used as flooring:
- linoleum;
- laminate;
- ceramic tiles;
- carpet;
- parquet;
- wooden boards;
- cement screed.
Before installing any material, preparatory work is carried out.
For finishing walls and ceilings use:
- plywood;
- OSB boards;
- drywall;
- eurolining;
- slats;
- block house;
- Fiberboard or chipboard.
After installation of any of these materials, finishing is carried out.
It could be:
- putty;
- painting;
- wallpaper sticker;
- wood varnishing;
- textured finish.
Any type of interior finishing is carried out strictly in accordance with technological requirements.
Let's watch another video about building an attic with your own hands:
Project
This type of roof is considered a complex structure. Therefore, accurate engineering calculations of three loads are necessary:
- constant - the sum of the weight of the roofing materials, rafter system, and attic floor. The actual weight of the roof is determined;
- indicators that vary depending on location. Snow cover thickness. Wind loads;
- the sum of the values of temporary and permanent loads.
The drawing of a sloping roof should always take into account all the loads that act on the roof. Before construction begins, a project for a sloping roof must be developed. To do this, it is best to turn to a professional to avoid mistakes and omissions in the future.
Arrangement
In order for the attic to be a truly living space in which it is comfortable to live, it must be insulated, lit and finished, taking into account the design features.
Insulation
Whether during construction or during refurbishment, the most important step is insulating the attic, even if we are talking about a seasonal house for summer holidays. Without a sufficient layer of thermal insulation material, in the summer the attic will turn into a noisy oven, which will be problematic to stay in at night, let alone during the day.
In the attic, all horizontal, vertical and inclined surfaces - floors, roofing, gables - are insulated. Various slab, roll, backfill or sprayed materials are used as insulation, but stone wool is the most popular. This type of insulation is resistant to moisture, fire, insects and microorganisms, has a low thermal conductivity coefficient and a high noise absorption coefficient. Last but not least, mineral wool boards are chosen because of their relative environmental friendliness - although they contain chemicals, they are in minimal quantities. The absence of shrinkage over time, and, consequently, the absence of the danger of the formation of cold bridges, is also an important indicator. If the ceiling allows the installation of a floating screed, many people use EPS to insulate the attic floor.
For most regions, an insulation thickness of 200 mm is sufficient.
To insulate a room as effectively as possible, it is recommended to use two layers of 100 mm thick slabs, laid with overlapping seams - the first layer between the joists, the second on top of the first.
The slabs of the first layer are laid at random; the standard pitch of the rafter system allows them to be laid in such a way that they are in a somewhat compressed state. If this does not work, you need to fill additional bars. However, any insulation will work effectively only with the right “pie”, which includes both protective films - waterproofing between the insulation and the roofing material, and a vapor barrier - on top of the insulation, before finishing. And so that the moisture accumulating under the roof is freely removed by ventilation, a ventilation gap of about 5 cm is made between the insulation and the roof, and the roof covering is arranged with ridge aeroelements.
RostikaFORUMHOUSE participant
Attic roofs must have their own “attic”, reduced to 5 cm - between the insulation and the roofing, called a ventilation gap. Heat always rises from the premises, bypasses the vapor barrier and insulation and seeks an outlet into the atmosphere, and the gap will be this outlet. Ventilation strips are installed in the eaves of the roof (or gaps are left) through which street air will flow. It will run from the eaves to the ridge, pick up vapors and blow them into the aerators (or holes in the ridge). The basic principle of insulation is that the vapor barrier is laid close to the insulation, the amount of insulation should not be less than recommended for a specific climate zone, and on top of the insulation is a membrane that allows air to pass through well, or waterproofing.
Lighting
In order for the attic rooms to be fully illuminated, windows are installed not only vertical - in the gables, but also inclined, directly into the roof. Therefore, the length of the window depends on the slope of the slope, and its width depends on the pitch of the rafters. To install a roof window, a vertical beam is mounted between the rafters. The most affordable, but impractical option is blind window structures without an opening mechanism. More expensive, but also more practical windows are not much different from façade windows - they can be opened fully or in ventilation mode, there are window-balcony combinations, and automatic systems with remote control are produced for hard-to-reach places. There are several rules regarding lighting:
- The glazing area should be at least 10%, but preferably more (with an attic area of 10 m², the window area is at least 1 m²).
- The lower the roof slope, the greater the height of the window.
- The optimal distance from the floor to the window is 90-110 cm.
- If you place windows in both the west and the east, you can enjoy both sunset and sunrise.
- In order to efficiently insulate and seal the window structure, even at the stage of drawing up the project, it is worth “tying” the pitch of the rafters to the standard dimensions of the window - its width and an addition of 5-7 cm.
For uniform lighting throughout the day in the attic, it is better to make several small windows than one large one.
If the glazing area is more than 1 m², then two windows are made, with an area of 2 m² - three windows, and in increasing order.
As for materials, modern double-glazed windows come in both wooden and plastic frames with a variety of fittings. The choice here is limited by financial capabilities, the style of decoration and the purpose of the rooms - you should not install wood in the kitchen or bathroom. Leaks, which are considered the main scourge of roof windows, in most cases are the result of installation errors, and not a property of such windows as a whole. Therefore, how the window will behave in operation depends not on the brand (unless we are talking about a homemade homemade product from small companies), but on adherence to technology and the use of special materials during installation.
Gennady_SUparticipant FORUMHOUSE
I have been installing roof windows for more than ten years and I will say that the main thing is correct installation, regardless of the company and type of windows.
Finishing
Considering the peculiarity of the attic design, when the main area of the walls is formed by the roofing system, and a layer of insulation is mandatory, the “dry” method is in demand for finishing. It involves the creation of a sheathing of iron (profiles) or wooden (timber) guides along all planes, on which slab materials are mounted - ordinary or moisture-resistant plasterboard, plywood, chipboard or fibreboard, OSB, less often DSP. The pitch of the lathing and the cross-section of the guides depend on the chosen finish - the heavier it is, the more massive the frame should be. Guides for drywall are usually mounted at a distance of 40-60 cm. Most other sheet varieties also fit within these limits.
MatlexForumHouse Member
Metal frame made of profiles in 40 cm increments, then sheathed in two layers of plasterboard. Ideally, fireproof sheets; only the bottom layer can be fireproof, but not the ceiling. We check with a level all the planes after the sheathing - they must be level, especially the internal corners of the attic. Finishing: primer, putty, sanding, gossamer (fiberglass), putty, sanding, primer, painting. All corners are reinforced with metal tape or tape for internal corners, but the former is better.
When dividing the attic into several rooms, the partitions are also made of lightweight sheet materials, fixed to the rafters (profile lintels) and the ceiling; mineral wool slabs are used for sound insulation.
If lining or stacked panels (PVC, MDF, block house) are used as the finishing layer, then they are attached directly to the sheathing. Regardless of the material chosen, there should be a small air gap between the frame and the finish. Sheathing of the frame begins with the slopes, then comes the gables and ends with the ceiling if it is a hip roof. Theoretically, the ceiling can be sheathed with a rough board and then plastered, but this method is rarely resorted to due to its labor intensity, while sheathing with slabs, clapboard or panels does not require special skills and a lot of time. All wooden materials used in finishing the attic must be treated with protective agents before installation, and if they are finishing, then decorative ones will also be required - varnish, wax or oil.
SlengFORUMHOUSE Member
With 99% confidence, the lining will come apart a little, so it must be painted before assembly.
There are a lot of finishing materials for decorating an attic, and if the attic is in a house for permanent residence, then there are practically no restrictions. When it comes to seasonal living, when choosing, you need to take into account temperature fluctuations and choose a finish that will withstand frost, thaw, and high humidity.
As for the color scheme, light shades visually expand the space, which is important for somewhat cramped attic rooms. Curtains and curtains that are common in other rooms in the attic can be replaced with blinds - textiles will clutter the room, but if the rooms are spacious, it’s a matter of taste.
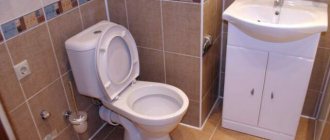
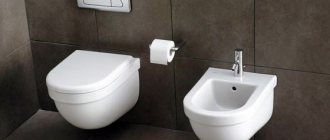
When installing living rooms in the attic, they try to place a bathroom there so that you don’t have to go downstairs every time. Even in a small room, it is possible to allocate several squares for the toilet and sink, and if the dimensions allow, then for a shower stall or tray with a watering can. To avoid difficulties with plumbing and sewerage, the bathroom is located above a similar room on the lower floor or kitchen.
When finishing, special attention is paid to sealing - modern materials allow you to make a thin screed and lay tiles, and for wall cladding you can use moisture-resistant boards, tiles, PVC panels or other materials designed for a humid environment.