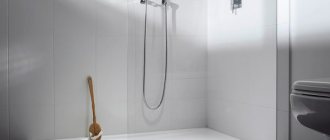
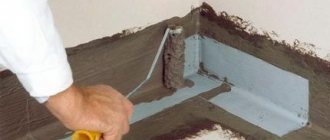
Shower stalls experienced a moment of popularity and began to gradually leave modern apartments and houses. They are being replaced by simple but superior design shower areas, separated only by a translucent partition.
One of the important elements of a device without a tray is the shower drain in the floor - a drain. You can equip it yourself by understanding the basic rules and procedure for installation work.
We will tell you which version of the drain design is best to use, how to choose a water seal, and also describe the step-by-step work on arranging the drain and finishing the shower area.
Operating principle of a dry shutter
A more modern analogue of a conventional siphon is a dry shutter. Structurally, it consists of a tube made of high-strength plastic with a check valve inside. There are mounting couplings on both edges. Depending on the connection features, additional elements may be required: corner adapters, straight adapters, funnel.
The technical features of the operation of a dry siphon can be examined on the HepvO model of the famous English manufacturer of plumbing equipment McAlpine. The siphon body is made of plastic. A tube made of a material with molecular memory is mounted inside. As wastewater passes through, the membrane opens and allows flow, immediately after which the tube closes and blocks air that can enter the room from the sewer pipe. When the dry seal siphon is not in use, the membrane is tightly compressed and seals the drain.
Advantages of the HepvO dry seal siphon:
- compact dimensions and the ability to install horizontally, vertically, or at an angle, which saves space and simplifies installation, but it is important to observe the direction of flow;
- the siphon valve with a dry shutter is made of a polymer material with molecular memory, due to which it quickly returns to its original shape;
- hygiene: on the surface of the polymer from which the valve is made, pathogenic bacteria and microorganisms do not multiply;
- high throughput;
- provides protection against water seal failure;
- higher performance indicators;
- does not become clogged when fat enters the system;
- works silently.
A siphon with a dry seal works flawlessly due to the presence of an air lock, and is an ideal solution for bathrooms, kitchen sinks in unheated rooms, for example, in country cottages or country houses. At low temperatures, the water in a conventional siphon turns into ice, and this can cause equipment failure. In addition, this type of plumbing equipment is recommended in regions with hot climates. If used infrequently, the water plug in a regular siphon may evaporate and an unpleasant odor from the sewer will seep into the room. A dry shutter will work flawlessly under such operating conditions.
There are several options for dry seal siphons. The difference between models is in purpose and design. Different siphons are used for sinks, toilets, bidets, bathtubs, showers, water filters, washing machines and dishwashers.
Advantages of drainage systems
Like any other drainage systems, drainage channels and drains have a number of advantages and disadvantages.
Drainage drainsShower drains are great for public spaces. Among the advantages of these systems:
Thus, drains are ideal if you need to equip a public place (shower room in a swimming pool, gym), offices, or a shower in a country house with a drainage system. |
Drainage channelsDrainage channels will help you decorate your bathroom in a certain style and make it comfortable and convenient. That is why they are most often chosen for personal use: in a country house or apartment. Among the advantages of the channels:
|
Both systems have one drawback. If there is a long break in the use of drainage systems, the water seal dries out. This may lead to an unpleasant odor in the room. However, this shortcoming can be easily corrected. To do this, it is necessary to install a submersible glass with a membrane (dry seal) for the ladder or channel.
In addition to the characteristics of drainage systems, the manufacturer is important.
What to choose: a domestically produced drain or channel or give preference to a channel or drain made abroad? You can learn about the advantages and disadvantages of drainage systems from various manufacturers in the following article. " return
Drain with dry seal for shower cabins
The design of a drain with a dry siphon is mounted in a shower tray or in a drain hole in the floor covering. The drain connects the drain to the sewer pipe and ensures drainage, and the protective grill acts as a primary filter. It can be plastic or metal with different hole options. Thus, the protective grille serves as a functional and decorative element. In cases where the use of a plastic shower tray does not correspond to the general direction in bathroom design and the decision is made to install a drain with a dry seal directly on the floor covering, it is recommended to use ceramic tiles, which are a reliable moisture-resistant material; in addition, this type of coating is hygienic and easy to maintain .
For equipping a drainage system in shower cabins in a country house or country house, a drain with a dry seal will be a cost-effective solution. A dry type water seal is installed in shower cabins that are not used every day.
Installation of water seal on sewerage
The siphon devices produced today are so clear and simple that installing them in place in the system is extremely simple and anyone can do it themselves. Let's look at a few examples:
- A self-formed water seal device can be made from a piece of pipe and several standard fittings.
The use of additional sealing in the form of sealant will ensure long-term operation of the device.
- In the same way, a drain connection is formed in a shower or bathroom, and it can be connected directly to a collector pipe with a diameter of 110 mm.
If cleaning is necessary, the device is simply dismantled and then put back together.
Considered the most difficult to install, a bathtub water seal can easily be made using a corrugated plastic hose. The corrugation is used for the overflow device, which is also a mandatory element of the plumbing piping of the bathtub, and the siphon can be used either as a single piece, selected according to size, or from the same hose. The inconvenience of working in cramped spaces forces us to pay special attention to the quality of installation of fasteners - without distortions and strictly according to the thread.
- The easiest way is to connect a bottle water seal to the kitchen sink.
To do this, you need to install the upper funnel into the hole in the sink and tighten the clamping nut. Before this, a gasket is installed under the funnel. Do not over-tighten the nut; it may dislodge the gasket from its conical seat and cause a leak.
After this, the casing is put on the pipe and secured with a nut. The corrugated pipe is led from the body to the inlet rubber bushing at the opening of the sewer pipe. The sleeve is selected to match the outer size of the hole, and the inner size to match the diameter of the corrugated pipe tip.
Just in case, it is better to treat the seats with silicone sealant. To complete this connection it will take about 15 minutes.
Watch the video
Braga. Part 3. Connecting the water seal to the sewer
How to make water seals with your own hands
The need for a siphon in the sewerage system is absolutely obvious. How to make this simple but important detail with your own hands? To do this, it is best to use standard fittings of the required size. Of course, you need to have the skills to solder plastic pipes using special equipment - a soldering iron.
Watch the video
Causes of sewer smell in the bathroom and kitchen + how to make a vacuum valve
But this is a simple art and learning it is not difficult and does not take long. The device can be rented on a daily basis without spending any money on purchase.
How to clean a drain
Before removing the siphon and cleaning it, it is recommended to remove any remaining water from the shower tray.
Disassemble the siphon and clean it from blockages
To repair a structure, it must be cleaned. Cleaning steps:
- Place some container into which the water will flow, for example, a basin or bucket.
- Remove the closure nut and then the flask. Wait until all the water has drained from the water seal.
- Clean to remove all dirt and debris. Rinse everything thoroughly with water, completely remove all plaque on the walls.
- Put it in place, making sure that the drain pipe does not press against the flask. Tighten all connections .
- Turn on the water and check the connections . If they are dry and the water drains freely, then everything is done correctly.
Photo 1. Disassembling and cleaning the shower siphon will not be easy, since it is located in a hard-to-reach place - under the bottom of the cabin.
It is recommended to clean the siphon not only because of a blockage, but also for prevention, once every 3 to 4 months .
Cleaning
If water flows into the hole with difficulty after a shower, it means the system is clogged. Let's look at how to clean the cabin siphon. First, prepare a container to drain the dirty liquid. Carefully unscrew the union nut. Take your time when completing the task to avoid spilling the liquid. Drain it into a container and remove the gasket. Clean with a regular brush. As a result of stagnation, dirt often accumulates. Therefore, preventive cleaning is required every six months. It is not recommended to blow with compressed air under pressure to avoid breaking the tightness of the connection. Run water through the drain to make sure it is intact. Place a sheet of white paper under the device, if it remains dry, then everything is fine, connect it to the tray. If it gets wet, then you need to find and eliminate the cause of the leak. This often happens because the rubber gasket is too thin and has become unusable.
Installation
Shower drain Viega Advantix 452452 100×100 mm dry shutter. Photo by Leroy Merlin
A dry shutter can be part of various designs; if you follow the instructions and carry out the work carefully, their installation will not cause difficulties . Instructions are supplied with the plumbing kits. The biggest problems when doing DIY installation are caused by high-quality sealing . Therefore, if the performer is not confident in his own abilities, then it is recommended to turn to specialists. But installation is quite simple, the main steps are:
* you need to check the device ; the sealing elements must be exactly in place;
* between the siphon and the plumbing fixture it is necessary to place an o-ring , which seals the joint;
* installation of a siphon and application of sealant to the joints.
Tips for choosing a device
When choosing a dry sewer drain, experts recommend paying attention to the following points:
- First you need to decide on the number of risers. As mentioned above, a sewer valve with a nominal bore of 50 mm is ideal for private purposes;
- a device with a horizontal outlet can be installed in limited space and has a height of 6 to 10 cm, while a device with a vertical outlet requires at least 15–18 cm of space. Before installation, you need to take measurements and decide which sewer valve is suitable for your case.
- It is recommended to check the serviceability of all structural elements of the dry sewer drain before purchasing. It is also advisable to check how it functions. To do this, you can pour water from a bottle into it.
The device with horizontal outlet can be placed in a space with a height of 6 cm
After you have decided on the technical parameters, you can begin to choose the appearance of the device. The drain grating can be made of different materials and have different perforations. A variety of design solutions allows you to choose a device that will easily fit into the interior of the bathroom.
Floor and drainage
Laying a sewer line is much more hassle than directly draining a bathhouse, but it is better to do it, the more carefully, the better.
Even if the floor in the bathhouse is covered with wooden gratings, it is still better to make a screed along the beacons with a slight uniform slope towards the ladder , and lay tiles on it. The final cutting of the drain extension can be done when it is known exactly at what height the tiles will approach the drain point. If the work is done very carefully, then even with a minimal slope there will be no puddles.
Providing access, with the ability to replace all elements, is too much of a luxury for an ordinary bathhouse. Therefore, you should not avoid work that may seem unnecessary, for example, the depth of laying the sewer system should not be less than the freezing depth . Insulating the floor under the screed with a 20 cm layer of expanded clay with a rich cement mortar is by no means an excess. A dry ladder is also not a panacea - dirt that gets into the shutter can prevent it from closing tightly. At the end of the season, it doesn’t hurt to wash the removable elements. Buying a dry water seal in a store or making it yourself - this question is not necessarily related to financial difficulties.
Choosing the right drain
When choosing drain structures for shower stalls, observe the following rules:
- The body of the plumbing fittings should not be compressed by the cabin parts. It is necessary to determine in advance the distance from the floor to the bottom of the pallet. This space includes siphons no more than 20 cm high.
- The diameter of the neck must match the dimensions of the drainage hole.
- The sewer pipe must lie below the level of the drain pipe.
- The filter component ensures rapid removal of liquid from the low pan.
Comparison with a water seal
Siphons with a water seal are a traditional solution, but in some aspects they are inferior to their dry counterparts . The devices function in different ways: in a wet shutter, water acts as a barrier against odors. However, the water may freeze or evaporate , leaving the door open for sewer odors to enter the room. This is a significant disadvantage of devices that dry valves do not have. They work on the "nipple" principle.
There is a damper inside that acts as a check valve . As a result, such a gate also performs regulatory work, i.e. prevents wastewater from moving in the opposite direction. A dry shutter is more functional; it can work either independently or in tandem with a hydraulic one. Dry valves are easier to install and operate, compact, and durable.
How experienced craftsmen replace a siphon
First, adjust the position of the cabin tray using a building level. Then the siphon parts are assembled to form a solid structure (fasteners, screws, dowels). A strip, which is included in the kit, is attached to the corner sides of the pallet. A rubber gasket is installed on the siphon body. The siphon is screwed on with screws, tightening evenly, without distortions. You also need to take care of drainage.
