If you are attentive, then you have probably noticed on some roofs special spherical devices that also spin. These are special ventilation deflectors, which today are indispensable in the ventilation systems of apartment buildings and suburban real estate. They work without electricity, but still do their job perfectly. They also decorate the roof of the house in their own way, introducing a unique dynamic element into the overall design.
Moreover, making such a turbo deflector with your own hands is not at all difficult - the main thing is to carefully study the principle of its operation and select weather-resistant materials. We will now tell you which ones, what to do with them and how to avoid mistakes.
Advantages and disadvantages
The main advantage of the rotary deflector is an increase in draft in the exhaust duct by an average of 20%. This is achieved due to the formation of air vacuum at the inlet of the turbo deflector during its operation. The increase in thrust will depend on the rotation speed of the active head, and its speed on the air flow speed.
Briefly, the following advantages of a rotating deflector can be highlighted:
- complete autonomy;
- eliminating the influence of weather factors (precipitation, sharp gusts of wind) on air exchange;
- increase in traction by ~20% at minimal cost;
- elimination of “backdraft”;
- low cost with a significant increase in the efficiency of the ventilation system;
- protection of ventilation shafts from foreign objects entering them;
- reduction of fat deposits and dust in ventilation ducts;
- long service life (at least 15 years);
- no special skills required for installation;
- Possibility of decorative design of the channel outlet.
The main disadvantage of the device is the dependence of its effectiveness on weather factors, namely the lack of wind. In complete calm, such a device ceases to perform its unique function, but at the same time its other qualities remain in effect, like a regular standard deflector.
Another disadvantage is the icing of the turbine in the winter season. In this case, you will have to knock off the ice film from the blades to restore the operation of the mechanism.
How does this deflector work?
The name "turbo deflector" consists of two Latin words - turbo, which means "vortex", and "deflector", which means "to deflect". In fact, the principle of the turbo deflector is not far from how airplane turbines work.
The turbine always rotates around its axis, regardless of the direction of flow, due to the fact that the blades have different dynamic wind resistance on their opposite sides.
Those. If the wind direction is constantly changing in your area, this will not affect the operation of the device. This is not even affected by such a problematic phenomenon as turbulence when the walls or roof of another building are nearby.
The whole secret of the turbo deflector is in “breaking” the air into small vortices. But only at first glance it seems that everything is simple here. In fact, this is a carefully thought-out design that has no unnecessary details:
The rotating head of the turbo deflector is its active part, which creates a vacuum of air in the housing. The average number of blades is 20; they are attached to a fixed body using a bearing with zero resistance.
It is this bearing that will allow the entire structure to rotate at the same speed, regardless of gusts of wind:
Here are quite interesting questions about the operation of this unique device:
DIY turbo deflector
Drawings for a turbo deflector
There are 2 options for a homemade turbo deflector, which you can easily construct with your own hands. In the first case, the body is made from a metal container in the shape of a cylinder. The blades are cut from the walls; they need to be bent outward. A housing is installed on the rotary axis without the use of bearings. The base is made from a piece of metal pipe of suitable diameter. The unit is attached to the ventilation outlet with a clamp. The design is inferior in appearance to factory models, so it is installed on outbuildings.
The second option is made using a drawing of a turbo deflector, which is transferred to cardboard, and the parts are cut out with scissors. The parts are transferred to the metal using ready-made patterns. Before fastening together, fitting and fitting are done. Self-tapping screws, bolts with nuts and metal strips are used for connections. The diameter of the ring is measured at the installation site; the shaft and bushing are made of the same metal.
Blueprints
First, the needs are calculated, then drawings are made that can be downloaded on the Internet. The drawing is important if the amount of sheet steel is limited. This way the parts will be arranged compactly and no extra space will be wasted. The cut parts are assembled into a layout to check the accuracy of the dimensions.
The need for a device can be calculated using the formula N = V / P, where:
- N is the number of deflectors;
- V—ventilated volume;
- P - device performance (available in the technical data sheet).
The ventilated volume is calculated by multiplying the volume of the room by the required air exchange.
How to calculate the need for devices?
For ventilation of small spaces (rooms, garages, basements) a turbine with a base diameter of 110-160 mm is used. Devices with dimensions from 200 to 600 mm are suitable for rooms up to 40 m2 with up to four people permanently occupying them.
Large diameters, 400 to 680 mm, are used to ensure air exchange in large premises, apartment buildings, warehouses, and livestock farms.
The deflector is often used where it is necessary to organize air exchange, but it is difficult to achieve good traction. Such a place, for example, could be a cellar
You can accurately calculate the number of deflectors required for installation using the formula:
Ventilated volume = air exchange rate per hour X volume of the room.
The air exchange rate per hour varies for different rooms. For convenience, the table is divided into indicators for domestic and industrial premises
Number of ventilation deflectors = ventilated volume/deflector capacity.
For example : The room is 12 m wide, 20 m long and 3.5 m high. The average wind force is 3.5 m/s. The air exchange of the room should take place in 3 cycles per hour. Calculations are carried out as follows:
- Ventilated volume = (20x15x3.5) x 3 (number of air exchange cycles) = 3150 m3/hour$
- 3168/800 (deflector performance) = 3.94, that is, 4 pcs.
Based on the calculations, to ventilate the room it is necessary to install 4 deflectors of the corresponding model.
Installation of a turbo deflector on the chimneys of boilers operating on gas or liquid fuel is possible, provided that the outlet temperature does not exceed the maximum temperature declared by the manufacturer.
It can be from 100 to 500 °C. At higher temperatures than allowed, it is necessary to use special high-temperature nozzles.
You may also be interested in the information on installing a deflector on a chimney yourself, discussed here.
How to make a TsAGI deflector for a chimney pipe with your own hands
The process of developing and assembling a deflector for a chimney consists of four stages: drawing, creation of blanks, assembly, installation of the structure and its fastening directly to the chimney.
Required Tools
You will definitely need:
- a sheet of thick paper for drawing and layout;
- marker for marking;
- riveter for connecting structural elements;
- metal scissors for cutting out parts;
- drill;
- hammer.
Don’t forget about the necessary tools before installing the deflector
Development of a drawing of a TsAGI deflector model
There is an algorithm for how to make a deflector for a chimney pipe with your own hands. It is recommended to perform the first stage on paper. First you need to calculate the dimensions of the diameter of the nozzle and the upper cap of the structure, and also calculate the height of the reflector.
For this, special formulas are used:
- diameter of the upper part of the deflector - 1.25d;
- outer ring diameter - 2d;
- height of the structure - 2d+d/2;
- ring height – 1.2d;
- diameter of the cap - 1.7d;
- the distance from the base to the edge of the outer casing is d/2.
Where d is the diameter of the chimney.
To make the task easier, a table containing ready-made calculations for standard sizes of metal pipes will help.
| Chimney pipe diameter, cm | Outer casing diameter, cm | Height of outer casing, cm | Diffuser outlet diameter, cm | Cap diameter, cm | Installation height of the outer casing, cm |
| 100 | 20.0 | 12.0 | 12.5 | 17.0…19.0 | 5.0 |
| 125 | 25.0 | 15.0 | 15.7 | 21.2…23.8 | 6.3 |
| 160 | 32.0 | 19.2 | 20.0 | 27.2…30.4 | 8.0 |
| 20.0 | 40.0 | 24.0 | 25.0 | 34.0…38.0 | 10.0 |
| 25.0 | 50.0 | 30.0 | 31.3 | 42.5…47.5 | 12.5 |
| 31.5 | 63.0 | 37.8 | 39.4 | 53.6–59.9 | 15.8 |
If the chimney has a non-standard width, then all calculations will have to be done independently. But, knowing the formulas, it is easy to measure the diameter of the pipe and determine all the necessary indicators to use them when drawing up drawings.
When the patterns are made, it is recommended to first assemble a paper prototype of the future reflector. Even if you are an experienced craftsman and are sure that you can design a deflector for a stove chimney with your own hands without any problems, you should not skip this stage, since it will help you identify possible errors and shortcomings, and correct the calculations or drawing. Only after creating the correct paper layout, which confirms that the deflector diagram is accurate, can you move on to the next stage.
Step-by-step instruction
There is an order of work that must be followed, otherwise you will not be able to connect the individual parts of the chimney deflector yourself with your own hands.
The procedure is as follows:
- Using paper blanks, transfer the template to the surface of the metal from which you plan to make the reflector. Carefully trace the outlines of the paper parts. You can use a permanent marker, special chalk, or even a simple pencil for this purpose.
- Using metal scissors, cut out the blanks of the necessary structural parts.
- Along the entire contour of the cuts, the metal must be bent by 5 mm and carefully passed with a hammer.
- Roll the workpiece into a cylinder shape, drill holes for fasteners so that you can connect the structure with rivets. Welding is permitted, but not arc welding. You need to be careful not to burn the metal. Choose the distance between the main fastening points from 2 to 6 cm, it varies depending on the size of the finished structure. The outer cylinder is rolled up and fastened in the same way.
- By bending and connecting the edges, make the remaining parts: an umbrella and a protective cap in the form of a cone.
- You need to cut fastening elements from a galvanized sheet - 3-4 strips: width 6 cm, length - up to 20 cm. Bend them along the entire perimeter on both sides and go over them with a hammer. From the inside of the umbrella, you need to drill mounting holes, stepping back from the edge by 5 cm. 3 points will be enough. After this, secure the metal strips to the cap with rivets. Then they must be bent at an angle of 90 degrees.
- Connect the diffuser and cone using rivets to the inlet pipe. Having made a deflector for a round pipe with your own hands, you can begin installing it.
A Volper chimney deflector can be created using a similar method. Its design is very similar to the TsAGI model, but there are some differences in the upper part. They are also made of stainless steel, galvanized or copper.
Installation rules
Installing a turbo deflector is simple: first, the lower fixed part is attached to a clamp at the outlet of the ventilation (or chimney). The rotating head is then attached to the top. The process is simple, you can do it yourself (you don’t need any expensive tools or specific experience), the only difficulty is that the installation will have to be done on the roof.
Before installing the product, read the installation rules:
- After unpacking, you need to check how the device works. To do this, you need to place the turbo deflector outdoors on any surface. When the wind blows, the turbine should spin.
- You need to check the operation again after installation. After the deflector is mounted on the ventilation shaft. Wait for the wind to blow and see if the head rotates.
Otherwise, the rules are the same as when installing a ventilation duct without a turbo deflector:
- If the ventilation duct is located at a distance of more than 3 meters from the ridge: its opening should be no lower than the conventional line running down from the horizontal line of the ridge with a slope of 10º.
- If the ventilation duct is located at a distance of 1.5 to 3 meters from the ridge: its hole can pass at the level of the ridge.
- If the ventilation duct is located at a distance of up to 1.5 meters from the ridge: its hole should be at least 50 cm higher above the level of the ridge.
Possible problems and their solutions
Despite the fact that the turbo deflector is designed extremely simply, it also needs maintenance and can also break.
Here are the main problems and ways to solve them:
- Deterioration in performance: slow rotation, extraneous noise during rotation. A possible reason is mechanical damage (for example, if a tree grows next to the house, a branch may fall on the deflector, or the plates may be bent by strong hail). In this case, you need to inspect the turbo deflector, if possible, dismantle and repair it.
- A sharp drop or complete absence of draft in the air duct in severe frost. Possible cause: freezing. This can only be noticed upon inspection (either climb onto the roof or from the ground - if the deflector is clearly visible). To solve the problem, you will either have to wait for the temperature to rise, or go upstairs and clear the product of ice.
- Completely stops rotation, slows down rotation. A possible reason is that the bearings are jammed (if no other damage is visually visible). In this case, the turbine will have to be removed and the bearings lubricated or replaced.
To prevent problems, it is enough to inspect the plates and lubricate the bearings once a year. It is best to do this after winter - since severe frosts are the most “dangerous” season for such products.
Lithol is suitable for lubricating bearings. To update the lubricant, you need:
- Remove the turbine.
- Using a puller, loosen the retaining ring.
- Bearings - lubricate (or replace, if necessary), and assemble and install the product in place.
Advantages and disadvantages of turbodeflators
What will a user get if he makes a turbo ventilation deflector with his own hands or buys one? A lot of advantages and only positive impressions about his work. Here are the advantages that a product for ventilation or chimney has:
- The turbo deflector head, which rotates, enhances air exchange in the ventilation or chimney pipe. No backdraft is formed, and the under-roof space does not accumulate condensate. In addition, the rotary device works much better than a regular deflector.
- The product runs exclusively on wind energy and does not consume electricity. Therefore, there will be no extra costs, unlike using electric fans.
- If you properly care for the equipment and perform correct installation, the service life will be 10 years, or 100 thousand hours of operation. If we take stainless steel turbo deflectors, their service life is 15 years. In comparison, fans work 3 times less.
- Snow, hail, rain, leaves, and rodents will not enter the ventilation duct. The turbo deflector is used in areas with strong and frequent gusts of wind.
- The design of the equipment is light, convenient and compact. Turbo deflectors with a diameter of 20 cm or more weigh slightly less than the TsAGI deflector. The large size product, which is 680 mm, weighs approximately 9 kg. To understand the difference, let’s say that a TsAGI deflector of the same diameter weighs up to 50 kg.
- Easy to install. Even a beginner can cope with this task. All you need is instructions and a standard set of tools.
This is why turbo deflectors are so often used. But along with the advantages, the products also have some disadvantages:
- When compared with other types of deflectors, the turbo deflector is somewhat more expensive. True, if you do it yourself, it will cost less;
- under unfavorable atmospheric conditions, for example, if there is no wind, low temperature or high humidity, the device may simply not work and stop. But if the deflector is constantly in motion, then it is less susceptible to icing;
- The use of a deflector for rooms with increased ventilation requirements, such as a medical laboratory, industrial premises, buildings with chemical substances, cannot be considered the only solution. You still need to install fans.
Depending on the material used, the price of the device can be quite high. Still, these disadvantages are very few, so many people prefer to use a deflector for their ventilation system.
This is interesting: DIY construction from heat blocks
Design features
The design of the deflector is not very complicated. Its upper part (head) begins to rotate under the influence of the wind, thereby creating a vacuum in the pipe. The lower part, the housing, is fixed directly to the ventilation duct. To successfully install the turbo deflector in its place, holes for self-tapping screws are made in the lower part.
Note! Professionals recommend installing a turbo deflector not only in systems with problems. They are recommended to be used even for normally operating systems. Thanks to this small device, ventilation efficiency will improve by 20%.
Since the ventilation output can be different, the design of the turbo deflector also varies. There are the following types of turbo deflectors:
- round;
- square;
- rectangular.
The product is selected depending on the parameters of the system in the room. If the buyer needs it, the turbo deflector is sold complete with roof passages, which are used for roof angles from 15 to 35°.
Types and characteristics
Nowadays, there are many types of deflectors for ventilation, among them the main ones are:
- Tsaga deflector;
- Grigorovich deflectors;
- H - shaped deflectors.
There are open structures that are divided by shape:
- can be flat;
- semicircular;
- with an opening lid or gable.
According to the principle of operation it happens:
- rotary deflector;
- turbine.
Like a weather vane.
Next, we will look at the most popular types of ventilation deflectors.
Chimney deflector
Very often, deflectors are installed on the chimney; it is installed in order to provide good draft for removing smoke. Thus, the deflector increases the operation of the equipment by twenty percent, this increases better fuel combustion and improves heat transfer.
Also, installing a deflector prevents atmospheric precipitation and various debris from entering the chimney.
Air conditioner deflector
Such designs are almost nothing like classic deflectors. They are screens - reflectors that redistribute the air masses produced by the air conditioner.
Therefore, air masses are directed not at a person, but at the floor or parallel to the ceiling, dissipating without losing their pressure.
Rotary deflector
This type of deflector increases the operation of the natural supply and exhaust system by four times, and at the same time, such a deflector does not require connection to electricity.
The rotary deflector consists of a movable head with blades, which are mounted on a base and attached with bearings.
The operating principle of the rotary deflector is as follows:
The wind gets into the blades and due to this the head begins to move, thereby the air is discharged and the thrust increases.
Thanks to the bearings, the head rotates at a constant speed, even in strong winds.
Vane
Deflector - weather vane is a special device, the body of which moves along with curved visors; they are connected to a bearing mount.
There is a weather vane on top of the structure; it allows the entire device to always be “downwind.”
This device works like this: air masses pass between the canopies, accelerate and create a rarefaction zone, due to this, traction is increased, fuel burns better and air exchange improves.
Such designs are good to use to prevent backdraft, flame extinction and sparking.
You can make such a design yourself; to do this, you need to install the structure on the cut of the chimney pipe; the fastening will be a bearing assembly and a ring.
Base deflector
Such deflectors are designed to ventilate basement floors and rooms, as well as to remove moisture. Such devices can be used in both forced and natural ventilation systems.
Another base deflector prevents various small animals, dirt, and meteorological precipitation from entering the basement.
The length of the deflector pipe is easy to adjust and, if necessary, it can be extended or sawed off to the desired height.
What is forced ventilation?
A little theory. As you may have guessed from the concept itself, forced ventilation assumes that the air from the room will be forcibly pumped out by some device. In this regard, the so-called deflectors - special aerodynamic devices - have shown themselves to be excellent. Their main task is to generate thrust, strengthen it mechanically, while simultaneously resisting strong winds.
Classic deflectors usually work only on draft, and if wind protection is also needed, a turbofan or wind vane is used. But smoke exhausters - the so-called smoke fans - are already connected to electricity.
What all these devices have in common is that they are installed on the head of the chimney. And you can’t do without them if the winds in your area are quite strong, or the chimney is located near tall buildings. And the turbo deflector is rightfully considered one of the most productive, the operation of which is based on the principle of reflecting the air flow from the diffuser.
To put it simply, simple laws of physics apply here. Due to rotation due to the wind, the deflector rarefies and draws air from the room or under-roof space. Its turbine head always rotates in only one direction, regardless of the direction or strength of the wind. This creates a partial vacuum in the pipe, and air is sucked in a little from inside the house. That is why in this case there is never reverse draft, and raindrops do not fall inside the pipe. This is how a very small device solves several vital problems at once:
According to official studies, the presence of a turbo deflector on a ventilation pipe increases its performance by at least 20%. Interestingly, such devices existed back in the 19th century, not only on buildings, but even on the pipes of steamships!
Today, the turbo deflector is installed where increased air exchange is needed - residential buildings and premises that do not have but require mechanical ventilation, such as a cellar or garage. Such elements are especially valuable when constructing a residential attic. Also, a turbo deflector will be a way out of a situation where it is difficult to provide normal traction using a conventional deflector (for example, due to capricious weather conditions).
Here is an interesting comparison of this type of fan with others:
The only energy that powers the turbo deflector is wind energy. In hot weather, its operation effectively discharges the air in the house without overheating it. You can save a lot of money on air conditioners!
Selection rules
You can select the optimal deflector based on the goals and tasks assigned to it. It is also worth considering the conditions in which it will operate.
A simple chimney is a cap on a wood-burning chimney, made in the form of a regular umbrella, and has the following advantages:
- maintains the necessary traction both in calm conditions and in the movement of air masses with a power of up to 10 points;
- does not create excessive pressure on the pipe, due to which even in a severe storm the chimney remains in its place; rather, the umbrella itself can break off and fly away;
- has a simple and understandable design;
- practically does not coke or clog, and is quite easy to clean;
- due to the imperfection of the aerodynamic structure, it is insensitive to the shape of the umbrella; if the building is located in the wind, then the chimney can be made in the form of a tent, this greatly simplifies its use and opens up great opportunities for the implementation of design ideas.
At the same time, there are serious disadvantages, such as:
- in weak winds it reduces draft, and the stronger the heating element works, the weaker it is. This is quite dangerous, since in cold winter weather, in the absence of wind, the stove can “choke” and breathe fumes into the living quarters;
- in strong winds, on the contrary, it creates too much draft. This significantly reduces the efficiency of indoor stoves and fireplaces;
- in gusty winds it can cause blowing into the pipe and creating a reverse draft effect.
The aerodynamic open model maintains sufficient draft in any wind for efficient operation of stoves and boilers using liquid fuel and gas. Such deflectors can freeze, they easily become littered and quickly become covered with soot and soot, however, they are easy to clean.
The disadvantages include the following:
- complex body of rotation;
- as a result of the load created by air masses, the umbrella itself can easily fly off the chimney, and at the same time, the direct mechanism of the device can collapse the pipe itself;
- with strong gusts of wind from force 8, the lateral pressure on the structure increases significantly and further increases in accordance with the power law;
- open structures are quite poor at reducing strong dynamic loads resulting from gusts of wind, which is why in no case should such a model be placed on pipes made of brick;
- the modification cannot be used for pyrolysis heat-generating mechanisms, otherwise, when wind occurs, all pyrolysis gases will be sucked out and the stove or boiler will simply go out;
- not suitable for creating design elements, since it is unsuitable for decoration; all kinds of blotches and figures only worsen the overall aerodynamic status of the structure as a whole.
By the way, an interesting study was conducted in the USA. There, at one time, they studied issues related to open deflectors and installed them on locomotives to check the degree of increase in efficiency at low speed. At the same time, the result was the most depressing - at mid-speed, fire began to burst out of the pipe and not a single train was able to reach its maximum speed. In general, the open version of the deflector should be recommended for all types of heating devices, with the exception of pyrolysis ones. At the same time, it must be checked and cleaned at least once a quarter. It is optimal for a chimney with low draft force, it is most effective for wood-burning sauna stoves; not a single case of people burning out due to the ventilation deflector in saunas has been recorded.
The closed or as it is called “perfect” type has such advantages as:
- provides stable draft, which is sufficient for stoves and boilers of any type;
- not prone to freezing and clogging from the inside;
- Dust and ice formed on the outside do not significantly change the operation of the device.
There are also disadvantages, however, users claim that they are not so significant, namely:
- when exposed to strong winds, it gives maximum pressure on the pipe, and then increases linearly, so the chimney under the deflector should be further strengthened with guy wires;
- has rather complex design and technological parameters;
- cannot be used as a design element, since any additional elements significantly reduce the overall level of aerodynamics.
Models may differ in appearance, purpose and material. Most often, plastic, stainless steel or aluminum are used to produce deflectors. In rare cases, copper may become a raw material for production. Many users prefer the sandwich model.
Weather vanes
Pipe deflectors - weather vanes are also called weather vanes. Sometimes all chimneys in general are called this, but this is incorrect, because... A weather vane is, by definition, a rotating device.
The deflector on the pipe - weather vane can be made rotary, self-orienting and rotating. The latter are also called turbo deflectors, and self-orienting smoke teeth, which is also incorrect. The smoke tooth is part of the chimney of an English fireplace. The weak point of all weather vane deflectors is the bearing. It becomes very easily clogged and covered with soot, and the seals are subject to increased wear. Therefore, you need to inspect the weather vane deflector at least once every 2 months. But the weather vane deflector itself almost never becomes overgrown with the main enemy of all fixed deflectors - icicles.
Pipe deflectors - weather vanes
A multi-bladed weather vane deflector (items 1 and 2 in the figure) provides stable draft in winds of up to 9-10 points with minor loads on the pipe, so it can be installed on sandwich, ceramic and glass chimneys. A single-blade weather vane deflector puts a lot of stress on the pipe in a strong wind, so it must be strong and the house must be located in a place where the storm wind will not blow up. But a single-bladed weather vane deflector can easily be designed in the shape of a bird (items 3 and 4).
Turbo deflector (item 5) – remember and don’t trust anyone – not smoke! It is ventilated or for gas boilers with electric ignition. The turbine rotates both by the wind and by the air current in the pipe, and a correctly made turbine, as in some types of wind engines, is self-spinning: the weakest initial thrust or a light breath of breeze is enough for the turbine to spin and draw air, and it will stop only when the thrust , and the wind will stop completely. In a house ventilation system with turbo deflectors, you have to turn on the fans in the vents, as they say, once a year, not every year. Unfortunately, the turbo deflector is easily filled with dust and debris from the air, so it also needs to be checked at least once every 2 months.
The technical properties of the turbo deflector are the same as those of a multi-bladed self-orienting one, but it loads the pipe even less. It is quite possible to make a turbo deflector with your own hands, see the video below.
Advantages and disadvantages of a turbo deflector
The following arguments can be made in favor of using a turbine:
- Fast air exchange. The rotating turbine head promotes rapid air exchange in the ventilation shaft, prevents the formation of reverse draft, and protects the roof space from the accumulation of condensate. The operating efficiency of the rotary device is much higher than that of a conventional deflector.
- It does not consume electrical energy, unlike electric fans, but works thanks to the power of the wind. This puts the turbo deflector among the most cost-effective devices.
- The average service life with regular maintenance and proper installation is about 100 thousand hours or 10 years; stainless steel models can last up to 15 years. This is three times longer than the operating time of the fans.
- Protection from precipitation. Prevents snow, hail, and rain from entering the ventilation ducts. Can be used in regions with strong and frequent winds.
- Compact and lightweight design. Devices with a base diameter greater than 200 mm weigh significantly less than the TsAGI deflector. The largest model (680 mm) weighs only about 9 kg; in contrast, the TsAGI deflector with the same base diameter can weigh about 50 kg.
- Easy installation does not require special knowledge and skills.
The following facts speak against its use:
- The device is quite expensive compared to conventional deflectors.
- Unfavorable atmospheric conditions such as lack of wind, high humidity and freezing temperatures can lead to a complete stop. It should be noted that moving turbines are subject to icing to a much lesser extent.
- The deflector cannot be used as the main means for removing contaminated air in rooms with increased ventilation requirements: in medical laboratories and in industries where work involves chemical and explosive substances.
We suggest you familiarize yourself with Marking the foundation for a bathhouse with your own hands
The price of a rotary deflector is quite high compared to static devices; it depends on the material used for manufacturing - stainless steel, polymer-coated steel, galvanized steel.
But the efficiency of work pays off all costs.
Image gallery
Photo from
The turbine deflector is constantly attacked by atmospheric negativity: rain, gusty winds, low and high temperatures, their sudden changes
It is important that the selected device lasts a long time, just as a stainless steel deflector will last. A galvanized deflector will last 5 years, after which the protective zinc layer will collapse, erode and no longer protect the steel from rusting.
A galvanized deflector will last 5 years, after which the protective zinc layer will collapse, erode and no longer protect the steel from rusting.
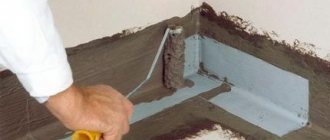
By painting the elements of the galvanized deflector with enamel before assembly, we will extend the operation two or more times. It is necessary to completely cover the parts, without allowing gaps
A polymer coating applied at the factory will actually equalize the service life of a stainless steel device and a painted deflector. The polymer shell will prevent the weathering of zinc
Stainless steel exhaust device
Galvanized turbine deflector
Painting the deflector with waterproof enamel
Protective and decorative polymer coating
Area of use
Where exactly can turbo deflectors be used? The products have proven themselves excellent in rooms and facilities where air exchange is extremely necessary. Scope of use:
- For private and apartment buildings. In addition, it should be noted that increased demands are placed on the operation of ventilation ducts in a high-rise building. Often in such houses the quality of ventilation is not the best, since they were made in the Soviet Union. But thanks to the use of a deflector, this problem is solved.
- Turbo deflectors are good for livestock farms and agricultural buildings such as stables, poultry houses, granaries and haylofts. They help ventilation more effectively remove odors, fumes and gases generated when keeping livestock. In addition, the humidity in the room is controlled, it is optimal.
- For processing enterprises. Since the turbo deflector does not require electricity to operate, the savings on the device are corresponding. The exception is enterprises that produce or process substances hazardous to humans.
- Public buildings such as sports complexes, swimming pools, shopping centers and cinemas.
Important! The turbo deflector is also used to ventilate the under-roof space.
But how to make turbo ventilation deflectors with your own hands? Let's find out.
Popular product types
You've probably noticed that they come in different shapes. Modern devices may have different tops:
- Flat
- Semicircle
- With lid
- With a gable gable roof
Semicircular cap
The first type is most often installed on houses made in the Art Nouveau style. For ordinary modern buildings, a semicircular cap is mainly used. The gable roof of the deflector does the best job of protecting the chimney from snow.
Chimneys are mainly made from galvanized iron, less often from copper. But today products coated with enamel or heat-resistant polymer are becoming fashionable. If the device is used on ventilation ducts where there is no direct contact with heated air, then a plastic cap can be used.
The designs of deflectors are also different.
In the domestic market the most popular are:
- TsAGI deflector, spherical with rotation, open “Astato”
- Grigorovich device
- "Smoke Tooth"
- Round chimney "Voller"
- Star "Shenard"
Various options for chimney caps
The TsAGI deflector has become the most popular in Russia. Its package includes:
- Branch pipe (inlet)
- Frame
- Diffuser
- Umbrella
- Brackets
You can buy a factory deflector and install it on the chimney, but some people prefer to make it themselves from scrap materials. To do this, you should follow a few simple rules.
This is a mechanism that has a rotating body and is connected to a bearing unit; specially curved parts are attached to it. The weather vane itself is located on top, it allows the entire device to constantly stay in the wind.
The ring with a bearing unit built into it is attached to the edge of the chimney using strong bolts. The air flow passing between the visors is accelerated, which leads to the creation of a rarefied zone. The thrust, accordingly, increases and the efficiency of removal of combustion products increases.
How to make a chimney deflector with your own hands
First you need to decide what material it will be created from. It can be galvanized iron or stainless steel. Copper is also suitable, although it is an expensive material. The use of these particular metals is due to the fact that the deflector must be as resistant to temperature changes and atmospheric influences as possible.
The device has its own specific parameters that must be adhered to. For example, the height of the chimney should be 1.6-1.7 parts of the internal diameter of the pipe, and the width should be 1.9.
The sequence of work on creating a deflector yourself is as follows:
- On cardboard we draw a diagram of the main parts.
- We transfer the patterns to metal and cut out individual parts.
- We connect all the elements to one another using fasteners or welding.
- We make the brackets from steel needed to mount the cap on the surface of the chimney.
- We assemble the cap.
A self-made deflector is first assembled and only then mounted on the pipe. The first to install is the cylinder, which is fixed with fasteners. Using clamps, a diffuser is attached to it, as well as a cap in the form of a reverse cone. This simple element allows the device to function in any wind.
Watch the video and do it yourself step by step:
To make your own cap you will need the following items and tools:
- Rubber or wooden mallet
- Hammer
- Bar
- Clamps
- Scissors for working with metal
- Steel corner.
To simplify the process of assembling the device, all parts have specially cut corners on both sides.
Installing a deflector is mandatory and is most effective if there is an indirect chimney.
When making the device yourself, you must strictly adhere to the proportions indicated above. If the deflector installed on the chimney does not meet these parameters, then it will not be able to perform its main function of creating good draft.
We make the cap ourselves, video review:
When making metal blanks yourself, it is best to do this using cardboard patterns cut to the required dimensions. Having attached them to a sheet of metal, it will be enough to trace the details along the contour and you can safely cut them out without fear of making a mistake.
If the pipe has a maximum permissible diameter, then installation will require the use of a stretcher made of wire.
Installation
The rules for installing ventilation deflectors are reflected in the regulatory document SNiP 41012003, which indicates their permissible dimensions and the height of the mounting location.
The connection point between the deflector and the shaft can be:
- flanged - a finished round or square product with holes for bolts, ensuring a tight connection;
- rectangular - used in the case of a square base of the deflector;
- round - the most common, due to the more frequent use of the round type of base.
Installation recommendations:
- the ventilation unit must be accessible to air flows of different directions;
- the height of the structure must exceed the height of the roof ridge by 1.5 m (optimal height for best efficiency);
- do not install in the area of aerodynamic shadows (dead space between buildings with the formation of rotating air currents).
Deflectors can be supplied either assembled or disassembled, so before installation you should first assemble it.
You can do this yourself in just a few steps:
- install the lower part on the ventilation hole, secure it with bolts or nuts;
- then the diffuser is attached (using a clamp);
- fastening the cap with or without a reverse cone using a bracket.
But if the coincidence is problematic for some reason, then the existing hole can be reduced using steel wire pre-untwisted and wound around it.
What to pay attention to
- Also, the deflector must meet all design parameters adopted in the document TU 36233780.
- If the release of aggressive air masses is expected, then a galvanized iron deflector is not used.
- To reduce draft during strong winds, it would be advisable to install a valve in front of the deflector.
- A preliminary calculation of the air temperature from the ventilation compartment will allow you to correctly select the material from which the installation is made.
Repair
The proper functioning of the ventilation system, like any device, should be monitored.
They will tell you about a system malfunction:
- the smell of dampness, putrefaction, debate;
- the appearance of fungal infections of mold in appropriate places with high humidity (behind the sink, in the bathroom, behind cabinets, tables), and in open places (on walls, ceilings);
- formation of condensation (on windows, walls, furniture surfaces);
- dampness and coolness - especially felt by things stored indoors;
- difficulties in obtaining oxygen and, accordingly, difficulty breathing;
- the system itself may emit a hum or dull popping sound, or emit a burnt smell.
Not only the internal microclimate of the room, but also the safety of staying in it depends on the high-quality operation of the entire ventilation system, because combustion products can begin to accumulate and provoke complications in the respiratory tract.
If you notice the appearance of these signs, it is necessary to diagnose, identify and eliminate the causes of ventilation failure.
Troubleshooting
Undoubtedly, seeking the services of a specialist in this matter is the highest priority.
But it is also possible to carry out preliminary diagnosis using one of the following methods:
- In one of the rooms a window/window opens slightly. And a paper sheet is brought to the ventilation grille. It is sucked in and held onto the grate during normal operation.
- To get a more accurate result, using a special device – an anemometer – will help. It is used to measure air flow speed. By correlating it with the diameter of the shaft, an accurate calculation of the flow is obtained from the data in a special table. Or using the formula: Q = V * S * 360 V – anemometer readings; S – ventilation opening area; Q – volume of passing flow.
We compare the obtained result with the accepted circulation standards:
- in the kitchen – 60 cubic meters/hour;
- in the bathroom and toilet room - 25 cubic meters/hour.
Now let's move on to consider the most common causes of breakdowns, these are:
- incorrect installation of the installation;
- inappropriate operation;
- ignoring preventive measures;
- mechanical damage;
- corrosion process;
- decreased wear resistance;
- formation of a debris jam;
- the compressor has insufficient power or its breakdown;
- ineffective filters, etc.
The listed reasons can lead to failure of the ventilation system and disruption of the entire circulation process.
It is recommended to carry out only minor repairs, preventive maintenance and cleaning of the walls of the ventilation shaft on your own, without serious intervention or dismantling of the structure.
Self-production of a turbo deflector
Making a turbo deflector with your own hands from scrap materials will save money. Work begins with preparing a drawing, as well as all the necessary tools and materials. To work you will need the following:
- steel sheet - 0.5-1 mm thick or plastic;
- drill with drills;
- cardboard sheets;
- riveter;
- scissors.
Create a drawing
If you do not have the skill to construct drawings, then you can use a ready-made project. But at the same time, all parameters of the device must correspond to the specific product, so they are carefully checked. When creating it yourself, you need to correctly calculate the characteristics of the device, adhering to the table with the main dimensions:
| Planting diameter, cm | Width, cm | Height, cm | Base height, cm |
| 200–250 | 290–350 | 290–345 | 70–100 |
| 300-315-355 | 400-400-450 | 365-365-385 | 110-110-110 |
| 400–500 | 495–615 | 465–635 | 140–225 |
| 630 | 790 | 700 | 250 |
The width of the diffuser and the height of the deflector are selected according to the internal diameter of the chimney, so first determine its size. It will become the basis of the drawing. Independent calculation of dimensions is carried out when the required parameters do not coincide with the data indicated in the table.
Manufacturing process
Each part is cut out of paper according to the drawing. The finished sketches are applied to a steel sheet, secured and outlined with chalk or pencil. Then cut out with metal scissors. Assembly and installation are as follows:
- Using pliers, all sections of the parts are folded by 0.5 cm. To make the edges thinner, the bends are beaten with a hammer.
- To create an internal cylinder, holes for fastenings are drilled in the workpiece. The element is given a cylindrical shape and secured with bolts or rivets. In order not to burn through the metal when making holes, you can use semi-automatic welding.
- The outer cylinder is made according to the same principle as the inner one. To create a cap, the workpiece is twisted into a cone shape and connected with a riveter.
- From the remains of the steel sheet, cut out 4 strips up to 20 cm long and 6 cm wide. Stepping back 60 mm on both sides, make a bend. To secure the strips to the cap, you need to make 2-3 holes for the bolts. Their location should be 5 cm from the edge of the part. The strips are then secured to the outer cylinder and cap with rivets.
- The finished diffuser is installed on the chimney in two ways: on the pipe or directly on the chimney itself. The best and safest option is to install the device on a pipe, since the structure is assembled at the bottom and then mounted on the roof.
- Before installing the device, it is necessary to prepare the pipe. Its size should be wider than the diameter of the chimney. Holes for fastenings are made in the pipe and deflector. They are placed on the underside of the parts, 15 cm away from the edge. The holes in both parts must match each other.
What does the modern market offer?
The turbo deflectors produced today from different manufacturers look very similar to each other, but in fact they have significant differences. And today they are produced by such brands as Turbomax, Turbovent and Rotavent.
Rotavent differs from other designs in the built-in canopy, which additionally protects the chimney from water penetration. It also uses a double-block bearing, which is lubricated with a special compound and withstands high flue gas temperatures well.
Thanks to this, the power of this design is retained for many years. At the bottom, the Rotavent is equipped with a release flange attached to the base, which allows it to be easily disconnected from the pipe.
But Turbovent is not installed on the chimney for coal stoves and wood-burning fireplaces. The thing is that here the maximum temperature of the flue gases is 250°C.
Therefore, these products are now actively used for natural ventilation systems, as well as for gas fuel boilers. And Turbovent is made of aluminum with a thickness of 0.5 to 1 mm, and its base is made of galvanized steel 0.7-0.9 mm and painted according to the RAL catalog.
Further, Turbomax is called a natural thrust supercharger. It is based on AISI 321 steel with a thickness of 0.5 mm. This turbo deflector is suitable for ventilation pipes and smoke ducts, as they are designed for exhaust gas temperatures up to 250°C.
Ventilation deflector device
Each turbo deflector for ventilation consists of several functional elements:
metal glasses (there are 2 of them as standard);
fixing brackets for secure fastening;
inlet and outlet pipe, which is put on the pipe and secured with a clamp.
The shape of the outer glass is different in shape, expanding at the bottom. As for the bottom, it is absolutely flat. The cylinders are placed one on top of the other, and the lid is fixed on the racks at the top.
The figure below shows the components of different types of structures.
The deflector device in the ventilation system of the house is implemented in such a way that when air flows are directed from bottom to top, the device works poorly: it is reflected from the surface of the roof, after which oxygen rushes to the gases escaping at the top of the hole. This drawback is typical for all units. To eliminate it, 2-cone solutions are required, connected to each other by a “bridge”.
Design and layout of ventilation in a chicken coop in winter
This is interesting: Layout options for Khrushchev - 1,2,3 rooms
Tools and materials
Let's say right away that such work is not the easiest, since the turbo deflector has a complex design. To bring everything to life, you need the following tools and materials:
- galvanized or stainless steel sheet;
- bolts, rivets, clamps and nuts;
- electric drill;
- scissors for working with metal;
- ruler, pencil and compass;
- drew;
- welding machine;
- several sheets of cardboard;
- regular scissors.
In the photo below you can see a drawing of the turbo deflector.
You will see exactly how to make it yourself from this video:
The main task is to make the landing part of the required diameter. After which plates with a tube in the middle are welded to it, where the rotating part will be installed. Blades are formed from sheets of steel according to a template, which are attached to the structure, forming a turbo deflector. The entire process and details are clearly depicted in the video.
When the turbo deflector is made, you can begin installing it. It is mounted on the chimney pipe. The lower part is put on the pipe and secured with bolts. This is a secure mount that will hold the structure in place.
There can be no problems with traction
Ready to install rotary deflector
The purpose of any ventilation system is to remove polluted air and excess moisture from the premises, that is, to ensure normal air exchange. This will take place if the ventilation duct functions efficiently and correctly - the draft in it is excellent. If there are problems in this regard, they are often provoked by rain, snow, or wind masses entering the canal shaft. Also, poor draft can be caused by incorrect placement of the ventilation pipe, its insufficient height or incorrectly selected diameter of the air duct. The installation of a rotary deflector is designed to eliminate such shortcomings of natural ventilation.
Case studies of positive applications of turbo deflectors
Situation #1 Backdraft
- Problem. In a high-rise 9-story building, in the apartments on the upper floors, a reverse draft effect was observed - air flows flowed from one channel to another.
- Solution. The concrete canopies of the ventilation ducts leading to the roof were dismantled. A TD-500 turbo deflector with a transition was installed in their place. To avoid the formation of condensation, self-adhesive insulation is used on the transitions.
- Bottom line. All air exchange problems disappeared. The draft became stable, the blowing and flow of air masses disappeared.