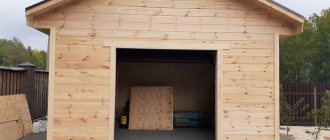
The roof of a house is a complex, multi-layer structure, the reliability and thoughtfulness of which determine the comfort of living and the durability of the structure. It protects from cold, precipitation and wind. The process of constructing a roof today is very different from the same process some 50-70 years ago, since the construction market during this time has increased the range of salted tools and materials that greatly simplify the work. Such inventions that help in the difficult task of erecting a roof include soffits and panels used for lining cornices. In this article we will tell you how to install spotlights yourself.
Types of spotlights
Soffit panels can be made from various materials, and depending on this they are divided into metal (galvanized, aluminum, copper) and plastic (vinyl). Each variety has its own characteristics, advantages and disadvantages. At the same time, the installation process is largely similar and does not differ much from each other.
Roof soffits have a perforated structure, which promotes free air circulation and protects the material from dampness, mold and putrefactive processes. Non-perforated soffits are not used for roofing, but are used for finishing indoor spaces.
If we talk about manufacturers, there are currently many companies that produce high-quality soffit panels. For example, Deke soffits for roofing, produced by the company Docke Extrusion, are very popular due to their high quality. Their warranty period is 50 years, which is certainly an excellent indicator for such products. Other well-known manufacturers of spotlights are companies such as Mitten, Grand Line, Holzplast, etc.
Scheme with a frontal plate
If the requirements for the appearance of the filing allow you to leave the fasteners open, you can use Front strip 1 (Fig. 16).
| Fig.16 |
Attach J-profile 3 and Finishing strip 2 as described above.
Prepare the soffit panel so that the length of the panel is 10-20 mm less than the length of the eaves overhang from the wall to the edge of the front board.
Tools and materials for installing soffits yourself
Fitting roof overhangs with soffit panels is not a difficult task, and therefore you can usually do without the help of specialists by installing the soffit yourself. Of course, this will still require a little skill and effort.
Before undertaking such work, you should read the instructions for installing roof soffits and prepare the necessary equipment.
The set of tools required for do-it-yourself installation of soffits includes the following:
- roulette;
- level;
- knife;
- carpenter's hammer;
- metal scissors;
- corner;
- hacksaw with fine teeth;
- electric drill;
- Circular Saw.
You can do without the last two tools, but they greatly facilitate the work and speed up the installation process.
Calculating the required amount of materials is quite simple: the eaves overhangs are conventionally divided into rectangular sections, and to calculate the area of each of them, the length is multiplied by the width. Next, based on the size of the soffit products themselves, the required number of panels for installation is calculated. Of course, when purchasing, it is advisable to take a little more material, providing some reserve - in case of errors in calculations and errors in work.
In addition to the soffit panels themselves, during the installation process certain additional elements are used: J-chamfers, J-profiles, H-profiles, sometimes external and internal corners. The necessary elements also include wooden blocks for constructing a frame frame (usually with a cross-section of 5 by 5 centimeters). Finally, installation requires fasteners: most often when installing soffits, dowels and galvanized self-tapping screws are used.
J-chamfer pattern
The scheme using a J-chamfer is the most aesthetically pleasing, as it allows you to hide the fasteners.
1 as a receiving profile on the wall side (Fig. 5). Attach it to the board, close to the wall or to the facade cladding material with self-tapping screws in increments of 500-600 mm.
| Fig.5 |
Attach the finishing strip along the top line of the front board 2.
Attach J-bevel 3 to the mounting location. It should fit into the finishing strip and be attached to the sheathing board. if necessary, adjust the length of the flat part by cutting off the excess.
Insert the J-bevel into the finish strip and secure as shown (Figure 5). Using a finishing strip eliminates the waviness of the flat portion of the J-bevel.
If you use short drainage system hooks, you do not need to use the finishing strip, since the hooks are attached to the front board (Fig. 6). In this case, it is recommended to fasten the J-chamfer 1 from above with self-tapping screws 2 into the pre-made perforation with an oval hole cutter.
| Fig.6 |
When the front or end boards serve a decorative function and remain open, use 2 J-profiles 1 (Fig. 7).
| Fig.7 |
Instructions for installing soffit panels
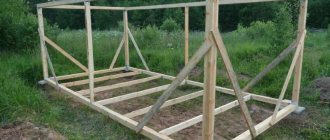
To install soffit panels under roof overhangs, you must first build a frame or box to which they will be attached. For this purpose, one block with a cross-section of 5 by 5 centimeters is attached to the wall of the house using dowels. Another block is fixed on the inside of the cornice board, after which the transverse slats connecting these two bars are filled. Fixing the bars to the rafter structures can be done using self-tapping screws.
Next, the soffit panels themselves are attached. For this purpose, in accordance with preliminary measurements, the soffits are cut into pieces of the required sizes.
Soffits are attached to certain structures using additional elements. The eaves of the roof are hemmed with a J-chamfer. The function of H-profiles is to attach soffits in places where they turn at right angles. They can also be used to directly connect the panels themselves to each other. By means of J-profiles, lateral connections of soffits are made to cornices and other structures: soffit panels on the side sections are inserted into J-profiles and fixed in them.
In addition, the soffits are also attached to each other using hooks and holes located along the edges.
Depending on the type of panels and the configuration of the roof overhangs, the installation instructions for soffits may have certain differences, however, thanks to the use of locking elements and auxiliary devices, installing them in any case is not difficult.
General installation recommendations
The covering of roof overhangs with soffits is carried out upon completion of roofing work. The roofing pie is technologically the most complex element of the building; it consists of many layers. It is protected from the top and bottom from water and mechanical damage, and remains open along the perimeter. The overhang performs the following functions:
- removal of precipitation and protection of upper load-bearing structures from water;
- base for installation of drainage systems;
- ventilation of the roof structure and attic space;
- The overhang can be used as a base for installing street lighting, so it must have an aesthetic appearance.
In an open, unprotected overhang, rafters are exposed to atmospheric influences, suffer from moisture, rot and become deformed when drying. When the insulation gets wet, it loses its properties, and the thermal insulation of the ceiling deteriorates significantly.
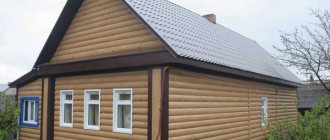
The sheathing is made in the same style as the roof
There are two opinions on what the overhang should be - ventilated or not. The technology requires that the roofing pie and attic have natural ventilation channels. These can be special products that are used in different modes, depending on the time of year and atmospheric precipitation. The ventilated overhang is protected from moisture, so it can be used all year round.
Rules for filing spotlights
Despite the simplicity of the process, there are certain rules and recommendations, without which the installation of spotlights will not be correct and may lead to unpleasant consequences during operation.
The main nuances that require compliance during the installation process are as follows:
- Soffits, especially plastic ones, should be fastened carefully, without bending or tension.
- The fastening of the panels should not be too tight, but should be secured all the way.
- The parts are joined together until a characteristic “locking” click appears.
- For DIY installation, it is best for non-professionals to choose plastic soffits. Their installation is much simpler than other varieties, since the plastic is lightweight, flexible and easy to cut.
- Thermal insulation of the facade and all finishing work during the construction of the house must be completed before the installation of soffit panels begins.
Installation of soffit panels using J-bevel
Prepare the soffit panels so that the length of the panel is 40 mm less than the length of the eaves overhang from the wall to the edge of the fascia board.
| Fig.13 |
Start installing panels from the edge or corner of the eaves.
Place the prepared panel 3 into the groove of the J-profile 2 , insert the second edge into the groove of the J-chamfer 1. Slide the panel into the middle of the grooves and secure with self-tapping screws (Fig. 13).
Do not attach the soffit too tightly. Leave a distance of approximately 0.8-1 mm between the lower edge of the screw head and the panel so that it has free movement horizontally (Fig. 14).
| Fig.14 |
The self-tapping screw is screwed into the center of the perforated hole. If the hole does not fit into the sheathing, make a hole with a notch (Fig. 19).
What are soffits in construction?
Soffits are panels with a polymer coating that are attached to the frame along the edge of the roof.
Panels are made from materials such as aluminum, plastic and copper. When joining them, the locking method is used. This connection principle greatly facilitates the installation of soffits on the roof eaves. Moreover, it is possible to hide the fastenings. We can say that soffits are essentially the same lining or siding, but are intended for decorating the ceiling. The only difference between roofing soffits and other types of decorative panels is that they can be perforated.
Overhangs are divided into cornice and pediment.
- Cornice. Through the eaves, air penetrates into the under-roof space and continues to move up to the ridge of the roof, thereby ensuring ventilation of the roof. If the cornice is tightly hemmed from below, ventilation will not take place. Moreover, if this is not done, insects, mice, and birds will eventually get into the under-roof space, and the protruding part of the rafters will have to be constantly treated with special moisture protection compounds.
Advice
It is better to hem the eaves overhang, but on the condition that the hem should not be dense, but, on the contrary, allow air to pass through.
A perforated ventilated soffit is precisely the roofing element that can ensure the unhindered passage of air through itself and ensure air circulation under the roof.
Thus, installing soffits under the gable requires a different type of material, solid with a blind form factor, which will ensure the impermeability of the sheathing
Design features of soffit panels
According to their structural structure, soffits come in three types: perforated, partially perforated and completely closed.
Perforation of soffit panels creates conditions for complete ventilation of the under-roof space, which is necessary to prevent the accumulation of dampness with all its negative consequences
- The perforated version consists of panels that are evenly covered with small through holes over their entire surface. This type of material is intended for hemming horizontal surfaces of overhangs that are not exposed to the direct action of precipitation. Perforation is capable of providing effective ventilation not only of the overhangs themselves, but also of the entire under-roof space of the roof structure. And constant air exchange must be provided here. This is necessary to prevent the accumulation of condensation, dampness, and as a result, the onset of putrefactive processes on the wood and the appearance of mold or mildew.
Perforated panels perfectly protect the space under the eaves from the penetration of birds and insects (for example, wasps) into these cavities under the roof, since the holes have a very small diameter.
Overhangs lined with partially perforated panels.
- Partially perforated panels do not have ventilation holes over the entire surface, but only on one or two sections of the profiled sheet. Thanks to such hemming materials, it becomes possible to regulate the air exchange in a unique way. Partially perforated soffit panels are used for lining the external horizontal surfaces of the house, as well as the ceilings of terraces, gazebos, verandas or porches. Therefore, this type of material can be called universal.
Gable overhang lined with non-perforated panels.
- The non-perforated version of the panels does not have holes on its surface, and is intended for cladding areas that are likely to be directly exposed to precipitation. Such areas may include overhangs on the gable part of the roof, as well as vertical walls along the eaves. In addition, soffits without perforation can be used to cover the vertical part of the pediment.
Vertical walls along the eaves, lined with non-perforated soffit panels.
All except wooden homemade soffit panels, both plastic and metal, have special locks with which they are secured to the eaves and connected to each other. After the soffits are docked and fixed to the overhang sheathing, the locks will not be visible.
Prices for soffit panels
soffit panelsLock connections on standard soffit panels.
Standard sizes of vinyl and metal soffit profiled panels can vary in width from 300 to 800 mm, and their length is usually 3050 mm.
If the lining work will be done independently, then it is necessary to take into account that the wider the panel is chosen, the faster it is possible to install the soffits in place.
Siding prices
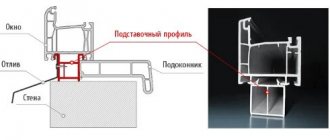
siding J-profile will hide the cut edges of the soffits, hold the panels in a given position, and emphasize the border lines of the eaves overhang
- To decorate the upper edges of the panels fixed to the wind board, a finishing strip is used. It is the final element of the design. This element is fixed along the upper edge of the wind board and the edge of the panel is hidden in it.
This illustration clearly shows the installation location of the finishing strip
- The H-profile is necessary for joining individual panels in places where it is impossible to use locks located at the edges of the soffits. For example, you can’t do without it when decorating the corner areas of eaves overhangs.
H-profile - masks panel joints in those nodes where it is not possible to use standard locking connections between them
The use of an H-profile simplifies the diagonal installation of panels and masks their unevenly cut edges. In addition, the H-profile must be installed between the panels in cases where the eaves overhang has a length of more than 8000 mm. The connecting element will add rigidity to the structure and make it more reliable.
- To install soffit panels on the wall of a building, not only the J-profile, but also the F-profile is used. It is convenient because it fixes the panel not only from below, but also from its upper part. The panels are pushed into this profile, fixed along the wall line, and firmly held in one position.
The F-profile is convenient for attaching soffit panels to the vertical surface of a building wall
- The profile, called the outer or outer corner, is usually mounted at the junction of the lower edge of the wind board and the eaves sheathing, and the wind board cladding panels and eaves soffits are installed into it.
The external corner profile is not used so often when filing overhangs, but sometimes, in some areas, it becomes the optimal solution
In addition, the external corner can be used in other areas of the cladding where it is necessary to join two panels on a corner line.
- Internal corner - this profile will be necessary if the house has an L-shaped or U-shaped layout, as well as if the porch, veranda or terrace of the house protrudes beyond the main building.
If the house is finished with siding, then the internal corner profile is perfect for framing the transition from the wall to the soffit
An internal corner is also suitable for joining along the wall soffit panels and siding boards or lining used for wall cladding.
J-bevel - excellent for facing the front board, while simultaneously creating conditions for attaching soffit panels
- A J-bevel is a wide profile with an S-shape at the bottom edge. It is designed to install the front edge of the soffit panel into it. This profile element can be used when installing soffits if there is a wind (frontal) board in the overhang structure. When choosing the size of this profile, you need to focus on the width of the wind board.
An example of using such a J-bevel is clearly shown in one of the illustrations above.
Additional fittings for installing soffits are selected depending on the design that the lining of the eaves overhang will have. Sometimes different profiles can be interchanged. For example, instead of an internal corner, two J-profiles are installed, turned in different directions. However, it is best to use the profile element that is directly intended for a particular area of joining or framing panels.
We recommend: Installation of a stretch ceiling
In order not to miss any of the elements for installing the structure when purchasing material, it is recommended to draw up a diagram in advance and measure the length and width of the surfaces of the overhangs and wind board. In a hardware store, according to the diagram drawn up, the sales consultant will help you decide on the size and shape of the profiles, as well as their length and quantity.
Prices for lining
lining
- Do not neglect additional elements in the frame sheathing, and also save on fasteners. A strong wind that arises can easily ruin the entire work by tearing off and breaking the soffit panels if they are not fixed securely enough. As a result, money and time will be wasted, and you will have to do the same work again, impoverishing the family budget for additional expenses.
- The filing of the soffits is carried out after the walls are lined with clapboard or siding and gutters are installed.
- It is recommended to fasten all parts of the soffit structure only with stainless steel fasteners. Otherwise, after a very short time, the initially neat appearance of the finish will be radically spoiled by rust stains.
- Soffit panels made of any material require compliance with a technological gap during installation, since when the temperature rises and the material expands, it can become deformed. In such cases, the cladding begins to warp, and it has to be dismantled in order to be redone later.
By adhering to all the rules and recommendations for performing installation work, as well as strictly observing the necessary safety measures, it is quite possible to complete the lining of eaves overhangs with soffits yourself, without resorting to the services of craftsmen, and at the same time saving a very decent amount.
Some additional nuances of covering overhangs with soffits can be found by watching the recommended video:
Calculation of the required quantity and selection criteria
Before you go shopping for soffits, you should calculate how many elements of this type will be needed, taking into account ventilation and the size of the building. So, ventilation should occupy approximately 1/150 of the total ventilated space. This means that the entire area that will need ventilation is divided by 150. Then ventilation elements (for example, dormer windows, etc.) are subtracted from the resulting value. Next, the result is compared with perforated soffits. Based on the area that one soffit panel will occupy, the total number of elements required for the work is calculated.
Important! It is impossible to cover eaves overhangs with a continuous covering. There should be ventilation in any case. The best option is to buy perforated soffits and calculate how many of them will be needed to cover the entire space between the wall and the eaves along each wall of the house.
Soffits for roofing
As for the selection criteria, it is only important to take into account that it is recommended to install soffits with perforations outdoors, and soffits without holes can be used indoors. Regarding color, you can choose according to your taste, but in any case, it is important to first assess how the chosen color will look in the overall harmony of the house.
Stage VI. Decorating the corners of the hem
The entire soffit installation process is completed by decorating the corners. Rotation can be done both at right angles and diagonally. Diagonal joining looks more impressive, but is more difficult to perform.
At the joints of panels, either an H-profile or two J-profiles are used to bypass the corners. So, in the diagonal version, a J-profile is used, and the soffit panels themselves are cut so that the corners fit each other.
If you don't need to hide the fasteners at all, install a simple docking strip:
- Step 1. Make markings: place the plank in place so that there are minimal gaps between the additional elements. Cut off all excess.
- Step 2. Fasten the strip with self-tapping screws to the sheathing and mark the panels that are adjacent to the H-profile so that the joint ends up looking symmetrical.
- Step 3. Remove construction debris and remaining protective film from the binder, touch up all scuffs and scratches.
The profiles themselves need to be mounted on the sheathing to create additional support. This is what direct and diagonal design of corners looks like when lining cornices with soffits:
If all the rules were followed when installing the soffits, the entire roof overhang will look neat, organic and holistic. In addition, spotlights have an important function, which they will perform only with high-quality installation. And thanks to our master classes and illustrations, you will be able to understand the intricacies of such a process and be confident in the result.
Which panels to choose: plastic or aluminum roof soffits ↑
Vinyl (plastic) soffits ↑
The most common type of panels for covering eaves today is perforated soffit. White, especially elegant, calm and at the same time eye-catching, costs less than the colored, especially brown, version. Colored plastic perforated soffits occupy the golden mean between white and brown in cost. These panels are often used in conjunction with siding, then the roof eaves lining does not stand out from the facade. Plastic soffits:
- wear-resistant, elastic, do not fade, resistant to sudden temperature changes, installation is virtually waste-free, easy to install.
in the photo: perforated soffit
by Slovo, in this case the price-quality ratio is optimal.
Aluminum soffits ↑
Aluminum soffit, an analogue of plastic, is made of a thin sheet of aluminum coated with a polymer colored composition. Unlike the latter, aluminum soffits are non-flammable, and their expansion/contraction coefficient is not so noticeable. Therefore, they cannot have the “wave effect” that is so often found especially on a plastic frontal board.
Solid soffits without perforation are often used for lining ceilings and gable overhangs.
in the photo: aluminum soffit
- Perforated aluminum soffit is used for hemming eaves overhangs. At the same time, it provides optimal ventilation in the under-roof space. To make it more efficient, the roof is equipped with roof fans or vents located closer to the ridge. Center vents or soffits with perforation in the center appear, after installation, in appearance as alternating strips: two solid, one perforated. Although they leave the impression of a continuous sheathing, they still allow ventilation of the under-roof space.
Thus, the question of which soffits are best for roof lining is decided based on the type of roof overhang.
Finishing the front board with soffit
If rafters with a width of 200 mm or more are used, which are not cut horizontally, the front board can be quite wide, more than 250 mm. In this case, you can finish the front board with soffit panels 1.
The figure shows a variant of the transition from the hem to the front board through the External Complex Corner Plank 2 (Fig. 19).
| Fig.19 |
A less aesthetic, but simpler option is to use 2 J-profiles (Figure 20).
| Fig.20 |
Install additional elements and soffit panels according to the rules described above.
Tips for arranging roof overhangs with soffits
- Vinyl panels must not be installed so that they come into contact with the roofing.
- It is more convenient to install soffits before finishing the walls with siding. This makes it easier to install the top finishing profile.
- The overhang can be covered with vinyl panels at any time of the year. However, when the ambient temperature drops below -10C, increased caution must be exercised. The material becomes brittle and may be damaged during installation.
- When finishing old houses, rotten and broken sheathing boards or eaves sheathing must be replaced in advance.
- All communications, wiring and fittings of lamps that are planned to be covered with panels must already be installed before the installation of soffits begins.
Before starting work, we recommend that you familiarize yourself with the explanatory video on the installation of spotlights and photos of finished projects in the gallery.
Manufacturers and price
Sheathing panels for roof overhangs are usually offered by companies that produce materials for external wall finishing, as well as manufacturers of roofing materials and drainage systems for roofs. The choice is influenced by the type of wall finishing or roofing; soffits can be made of the same material as the gutter. Also an important factor is the price of the panels themselves and additional elements for them.
We recommend: Roof abutment strip (top and bottom) – size, installation and assembly
Manufacturers and cost
You should not choose cheap soffit from unknown manufacturers, as there is a high risk of buying low-quality material that will become unusable within a few seasons. It is recommended to pay attention to well-known brands and check product certificates.
Stage I. Pre-installation of sheathing
Let's start from the very beginning. So, it is necessary to hem the roof overhang before laying the roofing material. You should also first insulate the walls so that there are no unprotected areas between the walls and roofs.
And first of all, they calculate and install the sheathing. The simplest and most common way of lining a roof with soffits is horizontal. For this task, bars are pre-attached to the rafters or their continuation in the form of fillies, forming the frame of the box.
At this stage, it is extremely important to control the future plane of the filing using a level and plumb line. Here are several options for exactly how to place the sheathing bars on the overhang of a standard roof:
It cannot be said that the horizontal or diagonal arrangement of the sheathing is better. Here, it most likely depends on which overhang seems more aesthetically pleasing to you and whether you plan to place communication cables in the soffits and build in lamps. Then the horizontal option is more appropriate, of course.
Let's move on. The sheathing needs to be laid along the perimeter of the overhang, parallel to the wall, and the suitable material is a galvanized profile or wooden slats. If you prefer wood, then make sure that such bars are sufficiently dry, with a moisture content of no more than 15-18%, without knots and bends, and if metal, then choose either aluminum or anti-corrosion steel.
There should be a distance of no more than 30-40 cm between the slats. If it turns out that the overhang still exceeds 40 cm, you will need to install an additional rail - between the inner and outer ones. But if the distance exceeds 40 cm, then strengthen this place. But you shouldn’t connect vertical ones with transverse bars, although this practice occurs.
Nail two boards on the side of the front board and the wall, onto which you will then fix the soffit strips and additional elements. For overhang lengths greater than 80 cm, use three attachment points. In this case, the boards must be of sufficient width for the installation of soffits and additional elements more than 100 mm wide.
Recommendations and tips
Before you start working with spotlights, you should familiarize yourself with a number of recommendations.
- Before installation of work, plastic soffits must be stored in a shaded place - bright and hot sun will negatively affect their condition.
- Soffits must be transported horizontally.
- When snapping the locking connections into place during installation, do not apply strong pressure to them - they may break. Soffit fastening
- There should not be a tight connection between the soffit and the profile holding it - the strip should move a little so as not to break due to thermal expansion.
- For the same reason, you cannot use glue and sealants when installing plastic soffits.
- The pitch for screwing in the screws should be about 40 cm. However, they should not be screwed in very tightly.
Rules for installing spotlights
Installation of spotlights is not as complicated as it seems at first glance. But it will make the roof and the building as a whole beautiful, neat, and complete. It’s worth spending a day of free time and still completing these finishing works.