Waterproofing concrete can be implemented at the construction stage of the building or during operation. In practice, maximum efficiency can be achieved using an integrated approach.
Reinforced concrete products can be processed using the following materials:
- sheet and roll coverings (geosynthetics or PVC membranes);
- liquid compositions – bitumen mastics, liquid rubber;
- sheet metal (metal-based materials are not used for waterproofing the floor);
- mixtures based on bentonite clay;
- mineral-based binders;
- penetrating mixtures;
- Waterproofing concrete is used for surface treatment of reinforced concrete structures.
Waterproofing concrete joints can be implemented:
- at the joints of walls and foundation slabs of a house, floor slabs, lintels, etc. (with materials like “Dehydrol”). To waterproof the joints of concrete slabs, grooves of 20x20 mm/30x30 mm are installed. Material consumption 0.8 kg/m.p of concrete;
- on prefabricated reinforced concrete structures. Recently, special sealing tape has been used to waterproof joints. The material is fixed on the surface of the structure in the abutment zone, after which it acquires waterproof properties;
- joints of balcony slabs, various canopies and walls, other external seams, including foundation ones, are best treated with coating waterproofing.
Insulation of floors must be carried out using penetrating materials. The slabs are processed from below or from the outside . In technical rooms it is better to use rolled materials or bitumen mastic.
Main structures requiring insulation:
- floor slabs between pillars and strip foundations,
- load-bearing foundation slabs,
- ceiling tiles, etc.
They are made from different materials: wood, reinforced concrete, steel beams. However, sealing is carried out even in the case of concrete solutions. Particular attention must also be paid to protecting the seams between products. They need proper treatment and careful moisture-proof filling. Proper waterproofing of concrete slab joints prevents leaks from upper to lower levels and guarantees the absence of traces of moisture that negatively affect the condition and appearance of the structure itself.
Pros and cons of using it for tiles
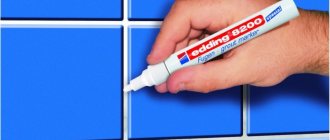
Epoxy grout for ceramic tiles and mosaics is not only a high-tech material, but also expensive. It should be borne in mind that this type of grout has both advantages and disadvantages. The advantages include:
- service life exceeding 50-60 years;
- immunity to various cleaning agents;
- resistance to various types of pollution and moisture.
- easy surface cleaning;
- ability to withstand temperature changes;
- resistance to mechanical damage;
- large assortment of colors;
- environmental friendliness;
- no odor;
- resistance to deformation
The main disadvantage of this grout is its high price. The solution sets quickly, so you need to work with it quickly. This requires some skill.
If the surface is not cleaned in a timely manner, it will be almost impossible to remove the already hardened composition on the tiles without damaging the top decorative layer. Because of this feature, it is recommended to dilute such compositions in small portions and immediately keep a soft, clean cloth ready to clean the tile surface.
Waterproofing foundation slab joints
Activities related to waterproofing concrete joints, according to the temporary method of implementation, are divided into two main types: those carried out during the construction stage and during the operation of the house. It is not advisable to choose the best method, since they are good together.
When waterproofing a monolithic foundation, it is possible to use vertical and horizontal protection. But if horizontal insulation was not carried out during construction, wrapping roll processing can help. The strip foundation is compacted with bitumen mastic. The pile-screw base will also have to be covered with an anti-corrosion layer.
Even when working with the highest quality and ideal reinforced concrete slabs, there are always seams between them. They are the main cause of leaks and other difficult-to-fix problems. This occurs due to shrinkage of the structure. The most effective way to solve the problem is injection and treatment with acrylate gel. The first does not lose its strength at low temperatures and copes well with all types of loads.
Choosing the appropriate composition
First of all, you need to pay attention to the type of main components that the epoxy-based grout contains. The composition of such materials may include cement, various additives that increase elasticity and improve other properties. The cost of grouting will depend on this. Another factor is brand. Common options:
- Mapei Kerapoxy Design;
- Litokol Litochrom Starlike;
- Diamond.
The cost varies between 900-1100 rubles. per 1 kg of substance. The grout does not have to be updated regularly, since it does not lose its properties throughout its entire service life.
By comparison, the cement version quickly deteriorates. This substance loses strength, over time it begins to absorb moisture more strongly, and cracks form on the surface.
You also need to calculate the volume of grout required to finish the wall or floor. In this case, information from the manufacturer is taken into account. In most cases, the label indicates how much substance is consumed per 1 m². Based on this, you need to calculate the total amount of grout per area to be treated. If you immediately purchase the required amount of material, you can reduce the surface finishing time.
Injection with acrylate gels and polyurethane resins
The technology for injecting concrete and reinforced concrete structures allows you to introduce insulating materials inside the body of the floor slab or create an insulating layer behind its outer surface between the wall and the surface layer. Filling expansion joints, voids, cracks, and even concrete capillaries by injection with polyurethane resins and acrylate gels allows you to create a continuous monolithic barrier to the flow of water, as well as protect the room from negative manifestations of dampness, such as mold and mildew.
Polyurethane resins
Multicomponent mixtures made on the basis of polyurethane resins are hydroactive materials. This means that upon direct contact with a moist environment, they increase their volume, due to which they fill all the most microscopic gaps and significantly increase the strength of the ceiling.
Foaming two-component compositions are rightfully the most economical and multifunctional. With them it is possible to carry out waterproofing at the construction stage of the facility, after its completion, as well as during renovation work of old buildings.
Acrylate gels
Injection materials based on acrylic acid are today used more often than other compounds. With their help, not just a waterproof membrane is created, but the materials of the supporting structure themselves are endowed with waterproofing qualities. Acrylate gels react with concrete molecules within a few seconds, creating a homogeneous composition that is impervious to water and moisture.
Instant polymerization upon contact with water makes it possible to use acrylate gels to instantly eliminate any leaks, without large-scale dismantling work.
Injecting cold seams or joints of floor panels with acrylate gels allows you to create strong, durable and reliable floors that do not allow water or moisture to pass through.
These qualities are especially valuable when performing waterproofing work on floor slabs of multi-level underground parking lots.
An expansion joint is an essential element of a building structure. It divides the building into sections from the ground to the roof, reduces the load on concrete elements of buildings, and protects against cracks due to precipitation and temperature expansion. At the same time, the expansion joint is a place for possible leaks of rain and groundwater.
Manufacturers
Several of the most famous foreign and domestic manufacturers:
- Litokol (Italy). The material is stored for two years at a temperature of +5°C. The temperature must not be allowed to drop, otherwise the components will become hard and lose all their properties. This manufacturer offers grout in 103 colors, including various additional effects. Suitable for both indoor and outdoor use. The price ranges from the smallest (1 kg) - 1300 rubles, the medium (2.5 kg) - 3500 rubles. up to the largest package (5 kg) – 4000 rubles. Positive qualities of the brand's products:
- No smell.
- Suitable for use in rooms with poor air ventilation.
- Easy to apply.
- High resistance to temperature changes and high humidity.
- Mapei Kerapoxy. The main difference between the products of this manufacturer is that the grout has minimal grain size. However, the range of products is limited: only 26 colors are presented. The manufacturer produces a grout of three components, which is even more resistant to acids and other aggressive chemicals. Price 3 kg – 3500 rub., 10 kg – 5600 rub.
- "Diamant" (Russia). The grout is available in an assortment of 46 colors. But it can only be used to treat the bathroom. Sold in packages of 2.5 kg - from 2000 to 5000 rubles.
- "Basic." The epoxy grout from this company is characterized by high resistance to temperature changes (from – 50 to + 75°C), elasticity, hydrophobic properties and is not prone to the development of fungus. The solution is usable within an hour. The grout is available in 29 colors, packing 2.5 kg - 2000 rubles. In general, it has all the properties that are characteristic of epoxy.
- "Fugue". The product has all the properties characteristic of epoxy grout. Suitable for processing both indoors and outdoors. The solution is usable within two hours. The material is available in 32 colors. The cost varies significantly, for example, in online stores you can purchase 2.5 kg of dry mixture for literally 2,000 rubles, while in retail stores the product will be much more expensive.
Whatever company the buyer chooses, when starting to work, it is necessary to read the instructions on the packaging and act on them.
Welded insulation
Polymer bitumen material is often used as a built-up waterproofing of expansion joints. As an addition, a seal in the form of a tourniquet is used. Such a waterproofing system is installed after all concrete work is completed. This material is a very elastic material, and its tensile strength is 1000%, which means that it can stretch 10 times.
The material is produced in rolls, the size varies from 30 centimeters to a meter, which allows it to be used for any seams, even complex designs. The material to be deposited is installed using a torch.
Colors
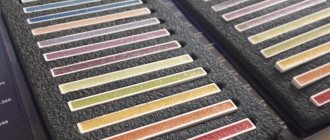
Epoxy material is available in a large number of shades, ranging from light to dark. A common option is to use glitter. If desired, you can purchase a metallized mixture. There are colorless polymer grouts. The choice is made taking into account the shade of the treated coating, the color scheme of the interior and its style.
Using this mixture you can make the surface of the floor/wall more neutral. In this case, use grout 1-2 shades darker/lighter.
To get the appearance of a solid coating, select a material of the same color as the tile.
Another common option is to use grout that contrasts with the base coat. In this case, caution must be exercised, since creating accents in a room where they already exist is not recommended. As a result, the interior design deteriorates.
Waterproofing on the ground
The work is carried out as follows:
- the soil is compacted;
- sand filling is carried out (moistening and compaction);
- crushed stone or expanded clay backfill is performed;
- waterproofing is carried out (using the selected material);
- a rough screed is laid;
- vapor barrier and thermal insulation are installed;
- reinforcement and finishing screed are implemented;
- the selected floor covering is installed.
- rolled bitumen material or polymer membrane is rolled out over the base; All strips are laid out in one direction, the overlaps are fixed with construction tape;
- the material should extend onto the walls by 15-20 cm;
- then the rough screed is implemented.
Waterproofing on the ground requires the arrangement of a drainage system, otherwise the work will be ineffective. Concrete floors on a concrete base with waterproofing are much easier to install.
Protecting a private home from moisture is a serious step that any builder can implement.
How to practically make penetrating waterproofing of concrete is shown in the video:
Sealing the joint between the bathtub and the wall using polyurethane foam
Filling the seam between the bathtub and the wall with foam is one of the easiest ways to solve the problem. Especially compared to the outdated solution method. And one-component polyurethane foam, which has excellent water-resistant qualities, is best suited for these purposes. You just need to work very carefully, since polyurethane foam that gets on tiles, painted surfaces, or even hands is extremely difficult to clean off later.
The “foam” process of sealing seams is simple:
- first the seam is cleaned, degreased and thoroughly dried;
- the foam in the container is shaken properly and poured into the cavity of the leaking joint;
- 40 minutes are allotted for complete foam drying in a room with high humidity;
- excess foam along the edge of the bathtub is carefully removed with a painting knife;
- Then the sealed joint is designed at the discretion of the master.
Important: during the drying process, the polyurethane foam increases in volume several (up to 30) times. Therefore, it is necessary to clearly measure the amount of composition to be laid.
You will see a detailed description of the process of sealing a joint using foam by viewing this review:
Waterproofing materials for floors
To waterproof the floor over the entire area, it is convenient to use environmentally friendly bitumen-polymer based materials recommended for use in residential premises:
Water-based bitumen-polymer emulsion
Water-based bitumen-polymer emulsion
Water-based bitumen-polymer emulsion
Bitumen polymer membrane
Water-based bitumen-polymer emulsion
Water-based bitumen-polymer mastic, cold, ready for waterproofing
One-component, water-based bitumen-polymer primer
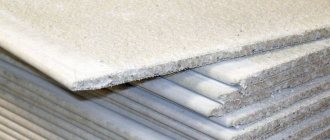
Interfloor and attic floor slabs are typical reinforced concrete products used in the construction of houses. The main purpose is to divide buildings into floors.
In order not to overload the structure, floor slabs can be produced hollow. If floor slabs are laid on the roof, then the voids in the slab can be filled with thermal insulation material. Floor slabs vary depending on the cross-sectional shape. In residential construction, solid and hollow cores are used, and in industrial construction, ribbed ones are used.
Seams between the slabs on the ceiling - do they need to be sealed and with what?
Craftsmen believe that it is necessary to seal the seams on the ceiling. There are several reasons for this:
- Untreated tile joints reduce the sound insulation of the room.
- Due to seasonal temperature changes, the house will move a little, and if the apartment is in a new building, it will shrink. In this case, loose slabs will also “walk”, and the decorative paint will crack and crumble.
- Crumbs and dust may spill out from the seams themselves. Even stretch ceilings will not save you here, since they work like a membrane, that is, with a sharp fluctuation in the air, all the dust will pass through the tension covering into the room.
Recommendations
When sealing seams in ceilings and floors, there are many pitfalls that you should be aware of. Advice from professionals will come to the aid of the “pioneers”. Here are some of them:
- Instead of foam, when sealing seams, you can use regular ceramic tile adhesive.
- If you don’t have a painting mesh (serpyanka) at hand, a regular medical bandage or gauze will do.
- Many people use cotton cloth, which is pre-moistened with water.
- It is not recommended to use silicone-based sealants when sealing small seams. As time passes, yellow spots may appear on the treated area. In addition, it is visible through the paint. The best option is acrylic sealant. It leaves no traces.
- Before processing the ceiling seams, it is necessary to determine the installation of electrical wiring. Such measures will help not to compromise the integrity of the wiring when eliminating cracks.
Finally
Independent work on waterproofing seams between floor slabs is an opportunity to gain moral satisfaction and self-esteem. It is important to save your money. But when dealing with cracks and sealing seams in the ceiling, you need to follow the sequence of actions. Use recommended materials and tools. At the same time, observe your own safety measures, which no one has yet canceled, good luck.
How to calculate the amount of grout
On the packaging of grouting compounds, manufacturers indicate the approximate consumption of the mixture per square meter. But tiles come in different sizes, the seams have different widths and thicknesses, so you have to calculate the quantity yourself. The easiest way to do this is using tables developed by specialists.
If suddenly you do not find the desired option in the table, use an online calculator. This is also a convenient method that allows you to calculate the required volume of grout with maximum accuracy. You need to take accurate measurements of the tiles (length, width, thickness), determine the approximate width of the joint and find out the density of the grout mixture (this information is indicated on the packaging). After you enter all the numbers in the appropriate boxes and click the “calculate” button, the online calculator will give you the result, to which you should add 8-10% in reserve.
Consumption table and palette
There is another option - calculations using a formula. For convenience, let's denote the parameters by letters:
- A – tile length;
- B – tile width;
- C – tile thickness;
- D – seam width;
- P – density of the working composition (for cement grout it is usually 1.6-1.9 kg/d3).
All dimensions are in millimeters, consumption is in kg/m2.
Calculation formula:
material consumption = (A+B)×C×D×P/(A×B)
For example, a tile has dimensions of 300x300x5 mm, a joint width of 3 mm, and the density of the mixture is 1.6 kg/d3. We carry out calculations using the formula: (300+300)x5x3x1.6/(300x300)=0.16 kg/m2.
Formula for calculating the amount of grout
Now, to find out how much grout is needed, you need to multiply the result by the total area of the cladding. For example, you need to cover a section of a wall 3x2 meters, which means the working area is 6 square meters. Let's do the calculations:
6x0.16=0.96
We add another 10% in reserve: 0.96+10%=1.056 kg.
That is, to process the seams you need to buy a little more than a kilogram of grout. If you have not yet decided on the tile, keep in mind that the smaller its size and the greater its thickness, the more grout mixture is consumed. Increases the consumption rate and relief of the facing material.
Table of cement fugue consumption (Table 1)
Table of cement fugue consumption (Table 2)
Preparing connections for sealing
After the material has been found and purchased, you will also have to take care of the availability of all the tools that will be needed for high-quality sealing of seams. To do this you need to prepare:
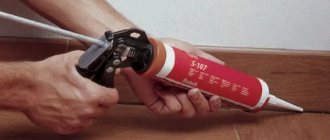
- mounting gun for uniformly squeezing out sealant;
- rubber spatula to remove excess;
- alcohol, acetone or other liquid for degreasing surfaces;
- scotch;
- a soft cloth for final cleaning after completion of work.
The process can begin only after all surfaces have been completely cleaned and degreased. Open areas are protected from material penetration with masking tape. If sealing joints is carried out for the first time after the bathroom has been tiled, then these actions will be enough to prepare for the start of work.
We seal the seams with sealant in the bathroom, swimming pool
If it is necessary to reseal the seams, then the old sealant on them will need to be removed. This process requires painstaking and careful work and is carried out with special products designed for washing. Such chemical materials are now sold in the form of pastes or aerosols.
Before you start using a chemical product, you should read the instructions that come with it, which indicate the cleaning procedure, the time required to let the product sit and the types of surfaces for which it is intended. Just in case, in order not to damage the coating, it is recommended to test the action of the remover on a small, inconspicuous area.
If the test cleaning was successful, then the remover is applied to the old seams and cleaned with a napkin after the time specified in the instructions. If the seam is not completely cleaned, the procedure will have to be repeated. We must not forget that working with chemicals should be carried out in compliance with safety regulations: that is, ensure the room is ventilated and wear rubber gloves and a respirator.
Concrete floor in a private house
Sealing concrete floors in the basement can be achieved by laying the so-called “pie”:
- crushed stone;
- fatty clay;
- thin concrete layer;
- a layer of mastic with waterproofing properties;
- roll waterproofing - two layers;
- thin concrete layer;
- reinforced screed.
In this case, it is highly not recommended to use films and membranes, since they are not able to withstand seasonal soil shifts when there is high friction between materials and the foundation.
Waterproofing the concrete floor of the first floor must take into account possible shrinkage if work is carried out during construction
Waterproofing a concrete floor in a basement should always be multi-layered, since its recess will likely be exposed to groundwater, particularly in the spring.
