A roof with two slopes over garages is built a little less often than a single-slope analogue. Although, according to a common misconception, one slope requires less costs, a “house” structure is often cheaper to build. Water flows freely from its inclined surfaces, so there is no point in laying multi-layer waterproofing.
There is no need to install parapets that increase the consumption of materials. The simple construction process is quite accessible to the home craftsman if he knows how to construct a gable roof for a garage in strict accordance with the technological instructions.
Stages of building a hipped roof
The first stage of building a roof is determining the purpose of the roof (covers the attic floor, attic, etc.), choosing the roofing material (depending on this, the list of materials for construction will be determined), taking into account the atmospheric conditions of the place where the roof will be used (wind, rain , snow).
Choosing a hip roof will give the building greater resistance to rain and make it more durable (the rafter system is more reliable). The main difference between this type of roof and a gable roof is that instead of side gables, it has two triangular roof slopes.
When choosing the angle of inclination of the slopes, you should take into account the level of precipitation and wind characteristics of the area. For low and medium annual precipitation, it is recommended to choose an angle within 4-40 degrees. In case of heavy snowfalls and prolonged rains, the recommended optimal angle of inclination of the slopes is within 40-60 degrees.
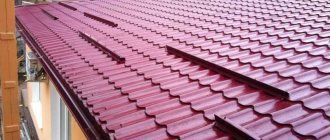
The roofing material can be: rolled roofing, tiles or metal tiles.
Depending on all the above nuances, the thickness and other parameters of the wooden component of the hipped roof will be selected.
The end result of the first stage is the creation of a diagram of the future roof, on the basis of which construction will be carried out.
We will describe further technology on how to make a hipped roof with your own hands.
The second stage is to build the base for the roof. The base is used to evenly distribute the load from the roof to the load-bearing walls. The construction of a hipped roof requires a base that can be built on your own - a wooden mauerlat and benches. Waterproofing is required under the base to extend the service life of the roof. A mauerlat is placed on the hydraulic barrier along the outer contour of the building (the size of this beam varies, either 100x150 mm, or 50x150 mm).
Lezhni - a beam located in the plane of the base of the rafter system at the same distance from the two side mauerlats. It serves as a supporting element for struts and racks, so it is laid on load-bearing partitions (see drawings of a hipped roof). Large roof structures may include several roof decks.
The third stage involves the direct installation of the roof frame (base, rafters, sheathing).
Structurally, the construction of a roof in a house with or without existing floors differs (in this case there is no need to lay floor beams on which supports will be installed).
The installation of racks (vertical supports of the roof frame) should be approached with particular care. It is necessary to accurately maintain the installation angle (90 degrees). At the slightest deviation, further deformation of the roof is possible. The installation step of the racks is up to two meters.
The structure of a hipped roof of a house consists of four planes (slopes). Two trapezoidal and two triangular. Trapezoidal slopes will be formed by side rafters, hip (triangular slopes) - by slanted (diagonal) rafters.
The rafters at the top of the frame are supported in the ridge beam (purlin). This beam goes on top of the vertical posts (possibly a groove connection with the posts). The distance between the rafters is from 50 to 150 cm (according to the roof plan). The recommended width of the rafter board is 150 mm.
The frame is fastened using corners and steel plates with self-tapping screws (nails). To strengthen the resulting structure, diagonal supports, struts, and wind beams are used. They allow you to increase the permissible load of the system.
Waterproofing is laid on top of the rafters. Then a counter-lattice is made (bars that are attached to the rafters on top of the waterproofing). It is needed to create a ventilation channel between the roofing material, sheathing and waterproofing. This will allow moisture to be removed quickly and effectively. Next, the sheathing is performed - horizontal boards are attached from the bottom to the very top to the counter-lattice (see diagram of the hipped roof structure).
The last step is the installation of roofing material. Installation is carried out depending on the parameters of the material. Example of installation of metal tiles.
Useful tips
So, we talked about different technologies for constructing lean-to garages. I would like to give a few recommendations that will affect the quality of the final result.
The first concerns the direction of roof slope. It should immediately be noted that the slope itself can be formed both in the longitudinal direction, that is, from the facade of the building to its rear wall, and transversely, from side to side. In this case, the slope must be installed so that the wind always blows in its plane, pressing it against the building, and not on the other side, lifting it.
As for the angle of inclination, the optimal value is 25-300. There is no point in doing more, such pitched roofs simply look awkward, and the wind load increases greatly. Low-slope roofs (less than 100) must also be erected with great care. Because the snow load on them increases.
Huge snow load on the garage roof Source pikabu.ru
The cross-section and installation pitch of the rafters of a pitched garage roof are important indicators. To calculate them, you need to know a fairly large number of different indicators. For example, snow load, wind load, weight of roofing material, insulation and other elements and layers. This is actually a complex calculation that experts carry out, but it is very important. Today it is possible to carry out calculations using online calculators. It is convenient, simple and quite accurate.
And one last piece of advice. Typically, a pitched garage roof is constructed from lumber. Therefore, the entire structure must be treated with an antiseptic, which will protect the wood from insects, mold and mildew. They reduce its quality technical component. After drying, a second layer is applied - a fire retardant, which is responsible for the fire resistance of the wood.
Garage roof: main types of garage roofs, selection of materials and design ideas (110 photos)
Many car enthusiasts value and love their cars very much, so if possible they try to hide their car in a warm and cozy garage. However, not every car enthusiast has a warm and cozy garage. But many car owners decide to build their own garage.
Of course, it’s not at all difficult to build brickwork; the difficulty lies in building a garage roof. Therefore, many initially have a reasonable question: how to make a garage roof with your own hands?
It is possible to build a garage roof on your own if you have basic builder skills and a general idea of the final result of the construction.
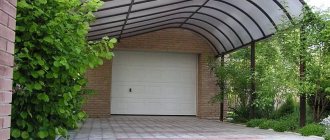
The simplest and best option when building a roof on a garage is a pitched roof. Assembling such a structure will not be a big problem or difficulty, and this option has its advantages:
- does not require any experience or knowledge
- does not require large financial expenses
- The construction process will not take much time, usually no more than 3-4 days
- the design of such a roof has a long service life
Advantages and disadvantages
The above photos of hip roof options show their obvious feature - the presence of four slopes that completely cover the house.
This factor provides several advantages:
- High security. This design prevents wind from entering. Moisture, ultraviolet radiation.
- Durability. Homes and coverings.
- Practicality. Under such flooring there is a large space that can be used as a room.
- Illumination. Several attic windows will add light.
- Design. Variations in coverage and the possibility of installing window openings on all sides will give the estate a special chic.
However, it is worth remembering the disadvantages: high price, complex installation and durability.
Determining the slope angle
In the process of designing a garage, it is very important to correctly and correctly slope the slope; this is necessary for water drainage during rains. In this case, it is necessary to install supporting walls with different levels. However, the slope of the slope depends on various nuances.
Features of climatic conditions. In this case, it is recommended to make slopes based on the characteristics of the climate, for example, in a climate where there is a large amount of precipitation in the form of rain and strong and gusty winds, it is recommended to make a slope of no more than 5-7°. But if the climate is more severe with a lot of snow, in this case it is recommended to make the slope no more than 25°.
Selection of roofing material. Of course, one of the most important questions in roof construction is how to cover the garage roof? Basically, bitumen-polymer rolls or the so-called “roofing felt” are used for roofing garages; it is also good to use slate or sheets of steel or metal tiles for such purposes.
However, they all have different slope angles. For example, “roofing felt” has an indicator of no more than 10°, for slate it is recommended to have a slope of no more than 20°, but for metal tiles a slope of about 25° is typical.
External view of the architectural panorama of the site. In this case, it is necessary to maintain almost the same slope of all roof structures; this is necessary to create a single general panorama of the site.
Half-hip
The half-hip variety is distinguished by the ability to add more complex structures instead of triangular slopes. For example, a triangle slope is placed on top, and the bottom ends in the shape of a trapezoid. This makes it possible to create a comfortable entrance to the attic compartment or attic window. The trapezoidal bottom can also be made in the form of a slope.
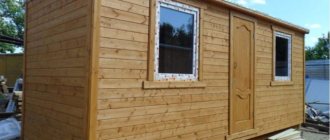
Assembling a pitched roof for a garage
Before purchasing materials, it is necessary to accurately count everything again, and only after that can you purchase everything necessary for construction. In fact, building a shed roof for your garage is not that difficult.
You just need to do everything consistently and slowly. It is advisable that you have a drawing of the roof, which will serve as a clear guide to action.
Roof insulation is also important. Therefore, many do not know how and how to insulate a garage roof? The process of insulating a garage is considered almost the final stage of construction. To insulate a garage, you can use almost any insulation.
The insulation is laid between the rafter beams, and they must fit tightly together. To insulate a lean-to garage, you can use insulation with a thickness of 20 cm.
Thus, you can do the garage roof repair yourself. At the same time, there is nothing complicated in the construction process. The only difficulty is that in some moments the help of assistants will be required. This is due to the fact that the beams and rafters are long and heavy and they need to be held somewhere, so helpers are needed here.
If you have any difficulties choosing a roof design, here you can see colorful and illustrated photos of a garage roof. You may like some option.
Metal roofing
For garages, corrugated sheeting is usually used. This is an inexpensive, durable and lightweight material. Due to its lightness, you can reduce the cost of installing a rafter system by choosing beams of a smaller cross-section. Corrugated sheeting is installed in a similar way to slate, but in this case special self-tapping screws with rubberized heads are used.
When installing a metal roof, waterproofing must be done. Polyethylene film or roofing felt can be used as a waterproofing material.
The waterproofing is laid on the sheathing, and metal sheets are mounted on top. If necessary, the roof can be insulated by installing heat-insulating material from the inside between the rafters.
Main types of pitched roofs
The construction of a roof over the house is a sure indicator that capital construction is moving towards a logical and long-awaited conclusion, that work on improving the rooms will soon begin, from gluing wallpaper for painting to varnishing new doors and installing the ubiquitous PVC windows. But any internal repair must be based on the absolute reliability of the roof - it must be airtight, warm, durable and visually attractive.
Of all types of roofs with a pronounced slope, a roof with four slopes is considered the most reliable due to the uniform distribution of the load - and it is also characterized by difficult installation . Therefore, a description of other roofing methods will not be superfluous; “the roof of your house” can be made according to different design schemes:
- A pitched roof between two long walls. Installation of a hip roof of this type is often relevant for auxiliary buildings (garages, workshops, sheds, etc.), it is quick and simple. Roofing work on a pitched roof can serve as a good “repair school” before erecting more complex structures over residential buildings;
- The roof is gable - it covers a classic Russian hut, with a ridge and a spacious attic. If the house plan is similar to an elongated rectangle, then a gable roof will be a budget-friendly and reliable repair solution that can be done on your own;
- A mansard roof is a variant of a gable roof, with broken elements of the roof structure instead of straight ones. The result is not a banal attic, but a completely residential attic under the roof itself - for the sake of expanding the living space, such a covering is used;
- A hip roof is a roof with one or more peaks, the “poles” of a converging roof. It usually covers complex, polygonal buildings, with numerous outbuildings and extensions. It is extremely difficult to build a hip roof yourself; you will need to hire specialists from a reputable repair company;
- A simple hipped roof is built over a house with a strictly square plan, all its sides (hips) are equal to each other. Installation of a hipped roof of this type is simpler than other options (see below);
- The roof is hipped rectangular - if the length of the load-bearing walls is unequal, two end slopes will be triangular (like a square structure), and the other two will look like identical trapezoids;
- A complex hipped roof is a variant of a rectangular design with additional bay windows, dormer openings, attic windows and other protruding elements.
As can be seen from this extensive list, there are many options for “roofing” residential and non-residential buildings - and each of them requires preliminary planning, even a basic pitched roof. The hipped roof, the calculation of which is more difficult than others, deserves special consideration.
Hip roof - design calculation
The basis of any sloped roof is the rafter structure. The smaller the slope, the stricter the requirements for the load-bearing capacity of the rafters. A small roof slope angle is unfavorable; it will require powerful base beams, their frequent arrangement, mutual tying with lintels and other structural difficulties. On the other hand, too “steep” elevation angles will lead to significant costs for roofing material, and very expensive metal tiles or composite slate are used for the roofs of residential buildings.
Therefore, the angle for a sloping roof to the horizon is most often taken as 20˚-40˚. This slope value allows you to use standard beams for rafters, insulate and soundproof the roof of the house, and guarantee reliable drainage of precipitation. It is possible to facilitate the mathematical preparation stage with the help of modern network communications.
The online calculator on the website will calculate a hipped roof quickly and free of charge. Just keep in mind that the result of the software calculation directly depends on the accuracy of the input data, namely:
- Length and width of the roof opening;
- The selected angle of inclination of the roof to the horizon;
- The dimensions of the roof overhangs behind the wall line:
- The type of roofing material, the mass per unit area and the size of the overlap of one sheet on another;
- Installation costs for cutting both rafters and the metal tiles themselves, corrugated sheets, etc.
The result of the calculations can be performed in several versions - with different cross-sectional sizes of the rafters, the pitch between them and other details. In general, constructing a new truss structure with your own hands is not recommended; it is better to carry out this stage by professional craftsmen.
With the guaranteed reliability of the rafters and their high-quality installation, further work on insulating the roof, creating an acoustic barrier, vapor barrier, and constructing the roof itself is quite doable on your own. As a last resort, trust the craftsmen to lay out the “skeleton” of the rafter structure - that is, the corner beams going to the corners of the house, and decide on the spacing between the joists. Further roofing work is permissible in independent mode.
Slate
The main advantages of slate are affordable price and long service life.
- A roof covered with slate will last about 40 years without repair. Lay overlapping sheets on a wooden sheathing.
- For fixation, special slate nails with wide heads are used.
- Due to the relatively high weight, the requirements for the reliability of the rafter system increase, so for its installation it is necessary to use a beam of a sufficiently large cross-section - at least 8x10 cm. For waterproofing, roofing felt is usually used, mounted on the sheathing.