When space on the site is limited, when the arrangement of the dacha does not involve the construction of a permanent house or a project for it is just being created, a gazebo with a utility block is needed.
The outbuilding itself is indispensable on any suburban area, especially where there is a vegetable garden. Most often, it is built with your own hands, since it is not a complex structure. And also, the owner himself knows better what purpose such a barn should serve and what size and shape it will be.
The utility block is often made in the form of an individual structure with one function - storage of garden tools. This is appropriate when the area of the dacha is large and there is no need for other additional household structures.
Photo: architectural design of a gazebo with utility room and barbecue area
Most often, the project is carried out combined:
- change house, shower, toilet;
- barn, summer kitchen, carport or firewood, garage;
- utility room, bathhouse, rest room;
- a room for tools, a gazebo, a stove and much more (there can be infinitely many combination options).
Photo: Finnish grill house
3D model of a gazebo with a garage
Project of a summer kitchen with a utility room
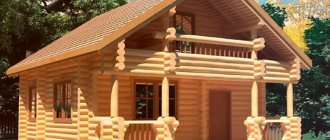
The most common project is to combine a cabin with a veranda or gazebo. They are built under one roof or have individual roofs, are made of various materials, and have their own design features.
Garden gazebo made of wood with storage room
Project of a canopy with a utility block
What is a utility block with toilet and shower?
The name of the utility block with toilet and shower speaks for itself; it is a combined structure that allows you to combine several rooms for various purposes. Such premises can be not only a toilet and shower, but also a storage room, garage, shed or a place for a recreation area.
Large utility room with toilet and shower
Such buildings were previously used to store various things and garden tools. But, subsequently, they were assigned a different role. They began to be used more purposefully, equipping a kitchen, shower or veranda inside.
The size of a utility block with a bathroom and shower may vary, depending on what goal a person pursues when erecting such a structure for his dacha.
The advantage of such premises is that several sections of a certain value can be placed under one roof.
Household plan
In one utility unit you can place:
- Storeroom, garage, shed, toilet, shower, veranda.
- Toilet, shower, terrace, veranda.
- Shower, toilet, bathhouse, garage and storage room.
Closed summer kitchens
A closed summer kitchen, completely protected from the wind and other weather surprises, will perfectly serve as a guest house. And if you provide good heating, it will be suitable for living in winter. Examples of closed summer kitchens in the country are in the photo below.
A closed summer kitchen with a sofa and a dining area is a complete, durable home with obvious advantages. Neither rain, nor snow, nor mosquitoes will drive you away from the table, will not disrupt your plans, and even more so, will not damage the furniture and equipment. But more materials are needed for its construction.
What can the construction be made from?
Household units for a dacha can be of two types:
Wooden utility block with toilet and shower
- Capital.
- Temporary.
Temporary outbuildings are needed for a certain period of time while construction is underway or other work is underway. Upon completion of construction, they are demolished as unnecessary. Therefore, for construction you can use any available material:
- board,
- slate,
- Ondulin, not even new.
Capital buildings with a bathroom and shower require more attention. Typically, a utility block for a dacha consists of a foundation, walls, roof and doors. When building such buildings with your own hands, it is recommended to use:
- tree,
- brick,
- gas blocks,
- foam blocks.
In order to determine the amount of material, you need to draw up a drawing or project.
Outdoor summer kitchens
Open buildings are those in which walls, and sometimes even a roof, are completely or partially absent. These include gazebos, pavilions, canopies, patios or pergolas.
This is a great opportunity to organize a kitchen with a barbecue or other source of fire. An open kitchen won't cost you much. It is quickly erected and does not require exhaust hood, heating, a strong foundation or professional construction skills.
Having dug a pit 15-20 cm deep, you fill it with sand or crushed stone, compact it, and then lay terrace boards, brick, stone or paving slabs - that’s the foundation.
Important: the roof in an open structure must extend beyond the boundaries of the building - this way it will save you as much as possible from slanting rain.
The absence of windproof walls and free circulation of air masses is both an advantage and a disadvantage of an open kitchen in the country. On the one hand, the wind saves from the heat and fans the fire. But in the company of rain and cold, it makes your stay in nature uncomfortable, and open structures - short-lived buildings for seasonal purposes.
Open kitchens are often used to create cozy outdoor dining areas. The walls will be partitions decorated with climbing garden plants or trees.
Clematis, bindweed, grapes, kiwi, vines - select plants so that they bloom one after another, and your kitchen is constantly transformed in color. A beautiful and useful wall substitute for the dining room would be a mosquito net with a pattern, long curtains or roller blinds.
To get an idea of the variety of open summer kitchens, take a look at these photos.
Household projects
This stage of construction involves not only choosing the location of the utility block, but also drawing up its design. On paper you need to indicate all the dimensions of the structure and internal partitions. This will allow you to fairly accurately determine the amount of materials.
Variant of the utility block project
The utility block for a summer residence can be made in several versions.
For example, you can take the following projects as a basis:
Project 1
Utility block with toilet and shower (Project No. 1)
This building has a rectangular shape, 4 meters long and 2 meters wide. In such a room you can place a toilet, shower and shed. Each room has its own door, and the middle room also contains a window. You can calculate the dimensions of each room yourself, based on your capabilities, or use the data provided. Sometimes you want to watch some homemade porn, made with love. But sometimes there are difficulties with choosing a genre to watch. Eat. for example, such a genre as homemade FFM porn video, where two girls try to give maximum pleasure to a guy, bringing him simply to the cosmic magnitude of orgasm. that reaches right up to the Earth’s orbit, which can be observed from the link,
Project 2
Utility block with toilet and shower (Project No. 2)
This project also has a rectangular shape and three rooms, where it is also planned to place a shower, a toilet and a shed. But there are slight differences between the first option and the second; the rooms have an internal connection. The room contains one door and two windows.
Project 3
Utility block with toilet and shower (Project No. 3)
The third project has a slightly different arrangement of rooms. Two narrow rooms are designed for shower and toilet, and one large one is reserved for a barn. Each room has its own door.
Project 4
Utility block with toilet and shower (Project No. 4)
The fourth project offers another option for placing rooms. Where the doors of the rooms are located on two opposite sides of the building. Small rooms are reserved for toilets and showers, and a large room is reserved for household needs or a shed.
Optimal place
Finding the best location for a new building is perhaps one of the most difficult parts of the project. Based on placement, summer kitchens are divided into two types: free-standing structures and extensions to the main house.
But here's what you need to consider. On the one hand, the summer kitchen in the country should be closer to the house, because it will be easier to establish communications. But then smoke and heat can enter the house, causing inconvenience. Therefore, it is important to find out in which direction air masses are most often directed.
Like any place for preparing or eating food, the kitchen should be located away from the toilet, chicken coop, doghouse, roadway, compost pit and other sources of unpleasant odors.
Cooking in the sun is not a pleasant task, so the proximity of a dense tree crown will not hurt.
And, of course, everyone would like to enjoy a magnificent landscape, garden or vegetable garden, and not the wall of a neighboring house. At this point, a compromise is possible - a partition decorated with climbing plants, textiles, stained glass or decor that will hide the unsightly appearance.
It is also necessary to take into account that a closed summer kitchen requires a deep foundation.
Preparatory activities
Before you start planning the outbuilding itself with a toilet and shower for your dacha, you need to choose a suitable location on your dacha plot. The building must fit harmoniously into the landscape of the site along with other buildings.
Recommended distance between buildings in the country
In addition, there are a number of other points to consider:
- Since the utility block will be equipped with a bathroom with a shower, it will also have a drainage hole that needs to be cleaned periodically. Therefore, such a structure must be placed near the fence.
- The drainage pit should be located at a distance of 15 meters from residential buildings.
- Large trees should not grow nearby, and there should be no underground communications.
- In addition, it is necessary to provide underground tanks into which sewage will be collected.
Conclusion
I tried to talk about the most popular options for sheds with a utility unit and give the most economical assembly schemes. The video in this article shows alternative options. If you have any questions, write in the comments, I will try to help.
A gazebo equipped with a utility room can be used for both summer and winter.
Related article: Increase in electricity consumption for no reason: what to do
How to build a utility block?
The modern market can offer a wide range of projects for outbuildings for a summer residence. If you have a little knowledge in the construction business, then you can easily make a utility block with your own hands, guided by the plan outlined below.
The sample will be a rectangular utility block with a bathroom and shower for a summer house with dimensions of 6m x 3m x 3m.
First stage
Marking the perimeter for the foundation. The pillars will be located at the corners of the building and in the center of the six-meter walls. The first thing to do is to remove part of the soil 20 cm deep, and in its place pour a ten centimeter layer of sand. The sand cushion should be compacted well.
Foundation diagram for a utility block
Now you can start preparing the holes for the pillars. The depth of one hole should be 1 m 20 cm. Before lowering the post there, a layer of fine gravel or sand should be poured onto the bottom and compacted well. After this, the pillars are lowered into the prepared holes, and, after checking them for verticality, they are carefully covered with sand.
If metal pipes are used instead of wooden poles, then their inside must be filled with concrete mortar by 1/3 and raised slightly so that the mortar forms a stable and durable base.
Second phase
Laying the foundation and installing the base of the utility block
While the foundation dries, you can start building the base of the frame. For these purposes, you need to take a wooden beam (15 cm x 15 cm) and make the base of a rectangular frame from it. The corner parts are fixed “half-wood”; self-tapping screws are used for the grooves. Between the foundation and the frame you need to lay a roofing felt layer, the edges of which need to be bent down. For greater strength, the frame can be reinforced with three transverse joists. For them, a 10cm x 10cm beam is used.
Third stage
Once the base is ready, you can begin making the frame yourself. A beam with a smaller diameter is used for it. The frame begins to be assembled from the end parts, taking into account that windows can be made on these sides.
Construction of the frame of the utility block
Vertical posts must be secured with steel angles and self-tapping screws. To secure the post to the foundation reinforcement, a hole with a diameter of 1 cm is drilled in its base. Having thus installed all four corner posts, they need to be strengthened with additional elements and struts.
The front part of the facade is mounted in this way: the middle pillars must be fixed in increments of 1 m 80 cm. To prevent them from moving during installation, they are temporarily connected with a board.
The selected project has two compartments, so you will need to design 2 door openings and one partition. The size of the doorways is 2 meters high and 85 cm wide.
The rear facade is assembled in the same way, only the work is simplified by the fact that there are no doors or windows.
The final touch is the upper junction at a height of 2 m. A beam with dimensions of 5 cm x 10 cm is used for it. It is formed from individual elements that are butted together using galvanized corners.
Fourth stage
DIY gable roof
This stage involves the construction of rafters and roofing. It is recommended to assemble the rafters on the ground, and when they are assembled, they are installed on the frame. The tilt angle should be about 10 degrees. The rafters must be secured using self-tapping screws, and the overhangs and cornices must be sheathed with edged boards.
Fifth stage
The fifth stage includes interior and exterior finishing. Roofing material, slate, tiles or sheet iron must be laid on the roof. Hang doors and install windows.
Slab selection
Even in ancient times, the construction of a house began with a stove. Today this is not the case, because there are a lot of heating devices, and their use is often limited only to cooking.
The type of kitchen stove must be determined in advance - since this determines what gas pipes or cables to install.
Most often, a regular gas stove is installed at the dacha. According to the older generation, it is easier to cook with it and costs less. If it is not possible to supply gas, you can use a propane cylinder or opt for an electric stove.
For lovers of barbecue and grilling, there are portable kitchens that can be moved from open air to a canopy and vice versa.
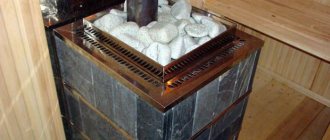
Fans of multifunctional items will appreciate heating and cooking stoves or stove complexes. After all, a Russian, Swedish or Dutch stove can be not only a fireplace and a means of cooking, but also an effective way to heat adjacent rooms of the house - for example, a bathhouse, sauna or shower room.
By installing a metal tank near such a stove, you will provide the kitchen in your country house with hot water (which is very convenient when washing dishes and cans).
If purchasing new equipment or building complex structures is not part of your plans, and even more so when you strive for maximum closeness with nature and want to build a fire source with your own hands, make a barbecue.
- do not intend to purchase new equipment for the dacha;
- you do not plan to build complex structures;
- do not trust portable structures;
- want to arrange a place for fire yourself -
Build a grill. This useful prop for the dacha can be made with your own hands.
Country life is unimaginable without a barbecue, which you can easily make with your own hands. (the word “construction” appears in other parts of the text).
To lay out the area in contact with fire, you will need a fireproof material - for example, fireclay brick, mortar or clay. The outer layer of the grill can be decorated with river or facing stone.
An alternative eco-fuel to gas and electricity - firewood - will definitely reduce your heating costs, especially if a forest is nearby. But, as with everything, it also has its drawbacks, because cooking with wood requires:
- regular cutting and harvesting;
- storage;
- annual chimney cleaning.
Now we move on to the next step: choosing the type of construction.
Technologies
Our wooden outbuildings are strong and massive structures. Be sure to pay attention to the thickness of the material, the Shinglas soft roof, as well as the windows, doors and foundation included in the price. Behind the walls of the constructed structures you will always be protected from the scorching sun, rain and wind.
Our company is a manufacturer and uses high-tech equipment! This is why our prices are so low and clients can build relatively inexpensively. All products and work are guaranteed .
According to the deadlines. The wall kit, joists and rafters are pre-fabricated at the production base. Then the disassembled material is delivered to your site, after which the craftsmen begin assembly. The boards or beams themselves are supplied profiled, which allows you to optimize the process of installing the utility unit and within 1 day .
Economy options
Many people dream of a summer kitchen in their country house, but often the prices for the stone most suitable for its arrangement direct our enthusiasm to something else. But in vain...
After all, a kitchen can be made from scrap materials, you just need to use your wits. For example, old window frames will reduce the cost of building an enclosed kitchen.
True, this will not save you from the need to lay the foundation.
Alternatively, a summer kitchen can be made from a railway container. It is possible that purchasing a ready-made change house that does not require additional finishing will cost much less than construction.
But still, a summer kitchen project in a country house, which falls under the category of economy class, most often involves an open-type construction. And since the concept of “simple summer kitchen” is very individual and flexible, let’s look at several different options.
1. A stove, sink and work surfaces united by an island, located on a common foundation with the house in the open air. Stone, plastic, stainless steel and thoughtful design will protect the island from the influence of moisture, but the awning installed nearby will save you and the prepared dishes.
2. Conversion of a gazebo, veranda or terrace into a summer kitchen.
3. Connecting two existing buildings with a common roof made of tarpaulin or lighter waterproof materials.
4. Stakes or metal supports covered with vines as walls and a thatched roof.
5. Arrangement of a summer kitchen near the fence wall: all that remains is to add an awning or a pitched roof.
6. Open or closed kitchen made of adobe - a mixture of earth, clay, hay and other available materials. True, adobe is suitable for buildings in hot, arid climates.