/Repair/Plumbing/
So, you bought a faucet to replace an old one or to equip a sink with a new set and decided to take on the installation yourself. On the one hand, connecting and installing a faucet on the sink with your own hands is very simple - anyone can do it. On the other hand, even having some experience, but not knowing the basic rules, you can do the work poorly or completely ruin the product, for example, by knocking off the thread, bending the connections, etc. Another reason why you still have to contact a plumber is this is the lack of a set of plumbing tools. But this problem is completely solvable, because you can always ask your friends for something.
We tried to explain as clearly as possible how to install a faucet in the kitchen with your own hands, reliably and correctly.
Mixer installation features
First of all, you need to determine how to install the equipment. In particular, the mixer can be installed on a countertop, on the sink body or on a table. Before you cut the sink into the countertop, you need to think about all this. In addition, it is necessary to consider the location of hot and cold water supply pipes. It is very important to provide free access to the joints in case of unexpected repairs. Also, when solving the problem of how to assemble a faucet in the kitchen, you should take into account the installation of additional equipment, for example, filters for water purification. It is necessary to foresee its location in advance.
Gander replacement and repair
To verify the cause of the gander leak, you first need to unscrew it and check the condition of the gaskets and nuts. To do this, you may need the following set of tools:
- Wrench;
- Rags – for preserving nickel and chrome plated surfaces;
- Gaskets;
- Fum tape.
Step-by-step list of actions for replacing the gander in the mixer:
- Close the main mixer valve;
- With one hand, fix the mixer body, and with the other start turning the key;
- Remove all handles
- Remove the gooseneck. To do this, pull it up in a vertical position or down if the mixer is wall-mounted.
How to choose the right kitchen faucet
Almost all faucet models are used in conjunction with a sink, so when choosing and installing a faucet in the kitchen with your own hands, you need to consider the following:
- Dimensions and depth of the sink.
- Distance from the wall to the hole for the mixer.
- The diameter of the technological hole intended for installing the mixer.
- Location of the drain hole.
In addition, when installing a kitchen faucet, it is important to pay attention to the length and height of the product. The end of the spout should be in the center of the sink, and its height should allow you to place a tall pan. However, it is worth understanding that when water is supplied from a faucet that is too high, splashes will be created that will fly outside the sink.
Another important parameter is the angle of rotation of the mixer. For a sink located a short distance from the wall, it is recommended to use a faucet that rotates 900. For a sink with two bowls, it is better to purchase and install a faucet in the kitchen with a rotation angle of up to 3600.
Preparation of materials and tools
Before changing the faucet, you need to prepare a complete set of tools and consumables.
The following tools will be needed:
- adjustable or open-end wrench 10-12 mm;
- tubular wrench for tightening hard-to-reach nuts;
- pliers ; screwdriver;
- rag;
- basin or suitable sized bucket,
- flashlight.
Materials you will need:
- installation kit supplied with the device (stud, O-rings, nut and mounting half-washers);
- sealing fum tape or flax with special impregnation (English Tangit sealant is especially suitable);
- silicone sealant;
- flexible liner.
The length of the hoses is selected in such a way that the hose does not break at an acute angle, but is not stretched.
Before replacing the faucet in the kitchen, it is advisable to purchase new supply hoses (often included with the new faucet).
Bellows or reinforced hoses can be used as connections.
- Bellows connections are made of stainless metal and are highly reliable and high in cost.
- Reinforced hoses are more common due to their low price and sufficient reliability.
You can indirectly determine which kitchen faucet is better by the quality of the connections.
Reliable products have the following characteristics:
- braid made of stainless steel or aluminum;
- ethylene propylene rubber (EPDM) hose.
- tips and fittings made of stainless steel or brass.
Appearance
The appearance of the faucet is of great importance when looking for solutions for how to install a faucet in the kitchen, since the plumbing equipment must be selected in accordance with the design style of the kitchen. In specialized stores, mixers are presented in a wide variety. These can be models made in loft, hi-tech, classic and minimalist styles. The shape of the faucets can be chopped or streamlined; in addition, chrome, copper or black products are produced.
As for the cost, it is important to adhere to the rule: the higher the price, the better the quality of the plumbing equipment, including faucets.
Design selection
Each mixer model is characterized by the presence of certain design features. Single-lever products are distinguished by their practicality. This design allows you to regulate the flow intensity and temperature using one lever. Mixers with two valves are less practical, but fit perfectly into the classic kitchen interior.
Some models are equipped with a special motion sensor; they are classified as non-contact products. When you bring your hands to the faucet, a sensor is triggered and water starts flowing. For the kitchen, this option cannot be called suitable for solving the question of how to install a faucet in the kitchen, since very often it is necessary to draw water into various containers.
The main factor influencing the cost of mixers is the alloy used and the brand of the manufacturer. The most affordable products are made of silumin and other cheap alloys. Such faucets have an attractive appearance, but quickly become unusable. This is explained by the fact that the manufacturing material itself is prone to cracking and quickly turns into crumbs.
High quality faucets are made of brass with a layer of nickel, aluminum or chrome. This increases the attractiveness of the products and makes them more resistant to wear.
Things to consider before starting installation
Several recommendations for choosing a mixer. Let's start with the basics. Mixers are:
- two-valve;
- single lever;
- thermostatic;
- contactless.
Even though it's 2021, some people still prefer to go with two-handle faucets. Why not? After all, the design of such a unit is very simple:
- two valves;
- axlebox tap, which allows and retains water flows;
- gaskets made of rubber.
Preparatory work
Before you begin to solve the problem of how to connect the kitchen faucet to the water supply, you must definitely turn off the water supply to your house or apartment. Otherwise, you may encounter serious troubles when installing the mixer. In addition, it is necessary to open the tap at the water collection point to drain the remaining liquid.
Then you can begin to prepare the necessary tools and materials. In most cases, the working set for solving the problem of how to install a faucet in the kitchen consists of the following:
- Screwdrivers of different types. Most often, the work requires a Phillips and flat-head screwdriver.
- A set of socket wrenches and an adjustable wrench.
- A self-contained lighting device, such as a flashlight.
- Sandpaper.
- Flexible hoses.
- Tow.
- A special composition WD-40, which is used to treat stuck compounds
Before assembling the faucet in the kitchen, you need to take care of the new connection to the mixer, this will ensure the tightness and durability of the connections.
Is it necessary to install ball valves in front of the mixer?
The ball valve has only two operating positions:
- open,
- closed.
Installing such a tap allows you to cut off the tap from the water supply for repair or replacement. However, in practice this does not always make sense.
As plumbing experts recommend, first you need to study the water distribution diagram throughout the apartment. If there is already a ball valve immediately after the outlet from the riser, then there is no need to duplicate it. If desired, you can install a valve or reducer that will help limit the water pressure in the tap.
Removing the old faucet
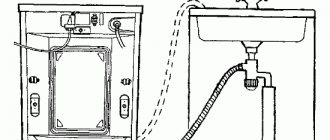
Before you start solving the question of how to install a faucet in the kitchen, you need to dismantle the old device. First of all, you need to determine the places where the mixer connects to the hot and cold water supply pipes. Then inspect the structure and find the place where the faucet is fixed on the sink. Using an adjustable wrench, the flexible connection of the mixer is disconnected from the pipe. To avoid flooding the workspace with residual water from the plumbing system, it is recommended to place a small container.
When connecting a faucet in the kitchen, a surface-mounted sink must be carefully removed, having first disconnected the lower part of the siphon. Next, the sink is turned, providing access to the place where the mixer is attached to the side of the bowl.
The connecting nuts are unscrewed using an adjustable wrench. First, loosen the nuts on the threaded pin a little, then use a screwdriver to unscrew the pin itself. Throughout the entire process of attaching the faucet to the sink, it is recommended to hold the mixer slightly to prevent it from falling.
In some cases, when installing a faucet in the kitchen, it is not possible to unscrew the connection nuts the first time, since rust may form in these places, and the parts being connected may stick to each other. The problem can be solved using a special WD-40 compound that is used to treat the fastener. After 10-15 minutes, you can safely begin to unscrew the connecting nuts.
Then the mixer is removed along with the clamp, and if necessary, the old hoses are replaced with new products. The hole for installing the mixer is cleaned of accumulated dirt. It is recommended to dispose of the dismantled old mixer.
Installation of a new mixer
Before you begin to resolve the issue of how to properly install a faucet in the kitchen, you need to connect the product to the liner. The joints are wrapped with tow, which ensures maximum sealing of the system. Tow should be wound onto the threads of flexible hoses before connecting them to the mixer. When adding a drop of drying oil to the tow, the material does not bunch up towards the base of the thread during the tightening process.
Each mixer is equipped with an annular decorative gasket, which is a metal element with a rubber layer. Before installing the faucet on the sink, it is necessary to inspect the gasket to ensure that the rubber layer matches the designated grooves of the ring. The ring gasket is threaded through the liner and pulled to the base of the mixer.
Next, flexible hoses are inserted into the mounting hole and the mixer is pulled directly to the connection point with the sink. During the process of screwing the mixer, it is recommended to invite an assistant who will hold the device for more convenient fixation. A pressure plate is passed through the liner.
At the next stage of solving the problem of how to install a faucet on a kitchen sink, threaded pins are screwed into the base of the faucet, passing them through the pressure plate. Screw the nuts onto the pins without fully tightening them. Full tightening of the nuts is carried out using a socket wrench, having previously fixed the mixer in the working position. You can proceed to the final tightening of the nuts only with full confidence that there is no displacement of the sealing gaskets, and they are all in their place.
Next, the sink is installed in place and the connections are connected to the hot and cold water supply system. For a more airtight connection, the pipes of the water pipes are cleaned with sandpaper and a layer of flax thread or a tape of rolled waterproof sealant is wound.
The tape is wound overlapping; when using flax thread to install a faucet in the kitchen, the threads are first lubricated with sealing paste, after which the thread is wound.
The installation process is completed by connecting the siphon to the sink and testing the mixer. When supplying water, carefully inspect all connections for leaks. If defects are detected, you can try to tighten the threaded connections and retest.
Technological nuances of installation
When solving the problem of how to connect a sink faucet, some difficulties may arise that have a significant impact on the quality of the work performed. For example, the joints of flexible hoses can become very sticky, and the use of special tools does not give the desired result. In addition, sometimes the diameter of the cut-in hole may need to be adjusted or the faucet may need to be mounted on a countertop.
In this case, you can use a jigsaw and cut a new hole. In addition, it is necessary to check the condition and functionality of the water pipes and all wiring. If necessary, these elements need to be modified or completely replaced.
To independently install and connect a kitchen faucet, it is enough to study materials on the relevant topic, and professional craftsmen will help solve complex problems.
Installation recommendations
Kitchen faucets can have two types of fastening: the device is fixed with a nut or two studs. Depending on this, the installation method of the mixer is determined.
In designs with a clamping nut, the installation process is complicated by the presence of a long base, so the question of how to install a kitchen faucet is solved in the following order:
- Install the O-ring.
- Mark the mounting hole in the sink and drill it.
- Install the mixer into the prepared slot.
- Screw on the fixing nuts and tighten them using an adjustable wrench.
- Connect a hose with a short fitting.
- Next, connect a flexible hose with a long needle.
- Check the functionality of the equipment, paying attention to the formation of defects.
The second option for attaching the faucet to the sink involves the use of studs. In this case, it may be difficult to tighten the flexible hoses after installing the faucet on the sink or countertop. For this reason, it is necessary to first screw the nuts into the base of the mixer, and then install it in place. Then you should figure out how to connect the sink to the sewer so that there are no problems later.
In general, the work is carried out according to the following scheme:
- The studs are screwed into their regular places.
- Flexible plumbing hoses are installed from below the sink.
- Place the mixer in the seat.
- Fix the device using fastening pins.
In both cases, it is necessary to control the position of the sealing elements; the space between the parts must be completely filled. Even minor gaps are not allowed.
Installation errors and ways to prevent them
When installing yourself, you should avoid common mistakes:
- Kinking of hoses.
- Water leaks after the process is completed. To eliminate this problem, rubber gaskets, linen seals and FUM tapes are used.
- Excessive tightening of nuts at the junction of the pipeline and hose. Gaskets will also help here, and docking work must be done manually, slightly tightening with a wrench.
Following the above recommendations will prevent incorrect operation and premature failure of the equipment.
Mounting the mixer on the countertop
To solve the problem of how to connect a faucet in the kitchen and install it on the countertop, you will need a similar set of tools as when installing the device in the sink. In addition, you need to prepare an electric jigsaw, drill and drill bits.
The actual installation of the mixer is carried out according to the same scheme, however, in this case, dismantling the sink is not required. For the mixer you need to make a hole in the countertop.
When choosing the location of the mounting hole and before screwing the faucet to the sink, you should listen to the advice of professional craftsmen:
- When using a mixer, water should not fall on the countertop.
- The location of levers or valves should be as convenient as possible for use.
- The faucet spout should point directly into the center of the sink.
The installation process begins with markings, using a pencil or marker to outline the contour of the base. Next, several holes are drilled with a drill and a hole of the desired size and shape is cut using an electric jigsaw. Subsequently, the liner is pulled through it and threaded pins are inserted. The cut area is treated with sandpaper and the resulting sawdust is removed.
The hole should not be too large, slightly smaller than the diameter of the pressure ring. In this case, you can expect that the entire hole will be closed. Subsequent steps when deciding how to fix the faucet on the sink are carried out according to the diagram for installing the faucet on the sink.
Briefly about the main thing
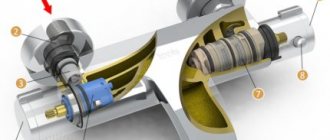
The causes of faucet leaks are most often faults associated with gaskets, faucet axle boxes or cartridges in single-lever models.
Crane axle boxes can be of two types: for worm-type ones, the seal is located on the rod at the base; for ceramic ones, three different gaskets must be replaced at once (the insert must be disassembled).
In the case of cartridges, as a rule, the mechanism itself has to be changed.
A moving spout (gander) can also leak due to a faulty gasket.
Repair of a mixer begins with shutting off the water flow in a specific section of the pipeline with a shut-off valve and draining the residual water.
To disassemble plumbing fixtures, you may need an adjustable wrench, wrench, screwdriver, or hex wrench.
Reassembling the device is carried out strictly in the reverse order by performing actions similar to disassembly.
Ratings 0
Installation of wall mixers
By installing the faucet on the wall, you can make the kitchen interior more unusual and attractive. This option takes up minimal space and significantly expands the work space. To solve the problem of how to connect a faucet in the kitchen and perform installation work, technological holes of a certain size are made in the wall or tile through which the equipment is connected. The hot and cold water supply pipes remain hidden behind the wall, so the device looks quite aesthetically pleasing.
To connect the mixer to the water supply system, the corresponding elements are brought out. Connecting a faucet in the kitchen follows the same pattern, regardless of the material from which the pipes are made. The pipe can be iron, plastic, copper or metal-plastic; only the adapters and fitting elements differ. The mixer is connected to iron pipes using tees and angles; to connect to other types of water pipes, special fittings are used, their other name is water sockets.
The method of connecting a kitchen faucet to the water supply also does not depend on the type of faucet, which can be cartridge or valve. The main condition is that the design of the mixer must be suitable for installation on a wall.
Wall faucets can be installed at any height; the product spout can be flexible or rigid. In the first case, multiple variations significantly expand the range of actions in the kitchen. Faucets with a rigid spout have limited stroke and rotation angle.
Instructions for connecting the mixer
The connection begins by screwing in the eccentrics; these elements are designed to connect the mixer to the water pipes. By setting the distance between the axes to approximately 15 cm, you can achieve minimal condensation formation on the pipes. This is exactly the gap that the manufacturer sets when producing most wall mixers. To ensure a tight seal, the threads must be wrapped with linen or synthetic tow.
Then the faucet nuts are screwed onto the eccentrics and a decorative trim is installed. When fixing it, you should be careful, and the decorative element should fit snugly against the wall. If after installation the gap is more than 5 mm, then you can remove the mixer and cut the eccentrics to the required length. The decorative overlay should hide all the imperfections of the wall that are formed during the installation of the wall mixer.
At the next stage, gaskets are installed, which are equipped with almost every mixer. This element can be silicone, paronite, rubber or made of another polymer material. The gasket is inserted into the housing nuts, which allows for a tighter fit to the eccentrics. To ensure maximum tightness, the eccentrics must be checked for cracks. Uneven cuts can be processed with sandpaper.
The final step is to tighten the nuts, first tighten them by hand and then tighten them with an adjustable wrench.
During the tightening process, it is not recommended to use much force to avoid stripping the threads on the nuts. Installing plumbing equipment in the kitchen and connecting the faucet to the sink cannot be called a difficult job, so a simple home craftsman can easily install the product. To perform installation work efficiently, you must have a set of necessary tools and materials on hand, follow the recommendations of professional craftsmen and follow safety regulations.
What is needed to repair a faucet?
Unfortunately, you cannot fix the faucet with your bare hands. In order to get started, you need to make sure that you have the following tools:
adjustable wrench
is a must-have tool for your home if you are going to do any plumbing repairs yourself.
Pliers
can be useful for unscrewing nuts in hard-to-reach places.
Fum tape
for sealing threads;
Pad
for the mixer and all connections.
Hexagon and screwdriver set
will be required when disassembling valves, removing handles and mixer heads.
Sharp knife
may be needed when adjusting rubber seals or removing plugs.


