If you are building a house and want to give it the charm of a Russian hut, a stove with a stove bench is the best solution.
If you are building a house and want to give it the charm of a Russian hut, a stove with a stove bench is the best solution.
Structurally, the stove consists of a firebox
, niches for storing dishes (
cold stove
), and an adjacent stand for hot pots and pans (
hearth
), niches for storing firewood (
guardianship/ovens
), a kind of oven for cooking and baking bread (
crucible
), chimney,
roof ( beds)
.
The lower part of the crucible is called under
; it is built at an angle to make it easier to place heavy dishes with dishes inside.
Above the pole there is an over-pipe
and
a chimney
, which is always equipped with a valve -
a view
.
In modern, modified designs of Russian stoves, such shortcomings as: uneven heating have been eliminated; high fuel consumption; duration of heating of the furnace.
Features of furnaces depending on their placement
The huge variety of designs of Russian stoves is explained by the fact that a hundred years ago each master had his own “secrets” and built according to his own ideas. Only the main characteristics remained the same, turning the hearth into a Russian stove: a large vaulted combustion chamber, thick walls, and a brick chimney.
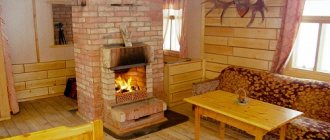
Home oven
The most traditional, it satisfies the heat needs of the residents of the house. Performs a heating function, equipped for cooking dishes and baking bread, drying things, storing mushrooms and fruits for the winter. Has a heated bed for sleeping.
Russian stove in the interior of a modern house
In a smaller economy version it serves as a kitchen stove. Dimensions in plan - from 1.5x2.5 m.
Stove for a summer residence
A Russian stove for a dacha is built according to a standard design, close to a house stove. For houses where people do not live permanently, this type of fireplace is poorly suited, since it can get damp from downtime and require a long drying time. Other types of stoves are more suitable for such conditions - Dutch or Swedish.
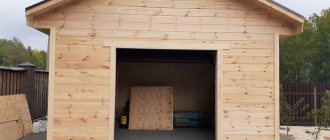
Garage oven
For many men, the garage becomes a special place that creates personal space. Therefore, it is important that such a small room is warm in winter. There is no requirement for a garage brick stove to maintain the temperature for a long time, because food is not prepared in this room. Therefore, the design of such a heated vehicle is extremely simplified, and the dimensions are minimal: 60x60 cm in plan when laid in 9 rows.
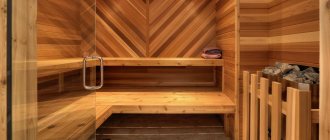
Bath stove
A sauna stove is not used for long-term heating of residential premises or cooking, therefore it is structurally different from a house stove. A special feature is the presence of a heated heater (a container into which crushed stones that are resistant to temperature changes are loaded).
Brick sauna stove
The stone acts as a thermal accumulator and serves to create steam. Often a water tank or a flow-through heat exchanger is also installed in the masonry.
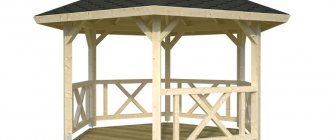
Stove for gazebo
The desire to build a stove in the open air (in a summer veranda, gazebo, or even standing alone) has a number of rational justifications. First of all, owners are interested in the ability to quickly cook or heat up food using free raw materials (wood waste, dead wood).
The second factor: in hot weather, you don’t want to “turn on the heating” in your living space for kitchen chores. It should be taken into account that in many country houses there is no large stove to save space.
Outdoor oven
A freestanding outdoor stove is distinguished by its unpretentiousness to air exchange. For these fires, the threat of carbon monoxide spreading throughout the house is not so critical. Hence, less stringent requirements for the presence of traction, the quality of the masonry or the occurrence of cracks. Therefore, heating installations are often installed in a similar way without a chimney at all, with open barbecue or grill grates, as well as smoking chambers that emit a large volume of smoke.
Device and design features
Built according to all the canons, the furnace has many structural elements.
Schematic representation of the main parts of a Russian stove
- Sub-bake. The recess at the base of the stove is intended for storing and drying firewood. Today, many owners refuse the oven to simplify and reduce the cost of the design and do it completely in vain. It is impossible to find a more convenient and practical place for fuel.
- A stove is a cold niche for storing dishes.
- The pole is a flat horizontal surface in front of the crucible. Here you can leave food pulled from the fireplace so that it remains hot for a long time. There are designs of stoves in which a hob is installed in this place.
- Pod or flank - the bottom of the furnace (cooking chamber) located at a slight slope to the hearth. Deviation from the horizontal towards the outlet makes it easy to move heavy cast iron.
- The crucible is a space inside the furnace that simultaneously serves as a firebox and a cooking chamber. As in the case of the finial, the ceiling of the furnace has a slope towards the exit. This allows you to trap hot gases under the roof, so they have time to warm up the array of the heating device. Between the hearth and the hearth there is a bend, or a bend, a kind of transition zone between the horizontal sections of the furnace with different temperatures.
- Overpipe is the same as high. In a Russian stove, this is a smoke collector located above the hearth. Behind it begins a chimney.
- A samovar (also known as a dushnik) is a narrow channel leading directly into the chimney, which is intended to connect the samovar pipe. Modern stoves do not have a choke.
- Vertical flue above the pole
- A view is a hatch that completely blocks the chimney. Through the view window there is access to valve 10, which regulates the draft in the furnace.
- Chimney valve.
- Bed.
Another illustration clearly shows the structure of the internal chambers of the structure. The stove, which can be seen in the lower picture, is intended for drying fruits, mushrooms and berries. As you can see, the thickness of the walls between the niche and the furnace is no more than a brick, which actually turns the stove into a kind of modern oven of Swedish wood-burning heat generators.
The structure of the internal space of a Russian stove
The combustion unit, which is a kind of recuperator, has a huge impact on the performance of the heating device: the incoming air flow is heated by flue gases. Mixing does not occur due to different densities of gases, and experiments have shown the absence of turbulence even at the interface between two gas flows. To avoid turbulence, the surfaces of the heel and fold are made as smooth as possible. Otherwise, turbulence will carry away some of the oxygen, which will increase the gas-generating ability of the heating device.
The oxygen entering the furnace supports intense combustion of the fuel. In this case, the heated gases rush to the roof of the furnace. Thanks to its inclination towards the mouth and a small threshold, which prevents the free escape of gases to the high, two stable zones of gas circulation are created. It is in them that the whole power of the Russian stove lies, but to form vortices you must strictly adhere to the basic dimensions.
In addition, the rotating flows retain unburned particles in the high-temperature flame zone for a long time, thereby increasing the completeness of fuel combustion. The heated roof and walls of the cooking chamber actively radiate energy in the infrared range, uniformly heating what is being cooked in the crucible. As for the crimp, it not only acts as a thermal economizer, but also allows you to keep food hot all day. To do this, it is enough to block the chimney and close the mouth with a wooden damper.
Thanks to the smoke circulation features, the stove remains warm for a long time
As you can see, the smoke circulation of a Russian stove has a minimal temperature gradient. The constancy of the temperature of the heated gases, as well as their constant circulation in the working area, leads to the fact that the smallest particles of fuel burn in the crucible without any residue. And here another important advantage of such a simple but carefully thought-out design appears. The fact is that ash is, of course, present in the heating unit, but with regards to soot and soot, they practically do not settle on the walls of the stove - you will only have to clean it a few times in its entire life.
Our website contains a large number of instructions for self-installation of stoves of various designs and complexity, including the Kuznetsov stove:.
Russian stove in the house
The traditional home life of the Russian peasant was literally built around the stove. When constructing the hut, a significant part of the internal space was allocated for it. The stove not only heated the room, but also served as a place for the whole family to sleep, cook food and bake bread.
Ancient Russian stove in a hut
The advantages of such stoves include:
- long service life with proper care;
- ability to retain heat for hours;
- many additional uses - drying berries and mushrooms, use for household chores and crafts;
- the ability to protect the body from disease.
The latter means that on the bench of a well-heated stove, the temperature is maintained at approximately 25-28 degrees Celsius for almost the entire heating period.
This design also had its disadvantages:
- the stove in the house took up a lot of usable space;
- due to its significant weight, it had its own foundation (therefore it was not possible to equip it in a multi-story building);
- required a large amount of fuel;
- the firebox could not withstand high temperatures.
The main drawback of the historical design of the Russian stove was that heating of the room occurred only in the middle and upper zones, and did not occur at all closer to the floor. This shortcoming was partly compensated for by the construction of additional fire chambers (flooding chambers).
A little history and facts
The stove is part of Russian folklore! There is no exact information when the prototypes of these structures first appeared. However, at first they had a completely different appearance, little reminiscent of the Russians we are used to. And only recently people began to build them in design and appearance similar to their analogues. Today, such structures are part of houses in Russian villages, where there is only stove heating and there is no talk of any gas. People use them to heat their houses, cook, heat food and bake with them.
The stove is part of Russian folklore
Tandoor or Russian oven
Tandoor is an ancient construction of a dome-shaped adobe hearth. Distributed in different regions: from Central Asia and Northern China to Africa and Latin America. It combines high heat capacity with fuel efficiency, because in the historical homeland of these stoves there has never been an excess of firewood.
Ancient tandoor
A distinctive feature of the tandoor is its single-chamber design with a high round arch. The operating temperature in the firebox is higher than in a Russian stove. Therefore, the thermal regime during cooking is more intense, which affects the range of dishes. The cuisine is famous for its wealth of recipes based on simmering: porridges, grain dishes, various soups and decoctions.
As a heating device for a large house, the tandoor is significantly inferior to Russian stoves. The simple design does not allow maintaining heat for a long time.
Features of the arrangement of a small stove
A small stove in the Russian style is built in different designs. Each of its options has been tested in practice. Such models are built by adherents of Russian traditions. However, small structures are not used to fully heat rooms. They are mainly used for cooking.
One of the options for a miniature stove in the Russian style is a design with an enlarged furnace and an expanded entrance. This allows for accelerated drying of various vegetables and fruits. You can even prepare baked dairy products here.
A mini Russian stove, the ordering of which always begins with laying the first continuous row, is created on a reliable foundation, which, of course, is smaller in size than the classic version. Usually the concrete base is a monolithically poured slab.
At the next stage, the walls of the underfloor area are erected. They are needed for the construction of an arched vault and an opening of the same shape. Wooden templates are used during installation. Next, just as in the classic version, the space between the walls and the arched vault is filled with sand.
After installation, the stove vault is filled with sand Source builders58.rf
In principle, all further work is similar to the processes when constructing a large stove in the Russian style. During the construction of the miniature version, the walls, hearth and cross-pipe are also laid out. In this case, an expanded mouth is created in front of the opening of the compartment where baking is usually done.
The mini version of the stove is distinguished by the absence of complex smoke exhaust channels. Therefore, the construction of such a structure is usually carried out in a maximum of 4 days. If the ordering scheme becomes more complex, installation may take two weeks.
Russian stove on the street
Both the construction of a Russian stove outside the home and its operation have their own peculiarities. They are caused by more aggressive effects of atmospheric phenomena during the combustion process and during long winter downtimes. A stove left in the cold for at least a few days without use will warm up unevenly from the sun's rays. And masonry joints are saturated with atmospheric moisture.
When melting for the first time after a break, you need to use a small amount of wood chips. The gases coming out of the pipe should become transparent, which takes an average of one and a half to two hours. After this, you can lay regular firewood.
With barbecue
The primitive design of a stationary outdoor barbecue involves an open brick box on one side with a chimney tapering upward. This option is closer not to a Russian stove, but to an English fireplace.
To build a more labor-intensive but effective Russian-style outdoor fireplace, you will need much more brick. The diagram for laying a Russian stove on the street with your own hands is shown in the figure:
Layout of a Russian stove on the street with your own hands
This device performs the functions of an ordinary hearth structure equipped with a grill for cooking over coals.
In the gazebo under the canopy
For the construction of a stove in non-permanent wooden buildings (verandas, gazebos, covered terraces), fire safety requirements become relevant. A non-combustible belt must be created around the masonry: at least 30 cm from the walls and 60 cm from the door. A heat-resistant material is suitable for this - sheet asbestos cardboard with a thickness of over 4 mm. The top should be sheathed with roofing iron.
Bread baking oven
The construction of a wood-burning baking oven can have a simplified design. Many of the requirements for a traditional hearth are optional for this type of stove.
The most important requirements:
- the combustion chamber is large enough to fit a tray with molds inside;
- a pronounced spherical arch so that thermal radiation is focused in the center of the furnace and maintains the desired temperature.
Placing a bread oven outside allows you to not lay out the outlet channels very carefully. After all, the threat of carbon monoxide poisoning in the fresh air is much less than indoors.
How to build outdoors
The main feature of designing an outdoor stove is the need to provide protection from atmospheric moisture. You will need to build a reliable canopy. A rafter structure is erected for it on wooden or metal poles. You can arrange a power system by welding metal. The main requirement: the ability of the canopy to support both its own weight in windy weather and the snow load in winter.
Recommendations for use by stove makers
The efficiency of fuel combustion and the overall condition of the stove depend on compliance with operating rules, which should be followed not from time to time, but regularly.
Brick, like mortar, is a “living” material that can become deformed over time due to temperature changes. Therefore, you will have to not only clean it, but also cover up the cracks so that condensation does not form and the heat capacity of the structure does not drop.
This happens very simply, here is an example: over time, a gap of only 2 mm wide has formed around the valve. It turns out that in an hour it passes as much as 15 m³ of air heated to a temperature of 90-100 ° C, that is, approximately 10% of the total heat emanating from the stove.
Heat loss increases up to 40% if you simply open the door, and by 20-25% if air is supplied through the vent
Furnace repairs and cleaning are carried out once a year, before the heating season. But chimneys need cleaning much more often - about 2-3 times per season. Before starting the fire, remove ash from the grate to ensure free access of air for efficient combustion.
Fuel is prepared in advance, since the logs must dry. To do this, they are put in woodpiles under a canopy and left for at least a year. It is not recommended to use wet firewood, since evaporating moisture settles on the walls and mixes with soot.
It is better if the firewood is the same length and thickness no more than 10 cm. This way they will burn equally quickly and evenly, which is important for heating bricks
Typically the combustion process takes from 1.5 to 2 hours.
Firewood is stacked in the combustion chamber in rows or in a cage, with a small distance between logs. It is important that they burn at the same time, as the heat will be greater.
It is not recommended to heat the stove for a long time for increased heating. This can provoke the appearance of cracks, as a result of which first cosmetic and then major repairs will be required - laying the masonry again.
For kindling, quickly flammable materials are usually used: wood chips, paper, shavings. Before lighting, open all the dampers, the view, the door
As soon as the wood ignites, the firebox is closed and the vent is opened. The draft is regulated by the position of the valve or view.
Some more useful tips:
- A bright red flame and black smoke indicate a lack of air - the flow needs to be increased.
- A white flame and a hum in the chimney is an excess of air; it is better to cover the vent a little.
- You can move the logs only after they have thoroughly burned out and formed wastelands that allow air to pass through.
- The firebrands are pushed into the center of the hot coals so that they burn out faster.
- As soon as the coals stop burning with a blue flame, they are distributed over the hearth, moving closer to the mouth.
- To protect against carbon smoke, the pipe is not closed for another 10 minutes to prevent carbon monoxide from entering the room.
If the stove is heated with coal, it is still recommended to heat it with wood.
When finishing external walls, remember that beautiful cladding can partially reduce the flow of heat into the room.
Traditional Russian stoves
Despite all the variety of devices of Russian stoves, there are several main types.
With a bed
In the Russian hut, heated sleeping places were installed on the stoves during the cold season. While the thermal insulation of the walls was not reliable, they tried to make such beds as high as possible, where warm air collected under the ceiling. To get to the floor you had to climb the stairs. They accommodated from 2 to 6 people.
Traditional Russian stove with a stove bench
Later the design of the buildings improved. The beds were attached to the side of the stoves, with a smoke channel running inside for heating. The height from the floor did not exceed 0.5 m.
With stove
If a heated bench is not attached to the stove, a cast-iron stove is placed above the firebox. It performs the function of a hob. The stove has factory-cast burners covered with lids (usually two). If necessary, the lid can be removed and a cauldron with food placed in the hole.
With water heating box
A heating box for water with a collapsible tap is built directly into the masonry. As an option, install a metal riveted or welded case into which a box of water is inserted.
Chimney pipe
The beginning of the chimney pipe was laid out dry. The smoke collector was constructed: the author picked out the outer halves of the bricks to make it a little wider, planted them on the mortar and from the top a couple of rows of bricks on the edge. A brick was cut into a smoke collector. Then it became clear that making the semicircular cutouts was in vain, it was necessary to catch up to the overlap of the smoke collector without cutouts, time was wasted. Cutouts were made in the ceiling for a diameter of 180 pipes. The pipe went: an old 180 mm disc was used as a guide.
The pipe is made of a quarter of a brick and there is simply no room to install a damper. Therefore, it was decided to lay a slab larger than the pipe. The result is protrusions of 8-10 centimeters. According to the design, protrusions must be made. We bought 10 kg (there is no smaller package) of heat-resistant cement called GC 40, they will be sawn.
Next, the oven was insulated, a mesh was laid on it, and one layer of mortar was placed on it.
Making a pipe from a used roofing sheet took one day. The distances to the roof locks seemed to specifically coincide with the 180 diameter I needed. All that remains is to saw off the sheet to length and bend it along the mandrel cut from the outlet.
Project of a standard Russian stove
Do-it-yourself layout drawings for a Russian stove and a description of the masonry are a necessary part of future work. It is important to understand that the design of even a typical stove was born as a result of the experience of generations of craftsmen. Not all the subtleties and nuances of the future hearth will be clear to a beginner. Therefore, making changes to the instructions not provided for by the project is an unwise step. Deviation from the drawing may result in the already erected stove cracking during lighting or not providing draft. Then the work will have to be completely redone.
Dimensions
The classic layout of a Russian stove for a home assumes the dimensions of the unit itself in terms of 1270x1660 mm. The foundation is 10-15 cm wider. The height of the facade is 2380 mm, the level of the bench is 1540 mm. The main masonry of such a stove, excluding the chimney, consists of 32 rows of bricks.
Blueprints
A diagram of the masonry with a description of each row and cross sections demonstrating the internal structure of the unit is shown in the figure.
Scheme of furnace laying with explanation for each row and cross sections
Description of the masonry
The design of the stove must be completely sealed, otherwise there is a danger of being poisoned by combustion products. Therefore, only whole bricks are used in the work and the seams are carefully filled with mortar. Internal coating of the joint with clay is not recommended due to the deterioration of heat transfer and the accumulation of soot on the surfaces.
Before laying, the brick is soaked in water: then moisture does not migrate from the solution. The seams are made 5-8 mm thick.
The firebox is the heart of the stove
The firebox consists of two parts:
- firebox;
- bakery (cooking chamber).
In small stoves (124 x 178 cm) the bottom is laid out with a rise to the rear wall of 6-9 cm evenly, and in medium (147 x 213 cm) and larger (160 x 231 cm) with a break in the middle or far (2/ 3) parts. This is done to ensure that the dishes stand evenly on the surface. The crucible must have a slope underneath. By the way, Domostroy states that the height of the beds (beds) should be 142 cm.
Before you make a Russian stove, you should decide on its parameters. The dimensions may vary somewhat, depending on the size of the brick - an even amount should be laid out for all dimensions (length, height, width), taking into account the clay mixture. Stoves in which the firebox on the sides also narrowed 6-9 cm towards the mouth are heated better.
“Aerobatics” is considered to be the execution of the crucible arch in the form of a three-center barrel (smoothed dotted line in the first photo), and not hemispherical and the expansion of the crucible in the middle part. Then no sparks are formed, the stove does not smoke, the fuel burns completely - 100%.
Sectional diagram of a stove on a wooden base Source stroyfora.ru
Preparatory work
Before you start building a Russian stove, you should make sure that everything you need is available.
Selecting a location
A lot depends on the choice of place to build a furnace. It is necessary to maintain a gap of 30-40 cm to walls made of flammable material or provide them with protective cladding with asbestos. Gaps will also be required for access to the outer walls of the stove for the purpose of inspection and repair.
A heavy unit weighing several tons requires a solid foundation (foundation) protected from ground moisture. A place is provided in advance where the chimney will pass through the ceiling and roof. There should be no ridge or rafters here.
Masonry tools
Basic working tools for a stove maker:
- a narrow trowel (trowel) for laying mortar and cleaning excess from seams;
- a hammer-pick to give a solid brick the required shape;
- building level and plumb line.
To mix the solution you need a shovel and a container.
Stove maker's tool
Now cutting bricks into wedges, removing corners and grinding the cladding is done with a hand-held power tool (grinder) with diamond wheels. This greatly simplifies the work of the master.
Necessary materials
The main materials for constructing a reliable fireplace are brick and refractory mortar. Their quality is given close attention. You will also need: cast iron for doors, dampers, valves, grates and a hob.
Brick selection
The correct selection of bricks for the job is a key factor in the efficiency of thermal output and the long service life of the future fireplace. Therefore, it makes sense to purchase red clay bricks of the M150-M200 brand only of the first grade. Hollow material is unsuitable for stove masonry.
Bricks with obvious signs of defects are also not suitable for such work:
- non-compliance with the standard (230x125x65 mm), to which all standard orders are oriented;
- with traces of burns, warping, shape and surface defects;
- with shells after the release of gases;
- having cracks and burrs from cutting.
Special grades of premium quality bricks, called hearth bricks, are sold individually and are ideal for laying stoves.
Foundation
The base of a heavy furnace is placed on a concrete foundation, which is cast over a compacted crushed stone bed in a hole up to half a meter deep. Horizontal waterproofing from groundwater is made of 2 layers of roofing felt on bitumen mastic.
Masonry mortar
The requirements for a solution suitable for furnace work are seriously different from the usual ones.
The material is required:
- resistance to high temperatures;
- coefficient of thermal expansion as close as possible to that of masonry bricks.
Refractory mixture for laying stoves
Since the quality of the clay plays a leading role here, it is better to buy a ready-made dry mixture at a hardware store.
Checking the quality of clay
The suitability of clay for stove masonry can be checked using a folk method. From the solution, make a spherical lump the size of a child's fist and slowly squeeze it between two planks. If the clay is of high quality, the lump will crack only after being compressed to half its size. Skinny, unusable clay does not deform at all, and material of average condition will burst after being compressed by about a third.
Construction Technology Tips
The construction of a Russian heating stove is a serious matter. It will be very difficult for a homeowner without experience in the stove business, so we recommend stocking up on time and patience. We published detailed instructions for preparing the mortar and laying it in an article about building a fireplace; we advise beginners to familiarize themselves with the specified material.
Here we will give general recommendations regarding the Russian home stove:
- Even the mini version of the heater weighs over 2 tons. The foundation slab must be supported on a stable soil horizon; the depth can be determined by the occurrence of the existing foundation of the dwelling.
- In the finished building, the “sole” must be arranged separately from the foundation of the house, retreating at least 10 cm. At the stage of construction of the cottage, the foundations, on the contrary, are combined - a common formwork is set up and concrete is poured.
- You need quality bricks and mortar, not a gully clay mixture. The correct geometry of the stones will make your work much easier - uneven bricks will have to be filed down.
- Soak the red brick in the bucket for 2-3 minutes, as shown in the photo. Do not immerse the refractory in water, just rinse it to remove dust.
- It is allowed to lay the furnace and firebox from ceramic bricks, as our ancestors did. But remember: such cameras are afraid of accidental overheating; the material begins to crumble and crumble.
- A bed built on a loose base is also afraid of temperature fluctuations. This is why it is recommended to fill the void above the vault with clay mortar. If you fill the cavity with sand, small cracks may appear on the roof. No sooner had the stove been built than repairs needed to be done.
- The refractory masonry is not tied to the ceramic; cardboard is inserted to provide a gap between the two walls. Horizontal seams are laid with kaolin non-combustible wool.
- The pipe does not have to be made of brick all the way to the top. Lighten the structure - after cutting, install a sandwich - a chimney that goes out onto the roof, as shown in the photo.
Reference. Often, stove makers strengthen the arch and walls with an iron frame welded from corners.
Finally, a few words about how to properly heat a new stove. After drying the stove for 2-3 days (in summer), first build a small fire on the top damper. When the pipe warms up, start heating the furnace little by little, then the lower chamber. Increase the amount of firewood slowly, do not rush. The task is to uniformly heat the furnace body for final drying.
Masonry of a Russian stove
Laying a Russian stove with your own hands involves carefully following the order drawings.
First rows of masonry
Rows 1 to 3 – the lining of the oven – practically do not heat up. Here you can lay red-hot brick, without screed, directly on the waterproofing layer. It is important to carefully check the shape and angles of the bottom rows, on which the evenness of all subsequent work depends.
First arch
The arch is built starting from the 6th row according to a template (circles) on supports. The arch is created with seams of variable thickness. The formwork is removed only after the masonry mortar has completely dried.
From the 7th to the 10th row of masonry
A vaulted oven is formed. On the 10th row, a pole is created and a bend is placed under the (lower surface).
Bedding
The crucible is filled with broken bricks, tamping it onto the clay mortar.
From 11 to 17 row
Rows are formed alternately by alternating spoon and butt types. To support the arched heels, bricks are hemmed in the 15th and 16th rows.
Zev, squeeze, mouth, crucible
The arch of the furnace mouth is supported by the fifth on the 15th row, the arch of the mouth - on the 16th. Vaults and arches are laid out on circles with formwork.
Row 18 and above
Construction continues above the crucible arch by alternating between spoon and bonded masonry. The upper plane of the bed (floor) is reinforced so that it does not fall inside the furnace. Usually a box is made with a clay backfill, and a continuous layer of spoon masonry is placed on top. The safest thing to do here is to make the flooring with a wooden board.
Chimney
They are laid starting from the 32nd row, with the necessary valves installed in the masonry. Height - up to the required exit level above the roof, taking into account the correct draft (no vortex support from the roof).
The procedure for putting the heating device into operation
Having built a stove, in no case should you rush to try its heating capabilities to their full potential. It must be handled with care and precision, since with intense heating, the walls located closer to the hearth will dry out much faster than distant surfaces. The difference in thermal expansion of wet and dry materials is quite significant, so there is a danger of cracks appearing at the boundaries of the seams. To avoid trouble, all oven openings are opened and dried under natural conditions for two weeks.
Due to the need for long-term drying of the furnace, it is recommended to begin its construction in the warm season.
To speed up the process of removing moisture or when drying a structure in unfavorable weather conditions, a fan heater or a powerful electric lamp can be placed in the furnace and firebox. In this case, the oven doors are closed and the channels are left open.
The fireplace is lit only after the walls have completely dried.
The furnace is fired only after the pre-drying period has been completed . To do this, during the first two days, no more than 3–4 kg of firewood is placed in the unit, adding 1 kg of fuel every day for a decade. The readiness of the furnace for full operation is judged by the absence of condensation on the internal surfaces of metal parts. The heating device is tested several times at half power, after which the operation of the unit is checked at maximum mode. During “break-in”, be sure to inspect the surfaces of the walls for the appearance of cracks and their possible increase. The defects that appear are repaired only after the stove has been heated at full strength several times.
Drying the lined stove
To prepare a newly built stove for the first fire, its entire structure must be completely freed from moisture. Drying fresh masonry will take about a week, during which a small fire is lit in the oven every day. The main thing is not to exceed the temperature of the outer walls (maximum +50 °C).
All parts of the oven are dried separately with a small fire made of torches and paper. The flame in the main firebox is lit when loading no more than 10% of the volume of firewood. Drying is complete if there are no wet spots anywhere on the surface and condensation does not appear on cast iron parts.
Briefly about the main thing
A classic Russian-style stove is a popular option for a heating structure with a large heating surface and equipped with a stove bench. Its design also includes a crucible, a hearth, an oven, a sub-pipe, an over-pipe, smoke exhaust channels, and a view.
A Russian-style stove can be miniature or medium in size. Large heating structures with a hob, fireplace, and oven are also being built. To build an effective stove, masters carry out masonry according to proven schemes. The stove structure with the hob is often adjusted. Miniature heated structures are also popular. This is a simplified version of the classic Russian-style stove.
Ratings 0
Construction of a Russian stove with a stove bench with your own hands
Let's consider building a stove to heat a room with an area of 45-50 m2. The size of the building is 127x166 cm with a bench height of 147 cm.
Step-by-step instructions for a Russian stove with a stove bench with your own hands provide for the consumption (in pcs.):
- red bricks – 1800;
- fireclay refractory bricks – 50.
Other materials (sheet steel, raw materials for mortar, reinforcing mesh) - as needed. The approximate consumption of sand is about 300 kg, purified clay is 250 kg.
Masonry scheme
The general structure of each row can be seen in the diagram:
Masonry scheme
Follow the instructions carefully, otherwise the hidden internal hot air ducts will fail.
Step-by-step instruction
An example of a row layout (in parentheses is the row number):
- (1) Place directly on the foundation waterproofing.
- (5) Base for vault arch.
- (6) Installation of grates, the cleaning channel is narrowed.
- (7-8) Place the steel sheet on top of the hearth.
- (10-11) The same, but with the installation of a hob.
- (12-16) The same, on the 15th row the arch is raised.
- (17-18) A binding wire is laid between them. The arch is narrowing.
- (19-21) Finish the arrangement of the bed.
- (22) From here they begin to rise the chimney.
As can be seen from the diagram, there is nothing in this work that requires special knowledge or cunning tools.
How much does it cost to build a Russian stove with a brick stove bench?
To build a Russian stove with a deck chair with your own hands, it is enough to know the price of the materials used:
- The need for bricks for such a fireplace, heating an area of 30 to 50 m2, is 1800 pcs. With an average price per unit of 22-25 rubles, the cost of masonry material is 45 thousand rubles.
- Fireclay bricks for the firebox (50 pcs.) – 3 thousand rubles.
- Set of metal parts – 25 thousand rubles.
Total procurement costs - 73 thousand rubles.
If you order work from a master stove maker, the 2021 prices for masonry are approximately 110 rubles per 1 piece. bricks You will need to pay the specialist another 198 thousand rubles.
Tools and materials
To build a Russian stove with your own hands, you don’t have to buy any special tools. However, prepare everything you need in advance - this will save time and help you organize your work correctly. Here's what you'll need first:
- A pair of different sized stainless steel trowels.
- Jointing for seams, if this type of finishing is planned.
- Mason's hammer-pick.
- Rubber mallet.
- Angle grinder (grinder) with cutting wheel.
- Electric drill with a set of drills.
- Tool for monitoring the accuracy of masonry (level, plumb line, square and mooring cord).
- Scissors for working with metal.
- Containers for mixing the solution.
- Mesh for sifting clay and sand.
- Roulette.
- Pliers.
Today you can find furnace castings of any type and functionality on sale.
List of materials:
- Red brick (grade no lower than M-150) – 1900 pcs.
- Sand - 300 kg.
- Clay (as thick as possible) – 250 kg.
- Basalt cardboard or other non-flammable sealant.
- Ruberoid for moisture insulation of the foundation.
- The hob is two-burner, dimensions 400x700 mm.
- Fire doors with dimensions of 250x210 mm and 250x180 mm.
- Grate 200x280 mm - 2 pcs.
- Grate 250x380 mm.
- Smoke damper 180x260 mm.
- Cleaning doors 130x130 mm - 2 pcs. and 130x200 mm - 1 pc.
- Blower door - 250x150 mm.
- The furnace damper is 380x450 mm.
- Water heating tank 120x280x500 mm.
- Steel corner with shelf 60 mm - 1.5 m.
- Sheet metal 5 mm thick.
In addition, it is necessary to take care of the materials for building the foundation - crushed stone, sand, cement and boards for arranging the formwork.
DIY Russian mini-oven
Building a Russian mini-oven with your own hands is not a difficult task for a skilled owner. The size of the heating unit is only 100x130 cm. The device will require 750 pieces. red brick. To prepare masonry mortar, you need to prepare clay, sand, and asbestos.
It is also necessary to purchase cast iron mortgages:
- grate – 2 pcs.;
- doors to the firebox and vent;
- damper;
- ventilation duct valve;
- stove valve.
You can build a small version of the furnace either with or without a water-heating box.
Before starting work, you need to make sure that all drawings for each row are available and the device is clear.
Layout diagram of a Russian mini-stove
Before starting furnace work, they build a reliable foundation of concrete on a crushed stone bed.
Classic version
Each row is laid out in accordance with the diagram, without allowing any deviations, otherwise higher levels of masonry will be without proper support. The grates for the bottom of the firebox are laid on the 6th row, and the underneath is formed on the 10th and 11th rows. A cast iron hob is installed on top of the 12th.
Order of the "Housekeeper"
How to arrange a Russian mini-stove with your own hands in the diagram:
Arranging a Russian mini-oven with your own hands
The scheme consists of 34 courses of brickwork, including the chimney.
Option with water heating box
It differs slightly from the main construction scheme. In the 5th row, a water-heating box structure appears in the masonry. An air channel is created nearby. Then until 9 p.m. the masonry is carried out taking into account the presence of this element. On this row, the box is covered with brick. Further work on the stove does not differ from the basic version.
Improved heater options
Many Russian masters were involved in the modernization of the classic stove - I. Kuznetsov, I. Podgorodnikov, A Emshanov, A. Batsulin. The essence of the changes is as follows: the details of the old design were taken as a basis - the vaulted furnace, the bend and the high above the mouth. New functional elements were added to them:
- Instead of a hearth, a hob is placed, and a small flood is arranged below. A parallel summer passage shaft is laid out, connected at the top with the main smoke collector.
- Hot gases from the additional firebox are directed through smoke circulations made in the lower part - the stove. Then the combustion products are discharged into a common pipe.
An example of modernization - in winter mode, gases from the furnace and furnace heat the lower part of the structure - At the end or on the sides of the furnace, vertical channels are installed, again leading to the lower zone under the firebox, then into the chimney.
- The channels from the firebox go into the attached heating panel and out through a combined pipe.
- The firebox is made from the bottom of the furnace and communicates with it through a grate installed in the hearth (bottom) of the main firebox. Gas ducts from the furnace penetrate the furnace and converge into a vertical shaft leading into the chimney.
Note. The changes made allow the stove to be heated in two ways: in Russian (the smoke comes out through the mouth and high) and in the heating and cooking mode (gases move around the channels).
Another example - there are vertical passages in the side wall that form a heating shield.
We tried to clearly describe common concepts; there are many more existing options. The purpose of the changes is to improve heat transfer and functionality of the basic design. If desired, a water circuit register or an oven is mounted inside the flues (the cabinet is placed next to the firebox).
Now we will analyze the updated options in detail using specific examples - with drawings and procedures.
The best stoves for a Russian wood-burning bath
There are several known methods for building a stationary fireplace for a bathhouse out of brick. They differ in the methods of removing combustion products from the furnace.
Black oven
The oldest design has minimal requirements for the quality of materials. The chicken stove does not have a chimney. Combustion products go directly into the room, filling it with thick smoke and soot. From the bathhouse, smoke comes out through the upper slot above the door. Despite all the shortcomings, the design also has a plus: the highest heat transfer. In addition, the smoke disinfects the room and expels parasitic insects.
"In gray"
The gray stove appeared as a development of the black one. A hole is made in the roof above the fireplace and a wooden pipe is led into it. By the same principle, smoke comes out in the mobile yurts of nomads.
Nowadays, the “gray” method is practically not used, except in cases where there is not enough experience for high-quality masonry or you want to save on materials.
The principle is simple: first, wait until the firewood is completely burned, close the smoke hole, and then use the sauna for its intended purpose.
"White" stove
This is a standard design with exhaust of combustion products through a heat-resistant brick chimney. This oven differs from previous options:
- good traction;
- lack of flue gas indoors;
- protection from flying sparks.
The best stoves for a Russian wood-burning bath are just like this.
How to build it yourself
To install a brick stove with a heater in the bathhouse, choose a place in the steam room, taking into account the size. The most common options are 3.5x4 bricks (89x102 cm in plan) or 4x5 bricks (102x129 cm). Be sure to provide a fire-proof distance from the furnace wall to the combustible structures of the bathhouse of at least 40 cm. The fire door is usually released into the dressing room.
Construction cost
Requirement for bricks for a fireplace with a heater:
- For a steam room with an area of up to 4 m2 – 650 pcs.
- Steam room with dressing area of 5 m2 – 850 pcs.
- Room up to 6 m2 – 1100 pcs.
With an average price per unit of 22-25 rubles, the price of masonry material will be 16-28 thousand rubles. Fireclay bricks for the firebox (30 pcs.) – 2 thousand rubles. Furnace casting kit – 25 thousand rubles. Total procurement costs are 43-55 thousand rubles.
Finishing: options, photos
The finishing of the stove should be given special attention, because the stove is a very large structure and will undoubtedly be the center of attention in any room. When finishing the stove, it is best to strive for the smoothness of all surfaces and the ability to keep them clean. Before carrying out finishing work yourself, you need, first of all, to assess the scale and complexity of the work, as well as compare the cost of different finishing methods. Before any finishing work, the surfaces of the oven must be cleaned of dirt and dust.
Finishing methods can be very diverse; let’s look at the basic and frequently used ones, which can be done without special professional training:
- Plaster. Plaster gives the stove a neat appearance, it allows you to correct defects made during masonry, and also fills masonry joints. The plaster solution is selected depending on the required quality of finish, purpose and humidity of the room. Clay-sand mortar is mainly used, and if necessary, lime, alabaster or cement is added to it. It is recommended not to exceed the thickness of the plaster coating by more than 1 cm.
- Mopping the walls followed by jointing the masonry joints. Work is being carried out to clean the walls of the furnace from mortar protruding from the seams, to fill the seams more completely and give them the desired appearance. When performing work, it is very important to promptly clean the bricks from the mortar with a damp cloth before it hardens.
- Furnace finishing with natural stone. Lately, this method has been gaining great popularity. Before gluing the stone to the stove, you should first lay it out on a horizontal surface in order to ideally select the size and color, after which the stone is transferred to the walls according to the approved plan. For laying natural stone, ready-made heat-resistant mastics are used.
- Tiling. This method is very labor-intensive and responsible. The lining of the stove with tiles must be done in parallel with the brickwork, row by row, and the first row of tiles is laid out first, and then the row of brickwork. The tiles should be connected to the main masonry with wire, and to each other with staples and pins. The tiles are placed on a clay mortar, which is placed in the rumps (special projections of the tiles on the back side). Depending on the desired look, the tiles can be arranged one under the other or intertwined. Before installing the tiles, they are laid out on a horizontal surface to select the ornament and cut to the required dimensions. There are 1.5 mm thick seams between the tiles horizontally, which are filled with gypsum mortar. Vertical seams are done flush. When installing tiles, you must strictly observe horizontal, vertical, vertical planes and angles.
Painting the stove with paints
The use of natural stone in the finishing of the stove
Artistic decoration with tiles
The stove is plastered and whitewashed with lime
The stove is neatly built of brick with jointing
After plastering or mopping the surfaces of the stove, it can be painted or covered with lime. Paints must be water or casein based. With the help of such paints, which can be multi-colored, you can paint the stove and give it a unique and inimitable design.
The metal elements of the stove are painted with special heat-resistant varnishes or paints.
Do-it-yourself repair of brick stoves
Many problems that arise during long-term operation of a brick kiln can be eliminated independently. Finding a competent stove maker is not easy, including for financial reasons, and the schedule of a qualified master is scheduled weeks in advance.
Lack of traction
Deterioration of draft in the stove chimney is the most common task of a master who undertakes to independently service the stove. Several factors can influence traction force. Some will appear immediately when the fireplace is put into operation: for example, wind pressure at the upper edge of the pipe and other inaccuracies made during construction.
Soot and products of dry distillation of wood enter the chimney with smoke. The latter contain tar, turpentine and many other compounds that condense on the cold surface of the chimney. If the draft is not adjusted in a timely manner, the stove will burn weakly and emit soot into the room. But the most dangerous consequence is when, due to the lack of outlet for combustion products, carbon monoxide is formed, which is dangerous to life.
Cleaning a Russian stove
You can clean the interior of the stove and chimneys yourself using mechanical or chemical methods.
There are also traditional methods:
- Aspen logs are loaded into the stove, the combustion temperature of which is higher than that of ordinary firewood. This will make the draft stronger, and flakes of soot and ash will begin to fly up from the pipe.
- Potato peelings are poured into the heated oven. The starch and steam they contain weaken the adhesion of the soot to the walls.
To mechanically clean the pipe channel, a heavy ball with a brush-brush attached is lowered from above on a long cable. The procedure requires skills to work safely at height, as well as carefully sealing all doors and openings inside the house.
Replacing the hob
The need to replace the hob arises if a crack appears in the cast iron due to thermal stress. It can be difficult to weld a part in place without removing it. Restoring a cast iron plate by welding requires special equipment and special electrodes. This is not always available.
Cast iron stove
After restoring the disassembled rows, the new part is installed according to all the rules:
- strictly according to the level;
- a large burner is placed in the place of the greatest heat in the firebox;
- Be sure to leave gaps at the edges for thermal expansion of the cast iron of at least 5 mm, otherwise deformation or even destruction is possible during the first fire.
To relieve internal stresses in the metal, the first firebox is performed in a slow mode, increasing the temperature no more than 70-80 degrees per hour. If you rush, the new slab will crack immediately.
Replacing the grate
The grate bars in the furnace are naturally destroyed by high temperatures. Usually they are not recessed into the masonry, but simply placed on the mortar on spades so that they can be easily changed. To access them, you will need to partially dismantle the firebox masonry if it is not possible to remove the top cast iron plate.
The replacement itself is very simple: using heat-resistant fireclay clay, sites are prepared for the installation of new parts. After drying, the lattice elements are laid on the same mixture, not forgetting to leave seams for thermal expansion (3-5 mm each).
Grate bars for furnace
Most often, when building a stove, craftsmen provide the ability to pull the grate out through the door by turning it diagonally. Then the repair will be limited to simply replacing the cracked parts with new ones with a mandatory thermal gap.
Replacing bricks in the masonry of a Russian stove
If an individual brick in the masonry collapses not at the seams, but along the body, it will need to be replaced. To do this, the block is cleaned along the contour from the mortar with a sharp thin object, freeing the seam. After this, the debris is removed piece by piece. The new brick is carefully cut to the shape of the hole formed and hammered into a special heat-resistant mortar with a wooden mallet.
Furnace repair
Firebox defects most often occur due to poor-quality material or serious violation of operating rules. It is highly likely that the insides of a Russian stove will crack if high-energy fuel (anthracite, coal) is used during the heating season. If the elements of the arch are destroyed, partial repair of the firebox is impossible; it is easier to rebuild it again.
Repair of the chimney of a Russian stove
Cracks that form on the brickwork of the chimney can cause cold air to leak in from the street, which will greatly reduce draft. Carbon monoxide can enter your home through cracks. There is a risk of poisoning or suffocation. Therefore, identified cracks are immediately covered with a special heat-resistant solution.
In the old days, a mixture of sand and clay was used in a ratio of 1:2. Today, special dry compositions for repairing fireplaces and stoves are available that have the desired properties.
Replacement of lining
To reposition the lining, partial disassembly of the fireplace will be required. Having a clear idea of the design of the stove, you can try to do the restoration yourself. The main rule of major repairs is to use only heat-resistant fireclay bricks, avoiding its contact with ordinary masonry.
How to choose the location of the furnace?
It is very important to decide on the choice of place where the Russian stove will be installed. If its location is in a wooden room, be sure to make the distance between the walls of the stove and the house approximately 20 cm. For safety, it is best to protect wooden walls using non-flammable material, for example, asbestos boards. The created gap will allow for an inspection of the furnace walls, which is done before the onset of the heating season.
If the stove is installed in an opening between two rooms, then it is lined with brickwork, at least 20 cm thick. A gasket of asbestos sheet is made between the masonry and the wooden wall.
How to decorate a Russian stove in the house
To ensure that a Russian stove not only serves as a functional element, but also decorates the interior, a caring owner will pay attention to its appearance.
Methods for whitewashing a stove
Whitewashing is the easiest and cheapest way to maintain a stove. In peasant houses, the hearth was usually whitened annually. Now, in addition to recipes inherited from ancestors based on chalk or slaked lime, many specialized compositions of a new generation are available. To prevent the chalk coating from staining your hands and clothes, the solution is made with skim milk containing casein. You can add ready-made wood glue or liquid glass.
Plastering and painting
The stove is plastered with a solution based on fireclay clay, which is not afraid of heating. Now special dry mixtures with a pre-selected composition are available for sale. After the finished layer has naturally dried for 3-5 days, the oven is lit and the coating is checked for defects.
To apply drawings, special paints are used that are designed for use on heated surfaces. They are found in retail chains and are made on the basis of organosilicon polymers. A budget option is paint based on liquid glass.
First, the plaster is completely painted white. Then, using colored tints, designs are applied, the choice of which is limited only by the taste of the master. If you don’t have the ability to draw, printed stencils or a template printed on a printer will help.
Decorating the stove with tiles
Tiles are ceramic parts specially designed for decorating the surface of stoves. The tiles have a special box-shaped projection (rumpa) on the inside. An artistic layer of heat-resistant glaze is applied on the outside. Their installation must be provided for at the masonry stage in order to mount them to each other and to the surface.
Decorating the stove with tiles
Finishing with such elements belongs to the realm of art rather than construction.
Finishing a Russian stove with tiles
Ceramic tiles are quite suitable for external cladding of oven walls, because they are resistant to heat. To lay tiles on a vertical plane of the wall, nails are inserted into the masonry joints, each part is glued onto the mortar separately, leaving a wide joint to compensate for thermal expansion. The seams are rubbed with elastic mastic.
Preparation for construction
Brick selection
The materials used in the construction of the furnace must comply with fire safety requirements. For this reason, various materials are used for its individual elements, which are listed in the table:
| Furnace element | Material |
| Laying the stove and chimney | · clay brick |
| Under and arch (lining) | · refractory brick · refractory brick |
| Facing | · plaster · tiles · natural stone |
| Fireproof insulation | · clay brick · asbestos cardboard · asbestos-cement heat-insulating boards · mineral wool boards, etc. |
The composition of the masonry mortar is chosen differently for each type of brick.
| Type of brick | Solution |
| Clay brick | clay-sand |
| Refractory brick | refractory clay and sand |
| Fire brick | fire clay and fireclay powder |
For the chimney, a solution based on lime and cement or lime and sand is used.
You can mix the solutions yourself or use ready-made certified mixtures, which are now available on the market in a large assortment. The advantage of using ready-made mixtures for a non-professional is compliance with technologies and proportions during production and compliance of the solution with the required characteristics.
With the correct selection and use of materials, the design of the stove: firstly, will comply with fire safety standards, which is of great importance in the house, and secondly, the entire structure will be provided with sufficient strength and stability.
When purchasing materials, you should carefully check their quality. The brick must have precise geometric dimensions and a smooth surface, and must not contain foreign inclusions. It is advisable to choose clay for the solution that is red, plastic, and free of impurities. Before mixing the solution, the clay is soaked in water and rubbed through a fine metal mesh. Sand must be fine-grained, the particle size of which should not be more than 1.5 mm.
Required Tools
Before starting furnace work, you must prepare the following tools:
- Ruler.
- Construction pencil.
- Trowel (trowel).
- Pick.
- Rubber mallet.
- Building level.
- Plumb.
- Bulgarian.
- Containers for solution.
- Construction mixer, if the solution is mixed independently.
- Joining, if no further finishing of the stove is planned.
Choosing a location for a future project
It is advisable to develop measures for the construction of a Russian stove at the time of designing the building. When determining a place in a house, pay attention primarily to the following factors:
- Foundation. They are considering the possibility of building a separate foundation or using an existing one that can withstand the additional load from the furnace. To build the foundation, ready-made concrete foundation blocks are used or a reinforced concrete monolithic slab is poured. Small gaps are left between the main foundation of the building and the foundation of the furnace, which are subsequently filled with sand. The base is not brought to the zero level of the floor to a height of two bricks, while a layer of waterproofing is laid on the first row of bricks.
- Free passage of the chimney over ceilings and coverings. It is important that supporting structures (beams, ridge beams, rafters, etc.) are not dismantled or damaged during the work. Failure to comply with this condition can lead to an emergency condition of the building and an increase in the total cost of constructing the furnace due to additional work on the construction of additional structures.
- Convenient location. The stove itself and the chimney can significantly influence the ergonomics of the room. Therefore, you need to carefully consider the placement of the entire structure in relation to windows, doors and furniture for ease of use. If the stove will be the main source of heating, then they try to place it in the center of the building, and if it is supposed to be used for cooking, then it is necessary to ensure that it is adjacent to the kitchen.
- Fire distances to combustible structures. This factor should be given close attention, since fire safety in the house must be organized at the highest level.
To prevent fires in ceilings and walls located near the stove, the following measures should be taken:
- In front of the pole window, a metal sheet measuring 700x500 mm is nailed to the floor, if it has a combustible coating.
- The distance between the stove and the combustible wall or partition is limited to a distance equal to the height of the stove. Thus, if the height of the structure is 1.2 m, then the nearby combustible wall must be at least 1.2 m away from it. In addition, the wall or partition must be protected from fire by thermal insulation materials (brick, plaster, asbestos-vermiculite boards, etc. ).
- The distance from the pole window to the opposite wall must be at least 125 cm.
- Metal and reinforced concrete beams passing near the chimney must be at a distance of at least 130 mm from its inner surface.
- Wooden beams passing near the chimney must be at a distance of at least 13 mm from its outer surface.
Russian stove in a stylish interior
Today, finishing materials from recent years are widely used in construction: textured wallpaper, suspended ceilings, laminate. A classic stove against such a background looks like a foreign object and hurts the eye. Let's consider whether it is possible to combine a proven heating unit with the latest artistic solutions.
Russian
The traditional style “a la rus” involves an exaggerated set of cultural cliches, usually associated with the Russian village. If the budget allows, the outer walls of the stove are lined with “Khokhloma” tiles. A cheaper design option is to carefully paint the surface white and hang bunches of dried herbs, amulets, and folk toys.
Country
The “country” style, that is, rustic design, is distinguished by functionality in combination with elements made from natural materials. To create such a solution, a good technique would be to finish the front surface of the stove with crushed natural stone. The look will be complemented by such style elements as laying logs on a decorative shelf and stands for stove utensils made of forged metal.
Provence
The Provence look usually refers to the combination of modern European decoration with elements of rustic style.
Russian stove in Provence style
For a home stove, this could be finishing with glazed tiles, combined with newfangled porcelain tiles or designer spotlights.
High tech
High-tech style is more associated with the interiors of a spaceship or interplanetary station, so it seems unrealistic to make an archaic rustic stove in this design. However, such a possibility exists, you just need to apply a little imagination.
The outside surface of the stove can be supplemented with hanging metal panels. Anodized aluminum will be better and more practical than others. Such finishing will not affect the performance of the fireplace in any way, because metal conducts heat well.
Minimalism
You can build a Russian stove by placing it in the space of the room so that it is hidden behind the interior details. A wall of furniture with a stand will visually divide the total volume of the room into two functional zones, and you can disguise the hearth behind the panels.
A Russian brick stove, properly built in accordance with all the rules and regulations, will last for several decades. It will not be possible to study the skill of a stove maker in absentia; this art comes with years of practice. The best advice here is to start with the simplest outdoor fireplaces and try out what you learn step by step.
Russian hut and tower
The stylistic concept of “Russian hut” involves the use of wood. It can only be an imitation, but it must be skillful and thoughtful. In some ways, this direction is reminiscent of a loft, but it is much more dynamic and elegant than the “concrete jungle” style. The main difference from the previous style is that each decorative element has its own functional purpose.
A house in the “Russian tower” style is radically different from other styles. Planning plays an important role here. In villages, many people still decorate their yard in this style. Key features: the presence of garden decor, bright colors, ornate carvings, an abundance of tiles, colorful patterns, bright decor.