To ensure that water flows through the sink without stagnation, the siphon must be cleaned occasionally. How to clean the siphon? You can do this in eight ways:
- plunger;
- using chemicals;
- with the addition of soda and vinegar;
- with the addition of soda, salt and water;
- cable;
- dismantling and washing the structure;
- removing the sump;
- hydraulic pump.
Each of the options is effective and worthy of attention. The choice depends on the degree of contamination and the availability of funds necessary for the procedure.
Method one: plunger
A plunger is a hand-held rubber device designed for cleaning drains. During pressing, pressure is generated, which loosens the clots of waste and pushes them into the drainage.
The algorithm for cleaning with a plunger is as follows:
- Close the drain with a plug;
- Fill the sink halfway with warm water;
- Cover the drain with a plunger;
- Press the plunger sharply several times;
- When the suction ends, quickly remove the plunger from the drain.
This cleaning option is only possible for minor blockages.
Grabber Claw
You can look for such a device in hardware stores or order it from a well-known Chinese online store.
The principle of using the claw-grabber:
- Insert the tool into the sewer hole up to the siphon.
- Press the spring located on the handle - the “claw” will compress.
- Pull out any dirt caught in the tool.
- Repeat the procedure until the siphon is clear.
- Author: iarriba
Rate this article:
- 5
- 4
- 3
- 2
- 1
(1 vote, average: 4 out of 5)
Share with your friends!
Method two: chemicals
Before cleaning the siphon using a chemical, you need to find out what material the pipes are made of. “Mole” products are suitable for metal pipes; products like “Mr. Muscle” are suitable for any other material.
To clean the sink siphon with a chemical, you must:
- Pour the product into the sink and let it sit for half an hour;
- Fill the sink with warm water;
- Clean with a plunger.
Chemicals remove both blockages and unpleasant odors.
Causes of blockage
Even with regular plumbing maintenance, hair, soap, rag threads, and washing clothes have resulted in pet hair getting stuck in the pipe.
The drain most often becomes clogged with hair.
When washing large dishes, such as trays, intensively, grease in the bathroom accumulates on the walls of the pipes. Solid particles adhere to the sticky oily layer and become stuck. This creates an airtight blockage that prevents contaminants from draining properly.
If the drain clogs very often, check the drain installation. Sometimes the bathtub can be installed at an angle. This prevents the contents of the pipes from entering the sewer. An unpleasant sewer smell and frequent blockages are a reason to think about removing the sewer.
Method three: soda, vinegar, water
An alternative to a chemical product is a mixture of soda and vinegar essence. It happens that the drain does not allow soda to pass through, then you have to push it through with a cotton swab. Cleaning work should be carried out in several stages:
- Wipe the sink with a dry cloth;
- Pour half a glass of soda and the same amount of vinegar into the siphon;
- Cover the drain with a towel for 30-40 minutes;
- Heat water in a kettle and pour it into the siphon. You can use regular tap water.
The described method is suitable for both removal of contamination and prevention.
Method four: soda, salt, water
Another way is to use three components at once for washing. When water, salt and soda interact, a chemical reaction occurs to form a solution that has cleansing properties.
Algorithm:
- Mix half a glass of soda and the same amount of salt. Pour the resulting mass into the siphon;
- Pour boiling water into the drain;
- Wait for the reaction to complete. Do not use the sink for eight hours;
- After the expiration date, rinse the sink with warm water.
The most convenient time to perform the procedure is at night.
Solution No. 2. Removing blockages using household chemicals.
To clean the siphon in the bathroom, manufacturers of household chemicals offer special compositions. It is imperative to choose exactly those products that are intended for cleaning pipes; such products do not contain aggressive components that can adversely affect the condition of the equipment. The product should be poured into the drain for the time specified in the instructions, and then rinsed with a strong stream of water. This method turns out to be effective even in cases of severe blockages, but you need to take into account that many ready-made compositions have an unpleasant aroma and are prone to vaporization, so it is better to leave the bathroom while the product is working.
Method six: disassembling and washing the siphon
Sometimes neither a plunger, nor a special product, nor even a plumbing cable can remove blockages. In this case, you have to solve the problem yourself by removing the siphon:
- The liquid remains in the siphon after it is removed. To prevent water from spilling, you need to tilt the siphon to the side and wait until it pours out;
- The siphon has two pipes. In order to disconnect it from the sink device, you need to unscrew the nut located on top of the pipe. After this, the siphon will be disconnected;
- Unscrew the bottom of the siphon;
- Wash all parts of the device, check for debris and fat accumulations;
- Reinstall the siphon, checking for leaks during assembly. If there are any, the nuts need to be tightened.
Problems also arise with clean devices. The point is due to incorrect installation, namely, the fitting of the pipe into the glass is too deep: the liquid does not pass due to the small well.
How to disassemble a plumbing siphon. Procedure
In today's article we will tell you about the rules and procedure for disassembling the plumbing siphon of a washbasin, sink or bathtub. In our material we will clearly show how to dismantle the siphon and its elements
HOW TO DISASSEMBLE A SANITARY SIPHON. PROCEDURE
Good afternoon, in this article we will tell you about the rules
and
the procedure for disassembling the sanitary siphon
of a washbasin, sink or bathtub.
In our material we will clearly show how to dismantle the siphon and its elements. Today, there are a large number of variations of the plumbing siphon
and its elements, but almost all of them are standard and are designed the same, with the exception of the materials from which they are made, the sizes and shapes of some parts.
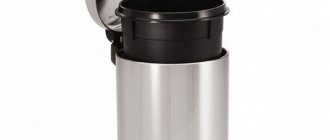
Typical kitchen sink siphon diagram
and its elements are reflected in the photo below.
After we have studied the design and structure of the sanitary siphon
From our previous articles, as well as how to
properly clear blockages and plugs
, we can move on to analyzing this plumbing device. After all, sooner or later almost every owner will have to disassemble the siphon, since unfortunately the material does not last forever, and the blockages can be very complex, where dismantling this device simply cannot be done without.
Ability to disassemble a plumbing siphon
bathtubs or kitchen sinks allow you to reach those clogged areas that are not accessible with a plunger and chemicals.
According to statistics, it is the “knee” (siphon) that most often gets clogged, as this is where the most dirt gets stuck. For example, hair and soap get stuck and deposited in siphon
; in the kitchen sink - pieces of food and grease from dishes. Therefore, the best option for clearing all the stuff that gets stuck in the siphon is to dismantle the siphon and its elements.
In order to disassemble the siphon and its elements, you must do the following:
— First of all, we place a basin or bucket under the siphon so that the remaining water from the “elbow” does not fall on the floor in the room during dismantling;
— Siphons come in 3 types: bottle siphon with immersed tube
,
bottle with two partitions
and
pipe siphon
.
All types of siphons
They are disassembled in the same way, only they differ in shape and slightly in structure. In the photo below you can look and choose your type of plumbing “elbow”:
— We disconnect the siphon sump from the fastenings, in which dirt accumulates, using a wrench;
— Next, remove the unscrewed elbow and place it in a bucket or basin, preferably adding any detergent there in advance so that the dried dirt and clogs dissolve;
— Next, we clean the siphon sump and dismantled elements from grease, dirt and hair with a stiff brush, as shown in the photo below:
— After completely cleaning the siphon and its elements (it is advisable to do this in warm water with detergents that are harmless to the skin of your hands), screw the sump back on and assemble the siphon parts;
At the end of the preventive and cleaning work, after completely collecting the siphon and its elements, we turn on strong water pressure in order to check how the water is drained and for possible leaks at the junction of the siphon parts.
After final assembly of the siphon elements, carefully install the gaskets. The gaskets must be installed evenly under the siphon nuts, because if they are positioned incorrectly, water will begin to leak in these places.
If cleaning the siphon does not help clear the blockage and the water does not drain or does not drain well, then use a plunger
or
chemicals
such as "
Mole
" or "
Nurek
". These remedies will definitely resolve the issue positively and the blockage will disappear.
Video review: “How to disassemble a plumbing siphon. Procedure"
We hope that our article helped you understand the dismantling
and
assembly of the sanitary siphon
and its elements.
As we can see from the material, there is nothing complicated in disassembling the siphon
and its elements, the main thing is to do everything based on the points described above.
We can add that after we have learned to disassemble
and
reassemble the siphon
and its elements, we will no longer need third-party help from a plumber to
clean
,
install
or
dismantle
this plumbing device.
THANK YOU VERY MUCH FOR YOUR ATTENTION. LEAVE YOUR COMMENTS AND SHARE WITH YOUR FRIENDS.
WE ARE WELCOME TO YOUR FEEDBACK AND SUGGESTIONS.
Method seven: removing the sump
The problem of blockage is solved by removing the siphon sump. A septic tank is a place where garbage accumulates. This method takes much less time than the previous one, but does not become ineffective.
Procedure:
- Prepare a bucket and place it under the still assembled siphon;
- Unscrew the sump;
- Remove all debris from it and clean the walls from grease stains;
- Screw on the sump;
- Turn on the water and check how easily it flows;
- Once again, pay attention to the sump: if installed incorrectly, leaks are likely.
If the problem is not solved and the water still flows with difficulty, you need to completely disassemble the siphon.
Method eight: hydraulic pump
Not long ago, a product appeared on the sales market that solves all problems with blockages - a hydraulic pump. This type of device allows you to clean the kitchen and remove blockages in the bathroom. Using a hydraulic pump, a powerful stream of water is generated that pushes debris through. The principle of clearing congestion using a hydraulic pump:
- Clamp the drain hole with a rag;
- Fill the pump with water;
- Press the nozzle onto the drain hole;
- Make 2-3 clicks.
The hydraulic pump is rightfully considered the most effective means of solving the problem of blockages.
Cleaning with a drill
Quite often there is a plumbing system in which a vertical pipe extending from the siphon meets a horizontal sewer structure. It is recommended to install a drain plug in this location to avoid blockage problems. Using such a plug, it is quite easy to clean a horizontal pipe from time to time. The cleaning algorithm will be as follows:
- a water container is installed under the sink;
- the cleaning plug opens;
- the horizontal pipe is checked for blockages using a cable or hook;
- if there is a blockage, clean the pipe using a special drill;
- If there is no plug for cleaning, the siphon should be removed.
other methods
A variation of baking soda and a chemical agent is regular hot water. This method is only effective if there is a metal pipeline. Boiling water removes holes in a few minutes. If the pipes are made of plastic, the water is heated, but not extremely hot.
Action plan:
- Prepare a solution: for five liters of liquid there is a glass of powder;
- Pour the solution into the pipeline;
- After 30-40 minutes, treat the drain with water;
- If the blockages have not disappeared, repeat the operation.
If there are not too many blockages, just unscrew the siphon and rinse it thoroughly. The process will take a couple of minutes, but will save you unnecessary problems.
Stagnation protection
Stagnation occurs due to the negligence of people who let hair, wool, paper, etc. into sewer drains. Siphon needs regular maintenance. In order not to have to worry about cleaning the siphon under the sink, it is enough to periodically pour diluted chemicals into the drain or use a plunger.
It is impossible to completely protect against clogging. However, by performing the operations described above every few months (as well as cleaning the shower stall), the risk of stagnation is minimized.
Currently reading
- Let's talk about high-quality drainage in the form of a shower siphon
- Characteristics and instructions of a bottle siphon for a washbasin
- Features and disadvantages of corrugated siphon
- Everything about choosing a chrome siphon for a sink
Prevention
Bath net
Many problems can be avoided if you take care to block the access of debris to the sewer pipe. To do this, just purchase and install a bath net. Don’t get confused - a kitchen sink mesh won’t help much, as it will only keep out large debris and some hair.
It is easier to prevent a blockage than to clean it. For example, as a preventive measure you can use soda and vinegar - for these purposes such an inexpensive mixture is more suitable than for cleaning.
By applying these simple tips, you most likely will not encounter the need to clear a clog due to its absence.