Installing any plumbing equipment in the bathroom - be it a sink or a bathtub, a hydrocabin or a shower compartment - requires a solution to the issue of sealing the gap between this equipment and the wall.
The complexity of this event largely depends on the scale of the problem and the time of implementation - during the renovation process or in an already used bathroom.
Where does the gap come from?
Before deciding how to close the gap between the bathtub and the wall, you need to understand how big the gap is and how it appeared in the first place.
- The bathtub is small compared to the size of the opening under it. If the length of the container does not match the dimensions of the niche, you will either have to select a larger model or do something with the dimensions of the opening.
- The walls are not level. This problem often occurs in houses where internal partitions are made of blocks or bricks. However, ready-made plumbing booths in high-rise buildings are also often “pleased” with littered corners and curved surfaces. Everything is simple here - you have to level the wall. This is necessary not only to eliminate the gap, but also for subsequent normal wall cladding.
- Uneven edge of the bathtub itself. It is rare, but it happens in cast iron or steel cheap models. Unfortunately, this defect cannot be corrected; you will have to fill the gap with something.
- It is not possible to move the bathtub close to the wall. If the width of the gap is too large, conventional sealing methods are not suitable; an insert must be made.
In any case, the size of the gap and its shape - flat or with expansions/constrictions - greatly influence the choice of sealing method. A gap of 2…3 mm can easily be eliminated with sealant or cement mortar, 3…10 mm will require the use of mounting foam or a small spacer, and wide “dips” can only be eliminated with the help of inserts and sealing.
How to close a bathtub from below with your own hands
How to close the space under the bathroom with your own hands?
After renovating the shower room and installing a bathtub. The question arises: how and with what to cover the space under the bathroom? This is exactly the problem faced by most people who decide to change their bathroom. The basement space does not look very attractive as cleaning products, tools are usually stored there, and plumbing connections are visible. You can cover the space under the bathroom in various ways, for example, by closing it with a curtain or special screens.
These products are characterized by their diversity; you can make them yourself or buy ready-made models. Factory screens are the most widely used, since their range is very extensive, from simple valves to complex frames in the form of a podium. Today, such a design is an integral part of the interior, practical and functional. In order to choose the best option, you need to understand all the offers.
Ready-made models
The factory screen under the bathroom is often already equipped with a curtain, which makes access to communications easier in case of unforeseen circumstances, and also allows you to store cleaning products or tools. This method is rightfully considered the most common, and besides, it will cost no significant costs. These products are usually made from plastic material, however, there are also metal, glass, and wooden variations. The dimensions of the structure fit the dimensions of the bathroom.
Ready bath screen
Finished products can be easily installed and secured with your own hands. They consist of one or more panels equipped with a curtain. The entire structure is framed with a metal or aluminum frame on special legs. The screen under the bathtub is attached to the floor at an angle of 90 degrees. after which the legs are fixed to the floor. This model allows you to completely close the space under the bath. Kinds:
- sliding curtains;
- closed tightly;
- swing doors;
- drawers.
These products are tightly closed structures, not equipped with a curtain. They are able to completely close the space below. They are distinguished by the type of panels: solid or lattice. After installation of the structure, the spacer legs can be loosened, and the screen itself can be removed in case of urgent need. Thus, constant use of the basement space will be difficult.
Sliding
Products with sliding curtains are very convenient for daily use. Their installation takes relatively little time, so they can be done by hand. Sliding panels are a very functional type of screen. Several doors from one to four open in a direction and slide behind each other. Less common are products with opening curtains in the form of an accordion.
The main advantage of this option is the possibility of unhindered penetration into the basement space. This is very important in small shower rooms, convenience when storing various items for repairs or maintenance of the room. In addition, this design does not interfere with quick access to communications. Sliding frames can also be equipped with single or double curtains. This is done for the convenience of arranging various containers or household items.
This design allows you to have direct access to the water pipes located under the bathroom without any obstacles. Hinged panels differ from their counterparts only in the way they open and close the doors. You can install them yourself without the use of massive tools. Often, close attention is attracted to products made from wood or MDF. However, this approach is not always practical and functional, but it has an attractive appearance.
Drawers
Today, these products represent a very interesting option. Modern technologies have allowed retractable models to become the most popular among their counterparts. However, they are distinguished by their high price, as well as their complex structure, so DIY installation will be problematic if you do not have the necessary experience. The panels have several pull-out compartments in the form of drawers. They can move out of the screen when necessary.
Screen with drawers
Stationary
Another name is that capital screens are non-removable panels. The closed part at the bottom of the bathroom makes access to the basement difficult. It will be very difficult to install the product yourself, so it is better to trust the professionals. These models are a structure that requires additional finishing. Such screens are usually made from the following materials:
Once the material has been chosen, the panels can be finished in any style. If you wish, you can paint them yourself or use tiles instead of paint, which is very convenient. In addition, it is possible to use film, PVC panel or artificial stone as a finishing material.
In some cases, the basement space is decorated with wood, however, in this case it is better to choose waterproof species - oak or beech.
Brick options
Brick models are the most reliable foundation, they are distinguished by an affordable price, as well as ease of construction, which can be done with your own hands. The one-piece design consists of laying bricks with cement mortar, which provides the screen with reliability and strength. Facing is carried out with any material available for this purpose. The enclosed space will look attractive, and uneven masonry can be corrected with the amount of glue during finishing.
Drywall, MDF or plastic
Models made of plastic or plasterboard, like other materials, are attached to a pre-assembled structure in the form of metal profiles, as well as wooden blocks. For timber blocks, certain conditions must be met, i.e. They were treated and impregnated with protective compounds against moisture. After installation, the entire frame is sheathed with the necessary material.
Decorative curtain
Using a curtain, you can securely close the basement space with your own hands. This method is rightfully considered the most accessible, simple and cheap. It perfectly hides imperfections under the bathroom, disguises unattractive places, and, in addition, makes it possible to safely store all the necessary cleaning products and equipment.
The curtain is easy to care for, i.e. she is unpretentious in everyday life. It is enough to pick up an ordinary piece of cloth and wipe it periodically. In addition, the fabric can be useful for placing the curtains around the perimeter and fastening them together. This will compact the material, making it more durable and practical. Usually special folds are left, but you can do without them.
The product can be secured in various ways, for example, by making fastenings using a special Velcro tape, and it is important that it is double-sided. Thus, one side is attached to the panel itself, and the other is secured under the rim of the bathtub using liquid nails. In addition, a small diameter furniture pipe can be used to fasten the structure. It must have the necessary fastenings in the form of loops, for which the coupling will be carried out.
Worth knowing! When choosing a screen, you should take into account the overall design of the apartment, for example, for a rustic style, a light curtain is suitable, and for a high-tech, a metal screen will be the best option.
Of course, curtains are good, however, there are other options. Podiums are suitable for a spacious shower room, where there is room to turn around. The finishing, design, and dimensions of this structure can be very diverse, and their limitations are limited only by the customer’s imagination. A brick is laid at the base of the frame, after which the panel is decorated with tiles or mosaics. The main thing is that all steps are treated with an anti-slip compound.
Podium under the bath
Video instruction
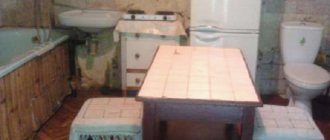
We bought an apartment in an old building with high ceilings and began settling into the new place. The bathroom has an antique cast iron bathtub that we are not going to replace with a new one. We have already decided how to update it from the inside, but from the outside it looks unsightly. Please advise us how to close this space so that it matches the overall look of the entire room?
Answers the question:
Natalya Skorik
The problem of arranging space under the bathroom does not bother owners of modern models. As is true, they look very attractive from the outside. They are covered with enamel, the color of which is easy to match to the wall covering. Bathtub legs can be considered a separate interior decoration, especially if they are stylized to resemble models from past eras. Quarrylic and acrylic products generally lack empty space in their lower part.
But, if you got an old cast-iron bathtub, you shouldn’t get rid of it. You just need to put it in order. So you made the right decision. It just needs to be brought into line with the overall interior of the room. There are several ways to do this. We have arranged the solution options in descending order of popularity.
Several types of screen
A fairly budget-friendly and perhaps the most common solution to your problem is to buy a ready-made screen. This ready-made structure can be easily assembled yourself. It is just as easy to disassemble if necessary.
Option #1 - the simplest design
The screens have special spacers. The height of their legs can be adjusted. Thanks to their special design, the screens rest firmly on the floor, on the side and even on the wall of the bathtub, if it is necessary to close the space on several sides.
The simplest screen can look very neat and attractive: thanks to the wide selection, you can choose the screen that best matches the interior of your bathroom
Their price is low because they are made from plastic. The appearance of the screens is very diverse. They are deaf and lattice, translucent and colored. The color range of models is so wide that choosing a product that matches the color of the bathtub itself, walls or floor is not difficult.
Option #2 - screen with doors
If your bathroom is of a modest size, the problem of storing everything that is usually found in such rooms arises. The space under the bathtub is perfect for jars, bottles, tubes and other things.
Then you need not a simple screen, but a structure with doors. They can be sliding or hinged. It costs a little more, but it has one more advantage: if you need access to communications located under the bathroom, such a screen will not have to be dismantled.
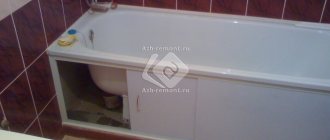
Option #3 - cabinet under the bathroom
There are even more interesting screen designs. Thanks to them, a whole closet with doors, drawers and shelves is formed under the bathroom. Everything that is useful in the bathroom can be placed in such a cabinet. To fully satisfy the needs of homeowners, it is better to order the desired model from furniture manufacturing specialists. Although, if desired, the finished product can also be found.
At first, it’s not even clear what we see in front of us, but, nevertheless, it’s still a bathtub, the lower part of which looks like a cabinet
Installation of a capital structure
No less popular is the permanent structure that covers the bottom of the bathtub. It is made from chipboard, plywood, moisture-resistant plasterboard or even brick. The finished frame is covered with tiles or other finishing materials. Today you can find ready-made frames for cladding on sale.
This capital structure allows you to get under the bath if you suddenly need it, and in its central part there is a recess for the feet
The disadvantage of this design is its monumentality. If there is a need to get under the bathtub, this fence will have to be broken. Therefore, the design needs to have a fairly wide window with a door. This window, if necessary, will provide the ability to store the same detergents under the bathtub.
Taking into account the fact that the bathtub can also be used for washing, for example, in the central part of the structure you can make a small inclined niche for the feet so as not to rest your toes on the tiles.
How to do this, watch the video:
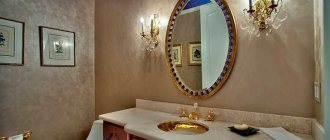
Curtain in Provence style
It happens that the shape of the bathtub is non-standard, and a ready-made screen cannot be selected for it. For some reason, you don’t want to make a permanent structure. In this situation, an ordinary curtain will help you out, which will encircle the bathroom like a skirt. Although this choice may seem old-fashioned to you, it will be relevant for a room in retro, country or Provence styles.
As you can see for yourself, using an original curtain is not a sign of poverty, but a manifestation of a subtle sense of style
You only need to mount the frame under the border to secure the curtain to it. The curtain itself can be sewn from non-woven material or you can buy a bath curtain and then cut it. It’s better to make two sets at once so that you can change them when it’s time to wash. This option is by far the most economical.
Brick or wooden podium
This method of hiding the space under the bathroom is used less often than others, not at all because of its high cost. It’s just that in city apartments, a bathtub with a podium will take up all the free space in the room, because a spacious bathroom is a rarity. Meanwhile, the podium perfectly hides the space under the bathroom and the communications that are located under it.
Of course, such a miracle is simply impossible to create in a city apartment. This bathroom option is good for a luxurious country mansion
Brick or wood is used to create podiums. Only these materials can withstand a fairly massive structure filled with water. Mosaics or tiles are used as facing materials. The wood is simply coated with water-repellent compounds and a special varnish.
We have presented you with some of the most popular options. You have to choose the one that suits you and best suits your idea of beauty.
Did not find an answer to your question? Look at here
Which is better - a free-flowing bathtub or an acrylic liner?
How to cover the bottom of a bathtub: budget and exclusive options for any budget
The new trendy sanitary ware is produced so decorative outside and inside that after installation it does not require any additional improvement of its appearance. But if you decide to leave the old equipment, you need to think about how to close the bathroom from the bottom so that the efforts and money spent on renovation are not in vain.
Content
How to close the space under the bathroom if every penny counts? The cheapest and fastest way is to make a decorative curtain with your own hands. Behind it you can hide all the shortcomings of the plumbing, and, if necessary, household items and household chemicals. Making a curtain is very easy. The first step is to make a frame and string special mounting hardware onto it. And then sew a product from any non-woven material. Or you can buy a ready-made oilcloth shower curtain and shorten it to the required length. Advantages:
- cheap, practical and aesthetically pleasing;
- easily mounted on any bathtub, regardless of its configuration and dimensions;
- in the event of a water leak, there is direct access to the breakdown site.
This design solution is most suitable for country, retro or vintage style
First of all, let's understand what a finished screen is. This is an inexpensive design that can be found in hardware stores. It is easy to assemble and remove when necessary. Screens for decorating the bottom of the bathtub are usually made of plastic. A large selection of shades allows you to choose a product that matches the color of any interior. Screens with doors, which, in turn, can be hinged or sliding, are convenient in everyday life. The last factor will be a big plus for a small bathroom.
If the bathroom is small, you should take a closer look at ready-made screens with sliding doors and built-in storage shelves
If you choose a design with internal shelves or drawers, you can significantly relieve wall cabinets. And in the case of a small bathroom, remove them completely. Advantages:
- one hundred percent moisture resistance;
- duplicate the most common types of ceramic tiles in color;
- easy care;
- Quickly assembled and disassembled: installation instructions are included with the product.
Wood-look decorative screen
Here is a list of building materials for the capital structure:
- moisture-resistant plasterboard 10-12 mm thick;
- PVC panels or tiles;
- tile.
First you need to make a frame. It can be assembled from a wooden beam, which is less preferable, or an aluminum profile. The guide elements are attached directly to the floor and walls. Then the frame is covered with plasterboard. Don't forget to make a hatch for pipe inspection.
First of all, you need to make a frame
The base for a ceramic tile screen can be laid out of brick or foam block using cement mortar. To avoid having to break a major structure in the future, make a window through which you can repair plumbing equipment.
Don't forget to make an inspection hatch
Some companies that manufacture bathtubs of non-standard shapes also specially produce frames for a specific model. They are usually made from high-density plastic or foam. After the rough work is completed, you need to cover the surfaces with finishing material.
As the latter, you can use mosaics, PVC panels, wooden slats, artificial stone and even leather.
Ceramic tiles can be used as a finishing material
- long service life;
- reliability and capital construction;
- hygiene when facing with ceramic or PVC tiles;
- easy care.
Before installing the frame structure, we level the floor.
- We lay water and drainage communications.
- We lay the pedestal out of brick and cover it with moisture-resistant plywood on top.
- Replacing an socket with your own hands Replacing an socket is necessary in cases when the old one stops performing its functions or is simply broken.…
- Installation of a split system with your own hands (instructions) Stages of installing a split system with your own hands Outdoor unit of the air conditioner
- Installing a fan in the bathroom with your own hands Any bathroom needs, first of all, good ventilation, which should be provided by a ventilation shaft. If…
- DIY bath mat made from stones Homemade bath mats made from river stones most often have many disadvantages: the stones are too…
With a one-piece design, the bathtub is installed on a podium, but, if desired, it can also be placed in a recess. 3. We sew up the side surfaces with moisture-resistant plasterboard or expanded polystyrene boards.
Bath built into the podium
When choosing cladding for the podium, you need to take into account the color scheme of existing finishing materials and the general style of the room. Advantages: • monumental and decorative; • strength and durability.
Stylish podium for a spacious bathroom in a modern style
If you want to close the bathtub yourself, use one of the first two methods. It is better to entrust the construction of a podium and other capital structures made of brick to professionals.
Was the article useful? Tell your friends:
Preparing to install a bathtub
To reduce the size of the problem and make it easier to seal the seam, you must perform the following procedures:
- Be sure to level the walls and floor of the bathroom. A horizontal skew of the bathtub (one edge or corner is higher than the others) will in any case create difficulties during operation, but in addition it can lead to the appearance of a gap after installation. This is due to the fact that under the weight of the collected water and the person in the container, the bath may settle and the sealing of the joints will be broken;
- check that the dimensions of the bathtub and the opening/niche under it match. If necessary, you can adjust the dimensions of the niche by chipping the walls. This is done when the dimensions of the bathtub along the edges are slightly, literally 2...10 mm, larger than the size of the opening. With this installation method, the bathtub “fits” its sides into the body of the wall;
- waterproof the walls above and below the sides of the bathtub, and better yet, on the floor.
After such measures, the width of the gap between the bathtub and the wall can be reduced to 1...5 mm.
Why is it so important to get rid of cracks?
There are several reasons that require urgent removal of gaps in the bathroom. We list them below:
- Unaesthetic appearance. The presence of voids greatly spoils the picture of the interior in the bathroom.
- Moisture ingress. This can cause water to leak to neighbors, and untimely removal will lead to the formation of fungus and mold.
- Damage to the floor covering. Sooner or later, if moisture gets on the floor, limescale and damp spots will appear on the floor, which are difficult to remove.
How to seal the gap between the bathtub and the wall
The most popular methods of closing a gap are:
- cement mortar, in pure form or with inserts from other materials;
- polyurethane foam (similar);
- sealant - only for narrow cracks (up to 5...8 mm) or in combination with other materials;
- borders and inserts made of metal or plastic;
- self-adhesive curb tape;
- panels made of plastic or other materials, with additional sealing of joints (with wide gaps, more than 20 mm);
- cladding with tiles, mosaics, and other materials according to the design of the bathroom with a pre-installed support insert and sealing of joints (gap 20...30 mm or more).
The choice of a specific method depends on the skills of the repairman, his budget, as well as the time of work and the required duration of operation of the protection. So, if you need to seal a gap in a rented apartment or temporarily seal a bathtub in your own before major repairs, options 1, 3, 5 are suitable.
Below are more detailed instructions on how to eliminate the gap in general and seal the joints.
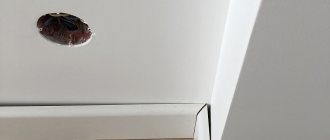
Choosing a hatch
A hatch measuring at least 400 x 300 mm must be built into the bath screen to provide access to the siphon and pipe connections. Often a second hatch is installed to store household items under the bathroom.
When choosing the dimensions and location of the door, you need to take into account the size and pattern of the tile (the tile can protrude 3–5 cm beyond the hatch). The most convenient models are those with a hinge, the door of which slides out of the opening and then swings open or slides to the side (they are produced by VS-Group, Delight, Hammer, etc.). If there is no room to open them (for example, there is a cabinet under the sink next to the bathroom), you should choose a removable hatch, secured with push latches. It is better to purchase a product with a corrosion-resistant aluminum frame and an adjustable opening mechanism, which will help achieve an even gap around the perimeter of the door. The hatch frame is mounted into the screen before it is lined. If the hatch is located close to the floor, it is important to carefully level it and leave a gap of at least 3 mm between the door and the floor. After tiling, the gap around the perimeter of the door is filled with silicone sealant, matched to the color of the grout. The hardened sealant is cut through with a wallpaper knife.
How to fix a joint between a bathtub and tiles using cement
When choosing this method, you need to remember that cement gradually breaks down under the influence of water, so you either need to protect the material from water with something on top, or use this method as a temporary solution.
Sequence of work:
- the surface of the walls and bathtub is cleaned of dirt, grease, debris, and moistened for better adhesion to cement;
- the width of the gap is checked - if the gap is more than 2...3 mm, the solution will flow (fall out) down. Filler is inserted into wide slots. This could be an elastic tube of suitable diameter (slightly larger than the width of the gap), cut strips of porous rubber, or even just a rag soaked in cement mortar;
- a cement mortar of the thickness of sour cream is mixed (the proportions can be found in the article);
- The prepared solution is first placed in the gap, after which it is removed as much as possible from the surface of the bathtub rim. Ideally, the seam should not protrude beyond the level of the upper plane of the bathtub - this will help to better disguise it during further finishing. A good option is to make a smooth transition from the side to the wall, as shown in the illustration.
Below is shown the WRONG way to seal a gap with cement - the side is made very massive, extends beyond the boundaries of the upper plane of the bathtub, and has a loose connection with the side and walls. This happens if a very dense solution is used and the rules for gradual hardening of the mixture are not followed.
Such a “seal” requires additional sealing.
Important: in order not to subsequently wash the bathtub and the wall from particles of cement mortar, it does not hurt to seal the surfaces next to the place where the seam is created with masking tape. This method of surface protection is suitable for almost all sealing methods. If you are installing a new bathtub, you can partially leave the packaging film on it, securing it with masking tape or tape so that it does not move during operation.
After the solution has completely cured (depending on humidity and temperature, as well as the amount of solution, the process may take 2...10 days), sealing with moisture-resistant material and finishing are performed.
Why do gaps appear?
There are several reasons. The first and main thing is the finishing flaws. Insufficiently smooth “wavy” surfaces, as well as screed on the floor, due to which the bathtub warps. Uneven corners or simply a non-standard room layout also leads to large gaps. Sometimes there are defects in the plumbing itself, then all that remains is to replace it and choose something more even and of higher quality.
In these cases, the minimum gap is even less than a centimeter, but sometimes reaches 2-3 centimeters. No matter how small it is, it still needs to be sealed.
Large gap between bathtub and wall
A large hole is formed if the plumbing fixture is shorter than the niche where it is placed. This often happens, because products are sold in standard sizes: 1.5 meters; 1.6 or 1.7. In this case, the gap can be closed with a false partition made of plasterboard or laid with bricks and cement - there are not many options here.
But small distances need to be filled - by ourselves or with the help of professional builders. Even if you don’t have special skills, it’s quite possible to cope.
Sealing with cement using inserts (for large gaps)
If the empty space between the edge of the bathtub and the wall is too large, you will have to use auxiliary measures - for example, special supporting elements.
Among such elements are:
- brick or concrete blocks, whole or in fragments. They are either inserted into the gap by surprise (in small pieces), followed by sealing the gaps with cement mortar, or laid out in the form of a wall using the same mortar;
- metal brackets and beams. Typically, in this case, moisture-resistant sheet material is laid on top of them.
Next, the resulting flat surfaces are finished with tiles, and the joints between the tiles and the side are sealed with other materials.
Bath podium
An elegant solution for spacious bathrooms. Here you are limited only by your own imagination. Like most blind stationary structures, the base of the podium covers the entire distance between the bathtub and the floor. It is laid out from bricks or blocks and finished with mosaics or tiles. The steps are covered with an anti-slip compound.
According to its design, a bathroom podium can be monolithic or frame. The first option involves one small step. The undoubted advantages of the monolith are its reliability and strength, as well as moisture resistance. But like all blind structures, it blocks access to communications.
To create a monolithic podium, formwork that is not adjacent to the walls is laid along the outer perimeter of the future structure. If the bathtub is installed, the drain is installed and all communications are in working order, the interior space is filled with concrete. The masonry mesh is slightly recessed on top. After the structure has hardened, you can proceed to finishing work.
The frame podium is hollow inside - it can be used for storage. The metal profile is additionally reinforced with wooden beams to impart rigidity to the structure. For the construction of steps, additional intermediate logs are used. The finished frame is covered with plywood or plasterboard and decorated.
Drywall and other panels
This method of solving the problem is only suitable if the surface of the panels is carefully protected from water, because even moisture-resistant drywall cannot withstand direct contact with water and constant high humidity.
GKL requires good waterproofing at the ends of the sheets and painting with waterproof paint on the reverse side; OSB panels, chipboard, fiberboard, wood - high-quality waterproof impregnation. The panels are laid on a prepared frame, wooden (also impregnated) or metal. Typically, this method of closing the gap is used in conjunction with installing a protective screen under the bathtub.
The panels are also finished with tiles, waterproof paint or high-quality plastic.
Screen with hinged doors
Allows easy access to communications located under the bathroom, as well as storing detergents and cleaning products here. It differs from others, in fact, only in the way the doors open. Wooden models or MDF screens look especially interesting, but this option is not always convenient in tight spaces.
Screen with hinged doors made of wood
Polyurethane foam
A very quick and popular way to eliminate a gap, including one of irregular configuration and quite large width. The installation is very simple:
- the edge of the bathtub and the wall nearby are cleaned of dirt and debris, protected from foam with masking tape (it is better to cover the entire bathtub with film);
- after shaking the container, the spout is inserted into the slot and the required amount of foam is blown out;
- The finally frozen foam is carefully cut with a knife to the level of the side of the bathtub.
Important: foam does not completely prevent water seepage between the side and the wall! The seam sealed in this way must be finished on top and additionally sealed!
Popular manufacturers of anti-wicking skirting boards
Today, popular manufacturers of skirting boards include both foreign and domestic brands and companies.
Leroy Merlin
Leroy Merlin is a famous French hypermarket chain that sells building materials and goods for home and garden. There is a wide selection of finishing materials, including all kinds of baseboard options for the bathroom.
Favorable prices and the possibility of delivery make the purchase even more enjoyable and profitable.
BNV
In 2021, the BNV online store took a leading position in the bathroom border market. The quality of the product was appreciated by customers, and high sales growth rates indicate the popularity of the company. The production is equipped with modern equipment and creates universal acrylic borders for the bathroom. There are 16 models available in different sizes and designs. A convenient way to receive it in any corner of Russia.
Borders and moldings are made to order according to individual sizes.
Mac
Polskaya is a leading global brand in the production and sale of innovative plastic profiles. Products are supplied to the markets of Europe, Asia and the USA. Their products are quick to install, do not absorb moisture, and do not contain lead.
Among the manufactured products there are self-adhesive skirting boards and tapes.
Porcelanosa Group
Porcelanosa Grupo ranks third in the ranking of the best manufacturers of sanitary ware, cladding materials, accessories for spas and hydromassage, as well as furniture. The company employs the best designers who implement the latest technologies in the creation of environmentally friendly materials used for ceramics, plumbing, and furniture. They offer non-standard solutions for the construction of modern buildings.
Today, the concern unites several companies that are engaged in production with a wide range of products. The goods they produce are aimed at creating a comfortable life for people.
The use of modern technologies, concern for the environment and high quality have helped the concern become a leader in the global market.
Such a wide selection of solutions for bathroom design will help the owner of any bathroom to choose options that suit his situation, taste and financial capabilities.
How to seal a seam between a bathtub and a wall using a ceramic border
This method will not work if there is a large gap between the bathtub and the wall. It is acceptable for a gap of 15...40 mm. Ceramic borders are usually purchased complete with facing tiles. It can also be purchased separately, based on roughly similar color and design.
In addition to the border itself, manufacturers offer connecting corners, and often finishing (end) elements.
The advantage of using such a ceramic plinth is that you can seal not only the joint between the wall and the bathroom, but also the corner between the walls. It is important that the surfaces are perfectly smooth.
You can also use frieze tiles or border tiles.
They are installed in the same way as regular wall tiles, using cement mortar or glue. Addition – mandatory seam sealing.
About plastic corners for the bathroom
The strip plinth is quite modest in appearance and is not suitable for all owners as a border. Plastic corners are the most popular. They are made from polyvinyl chloride, which is considered an ideal material for the manufacture of products that are intended to be used in conditions of high humidity. The plastic corner has several significant advantages.
- Wide color range. You can easily choose a border to match any bathroom decor, make it a key design element, or beautifully fit it into an existing harmony.
- Good flexibility. This characteristic makes it possible to install a protective skirting board even on a bathtub with a non-standard configuration.
- Affordable price. A plastic corner will cost more than a tape corner, but not so much as to force the average consumer to save up to purchase it.
At the same time, gluing the product is simple, the border tolerates temperature fluctuations indifferently, is not afraid of moisture, does not become infected with fungus, and is highly resistant to acids and alkalis included in cleaning products.
The only drawback of plastic skirting boards is their loss of appearance, which inevitably comes with time. The surface may become scratched, and some types of corners may turn yellow. However, this minus is relative: the low price and ease of installation allow you to replace the curb at any time. If the plastic corner is installed correctly, is not subjected to special physical influences, and is properly cared for, the product can serve the owners of the house for 4-5 years.
Plastic corners are divided into three classes according to their configuration:
- cast molding;
- plinth “swallow”;
- a composite type of corner.
This is what a molding type border looks like
This plastic plinth is called “swallow”
Compound corner
Any of the options can be fixed either to tiles or to any other wall finish.
Metal corner corners for cladding
This method is applicable at the stage of creating the cladding. The metal corner is attached to the wall so that its bottom shelf fits snugly against the side of the bathtub. Next, the bottom row of tiles is inserted into the groove of the corner or directly onto it (depending on the design).
Sealing is necessary, because otherwise dampness will penetrate under the tiles and gradually destroy the adhesive composition.
Peculiarities
The gap between the wall and the bathtub occurs due to a mismatch between the dimensions of the bathtub and the room, uneven walls or due to missing corners.
The size of the gap depends on the specific situation. At the moment, quite a lot of solutions to this problem have already been invented, and we will talk about them. How to close large gaps (more than 5 cm), small gaps, the best ways to resolve these situations depending on the input conditions - we will consider all this later in the article.
Plastic borders
This method is one of the simplest and is possible even with a fully installed bathtub and a tiled wall. In fact, it is a relatively flexible plastic profile that is glued to the joint between the side and the wall using sealant.
There are two main types - overhead (left) and insert (right) profiles. They are used depending on the width of the gap and the location of the bathtub in relation to the wall. If the joint is tight, you can refuse to use sealant, simply insert the profile “with tension” into the cleaned gap, but it is still better to attach the plastic plinth to the sealant.
Decorative curtain
A curtain is the fastest and most inexpensive way to hide all the imperfections of your plumbing. In addition, it is easy to store household items under it. To make a curtain, just select a suitable piece of fabric and stitch it around the perimeter; if the fabric is thick, you can make folds or do without them.
Decorative curtain for the bath
There are several ways to attach the curtain, the simplest is to use double-sided Velcro tape. One side is attached directly to the curtain, and the other is glued with liquid nails under the rim of the bathtub. You can also use a thin furniture pipe with fasteners, to which the curtain is tied using loops.
Important! When choosing a bath screen, you should also consider the style of the interior. For country, a curtain would be an excellent option, while for modern, a metal screen would be more preferable.
Sealing
In all of the methods described above for sealing a gap, there was advice to cover the gap with sealant. This is almost always special silicone or similar materials.
Narrow gaps can be sealed with silicone without additional measures to eliminate the gap; if there is a large free space, it will only be an addition to the main measures to eliminate the problem.
Important: before filling the seam with sealant, it is necessary to protect the surfaces from contamination, since it can be difficult to wash off silicone even from enamel and glazed ceramics.
A strip of silicone inserted into the seam is smeared, rubbing into the gap so that water has no opportunity to penetrate where it is not supposed to.
The excess is cut off with a knife or a special tool.
The sealant is selected to match the color of the facing tile or bathtub; most often a white or transparent version is used.
How to cut decorative edging around the perimeter of a bathtub
Quite often, when trying on bathroom surrounds, parts have to be trimmed both around the perimeter of the bathroom and in the corners. So, for example, flexible and elastic edgings can be cut with a special construction knife. A sharp construction knife is also quite suitable for cutting plastic or silicone.
However, for options made of ceramics or porcelain stoneware, you will need a special ceramic cutter or a grinder with a diamond blade.
For correct and precise cutting in corners, a special tool is used - a miter box, which allows you to accurately cut even workpieces at an angle of 45 degrees.
Different cutting corners require different tools to be used.
Temporary measures
If a gap appears unexpectedly, and there are no plans to carry out repairs in the near future, you can use a budget-friendly and quick, but, unfortunately, not very durable method of sealing the seam - using self-adhesive tape.
The tape is simply glued over the joint so that the fold falls on the line separating the two surfaces. The procedure is very quick and does not require much effort or skill.
The surface, of course, must first be cleaned and degreased - this will improve adhesion and help the tape last not 8...12 months, but at least two years. However, the duration of use also depends on how actively the bathroom is used.
You can watch the installation process in the video.
Tools and materials
Gaps of any width are a nuisance that requires a quick solution. Therefore, before sealing the gaps between the bathtub and the wall, the master will have to choose a method, find tools, and buy all the necessary materials. The “gentleman’s set” will depend on the embedding method. It can include many “needs.”
Tools that will be useful:
- sponges, sandpaper, sander;
- rags, rags (for work and stuffing into cracks);
- “liquid nails” with a “weapon” for them - with a pistol;
- sharp (breadboard) knife for removing excess material;
- grinder if you plan to cut tiles (borders).
You may need:
- primer;
- cement mortar;
- sealant, polyurethane foam;
- tile adhesive or grout;
- tiles, border tape;
- plastic corners, ceramic borders;
- corner and plug for plastic elements.
To degrease surfaces, it is necessary to prepare a product containing alcohol or a solvent (for example, white spirit).
Wooden beam
Actually, this is not an option for sealing the gap, but a way to reduce it. If the distance from the wall to the side of the bathroom is 5-10 cm, you can attach a beam with a cross section of 40*40- or 50*50 mm to the wall along the entire length. This way you will reduce the gap, there will be many options for sealing.
Before installing the timber, you need to do the following:
- Before processing, dry the timber in a dry room;
- Soak the timber with an antiseptic;
- Apply a moisture-repellent agent to it;
- If possible, use oak, elm or hornbeam timber.
Installation option without gaps
In order not to look for a way to seal the gaps between the bathtub and the wall, you can use the recommendations of professionals. They believe that it is better to install a new plumbing fixture before tiling the bathroom. In this case, the master receives several advantages at once. This is the attractiveness of the room and the absence of any potential places for leakage.
In order to avoid problems during installation of the coating, it is necessary to carry out careful calculations. The best option is when the tiles do not have to be cut, so the distance from the installed and adjusted bathtub is measured in advance. Then, based on the results obtained (the height and width of the wall), products for wall cladding are selected exactly in size.
Almost invisible gaps between the wall and the side of the bathtub are eliminated with grout. To ensure that you get rid of any headaches, the gaps are filled with sealant before installing the tiles. Another advantage of this option is its reliability. Any masking elements - plastic or ceramic products - can come off due to constant contact with moisture. A bathtub that has practically become part of the wall eliminates such consequences.
How to seal the gaps between the bathtub and the wall? Is it difficult to do this on your own? All these “plumbing operations” cannot be called super complex, but any work requires attentiveness, accuracy and precision from the master. If the owners have these qualities, then the “gap” in the bathroom will not become insurmountable. The second important point is the quality of materials. Anyone who wants to protect themselves from troubles in the future chooses reasonable spending rather than saving on absolutely everything.
The following, most informative video will tell you how to seal the gaps between the bathtub and the wall:
Sources
- https://stroy-podskazka.ru/vannaya/remont/kak-zadelat-shchel/
- https://www.ivd.ru/dizajn-i-dekor/vannaa-komnata-sanuzel/kak-zadelat-styk-mezhdu-vannoj-i-stenoj-37861
- https://dom-i-remont.info/posts/stenyi/kak-zadelat-shheli-mezhdu-vannoj-i-stenoj-vozmozhnye-varianty-borby/
- https://MasteraVannoy.ru/vanny/kak-i-chem-zadelat-bolshuyu-shchel.html
- https://stroy-okey.ru/remont/santehnika/chem-zadelat-shhel-mezhdu-vannoj-i-stenoj-9-prostyh-sposobov/
- https://mebel-expert.info/chem-zadelat-shhel-mezhdu-stenoj-i-vannoj/