To create a high-quality coating on the walls of a bathroom or kitchen that has a long service life, you need to know how to glue tiles to walls, observing all existing rules and strictly following the requirements of the technological process.
The main distinguishing features of such finishing materials as tiles are resistance to various kinds of negative influences, ease of maintenance and durability. It is these qualities that become decisive when choosing a material for finishing, but no less important is the fact that you can do all the upcoming work with your own hands.
Necessary tools for work
To lay tiles in the bathtub with your own hands, you will need a detailed repair plan and tools:
- Ceramic tile.
- Durable glue.
- Chisel, chisel, hammer - all tools are needed to remove the old coating.
- Spatulas and primer for preliminary preparation of walls.
- Plaster for leveling wall surfaces (if necessary).
You may also need auxiliary materials such as rollers and rags to clean the surface from dust, containers, and construction gloves. Detailed instructions on how to lay tiles in the bathroom will also come in handy.
Waterproofing
The bathroom is characterized by a special microclimate caused by high levels of humidity, constant steam formation and temperature changes, therefore, before laying finishing materials, reliable and high-quality waterproofing is installed. For this purpose, several options for hydrobarriers are used:
- Painting waterproofing based on bitumen or polymer mastic, which must be applied in several layers. The resulting waterproofing is smooth and has no joints, which is very important when finishing tiles.
- Coating type of waterproofing, represented by a dry mixture based on fine-grained sand, polymer additives and cement. The mixture is applied with a spatula and trowel, which allows you to get a thicker layer of screed to eliminate gaps and unevenness.
- Pasting technology , which involves protecting vulnerable areas of “wet zones” with moisture-proof self-adhesive or guided materials on a bitumen or fiberglass basis, creating a kind of “hydric trough”.
Coating waterproofing in the bathroom
Less in demand is the expensive option of poured-type waterproofing as a result of the construction of a single monolithic concrete water barrier.
The choice of waterproofing technology directly depends on several factors, which include the type of equipment installed in the sanitary room, temperature and humidity levels, as well as floor material.
Calculation of the number of tiles
Before starting repair work, a preliminary calculation of the amount of ceramic tiles is required. To do this, you should prepare a diagram with the exact location of the tiled elements around the perimeter of the room.
Be sure to take into account the number of joints and construction defects, which may require more material.
When buying tiles, they always take more material per square, so that you don’t have to buy missing pieces in the future.
Wall mounting process
- First, we place two rows along the central axes. We start from the central nail - the hairpin.
- Then we move the threads one row, controlling the distance using a tape measure, or better yet, using a triangle.
- We also strictly maintain the same distance from the leveled surface, which is achieved by securing the thread to nails - hairpins and “brute” force using a mallet.
- We continue to lay out along the stretched threads. This technology is necessary for accurate laying along one line.
- Don’t forget about the crosses to ensure uniform gaps between the tiles.
Choosing glue for work
The choice of adhesive for interior wall cladding must be especially careful. The quality and properties of the adhesive base significantly affect the service life of the ceramic coating.
Today, there are several types of adhesives for wall cladding in the bathroom:
- A universal option. Suitable for all types of surfaces and ceramics, but this is still a relative indicator. This option is ideal for attaching lightweight tile models.
- Moisture resistant option. It is used for hard-to-reach places, joint lines and surfaces that are constantly in contact with moisture.
- Strengthened version. Used for fastening particularly heavy types of tiles and decorative elements.
There is also a specialized type of adhesive structure that allows you to attach tile modules to plaster or wood base. Sometimes cement mortar is used instead of glue.
Sealing seams
Wall tiling is completed by grouting the joints using the following technology.
- Remove any excess glue. This may require a knife and solvent.
- Mix Mapei grout (or any other grout of your choice) according to the manufacturer's instructions. The most common color chosen is white, but you can purchase a brighter one for contrast.
- Next, use a spatula to apply it to the seams after laying the tiles on the wall.
- Treat the area thoroughly. Remove the remaining mixture with a damp sponge.
- Remove excess cement grout using a rubber eraser.
- Wait for the compound to dry and polish the area with a dry cloth.
Attention! In the gaps between the bathroom and the wall where the tiles were laid, the space is filled not with grout, but with sealant.
Step-by-step installation of tiles in the bathroom
The entire process of repair work can be divided into several stages:
- Removing old coating.
- Surface marking.
- Preliminary preparation of walls and floors.
- Leveling surfaces.
- Mixing the solution.
- Laying tiles.
Note!
- IKEA bathroom: TOP-140 photos and videos of IKEA bathroom design options. Manufacturer's advantages. Features of the collections
PVC panels for the bathroom: TOP-180 photos and video reviews. Advantages and disadvantages of the material. Varieties of PVC panel models. Mounting methods
Bathroom faucet: types of faucets and coating materials. Shower switch mechanism. Built-in and external mixers (photo + video)
Each stage is performed sequentially so as not to disrupt the repair technology.
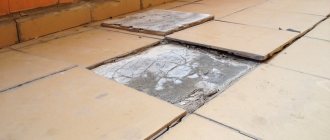
Let's figure out which fallen tiles can still be used and which should be thrown away
To glue the fallen tiles, you need to understand which of them is suitable for re-gluing. To do this, the product is inspected. A completely intact product is suitable, without chips, cracks or other defects. Small pieces that can be arranged together are also suitable. They match in texture and color.
You need to throw away small elements, a few centimeters in size. They are not suitable for reuse.
A completely intact product is suitable, without chips, cracks or other defects.
Removing old coating
Before starting repairs, it is necessary to remove the old tile covering. To do this, the tiled element is slightly pryed with a chisel and the tiled module is removed.
Using a hammer, carefully knock down the remaining cement joints and erase any identified irregularities.
Surface marking
In modern bathroom design, an original combination of several types of tiles is often used.
This approach allows you to zone the room using decorative edges, ledges or inserts with ornaments. Preliminary marking is carried out using a construction or laser level.
Note!
- Self-leveling floor in the bathroom - TOP 170 photo and video options. Advantages of self-leveling flooring in the bathroom. DIY pouring instructions
Chest of drawers in the bathroom: 165 photos of stylish models and videos of current options for placing chests of drawers
Sliding curtains for the bathroom - 165 photos + video instructions on how to choose and install sliding curtains correctly
Preliminary surface preparation
To lay tiles evenly on the surface of walls and floors, it is necessary to prepare the underlying base. For high-quality installation of tiled flooring, a primer is required.
In a hardware store, you should choose a primer specifically for the bathroom, with the addition of moisture-resistant impurities.
The primer is applied with a wide spatula and leveled over the surface of the walls and floor. A high-quality primer promotes better adhesion of plaster and tiles to the underlying surface.
Also at this stage it is necessary to assess the condition of the underlying walls and floor: their strength, the presence of large cracks, dampness.
If there are signs of fungus, the surface must first be dried, treated with antifungal solutions several times, and dried again.
Note!
- Bathroom design 3 sq. m. - 115 photos and video description of how to decorate a bathroom in a stylish and original way
- Bathroom 6 sq. m.: 175 photos of practical ideas for applying bathroom design and video description of styling
- Bathroom lamps: 140 photos and video description of how to install beautiful and stylish lamps
After drying, you should use a special moisture-resistant primer mixture or cover the walls with a special moisture-resistant composition.
Preparatory stage
The preparation of the walls must be treated carefully, since the entire procedure and further service life depend on this. The surface must be flat, without any changes, so that the process is as simple as possible. If there are irregularities, they will have to be adjusted by the amount of adhesive applied. Preparatory work includes:
- measuring the total area to calculate the consumption of building materials;
- determining the degree of wall deviation by level;
- strength testing using the knocking method to identify poorly adhering layers that need to be removed;
- cleaning from grease, stains, paint residues, glue, tiles and wallpaper;
- alignment;
- padding.
Preparation of the base for laying tiles begins on a dry surface.
- To level concrete, stone and brick walls, treatment with cement mortar is required.
- A layer of roofing material, a metal mesh, and plaster are applied to the wood.
- Preparation of the plasterboard surface consists of covering it with a plastic mesh.
- The plaster needs to be chiselled to improve adhesion. If you don't have one, use an axe.
Mixing the solution
A small amount of cement mortar is mixed in a special container using the recommended proportions of sand, cement and water.
The solution is applied to the surface of the walls and floor in an even layer after the underlying layer of plaster has completely dried.
What mistakes do beginners make when working with tiles on their own?
Often a product is lost if the process technology is not followed. Beginners did not prepare the wall before gluing; as a result, water or dirt got under the tiles. Before gluing the selected tile option to the wall, the surface should be plastered, primed, and allowed to dry each layer.
Before gluing the selected tile option to the wall, you should prepare the surface.
The tilework looks beautiful. It will make the room sparkle with new colors if you follow the technology when carrying out the work.
Laying ceramic tiles
Installation of tiles begins from the bottom up from the far corner of the room. Plastic inserts are either laid between adjacent modules or a special sealing solution is applied.
The solution must be immediately rubbed in using a spatula; the residue must be removed with a rag or sponge.
Laying tiles in difficult places
Owners of old apartment buildings very often face the problem of laying tiles in hard-to-reach places, joints and corners in the room.
Instructions on how to beautifully lay tiles in the bathroom without disturbing the overall style of the masonry:
- First of all, you need to assess the condition of the joint or complex corner, its dimensions.
- Using a construction pencil, mark the proper dimensions of the tile module.
- Carefully cut the tiles with a grinder and sand the cut surface.
The tile fragments are carefully inserted either in a T-shape or brought over the edge of the adjacent element.
If you have any questions, you should watch a video on how to properly lay tiles in a bathroom with uneven surfaces or a large number of corners.
Another important point is the question of how to lay tiles in a small bathroom. In practice, the technique of laying tiles “seam to seam” is used; the mortar is laid out in small portions.
Instead of plastic inserts, only grouting is used. This approach allows you to visually increase the size of the room.
It is also worth taking into account the design of ceramic tiles - for small rooms, light tiles with neutral shades are used.
Today, there are many video tutorials and instructions for beginners, tips from practical designers on how to beautifully lay tiles in the bathroom.
To work, it is not at all necessary to have significant construction skills; you only need desire and a creative attitude.
FAQ. Questions and answers
How to prepare tile adhesive?
First of all, in accordance with the manufacturer's instructions. The finished solution should have a thick but fairly soft consistency. After mixing, the glue is infused for about 5 minutes, then mixed again and only then used.
How to save tiles?
This can be done if you choose the right shape and size. Modern tiles can be large and small, rectangular and square. If you plan to use a complex pattern or the room has a complex geometric shape, then do not forget that rectangular tiles leave a lot of waste. Which, in turn, increases consumption and financial costs.
Do I need any preparation for the tiles?
Experts advise placing the tiles in a container of water for 8-10 hours before installation. This will increase the adhesion of the material, i.e. the glue will stick better. Then the wet tiles need to be laid out on the floor to dry.
How to determine that a tile is from the same series?
All tiles must be not only from the same manufacturer, but also from the same series. Then there will be no difference in shades between individual elements. It’s easy to make sure that the tiles are from the same series - just study the packaging and check the passport information.
Can I lay wall tiles on the floor?
Definitely not! Wall tiles are too flimsy and fragile to be used as floor finishes.
Insulation of walls inside an apartment: choice of material and installation technology
Deep penetration primers for walls: features, rules of use and rating of the best
How to paint plaster: choosing paint, life hacks from professionals
Leveling walls with beacons with your own hands: choosing plaster, methods and step-by-step instructions
Insulation of walls inside an apartment: choice of material and installation technology
How to putty walls with your own hands - detailed instructions and life hacks from the masters
Leveling walls with plasterboard with your own hands: 2 methods with instructions
Primer for wallpaper: what functions it performs, types, advice from professionals
On a note ! Properly laid tiles will become a highly durable, durable and high-quality coating - the most reliable in the entire house. In this regard, no other type of coating can compare with tiles! And it’s not even worth talking about its water resistance.
