When fuel (coal, firewood) for solid fuel boilers was available at an affordable price, few people thought about increasing the efficiency of these heating devices. But we now live in a time when energy resources for the population become more expensive every year, so the issue of modernizing KChM boilers, which are still preserved in many villages and urban gas stations, is far from idle, but most likely vital.
We bring to the attention of site visitors the simplest and most affordable options for increasing the efficiency of solid fuel boilers of the KChM series:
- Inserting a partition sheet into the boiler.
- Air supply from above to the boiler.
- Air supply from below to the boiler.
What is the real efficiency of solid fuel boilers
Manufacturers of heating equipment, in particular solid fuel boilers, offer a wide range of products with different characteristics.
Based on the design of the solid fuel boiler, all products can be divided into the following groups:
- traditional heating units;
- wood boilers with pyrolysis type of combustion (gas generator);
- long burning;
- pellet
A traditional solid fuel boiler, including a homemade one, in appearance resembles a stove or potbelly stove with the most necessary elements - a combustion chamber, a door, an ash pan and a chimney. Using the ash pan, you can regulate the draft by opening and closing the damper. Such designs are considered quite reliable because they do not contain any technological elements, such as temperature sensors or thermometers, an automatic control unit or electronics. In this case, the main design element of a solid fuel boiler is a heat exchanger that transfers thermal energy to the coolant. The heat exchanger can be tubular or made in the form of a container made of solid steel sheets.
There are, however, more complex devices that can also be classified as traditional. They are equipped with baffles and throttle valves to make it easier to regulate the draft, and the hot air travels a greater distance before exiting the chimney. Such partitions significantly increase the efficiency of the boiler, since more thermal energy is transferred to the coolant, and does not just “fly out into the chimney”. You need to understand that boiler efficiency is a very important indicator.
For such boilers, you can use almost any fuel - wood, coal, pellets and even garbage. The main thing is that it is as dry as possible. In terms of performance, boilers of simple designs can hardly claim 50% efficiency, and in most cases it is only 15-20%. The problem is that the fuel burns too quickly, without having time to transfer all the thermal energy to the water in the heat exchanger. As a result, more heat is simply released into the chimney or its excess causes the coolant to boil. For example, firewood needs to be added to the firebox every hour, and coal will last for 2-4 hours, but it still burns with excess energy and large heat losses.
Modern boilers with baffles and throttle valves are more economical and productive. In them, the combustion temperature of the fuel can be adjusted, and one load of fuel lasts for 8-12 hours. Therefore, the efficiency of such installations often reaches 80%.
What you will need
When a project is selected, it is necessary to calculate how much material is required. If the instructions suggest that you need cast iron, do not buy cheaper aluminum, otherwise the device will quickly fail. It is better to purchase a thermostat and deflector ready-made than to make it yourself.
It is important to consider several points when making the device:
- It is advisable to choose a programmable thermostat, so you can set a controlled temperature.
- It is better to install the deflector above the chimney pipe, thereby ensuring exhaust. It may look like an umbrella with a cone. The material is only stainless steel.
- The device must have automation, which includes control over flame, overheating, and draft. The presence of a blast valve is also important.
Boilers with pyrolysis combustion type
Pyrolysis boilers also use solid fuel, in particular firewood, however, the principle of their operation is fundamentally different from the installations described above. They are able to heat a house much longer and more efficiently, and use fuel more economically. In this regard, the cost of such units is approximately 1.5-2 times more than others.
The secret of gas generator (pyrolysis) boilers is that under the influence of high temperature and lack of air, wood is converted into charcoal, releasing pyrolysis gas.
This reaction requires a temperature between 200℃ and 800℃. This releases a large amount of energy, which dries the wood and heats the air. Pyrolysis gas moves through pipes into the combustion chamber, where it ignites when mixed with air - this is how most of the heat is generated.
Active carbons participate in oxidative processes during the combustion of pyrolysis gas, so the smoke coming out of the chimney consists mainly of carbon dioxide and steam - the content of harmful components is negligible. In addition, pyrolysis boilers, in principle, emit much less smoke than classic installations. Since the fuel burns with virtually no residue, gas generator boilers require cleaning quite rarely.
It is worth noting that a fairly high combustion temperature can be achieved even with raw firewood, however, in this case, the boiler’s performance will drop almost by half, which means fuel consumption will increase by the same amount.
Thanks to automation, the combustion intensity in such a boiler can be adjusted to save fuel and create an optimal temperature in the room.
Please note that making a pyrolysis heating boiler using solid fuel with your own hands is quite difficult and very dangerous. In the event of assembly errors, such an installation may explode.
Other options
A homemade boiler can come in two more variants, when the unit is obtained by remaking a gas water heater or stove. This can significantly save on installation costs.
Based on a gas water heater
The alteration involves replacing the nozzle or block responsible for gas combustion if a liquefied mixture is used. You will need to purchase an atmospheric burner that fits the combustion chamber. The ignition is mounted inside it.
To connect a fan burner, you will need to purchase an additional heating circuit. It consists of a security system unit, an expansion tank and pump, an air vent and a Mayevsky valve. This type of burner is more expensive, since it will also require a pressure gauge, an automatic air bleeder and a coaxial chimney.
Conversion from a gas stove
It is almost impossible to make such a boiler. There is only one available way: install a metal container with coolant on the burner, which will heat up and then move through the pipes to the batteries. The volume of the tank depends entirely on the power of the stove. It does not exceed 100-150 liters.
The return pipe is welded from below, and the direct supply is connected from above. Hot water rises and moves to the radiators. The cold liquid returns through the lower pipe.
Such a homemade device does not require a safety valve and an air vent, since excess water in the form of steam bubbles will escape through a loosely closed tank lid.
You can install a gas boiler yourself. You just need to follow the exact instructions and remember safety precautions. Before connecting, you must remember to obtain permission from Gorgaz.
Long burning fuel units
The idea of creating long-burning solid fuel boilers with your own hands will certainly seem attractive to many. The beauty of such structures is that you only need to put firewood in them a couple of times a day. A long-burning boiler differs from a traditional unit in that combustion in it begins from the top of the fuel stack. In this case, air is also supplied to the fuel chamber from above.
The design of a long-burning solid fuel boiler assumes the presence of a water circuit around its body, so the water in it is heated efficiently at any stage of the process. Since when the boiler is operating, it is not the entire filling that burns at once, but only the top layer of fuel, it lasts for almost 30 hours. A number of universal solid fuel boilers when using coal can operate for up to 7 days on one fill.
This design is not structurally complex and does not have any precision instruments that need to be connected to electricity. Therefore, their price is quite acceptable for the consumer. In addition, it is quite possible for a home craftsman to assemble a solid fuel boiler using ready-made drawings with his own hands. You can make a heating boiler with your own hands and save a lot of money.
Here are a few disadvantages of these designs. Fuel cannot be added to a boiler that is running. Firewood for the boiler must be well dried (no more than 20% humidity) and cut into small logs. Coal can only be used of high quality, with a low slag content. In addition, units of this type are limited in power - as a rule, no more than 40 kW.
Another type of solid fuel boiler is pellet units. Their difference is that wood waste pellets are used as fuel. Most industrial models have a special hopper from which granules are automatically fed into the firebox.
Calculations and creation of drawings
Before you create a device, you need to find or make your own drawings. They should contain information about what the future unit is, how to connect it, cool it, how the chimney and deflector are installed.
When making a device, you need to take into account how much heat is lost in each room where the battery will be located. Its quantity differs even for rooms in which the footage is the same. Calculations are carried out with a reserve. Add 10% for dimensions. 10 m² requires 1 kW of energy.
Gas emits 6.55 kW. You need to divide your daily energy consumption by this value. This gives the required volume of the boiler. A self-made tank holds the amount of liquid needed to heat a house.
Cast iron and steel structures - what are the differences?
Whatever material the boiler is made of, it is very important that it meets the basic operational characteristics. Let's look at them in more detail.
First of all, you should pay attention to the material of the heat exchanger - cast iron or steel. If you want to use a ready-made solid fuel boiler design, it’s unlikely that you’ll be able to make a cast iron heat exchanger yourself. Such work requires both special equipment and special knowledge and skills. Therefore, you can purchase ready-made sectional structures, which are disassembled before transportation and reassembled on site.
Cast iron heat exchangers tend to become covered with dry rust - a special film that protects the walls of the unit from destruction. In addition, wet rust also forms much more slowly, which is due to the long service life of cast iron products - from 10 to 25 years. Other advantages of cast iron heat exchangers include the absence of the need for frequent and complex maintenance. Cleaning of such devices is rarely required, and carbon deposits practically do not reduce the efficiency of the boiler. If it is necessary to repair or increase the power of the unit, you only need to replace the defective sections or increase their number.
The disadvantages of cast iron products are:
- the large mass of the boiler requires a separate foundation;
- difficulties in the assembly process and high transportation costs;
- sensitivity to thermal shock - cast iron does not like temperature changes, so contact of a hot surface with cold firewood or cold water can be detrimental to it;
- high thermal inertia - it takes a long time to warm up the boiler, but its subsequent cooling occurs slowly.
As for steel products, they are less sensitive to temperature changes and are not afraid of contact with cold objects. This property allows, when assembling solid fuel heating boilers according to drawings, to equip them with sensitive automatic elements. And thanks to their low inertia, such units quickly warm up and cool down - this allows you to regulate the air temperature in the house. At the same time, you can make a drawing of a long-burning solid fuel boiler with your own hands, which will allow you to take into account all the nuances.
In appearance, steel boilers are solid welded units that are quite difficult to transport, although their sensitivity to mechanical damage is much lower than their cast iron counterparts.
The possibility of repairing steel boilers is, from the point of view of some experts, very doubtful. Repairing, as well as welding a boiler with your own hands according to a drawing at home, is quite difficult; over time, leaks may form at the seams in it. In fairness, we note that everything depends on the worker’s skills in working with a welding machine. But repairing a cast iron heat exchanger is still easier - you only need to replace the sections.
As a rule, boilers with cast iron heat exchangers are non-volatile and inexpensive, so they can be a worthy alternative to already installed heating equipment in the event of a power outage. Coolant circulation in such units occurs naturally, without the use of a pump. However, the batteries must be installed in such a way that when heated, water moves freely through the pipes under the influence of pressure in the boiler.
Making a classic model
Building a reliable TT boiler that can last more than 15 years requires the use of the following materials:
- low-carbon steel sheet grade St10-20, 4 mm thick, for the manufacture of a firebox;
- the same, 3 mm thick - for the water jacket and doors;
- metal strip with a cross section of 20 x 3 or 20 x 4 mm;
- a piece of pipe with a diameter of 150 mm for the chimney;
- pipe Ø57 mm with a wall thickness of at least 3.5 mm for the heat exchanger;
- profile pipe 6 x 4 cm for the air duct;
- a corner with a shelf width of 5 cm made of thick metal (4-5 mm) on a grate;
- thin sheet steel with powder painting for external cladding.
Additional materials will require basalt fiber with a density of 80-100 kg/m³ for thermal insulation of the body and asbestos-graphite cord for sealing the door ledges. The automation kit and fan, which were mentioned in the previous section, are made in Poland, model KG Elektronik SP-05. There are also Chinese analogues on the market, they are cheaper.
Step one - welding the body
To weld the fuel chamber, it is necessary to cut 4 mm metal into blanks according to the dimensions indicated in the drawing. Start assembling from the bottom of the ash pan - grab the side walls and lid to it, and then form frames for the loading and cleaning door, as done in the photo.
Then follow this algorithm:
- Weld supports for the grate inside the firebox, and weld clips from a steel strip outside for mounting the water jacket.
- Install and weld the 3mm outer lining sheets of the water jacket. Note that it originates from the top of the ash chamber.
- In the upper compartment, which will subsequently be filled with coolant, cut 4 flame pipes Ø50 mm, and place the same pipes for connection to the heating system.
- Attach legs from pieces of any rolled metal to the unit and install a chimney pipe at the outlet of the fire tube heat exchanger.
Please note that the flame tubes converge in a bundle towards the chimney pipe
Stage two - installation of hanging elements
The doors of the fuel and ash chamber are made by bending the edges of the blanks and welding the internal frame, where the basalt insulation is laid. The insulation is hermetically sealed on top with a lid, and an asbestos-graphite cord is tightly inserted into the resulting groove along the perimeter of the sash.
What else needs to be done:
- Attach the handles and hinges to the body, and cover the doors with heat-resistant enamel.
- Weld a grate from the corners and put it in place.
- Make an air duct with a counter flange and weld it to the rear wall, as shown in the photo.
To insulate and line a homemade TT boiler, it is necessary to weld embedded parts made of any metal at the corners of the water jacket, as long as its width does not exceed 20 mm (on the back wall - 4 cm). Also provide stands for mounting the ECU on the top of the unit.
Final assembly of the heater
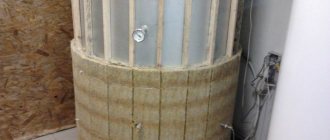
Thermal insulation of the boiler tank is simple - the walls are lined on the outside with basalt wool slabs, which are secured with a cord. Make sure that the insulation fits tightly to the frame of the loading and ash opening, as well as to the profile pipe of the air duct.
This is how the control unit and fan are mounted
The last step is to cover the heat generator with polymer-painted metal, screwed with self-tapping screws to previously welded embedded parts. After this, the doors are hung and an automation unit with a fan is installed. An original video from the developer of this long-burning TT boiler, Vitaly Dashko, will help you understand the assembly process:
Assembling a boiler according to a finished project
The easiest way would be to build a solid fuel boiler out of brick with your own hands. Its design is popular and does not require complex calculations. Such a boiler can be used for several purposes at once, which is why they are installed mainly in kitchens. It is noteworthy that even beginners can assemble such a unit on their own.
In the process of work, you will need a grinder, a welding machine with electrodes, sheet steel, brick, materials for stove mortar, pipes and metal corners. For those who have never held welding in their hands, it is best to cut the parts according to the drawing of a solid fuel boiler, and entrust the welding work to a professional. This is important, since the quality of the seams directly affects the durability of the boiler.
The positive aspect of independent construction of heating equipment is that you can select the size of the solid fuel boiler and firebox, as well as calculate its power for specific needs. In addition, it can be equipped with a hob or brick vault so that heat is accumulated during the combustion of wood and then redistributed to the heating system.
The heat exchanger is most often made rectangular, using a rectangular profile and pipes with a cross-section of 40-50 mm. Thanks to the profiles, the joining of pipes is easier, and the seams are more durable.
Case manufacturing
The body is made of sheet heat-resistant steel with a thickness of at least 5 mm. Before work, the material is cleaned of rust using an angle grinder. Parts are marked and cut. Angle grinder is also used.
The stages of manufacturing the case are shown in the photographs.
Firebox
Holes for firebox, blower
The holes are pre-marked on the front part of the housing. They are cut through by an abrasive wheel of an angle grinder. The edge is additionally processed - sharp edges and burrs are unacceptable (will lead to injury).
Holes for pipes
Through the upper and lower pipes there is an outflow of hot water and an influx of cold water from the heating system. For pipes, it is recommended to use sections of seamless pipe with a diameter of at least 50 mm. Smaller sizes create too much resistance to water flow and lead to boiling in the boiler when the radiators are not warmed up. Holes are cut with a welding machine, drill, chisel, sledgehammer (the method is described in detail below). The edges need to be smoothed with a file and the pipe welded.
Boiler assembly - smoke circulation, water pipe system (without water jacket)
Step-by-step instructions for building a solid fuel boiler
So, the whole process of how to make a boiler with your own hands according to the drawings can be divided into several successive stages:
- Using a grinder, you need to cut blanks from pipes and profiles. The profiles will be racks; you need to cut round holes in them with a gas cutter for joining with the pipes. You will need to make 4 holes along the Ø50 mm pipe in the front pillars and the same number in the rear ones. In addition, we also need holes for inserting into the heating system. Sagging and deposits as a result of cutting or welding must be cleaned with a grinder so that they do not interfere with the movement of water through the pipes.
- Next, the blanks are assembled into a single structure. Two people will have to work - the welder will need an assistant to hold the tubes in a stationary position. To make it more convenient, you can place the racks with pipes on a flat surface and weld the front and back parts of the boiler.
- Now you need to ensure the supply and drainage of water from the boiler. The incoming and return pipes are welded to the finished frame, and the ends of the rectangular profiles are welded with pieces of metal 60x40 mm.
- Before installing the heat exchanger, it is checked for leaks. To do this, install it vertically, close the bottom hole and fill it with water. If there are no leaks at the seams, then you can continue working.
- The boiler body is built from brick and a heat exchanger is built into it, leaving a gap of at least 1 cm between them. The register must be installed in such a way as to create a rise towards the exiting hot water. The level difference between the outlet and the front right upper corner of the heat exchanger must be at least 1 cm. This will improve coolant circulation and eliminate air pockets.
- The brickwork should overlap the heat exchanger from above by 3-4 cm. A cast-iron slab is laid on top of the masonry. The chimney is installed at the discretion of the owners - brick, metal, or led into a ready-made pipe.
Internal details
Three pancakes are cut from a metal sheet: two with a diameter of 425 mm, one with a diameter of 412 mm. The latter will be installed inside the housing, and since the thickness of the pipe wall is 6 mm, then 12 mm falls on the diameter, plus 1 mm for free entry.
In one of the pancakes with a diameter of 425 mm and in a circle of 412 mm, a hole with a diameter of slightly more than 100 mm is cut in the center. A chimney is being prepared from a 100 mm pipe. To do this, a section of 120-130 mm is cut. Pieces 50 mm long are cut from a 25 mm pipe for the legs of the boiler. A grate for the ash pan is made from fittings; the size of the internal diameter of the body is taken as a basis.
How to increase boiler performance
A self-assembled solid fuel boiler, as a rule, is characterized by significant heat losses associated with the loss of heat into the chimney. Moreover, the straighter and higher the chimney, the more heat is lost. The way out in this case would be to create a so-called heating panel, that is, a curved chimney that allows more thermal energy to be transferred to the brickwork. The brick, in turn, will give off heat to the air in the room, heating it. Often such passages are arranged in the walls between rooms. However, this approach is only feasible if the boiler is located in the basement or on the ground floor, or if a bulky multi-stage chimney is built.
Alternatively, you can increase the efficiency of the boiler by installing a water heater around the chimney. In this case, the heat of the flue gases will heat the walls of the chimney and be transferred to the water. For these purposes, the chimney can be made from a thinner pipe, which is built into a pipe of a larger cross-section.
The most effective way to increase the efficiency of a solid fuel boiler is to install a circulation pump that forcibly pumps water. This will increase the productivity of the installation by approximately 20-30%.
Of course, the boiler must be designed so that the coolant can circulate independently if the electricity in the house is turned off. And if it is available, the pump will speed up the heating of the house to comfortable temperatures.
General information
Important: The law prohibits the use and installation of gas equipment without obtaining the appropriate permission from the responsible organization, which will require a certificate of conformity for the device.
You must understand that it will be extremely difficult to obtain this type of document for a homemade device. Minor deviations from the norms will result in a complete ban on the installation of a homemade device.
Types of gas units
Boilers differ in the following parameters:
The number of circuits is single-circuit and double-circuit. Single-circuit units perform only one function, namely heating the water and pipes of the house. The second type heats the house and provides hot water;- method of removing combustion products - having natural draft and with supply draft. For the first option, air is supplied from the street, and for the second, a chimney pipe is required;
- ignition method - electric type, when work occurs, and having a piezoelectric element, in which the device is ignited with one’s own hand;
- depending on the mounting method - wall and floor;
- control method - single-stage and two-stage;
- connection method - to the central gas pipeline or to a gas cylinder;
- according to the material of manufacture - steel, cast iron and copper.
Device principle
The design of the gas unit contains the following elements: burner, heat exchange device, pumping device, expansion tank, automatic system, ventilation device, protective system, temperature measuring device, solenoid valve, air vent.
When the device is turned on, the gas burner ignites, which heats the heat exchanger with water or antifreeze. The action of the pumping device creates excess pressure, due to which there is a continuous circulation of the thermal energy transmitter in the pipes and the release of thermal energy through radiators. Then the cold coolant flows back into the boiler.
Switching from wood heating to pellets
During communication with the owner of the house, it became known that the modernization of the heating system was implemented back in November 2019. Previously, the building had only stove heating, but taking into account the more regular appearance of all family members at the dacha, they began to think about creating a water heating system.
Gas equipment was not considered, since the pipeline only passed through the neighboring village. An electric boiler is an expensive type of heating, so the choice fell on a solid fuel unit from the Polish manufacturer Drew-Met.
The main source of fuel is firewood, but it is possible to switch to pellet granules. Thus, a PellasX pellet burner, the necessary automation for it and a pellet storage bin were purchased for the boiler.
Burners of different brands have a similar structure. The main elements are a firebox, an auger for feeding pellet granules, an igniter and a fan. The operation of such equipment involves regular cleaning of the heat exchanger and ash pan, as well as maintenance of the device itself.
Security measures!
In order for such a boiler to truly be an effective and economical heating option, to serve for a long time and not cause burns or accidents in the house, take into account the main points of fire safety.
TT boiler
- It is necessary to monitor the temperature in the system and prevent it from overheating.
- Do not install a shut-off valve on the pipeline.
- Do not keep flammable objects near the boiler.
- It is necessary to monitor the ventilation in the room.
- A separate room must be equipped for the boiler.
At the preparatory stage, consider the place where the boiler will be installed.
Ideally, of course, to equip a separate boiler room, because the operation of a long-burning TT boiler is somewhat different from the usual wood-burning brick stove. And externally, this unit will not be pleasing to the eye or serve as a decoration for the house.
Considering that solid fuel does create a certain amount of dirt, it is better to install a long-burning TT boiler in a non-residential area.
But if its power is small (does not exceed 30-35 kW), then you can simply separate (zone) the main room from the “boiler room” using a brick wall.
Be sure to provide a ventilation system in the room where this boiler will be used. Oxygen must be supplied from the street on a constant basis.
Atos
- Manufacturer: Poland;
- Power supply: 220V/50Hz;
- Connected pump power: up to 130W;
- Fan power: up to 130 W;
- Coolant temperature setting range: 35-80°C;
- Temperature measurement accuracy: 1°C
- Room temperature setting range: 25-50°C;
- Alarm when the set temperature range is exceeded;
- Relay output for additional alarm;
- Manual target temperature setting and circulation pump control.
- Estimated cost: 6750 rub.
Automation originally from Poland has proven itself well in combination with heating boilers of various types and designs with a capacity of 25-50 kW. Among the advantages is the ability to ignite fuel in any weather conditions, increasing the efficiency of the boiler while maintaining a stable coolant temperature, according to the set value. The control unit is compact, with a simple interface and a two-digit dial for setting all key parameters.
So think about it! For remaking the boiler, if it is done by a welder, you will pay 1-2 thousand rubles, and you will save much more during the heating season. If you can do the welding work yourself, you will also save this money.
Waste oil boilers. Production and delivery throughout the Russian Federation
Cost of equipment
The solid fuel boiler, along with a pellet burner and a buffer tank, cost Konstantin about 3,000 thousand dollars.
At the moment, the choice of pellet devices on the Belarusian market is huge. Various manufacturers are represented in any price category. The same applies to automation, burners, heat accumulators and other devices. The final price depends on specific needs and wishes.
The cost of the entire heating system, including turnkey installation, was 11 thousand dollars.
Naturally, the price is not at all small, but now the dacha is a full-fledged suburban home that can be used all year round. The material was taken from the Tut.by portal, you can read the full article.