Last Updated on 10.10.2017 by Sia
A water heat accumulator is a special device that collects excess thermal energy from the boiler; in simple words, it accumulates heat up to a certain point. If the house stops heating in the usual way, the storage tank will supply heat uninterruptedly. The cost of such a device is very high: for a volume of 200 liters you will have to pay almost a thousand dollars, to say nothing of larger equipment. If your plans do not include large expenses, then we suggest making a heat accumulator yourself.
Scope of application of the heat accumulator
Some people think that a heat accumulator is not particularly needed in the house, because it rarely works. However, the equipment plays an important role in the heating system and is used in several cases.
If the house is heated by a stove that has a water circuit, or by a boiler, which must be heated by adding firewood and coal. So that the owner of the house sleeps peacefully at night and does not run to the stove to add fuel, the heat accumulator starts working.
When the house is heated with an electric boiler, the electricity bill will be a considerable amount. Everyone knows that at night the tariff is half as much, so it is advisable to use a heat accumulator during the day.
And, of course, when the main heating source is turned off, for example, in the event of a breakdown, the thermal energy storage device will be very useful.
Advantages and disadvantages of installing a heat accumulator in the heating system
A heating system based on a solid fuel boiler with a heat accumulator has serious advantages over other options:
- The efficiency and efficiency of heating equipment is increasing.
- There is an increase in the heating time of the premises per one load of solid fuel.
- High fuel economy is achieved by minimizing coolant temperature changes. For example, when the temperature drops to a minimum, it is necessary to increase fuel consumption in order to raise the temperature indicator. This does not happen with a heat accumulator.
- It is possible to optimize the operation of the hot water supply system by using a buffer tank as a water heater.
Some models of heat accumulators can be connected to solar panels or heating elements. This expands the functions of the device and creates certain favorable operating conditions for the entire heating network under conditions of economical consumption of solid fuel. The latter figure varies in the range of 10-30%. A good result, depending on the installation of just one container.
The heat accumulator has one drawback - its large overall dimensions. That is, the tank will take up a lot of space.
Two important points:
- The efficiency of a thermal energy accumulator depends largely on how thermally insulated the building where the device is installed is. If the insulation is weak, then you cannot expect high efficiency of the tank.
- The efficiency of the battery also depends on the equipment of the heating system. If a circulation pump, monitoring and control unit are installed in it, then the efficiency will be high.
Types of heat accumulators
There are several types of thermal accumulators.
Standard buffer capacity. The battery is an ordinary metal tank. In order for it to retain heat longer, the tank must be covered with a layer of insulation. If the structure is not insulated, you can do it yourself.
Hot water storage tank. In order for the heat storage tank to heat water, it must be equipped with a coil. The coil serves as a conductor of cold water from the water supply to the tank; it is placed in the upper or lower part of the structure or, in general, along the entire perimeter of the heater. It is not recommended to pour water directly into the tank, as deposits form on the walls of the battery and bacteria spread.
The coil is carried out not only from the water supply, but also from the sun's rays by so-called solar collectors. The coolant enters the storage tank from special panels heated by the sun, leaves heat in the tank, and returns along the coil to the panels to reheat.
Water heat accumulator with heat exchanger. Like the coil, heat exchanger
Thermal accumulators
used for hot water supply. Due to its high thermal conductivity, corrugated pipe is perfect for connecting to solar collectors. The heat exchanger is also used for underfloor heating systems. The pipe can withstand pressure up to 10 atmospheres.
Tank-in-tank design. Such a heat accumulator is called a full-fledged boiler inside a technological tank. To increase the heat exchange area and help clean the tank walls from scale, ribbed stainless steel is used to make the structure.
Advantages of thermal accumulators
The mechanism of operation of the thermal accumulator
The heat accumulator can fully replace the hot water boiler. Moreover, both devices are comparable in cost.
However, the heat accumulator will not only provide hot water supply, but will also solve a whole range of additional problems. By using a solid fuel boiler with a heat accumulator, you can get many advantages:
- the service life of heating equipment increases several times;
- the boiler will never operate at maximum loads or idle;
- the temperature of the heating supply to the house is equalized. If the water in the boiler does not have time to heat up, hot coolant is automatically supplied from the reserve tank. Conversely, excess temperature of the carrier will be selected and accumulated;
- a correctly selected container continues to take heat from the boiler even with complete combustion of the fuel;
- resource savings reach 30%.
The advantages of batteries have been appreciated by many manufacturers of solid fuel boilers.
And now they provide their equipment warranties only if additional tanks are installed. Date: September 25, 2021
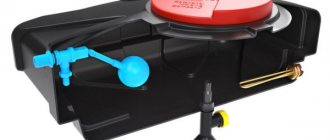
Heat accumulator device
The base of the storage tank is a regular tank, with pipes at the bottom and top, to which a coil is attached. At the bottom, the tank is connected to the heat source, and at the top – to the heating system. The unit has a high heat capacity of water. The battery works according to a certain principle.
There are two pipes in the side walls of the tank. One is a conductor of cold water from the water supply system, the second is needed for the coolant to flow into the heating radiators.
The upper coil is connected to a pipe through which cold water flows, and the lower coil is connected to a hot water pipe.
Principle of operation
Hot water circulates through the coil and heats the liquid in the heat storage tank. If the boiler turns off, the water in the pipes gradually cools, but circulation continues. The cool liquid entering the storage tank begins to push the hot storage tank present there into the heating system, due to which the rooms continue to be heated for some time, even if the boiler is turned off.
In order for the coolant to move through the pipe, you need to equip the tank with a circular pump.
The best manufacturers
If you don’t know which company’s heat tanks are better in terms of price and set of characteristics, then try to give preference to models from the most well-known brands. In most cases, such devices from domestic or foreign manufacturers are of good quality and work properly for a long period.
Popular manufacturers:
- Parpol (Bulgaria);
- S-Tank (Belarus);
- Nibe (Sweden);
- Tesy (Bulgaria);
- Hajdu (Hungary);
- Sunsystem (Bulgaria);
- Stiebel Eltron (Germany).
How to assemble a heat accumulator with your own hands
It is not necessary to buy a heat accumulator. You can do it yourself, saving almost twice, and the efficiency will be no worse than that of a purchased one. The simplest cylindrical heat accumulator is similar in operating principle to a thermos. Its walls retain the heat of water for a long time, so it is perfect for heating rooms. Before you start assembling the water heat accumulator you will need:
- A tank with a minimum volume of 200 liters, a tank smaller does not make sense. Select the volume based on the area to be heated.
- Material to thermally insulate the structure, for example, take mineral wool.
- Foil film.
- Adhesive tape.
- Copper tube coil for its manufacture.
- For formwork, you can use a concrete slab or boards; you will also need concrete for pouring.
An iron barrel is perfect for storage.
Once you have stocked up with all the necessary materials, you can begin to work.
Diagram of the heat accumulator SWaG 800
Battery buffer tank volume
Let's figure out what volume the heat accumulator should be. There are differing opinions that are based on calculations based on:
- room area;
- boiler power.
Let's look at each of them. Based on the area of the room, there can be no exact recommendations. Since there are many factors that influence the battery life of a system without a boiler, the main one is the heat loss of the room. The better the house is insulated, the longer the buffer tank will be able to provide the home with heat.
Of course, the larger the tank, the better, but to heat a larger amount of coolant you will need more heater power. Calculation of boiler power is done based on the heated area. One kilowatt warms up ten meters. You can install a five-ton tank, but if the boiler cannot handle such volumes, there will be no point in installing such a large heat accumulator. This means that adjustments need to be made to the calculation of the power of the boiler itself.
It turns out that it may be more correct to make the calculation based on the power of the boiler. Let’s take for example the same house of 200 sq. m. An approximate calculation of the volume of the buffer tank is as follows: one kilowatt of energy heats 25 liters of coolant. That is, if there is a 20 W heater, then the volume of the heater should be about 500 liters, which is clearly not enough for such housing.
Based on the results of the calculations, we can conclude that if you are planning to install a heat accumulator, then you need to take this into account when selecting the boiler power and take not one, but two kilowatts per ten meters of heated area. Only then will the system be balanced. The volume of TA also affects the calculation of the capacity of the expanzomat. An expansion tank is an expansion tank that compensates for the thermal expansion of the coolant. To calculate its volume, you need to take the total volume of coolant in the circuit, including the capacity of the buffer tank, and divide by ten.
Stages of heat accumulator assembly
First you need to prepare the barrel. If it is old, then clean it of dirt and traces of corrosion.
We take thermal insulation material and wrap it around the outer walls of the tank, after which we secure the insulation with tape wrapped in several layers. Mineral wool is perfect for insulation, but the use of extruded polystyrene foam is not recommended, due to the fact that mice can live under such cladding in the cold season. They are indifferent to mineral wool.
To wrap the barrel, you need to take a foil film and secure it with adhesive tape. A homemade heat accumulator can be sheathed with a sheet of metal.
The next step is to make the coil. To do this, you will need a copper tube 8–15 meters long (the length depends on the volume of the tank) and a diameter of 20–30 meters. Bend the pipe into a spiral and place it inside the barrel. When connecting the coil to the boiler, the spiral will heat up, and accordingly, the water in the storage tank will heat up.
To move water, we need to make pipes, which we will equip with taps. Taps are needed so that, if necessary, you can quickly shut off the water circulation.
The last stage is the installation of a heat accumulator. The tank is installed on a concrete base. You can use a ready-made slab or fill the formwork with concrete mortar yourself.
This type of design is suitable for a single boiler heating system. If there are several boilers, it will be difficult for a beginner to make the correct unit on his own.
Prices: summary table
| Model | Volume, l | Allowable operating pressure, bar | Cost, rub |
| Sunsystem PS 200, Bulgaria | 200 | 3 | 38 000 |
| Hajdu AQ PT 500 C, Hungary | 500 | 3 | 33 000 |
| S-TANK AT PRESTIGE 300, Belarus | 300 | 6 | 39 000 |
| ACV (ATsV) LCA 750 1 CO TP, Belgium | 750 | 8 | 178 000 |
Heat accumulator from cylinders
If the boiler room is too small to install volumetric barrels, you can make a cylindrical heat accumulator from propane cylinders. This design has a volume of only 100 liters, but is quite suitable for a small room. The drive performs several functions:
- Unloading a solid fuel boiler in case of overheating by accumulating excess heat, which ensures the safety of the boiler.
- Heating water for household needs.
- The cylinder is capable of heating the house for several hours if the boiler is turned off.
First you need to prepare the materials:
- propane cylinders 2 pcs.;
- copper tube, 10 meters long and 12 meters in diameter;
- fittings and sleeves for thermometers;
- basalt wool as insulation;
- metal to sheathe the structure.
If all the necessary materials are available, you can begin production.
- Unscrew the valves from the cylinders and cut off the caps using a grinder. Before cutting off the cap, fill the container with water to prevent any remaining gas from exploding.
- Bend the pipe into a coil shape around a pipe of the desired diameter.
- Use a drill to make holes in the cylinder for the thermometer clamps.
- Weld two cylinders by placing them on top of each other.
- You need to install a coil inside the resulting structure, and release the ends of the tube through the holes made.
- You need to attach a bottom and a lid to the made tank: we cut a fitting for the drain valve into the bottom of the cylinder, and into the lid for venting air.
- Insulate the storage tank with basalt wool.
- Cover the battery with a metal sheet, securing it with self-tapping screws.
This heat accumulator is not equipped with a circulation pump and is connected directly to the boiler. It is connected to the boiler with steel pipes, the diameter of which is 5 cm.
We make a heat battery ourselves
You have decided that you cannot do without a buffer tank and want to make it yourself. Then get ready to go through 5 stages:
- Calculation of the volume of the heat accumulator.
- Choosing a suitable design.
- Selection and preparation of materials.
- Assembly and leak testing.
- Installation of the tank and connection to the water heating system.
Advice. Before calculating the volume of the barrel, think about how much space in the boiler room you can allocate for it (in terms of area and height). Clearly decide how long the water heat accumulator should replace the inactive boiler, and only then proceed to the first stage.
How to calculate tank volume
There are 2 ways to calculate the capacity of a storage tank:
- simplified, offered by manufacturers;
- accurate, carried out according to the formula for the heat capacity of water.
The duration of heating a house with a heat accumulator depends on its size.
The essence of the enlarged calculation is simple: for each kW of boiler installation power, a volume equal to 25 liters of water is allocated in the tank. Example: if the productivity of the heat generator is 25 kW, then the minimum capacity of the heat accumulator will be 25 x 25 = 625 l or 0.625 m³. Now remember how much space is allocated in the boiler room and adjust the resulting volume to the actual size of the room.
Reference. Those who want to weld a homemade heat accumulator often wonder how to calculate the volume of a round barrel. Here it is worth recalling the formula for calculating the area of a circle: S = ¼πD². Substitute the diameter of the cylindrical tank (D) into it, and multiply the resulting result by the height of the tank.
You will get more accurate dimensions of the heat accumulator if you use the second method. After all, a simplified calculation will not show how long the calculated amount of coolant will last under the most unfavorable weather conditions. The proposed method is based on the indicators you need and is based on the formula:
m = Q / 1.163 x Δt
Here:
- Q – amount of heat that needs to be accumulated in the battery, kWh;
- m – estimated mass of coolant in the tank, tons;
- Δt – difference in water temperatures at the beginning and end of heating;
- 1.163 W•h/kg•°C is the reference heat capacity of water.
Let's explain further with an example. Let's take a standard house of 100 m² with an average heat consumption of 10 kW, where the boiler must be idle for 10 hours a day. Then it is necessary to accumulate 10 x 10 = 100 kWh of energy in the barrel. The initial water temperature in the heating network is 20 °C, heating occurs up to 90 °C. We calculate the mass of the coolant:
m = 100 / 1.163 x (90 - 20) = 1.22 tons, which is approximately 1.25 m³.
Please note that a heat load of 10 kW is taken approximately; in an insulated building with an area of 100 m², heat loss will be less. Point two: so much heat is needed on the coldest days, of which there are 5 for the whole winter. That is, a heat accumulator for 1000 liters is sufficient with a large margin, and taking into account the seasonal temperature difference, you can easily keep within 750 liters.
Hence the conclusion: in the formula you need to substitute the average heat consumption for the cold period, equal to half of the maximum:
m = 50 / 1.163 x (90 - 20) = 0.61 tons or 0.65 m³.
Note. If you calculate the volume of the barrel based on the average heat consumption, in severe frosts it will not be enough for the calculated period of time (in our example - 10 hours). But you will save money and space in the furnace room. More information on making payments is presented in our other publication.
About the design of the container
To make your own heat accumulator, you will have to defeat one insidious enemy - the pressure exerted by the liquid on the walls of the vessel. Do you think why factory tanks are made cylindrical, and the bottom and lid are hemispherical? Yes, because such a container can withstand the pressure of hot water without additional reinforcement.
On the other hand, few people have the technical ability to form metal on rollers, not to mention drawing semicircular parts. We offer the following ways to resolve the issue:
- Order a round internal tank from a metalworking enterprise, and carry out the insulation and final installation work yourself. It will still cost less than buying a factory-assembled heat accumulator.
- Take a ready-made cylindrical tank and make a buffer tank on its base. We will tell you where to get such tanks in the next section.
- Weld a rectangular heat accumulator from sheet iron and strengthen its walls.
Sectional drawing of a rectangular heat accumulator with a volume of 500 l
Advice. In a closed heating system with a solid fuel boiler, where excess pressure can jump to 3 Bar or higher, it is strongly recommended to use a cylindrical heat accumulator.
In an open heating system with zero water pressure, you can use a rectangular tank. But do not forget about the hydrostatic pressure of the coolant on the walls; add to it the height of the water column from the container to the expansion tank installed at the highest point. That is why the flat walls of a homemade heat accumulator should be reinforced, as shown in the drawing of a 500 liter capacity tank.
A properly reinforced rectangular storage tank can also be used in a closed heating system. But in the event of an emergency pressure surge from overheating of the TT boiler, the tank will leak with a 90% probability, although you may not notice a small crack under the insulation layer. Watch the video to see how the unstrengthened metal of the vessel bulges when filled with water:
Reference. It makes no sense to weld directly onto the walls stiffeners made of corners, channels and other rolled metal. Practice shows that the pressure force bends corners of a small section along with the wall, and tears off large ones at the edges.
Making a powerful frame from the outside is impractical, the consumption of materials is too high. A compromise option is the internal spacers shown in the drawing of a homemade heat accumulator.
Drawing of a 500 l heat accumulator - top view (cross section)
Selection of materials for the tank
You will make your task much easier if you find a ready-made cylindrical tank, initially designed for a pressure of 3–6 bar. What containers can be used:
- propane cylinders of different capacities;
- discarded process tanks, for example, receivers from industrial compressors;
- receivers from railway cars;
- old iron boilers;
- internal tanks of containers for storing liquid nitrogen, made of stainless steel.
It is much easier to make a reliable heat accumulator from ready-made steel vessels
Note. In extreme cases, a steel pipe of suitable diameter will do. Flat covers can be welded to it, which will have to be reinforced with internal braces.
To weld a square tank, take sheet metal 3 mm thick, no more is needed. Make rigidities from round pipes Ø15-20 mm or profiles 20 x 20 mm. Select the size of the fittings according to the diameter of the boiler outlet pipes, and for cladding, buy thin steel (0.3-0.5 mm) with powder painting.
A separate question is how to insulate a heat accumulator that you welded yourself. The best option is basalt wool in rolls with a density of up to 60 kg/m³ and a thickness of 60-80 mm. Polymers such as polystyrene foam or extruded polystyrene foam should not be used. The reason is mice that love warmth and in the fall can easily settle under the lining of your storage tank. Unlike polymer insulation, they do not chew basalt fiber.
Don't have any illusions about extruded polystyrene foam, rodents eat it too
Now we will indicate other options for ready-made vessels that are not recommended for use for heat accumulators:
- An improvised tank made from a Eurocube. Such plastic containers are designed for a maximum content temperature of 70 °C, but we need 90 °C.
- Heat accumulator made of an iron barrel. Contraindications: thin metal and flat tank lids. Instead of strengthening such a barrel, it is easier to take a good steel pipe.
Assembly of a rectangular heat accumulator
We would like to warn you right away: if you have mediocre welding skills, then it is better to order the manufacture of the tank externally according to your drawings. The quality and tightness of the seams is of great importance; at the slightest leak, the storage container will leak.
First, the tank is assembled using tacks, and then welded with a continuous seam
For a good welder there will be no problems here, you just need to understand the order of operations:
- Cut metal blanks to size and weld the body without a bottom and a lid using tacks. To secure the sheets, use clamps and a square.
- Cut holes in the side walls for the stiffeners. Insert the prepared pipes inside and scald their ends from the outside.
- Grab the bottom and lid to the tank. Cut holes in them and repeat the operation with the installation of internal braces.
- When all the opposite walls of the container are securely connected to each other, begin continuous welding of all seams.
- Install supports from pipe sections at the bottom of the tank.
- Insert the fittings at a distance of less than 10 cm from the bottom and lid, as shown in the photo below.
- Weld metal brackets to the walls, which will serve as brackets for attaching the insulating material and sheathing.
The photo shows a stretch made from a wide strip, but it is better to use a pipe
Advice on installing internal struts. To ensure that the walls of the heat accumulator effectively resist bending and do not break due to welding, extend the ends of the stretch marks outward by 50 mm. Then additionally weld stiffeners from a steel sheet or strip to them. Don’t worry about the appearance; the ends of the pipes will then be hidden under the cladding.
Steel brackets (clips) are welded to the body to secure the insulation and sheathing.
A few words about how to insulate a heat accumulator. First, check it for leaks by filling it with water or lubricating all the seams with kerosene. Thermal insulation is quite simple:
- clean and degrease all surfaces, apply primer and paint to protect them from corrosion;
- wrap the tank with insulation without squeezing it, and then secure it with a cord;
- cut the facing metal, make holes in it for the pipes;
- Screw the casing to the brackets with self-tapping screws.
Screw the cladding sheets so that they are connected to each other with fasteners. This completes the production of a homemade heat accumulator for an open heating system.
Installation and connection of the tank to heating
If the volume of your heat accumulator exceeds 500 liters, then it is not advisable to place it on a concrete floor; it is better to arrange a separate foundation. To do this, dismantle the screed and dig a hole to a dense layer of soil. Then fill it with broken stone (rubble), compact it and fill it with liquid clay. Pour a 150 mm thick reinforced concrete slab in wooden formwork on top.
Scheme of the foundation for the battery tank
The correct operation of a heat accumulator is based on the horizontal movement of hot and cooled flow inside the tank when the battery is “charging”, and the vertical flow of water during “discharging”. To organize such battery operation, you need to perform the following steps:
- the circuit of a solid fuel or other boiler is connected to a water storage tank through a circulation pump;
- the heating system is supplied with coolant using a separate pump and mixing unit with a three-way valve, which allows you to withdraw the required amount of water from the battery;
- the pump installed in the boiler circuit should not be inferior in performance to the unit supplying coolant to the heating devices.
Tank-heat accumulator wiring diagram
The standard connection diagram for a heat accumulator with a TT boiler is shown above in the figure. The balancing valve on the return line serves to regulate the coolant flow based on the water temperature at the inlet and outlet of the tank. Our expert Vladimir Sukhorukov will tell you how to properly strap and set up in his video:
Reference. If you live in the capital of the Russian Federation or the Moscow region, then regarding the connection of any heat accumulators, you can consult personally with Vladimir, using the contact information on his official website.
Online calculator
*If the calculator shows 0 (zero), it means you have no excess energy to accumulate.
Explanations:
The rated power of the boiler is indicated by the manufacturer. If the documents for the equipment have not been preserved, you can find the specifications on the Internet.
The power needed to heat your home. It is calculated by specialists using a complex form, which includes: the volume of the room, the heating system, and the energy efficiency of the entire house.
Supply and return temperatures. If the system does not have thermometers installed, it can be removed with any heat remover.