Home / Types of ceilings / Wooden / Using a blockhouse to decorate the ceiling
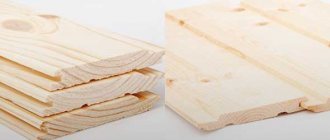
The name “blockhouse”, in fact, means the lining that has long been familiar to everyone. There is, however, a difference - such material will no longer be produced in the form of flat dies, but will have one rounded side, which imitates the rounded surface of a log.
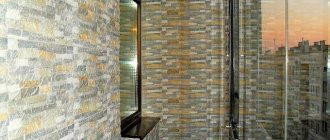
This type of decor is used mainly for finishing external walls or surfaces of houses, but nothing will prevent it from being used equally effectively inside the house. In particular, they cover walls and ceilings. This is done in order to imitate finishing with a solid beam or log.
This type of decoration is becoming more and more fashionable, but not many people can afford a house or other building made of solid and real wood, therefore, it can be replaced with an imitation.
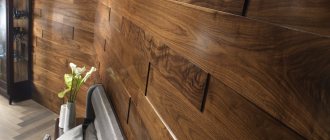
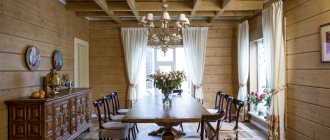
The walls and ceiling in the photo are made using blockhouse decor. The imitation is so accurate that not everyone will be able to discern the substitution.
What it is
All types of this material are manufactured with only one purpose - to obtain a coating that quite accurately imitates a wall or ceiling made from real beams or logs. Hence the basic shape of such products - strips, with an internal flat side and an external rounded side.
Sometimes you can find varieties in which, to save and lighten the weight of the mounted parts, there is a recess on the inside.
The main materials used for the manufacture of this type of decorative strips will be:
- Spruce
- Pine
- Larch
- Metal
- Plastic
The last two types are not recommended for decorating the interior of the house. They will not decorate your home at all, and therefore will not be considered.
Spruce is also not very suitable for interior work. It is too soft and will not withstand stress. Other types of wood can be safely used, only making sure that all the boards are from the same batch. Different deliveries may differ in color and texture.
The blockhouse itself is divided into two types:
Class “A” - containing a small number of knots and virtually no wormholes
Class “B” - with dark knots, minor surface damage and small cracks
Advantages and disadvantages of a ceiling block house
As such, the internal ceiling block house has phenomenal strength, wear resistance and dimensional stability as it undergoes a lengthy drying process.
It attracts with its lightness, which is especially important when it comes to finishing the ceiling. This property of the block house allows you to install it even independently, and convenient locking elements further simplify the task. If an individual strip is damaged, it can be easily replaced with a new one or sanded.
Elements dried to a moisture level not exceeding 12% are under reliable protection from the proliferation of fungal growths and rotting.
Another undeniable advantage that the block house has for interior ceiling decoration is environmental friendliness, complemented by hypoallergenicity.
These properties are the result of the constant release of resin and phytoncides from coniferous wood, which suppress the growth of harmful microorganisms and the proliferation of bacteria. In addition, the resin improves the waterproofing characteristics of the panels.
The sufficient thickness of the panels with grooves on the reverse side contributes to excellent thermal and sound insulation of the room in combination with good moisture and vapor permeability. In addition, block house material withstands constant exposure to UV rays and does not change its original color.
It is impossible not to note the low cost associated with the possibility of waste-free production, which makes the price of block house slats quite attractive.
The aesthetic and presentable appearance of the finish, recreating the log vaults of a log house, immerses you in the atmosphere of ancient wooden mansions, striking in their massiveness and nobility.
The block house is not without its drawbacks, including flammability and poor water resistance, which requires periodic treatment of the coating with special compounds.
What can a blockhouse be used for?
Most often, as already mentioned, a blockhouse can be seen in the design of the external walls of a house. Indoors, blockhouses are also often used to decorate walls. But there is also an unexpected application - making a ceiling covering from a blockhouse, as in the previous photo.
This design is appropriate if, in general, the decorating style is consistent with a “wooden” theme. A very typical example would be country style.
It is in the village style that you can most often see decor made from natural wood and the use of materials found in nature. You can also build a house from natural or laminated timber.
The first option will cost a lot, since the cost of anything made from real wood is very high, and the second option will not have the most beautiful appearance.
By using materials that imitate solid timber or logs, you can save significantly. And a blockhouse is one of the best ways to imitate wood.
Types of paints for wooden ceilings
The following types of paints can be used to paint a wooden ceiling structure:
- varnish for interior work. Using this product you can create a durable surface with excellent water and dirt repellent qualities. This color mixture can be used on any wood product, including painting wooden ceilings;
- colored wax . This is a natural product for painting ceilings, walls, and wood floors. The water-based product has only a natural composition with a water base, wax, lavender and bergamot oil. Allows you to create a durable surface with a breathable structure;
- glaze for wood . This coloring penetrates deeply into the wood and creates a surface with a breathable, durable, elastic, water- and dirt-repellent structure. Can be used for any wooden structures;
- paint for interior work . Suitable for any wood and metal products. Creates a durable coating that is not exposed to high humidity and dust. In the sun it may turn yellow over time;
- water-based acrylate-alkyd glaze for exterior and interior use . Suitable for processing various types of wood - pine, larch, oak, linden, Canadian cedar. It is simple and easy to use and can withstand high humidity.
Advantages of such solutions
For the most part, blockhouses are used in private homes. This suggests the idea of creating an interior from natural material, even if the house itself is built of stone.
It is for such interiors that a blockhouse is useful. It has a very beautiful appearance, and the surface, imitating a wooden beam, will in itself be a decorative element.
Among other things, this decor is very easy to maintain and install. To ensure the best appearance, you only need to cover the surface of the parts with a protective varnish or other coating, and care will consist of wiping all parts with a cloth soaked in water.
Compared to building with natural logs, the price of a frame structure will be significantly lower. But the appearance will no longer be so attractive. But a coating that imitates natural timber will come to the rescue. Externally, it is almost impossible to distinguish it from a real log. Unless you use plastic finishing options.
Is it possible to use imitation timber on the ceiling?
False timber is one of the best finishing materials, which is used not only on the facade, but also in the interior of residential premises. This is a high-tech cladding board that can create the effect of a wall, which is laid out from massive profiled timber. But it turns out that this material is also used to decorate the ceiling; in Moscow, imitation timber is ordered very often. What is the advantage of finishing the ceiling in this way, are there any pitfalls in this decision?
How to install such a covering
The installation process itself will not be much more complicated than installing the most common plastic panels. Essentially, everything is exactly the same - lathing, clamps, nails or screws, and decorative coating.
First, the sheathing is constructed. In the best way, for the construction of a frame base, invented metal profiles are suitable, but you can also take wooden bars.
If wood is used, then you need to take parts at least 30 millimeters thick to ensure the necessary ventilation gap and the overall strength of the structure.
The outer covering is mounted on the sheathing, using self-tapping screws or special mounting plates, plank by plank.
Everything happens exactly the same as when installing conventional MDF panels or plastic trim. One part is inserted into another using the tongue-and-groove method, ensuring sufficient strength of the resulting coating.
A little trick: when installing, position the boards so that the tenon is located towards the light source. This slightly masks the junction of the two planks.
The planks can be fixed either simply with self-tapping screws or with the help of clamps. The method of fixation does not matter much here. Whichever one is more convenient is worth using. Craftsmen usually prefer to use clamps, but you can get by with self-tapping screws.
It is not recommended to use nails when installing such structures, since they do not ensure reliable fixation of the planks.
DIY blockhouse ceiling video
Block house is a material that is used to decorate the facades of buildings, as well as interior walls. The advantages of this type of finishing are obvious - the noble beauty of natural wood, high environmental friendliness, and a relatively inexpensive price. It is also important that thanks to special locks at the ends of the planks, it is easy to install a block house with your own hands, even with a little experience in construction work.
Do-it-yourself block house - it's not difficult!
When choosing a blockhouse for cladding, be sure to carefully conduct a visual inspection of the material. Most often, the planks are already packaged in plastic wrap, which it is advisable to open. Boards with cracks, rotten knots, blue discoloration, mold or putrefactive deposits are not allowed for use. The pitch should not be more than 0.8 cm wide and 0.3 cm deep. Pay attention to the location of the annual rings. The closer they are to each other, the denser the wood.
To install the blockus you do not need any unique tools. Since most often the planks of a house block are strengthened using self-tapping screws (“self-tapping screws”), you will use an electric drill when working. A drill-driver will be an indispensable assistant for a large amount of work if you are planning to cover a house with a blockhouse with your own hands.
In this case, clamps are also used - special fasteners made of galvanized carbon steel. Thanks to this finish, the clamps successfully resist corrosion. This fastening clip is made in the form of a flat plate with special cuts for screws and a tongue that holds the planks of the house block or lining. The height of the tongue for a block house must be at least 6 mm.
The use of clamps allows for high-quality fastening of panels, without deformation of the front surface of the wood, cracks and chips.
In addition, when using brackets of a similar design, the junctions of individual planks become invisible, which is very tempting from an aesthetic point of view. The consumption of clamps is about 200 pieces per 10 square meters of surface, their price is quite affordable. It should be noted that the use of special fastening clips can significantly reduce the time spent on installing a block house with your own hands.
To cut blockhouse boards you will need a power saw. If the amount of work is small, you can get by with a hand saw with fine teeth. If you use circular saws, you should use discs without carbide tips, which will allow you to get a clean and even cut even in soft wood.
It is necessary to stock up on heat-insulating material in advance. You can achieve good thermal and sound insulation with products made from staple fiberglass, made in the form of insulating mats or slabs. Mineral wool is also often used as an insulation material. All these materials belong to the group of non-flammable materials, unlike polystyrene foam and its derivatives. The size of the timber from which the sheathing is made is also selected, commensurate with the thickness of the insulation.
To avoid dampening the walls of the house and getting the insulation wet from condensation, you must not forget about the vapor barrier of the house. To do this, purchase traditional glassine or more modern multifunctional materials (perforated film, vapor barrier sheets with foil or membrane material with micro-holes).
Before you cover a block house with your own hands, the purchased wooden panels must be given time to acclimatize to the weather conditions of your area. During this period, it is possible to carry out the necessary preparatory work, including the following steps:
- The selected vapor barrier is attached to the walls with an overlap, using special aluminum foil with a sticky surface (aluminum tape).
- A lathing made of wooden beams is installed on top of the vapor barrier. All timber used must be treated with special antiseptic impregnations to increase its service life. If the beam is installed on wooden walls, it can simply be screwed on using self-tapping screws or nailed. In the case of brickwork, you will have to use special frame dowels, with holes drilled for them. The distance between the individual bars is selected in accordance with the width of the rolls of heat-insulating material. Usually it is 60 cm. The selected insulation is placed in the resulting openings, which is protected on top with a moisture-proof film. To ensure tightness, the film is carefully overlapped and attached to wooden blocks using a construction stapler.
- After this, another layer of sheathing is fastened, onto which the blockhouse will be directly attached. When installing this grille, be sure to use a level.
Before starting work, we recommend that you familiarize yourself in detail with the material, “block house, installation according to all the rules” and watch a video on installing a block house with your own hands:
Advice from professionals will undoubtedly help you avoid many common mistakes for beginners and perform the job at a higher quality level.
Decorating a house with a blockhouse with your own hands starts from the very bottom row. Unlike other wall panels, the blockhouse is mounted only in a horizontal position. The clamps are attached to the sheathing with self-tapping screws, and the first plank is inserted into the legs, with the groove down. This is necessary so that moisture does not subsequently accumulate in the recess. The groove of the next one is put on the tenon of the first board. If self-tapping screws are used when attaching the block house, then recesses are pre-drilled for them in the upper and lower parts of the board. The distance between fasteners should be no more than 400 mm. It is recommended to screw the screw into the tenon at an angle of 45°.
DIY block house installation
- Wall beam 68 x 132 mm
- Block house 35 x 135 mm
- Mounting beam 40 x 50 mm
- U-shaped profile
- Vapor barrier
- Basalt-based insulation (2 circuits of 50 mm each)
- Wind protection
To decorate the shiny metal head of a self-tapping screw, you can use several methods:
- make plugs from the remains of the blockhouse boards, which are attached to the holes with PVA glue. In this case, you will have to cut off the protruding parts and sand the resulting irregularities flush with the wall panel;
- You can purchase special wooden plugs for self-tapping screws. It would be especially appropriate to use them for interior decoration. The plugs will also have to be “seated” with PVA glue;
- The least expensive and simple method is to make a kind of wooden paste based on sawdust and PVA glue. After filling the holes with the resulting mass, it is allowed to dry and sanded. The attachment points with this method resemble wood knots and may differ slightly in color from the main shade of the wood.
If you are decorating your house with a blockhouse with your own hands, then the greatest difficulty will be in decorating the corners. You can purchase special decorative elements: an outer corner and a “boat” (inner corner). The disadvantage of their use is that the baseboard data will touch the convex surface of the block only at the highest point. Due to this, quite large unclosed gaps will remain.
Connecting a blockhouse using cuts made in advance at an angle of 45° requires considerable skill and dexterity, which beginners in the construction business often do not possess. Therefore, it is best to strengthen a 50x50 mm planed beam in the corner, to which the blockhouse boards are attached.
This method is useful for both internal and external corners of the house. If desired, the visible part of the beam can be rounded, giving it an oval shape for greater decorativeness.
It should be noted that often companies producing blockhouses carry out precise cutting of the material for their clients, according to the architectural design. In this case, thanks to cutting on high-precision technological equipment, the work of cladding the facade with a blockhouse with your own hands is greatly simplified.
Window and door openings are usually decorated with special boards - platbands. If earlier the platbands were always made in figures and were often decorated with carvings, inlays or paintings, now this detail performs a utilitarian rather than a decorative function. First of all, the platbands perfectly cover the cracks, blocking the path of cold air, dust and precipitation.
According to their appearance, modern platbands are divided into:
Depending on the mounting method, you can choose overhead or so-called telescopic platbands. The latter have a special shape with protrusions that fit into the slots of the door or window frame.
However, if you want to revive traditions, you can also find carved platbands in the traditional Russian style on the market, which will undoubtedly give your home a certain originality.
Can making a block house with your own hands save money? In principle, if you have some woodworking equipment and certain skills, you can try to do this. However, practice shows that often blockhouse planks made at home cannot always be compared in quality with industrially produced samples. In addition, this process is not only labor-intensive, but will also take you quite a long time. After all, according to experts, it takes at least 40-50 minutes to make one board in artisanal conditions. And most importantly, there is a fairly large amount of waste, which can negate all planned savings.
For more information on how a block house is produced, we recommend that you read the block house material from the manufacturer.
Each person has his own perception and assessment of the environment, everyone prefers to be in an environment familiar to him, and it is purely individual. But there is. No matter how beautiful a new house may seem, no matter what modern technologies and materials are used in its construction, you cannot get by in it. Why, despite the huge selection of materials for construction, are wooden gazebos the most popular buildings on a personal plot? - question.
For wood building materials, contact the professionals here.
You can find good quality wooden house projects in
With the advent of the block house on the market, an ideal alternative to modern eurolining appeared. This material is produced using the latest technology and science, and this is not an exaggeration. Decorating a block house inside a house creates a special atmosphere in the room, gives it a unique effect and fills it with the aroma of freshly planed wood. And if the block house is made of coniferous wood, this also has a beneficial effect on the health of the residents. If you are interested in technology and want to decorate interior spaces with this material, then you will be interested in this article, which will talk about the advantages of this material and the technology of its installation.
The main and most significant advantage of a block house is ease of installation. Even a non-specialist can install it. On the outside, the product has a tubular shape, and on the ribs there are special fastener grooves for joining. The environmental friendliness of the product deserves special attention. Wood does not have any harmful effects on the human body. The material itself is quite light, which has a beneficial effect on the entire structure of the house, since there will be no additional loads on the walls and foundation. Finishing the room with a block house improves the quality of sound insulation of the room.
The use of this material makes it easy to combine or highlight different design elements of a room.
In order for the interior cladding of the house to be pleasing to the eye, it is necessary to pay attention to the choice of material from which the block house is made. For example, products made from coniferous trees are very popular. The spruce has many knots, which creates an unusual sketch in the plane. Pine, in turn, demonstrates excellent structure. If you combine them, you get a wonderful ensemble of pine aromas and the attractive appearance of pine.
If the block house will be installed in a steam room, then it is better to choose linden or poplar. Needles are not suitable, since at high temperatures they release harmful resins. Moreover, these rocks become very hot, as a result of which you can get burns if they come into contact with the wall in the steam room.
Another good option is a hardwood product. This wood is quite hard. It perfectly resists mold, mildew and rot. Moreover, the material is resistant to cracking and warping. As a rule, wood is treated with an antibacterial compound. It is better to do this before installation, so the material is well saturated.
Before starting installation work, make sure that you have purchased all the necessary additional elements, namely external and internal corners and docking panels.
As for the size of the panels, you should pay attention to their width. If you are holding a panel with a width of 23 cm in your hands, then it is usually used for exterior decoration of a house. For interior decoration, a panel 8 cm wide is preferable. However, this is not the rule. The width of the panel can be any, depending on your preferences. Also pay attention to the length of the product. Usually the bar is from 2 to 6 m. Its price depends on the length of the panel; the longer the more expensive. This also applies to the thickness of the strip. Usually it ranges from 2–4.5 cm. For the interior lining of the room, a thickness of 2 cm will be sufficient.
Installing long and thin block house panels visually increases the area of the interior. This effect is further enhanced by the use of light wood.
When you have decided on the size of the panels, you also need to take into account the class of the block house. The most expensive building material is considered the “Extra” class. Its surface is completely free of any defects. Approximately one knot is allowed per 1 m of the product.
The use of an “Extra” class block house is usually used in elite premises, since its price is quite high.
If you are not a consumer of such a high class, then consider panels of class “A” and “B”. Such products will have slight mechanical damage and knots. Accordingly, the price is significantly lower. Moreover, the presence of chips and knots is not a big problem. For example, obvious defects can be hidden in unsightly places in a corner or behind furniture.
On the market you can find a block house that imitates timber and logs. The log effect is in great demand, since after installation it is extremely difficult to find differences from natural logs. One gets the impression that the house was built from logs!
A simple way to calculate the required material: multiply the height of the wall with its length. Calculate the area of door and window openings. Add 10% to the received amount. This volume represents the amount of base material. Next, measure the inner and outer lengths of the corners, adding the resulting amounts together. The amount of sheathing is calculated according to the following scheme: multiply the number of rows by the height of the wall. If the height of the room is 5 m, then there will be 5–6 rows.
When you have made your choice and purchased the necessary material, you should prepare your workplace. It is advisable that the block house adapt to room temperature a day before installation. To do this, you can leave it indoors for a day. After this, it is important to treat the grooves and the back side with an antiseptic, for example, Tikkurila, Neomid or Aquatex. The walls are treated with waterproofing.
Among other things, prepare your tools. For work you will need:
- screwdriver;
- sander;
- drill;
- hammer;
- wood saw or jigsaw;
- level, plumb line or mounting thread;
- mounting screw 30 mm;
- pump room for varnish and stain;
- roller 250 mm wide;
- brush 5 and 10 cm wide.
As for the material, you need to purchase:
- block house;
- timber 40×50 mm;
- timber 25×50 mm;
- external and internal decorative corners;
- baseboards;
- varnish;
- stain;
- antiseptic;
- fireproof impregnation.
If you have all this, you can get to work.
All work consists of several sequential processes, the first of which is the production of sheathing. It is installed vertically, in increments of 600–700 mm. In each beam, drill holes for mounting dowels or self-tapping screws. The beam at the corner should be secured using a level. If the wall is uneven, then an additional element is placed under it. It can be cut from 45x50 mm timber. The same principle is used for installation in the opposite corner.
For fastening, you can use drywall hangers. They will make it easier to adjust the distance from the wall.
You pull a rope between them. First, it is recommended to install the sheathing in the middle, and then move towards the corners. It is recommended to start fastening from the bottom up. When the sheathing is assembled, you can begin installing the block house.
Each board should be secured to the sheathing with self-tapping screws at an angle of 30-45°. But it’s important not to rush here! Using a thin drill, drill a hole in the panel and only then screw in the self-tapping screw. When laying the first plank, make a small indentation from the floor, up to 1 cm. This is necessary for ventilation, which will prevent possible deformation of the material. This also applies to the top. To process external and internal corners, it is better to use special elements. The panel is inserted into them and then secured. To complete the work at the top and bottom, install the ceiling and, accordingly, the floor plinth.
After completely installing the block house, take a grinding machine and sand the surface. Take your time when doing this work. One careless movement can damage the surface of the board. Next, cover the surface with an antiseptic (if the panels are not pre-treated with it), fire-prevention impregnation and stain. To ensure that the stain is evenly distributed over the surface, use a roller and brushes in the corners. After complete drying, repeat the stain application procedure.
If burrs or chips are found at this stage, clean them with sandpaper.
As you can see, there are no particular technological difficulties in installing a block house. All work must be done slowly and carefully, according to the principle “measure 7 times - cut once”! Also take into account the following useful recommendations that are not included in the material already described:
- The moisture content of the material should not exceed KD 8-12%. Otherwise, there is a risk of cracks and deformation.
- If you do not want to use corner connectors, make a 30° cut on the ends of the planks to the wrong side. So, the fit of the boards will be tight.
- To avoid breaking the edge of the board, sand the end along the joint with sandpaper.
- Before purchasing, inspect the surface of the product. There are often falling knots and a green coating that spoils the appearance of the wood.
- It is advisable to apply varnish to the block house in damp areas. The stain emphasizes the structure of the wood product.
- To tighten the self-tapping screws, use special “cue balls”. They have a magnetized tip.
- Do not use nails when attaching planks.
- Varnish and stain must be made on a natural basis.
- Wash your roller and brush thoroughly after each application of varnish and stain.
There are many products that can help protect the surface of the skin. For example, you can use wax or special primers. Their presence will require occasional vacuuming to remove dust. You can also use a slightly damp sponge. Do not use aggressive detergents or abrasive materials when treating the surface.
So, using a block house to cover the walls of a wooden house will give the room originality and create the ancient atmosphere of a log house. With all this, the installation work can be done with your own hands. It is enough to have a simple set of tools described in this article. We and our readers would be interested to hear about your own experiences. Leave comments at the end of the article if you have already lined the internal walls with a block house.
The provided video materials describe working with a block house:
Features of plywood ceiling cladding
Types of ceiling finishing include covering it with plywood. During finishing work, it is recommended to use plywood sheets with a regular or waterproof structure. In this case, you can use thick and thin sheets.
Before installing plywood sheets on the ceiling structure, it is necessary to make a sheathing of wooden blocks. For cladding, it is recommended to use sheets with a thickness of 4-8 mm. Thinner sheets are usually attached with glue, thick sheets are secured with screws or nails.
Positive traits:
- Naturalness and naturalness . After covering the ceiling, the house will have a pleasant atmosphere and the aroma of natural wood;
- Lightness . Due to the fact that plywood sheets are light in weight, they will not create an increased load on the base;
- Increased resistance to moisture . Due to the fact that the surface of plywood sheets is treated with a special compound, this material can be safely used in conditions with high humidity;
- High strength characteristics . Plywood sheets have a multi-layer structure, so they have increased strength
- Low cost.
Slat ceilings
Options for finishing the ceiling in a wooden house can be varied, but cladding with slatted elements is especially attractive. In this case, slats can be purchased ready-made or made to order.
Moreover, there is a wide range of materials, the choice of which can be limited only by financial capabilities and your preferences. The width of the slatted elements may also vary. Typically, this parameter depends on the dimensions of the lining (approximately 12-12.5 cm) or on the size of the cladding board.
Important! When choosing wood for making slats, many designers and experienced builders recommend giving preference to traditional species. The ceiling made of poplar, elm, and aspen looks stylish and beautiful. You can also make slats from several types of wood at once.
Several important recommendations that must be followed when finishing the ceiling with slats:
- before starting the installation of slatted elements, it is worth treating them with stain and compounds to increase fire resistance;
- if there are any defects on the surface of the slats, then it is best to sand them;
- You first need to make a sheathing to which the slats will be attached;
- it is necessary to secure the slatted elements with nails and screws, as well as beams with a guide structure that are inserted into the grooves;
- As soon as the slatted ceiling is made, it is treated with water-soluble paint or varnish.