The finishing of the ceiling surface can be different; one of the options is tension structures. They are quickly installed, do not require special preparation of the base and at the same time have an attractive appearance. Installation of the system is quite simple; if you wish, you can do it yourself. We’ll figure out how to install a stretch ceiling with our own hands in order to do it efficiently and without errors.
Stretch ceiling device
The load-bearing structure is a special profile (baguette) installed in the upper corners of the room. The construction of a stretch ceiling assumes that the edges of the PVC sheet have a harpoon, which is inserted into the fastening profile. Initially, the film is simply suspended, then heated using a heat gun. When heated, it becomes elastic, which allows it to be stretched. Along the entire perimeter, the harpoons are snapped into a baguette, and to hide the internal fasteners, a latch is installed - a decorative cap strip. As a result, the stretch ceiling becomes perfectly flat.
Necessary tools and components for installing a stretch ceiling
Purchase all elements in advance so as not to stop work.
It’s not enough to know how to stretch a stretch ceiling. It is important to have the following set of tools at hand:
- A level will be required for measurements and marks. It would be desirable if it were laser, but a regular water one would also work. You also need a marker or pencil with a ruler and a cutting line.
- You'll have to work with a file. Prepare two canvases. One for wood, the other for metal. Keep keys within reach for replacement. Make sure the teeth are sharp.
- A screwdriver is useful as a power tool. A conventional drill is used if the house has wooden floors. You can’t handle reinforced concrete without a hammer drill. Drills with pobedite tips are used.
- It is better to warm up the film with a hair dryer. An alternative is a gas heat gun with a connected cylinder. Then you will not have to run an electrical extension cord into the premises.
- Naturally, you will need a regular hammer, as well as a set of spatulas. The shoulder blades should be curved. Purchase this tool from a specialty store that sells everything you need.
- A stepladder is a mandatory element. To ensure your own safety, do not use homemade structures, especially if their elements are not rigidly fastened. You will also need a stationery knife with replaceable blades.
Dowels with self-tapping screws are used as fasteners. For quick gluing you will need a second of super glue. In addition to your own canvas with harpoons attached around the perimeter, rings made of heat-resistant plastic are useful. They are used when installing isolation devices. Prepare the profile used as mortgages in advance. Purchase small self-tapping screws called “bug screws.”
How to measure a ceiling panel
Before stretching a suspended ceiling, you need to accurately measure its dimensions and make a drawing, which is especially important if the perimeter is not a simple rectangle, but has a more complex shape. Often the corners are at different levels.
To correctly construct the ceiling in the program, you should divide the plane into triangles, then all the calculations will be correct.
Walls and ceilings are not always smooth, and therefore use the following recommendations:
- The most convenient way to use a laser level is to place it on a tripod in the center of the room. Check each corner one by one. Start marking from the lowest. In this case, step back 3-5 cm, which is especially important if you plan to install spotlights. Make marks in the corners with a pencil.
- If there is no laser level and you have to use a tape measure, measure the height of each corner. Determine the lowest one. An indent of up to 5 cm is also made. Place a mark. Now, in the remaining corners, it is also necessary to mark the installation location of the stretch ceiling, for which the same distance is measured from the floor.
In the latter case, an error of 1-2 cm is possible, which will not be visible visually. Next, the walls are marked, and you can’t do it without an assistant. The tapping cord is stretched along which a line must be drawn.
Stage three. Marking
Prepare a marker and tape measure to mark the ceiling. First, measure the height of the future ceiling (excluding drywall) and make 3-4 marks on each wall. Connect these marks into a continuous line using painter's thread. It is along this line that you will install the ceiling profile.
Also mark the ceiling itself for the main profile (6x2.7 cm) and suspensions. Step back from the walls at the distance indicated above, make a few marks and beat off a line (in the same way as before). Repeat the same procedure for all planks, i.e. every 60 cm. Mark along the lines the points where the hangers will be attached.
Markup example
Features and Benefits
Stretch ceilings are a combination of materials made from fabric or vinyl and metal profiles that decorates the ceiling, hiding any unevenness and other defects that were made during the construction stage. These ceilings can be stretched in any room: living room, kitchen, bathroom, hallway or work office.
Stretch ceilings have their undeniable advantages:
- they will help to create an ideal and even ceiling of various colors and textures in a very short period of time;
- huge scope for imagination and design approaches;
- strength, resistance to moisture and dust, environmentally friendly materials;
- there is no need to clean the room for a long time after installation;
- they give you a chance to experiment with lighting in your living space;
- ability for additional sound insulation and improved acoustics.
However, such canvases have some disadvantages:
- ceilings can tear under a single mechanical impact, so they require careful use and care;
- can lower the ceiling level by at least 3-5 cm or more;
- if there are temperature changes in the apartment, then such ceilings (most often polymer) will sag or wrinkle - this fact is especially noticeable in places where there is a draft.
Also, these ceilings have other properties that depend on the fabric used and their design, which is very important to take into account when creating a project, ordering and installing the ceiling. Therefore, you need to understand what types of ceiling structures there are.
What should be the height
Finishing the ceiling with a suspended structure requires at least a small frame. This will make the space of the room visually noticeably smaller. The design of a suspended ceiling is simple: using a frame system made of metal profiles or wooden beams, the canvas and various elements of the future covering are attached to the main partition. Decorative panels and all parts on a metal grille are attached to the installed hangers. Correct installation of guides and support profiles ensures easy installation. And with the most minimal installation option, the distance between the ceiling and the suspended ceiling will be at least 3 cm.
The ceiling installation height is also affected by some individual reasons:
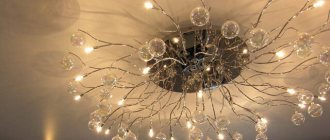
Built-in lamps may have a large body, which will need to be hidden behind the ceiling structure. If desired, you can install an LED strip or a simple chandelier into the ceiling structure. It is also necessary to take into account the dimensions of the housing, which will be hidden behind the insulating material.
Types of structures
There are several types of tension fabric designs:
- Single-level. This is a classic look. They are very economical and suitable for both large and small rooms. To connect several canvases at the same height, there are dividing profiles that have an intermediate decorative plug or backlight.
- Multi-level. They are used to create several different zones in a room or to cover obvious ceiling irregularities. They can also give scope for design creativity. But multi-level canvases are only suitable for spacious rooms with high ceilings, and installing them is several times more difficult than the option described above. For them, it is better to use transitional level profiles, which will help ensure a smooth joint and height difference. Do not forget that the bead fastening system is not used when installing structures with multiple levels.
- Soaring ceilings. They are a kind of modification of suspended structures with a built-in strip of LEDs, the light from which is soft and diffused, which creates the effect of a “floating” ceiling. In such cases, the lighting is placed along one wall, along the entire perimeter of the ceiling, or around its individual parts. Creating floating ceilings requires special baguettes, which, in addition to recesses for installing fabric, have a special niche designed for an LED strip. Also, this variety requires special profiles: wall and ceiling, dividing and for level transitions, because they can make the location of the lighting more convenient.
Preparation
This is the first and very important stage, without which you cannot install the tension fabric yourself. It is divided into several points that must be completed.
First of all, you should remove all furniture and equipment from the room where the ceilings are supposed to be stretched, since the space should be as free as possible so that the installation takes place quickly and without the possibility of mechanical damage to the canvas. If it is impossible to remove some objects from the room, then they need to be moved to the center of the room and covered with protective film.
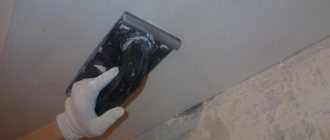
Then you need to remove the old plaster from the ceiling, as it can fall off and leave unsightly marks on the canvas.
Pre-treat the walls and ceiling with a disinfectant and antiseptic to avoid the appearance of mold, mildew and unpleasant odors after installation of the structure. Also, the surface on which the fabric will be stretched must be coated with a primer, preferably in several layers.
It is best to glue the joints between concrete walls with fiberglass tape along with PVA glue. If there are already cracks in the ceiling, they can be filled and leveled with cement mortar, and for large depressions - with polyurethane foam or plaster. This is necessary so that there are no holes on the canvas after shrinkage.
Attaching plastic panels
How to decorate a ceiling with plastic panels. It is good to cut plastic panels with a hacksaw or a knife. We cut it to the required size and insert it into the recess of the ceiling plinth.
The plastic panels are simply inserted. If you are installing a ceiling in the summer, then no gaps are left along the edges of the panels, and in winter the panels must be made shorter by 5 mm.
The gap is necessary to increase during the heat. Otherwise, the ceiling will bend. Having sawed off the panel to the required size, we slide it into the groove from the edges, then we move it towards the already exposed panel.
With a small pressure, the panels click into the lock hole and there are no gaps left. The plastic is also secured to the bars with self-tapping screws and washers.
Types of suspended ceilings
To a non-specialist it may seem that all tension systems are the same. However, it is not. Despite the similar method of fastening, the stretched fabric is different. Depending on its type, the fixation method and installation technology are selected. Let's consider two main types of material.
Fabric
For tension, high-strength synthetic fabric made of polyester or polyester and impregnated with polyurethane is used. The production technology allows us to obtain only matte fabrics, but high-quality imitation of fabric of various textures is possible: chintz, suede, etc. Double-layer fabrics are also produced. In this case, an embossed decorative layer is applied to the fabric base in the form of a mesh.
Instagram potolkint_ideal
Instagram proatrium
Fabric materials are available in different finishes. They can be white or colored. In the latter case, there are few shades, no more than twenty. But they are all deep and smooth. It is possible to apply glitter and photo printing (although in the interior they may look old-fashioned). Another decorative option is translucent fabric, under which special lamps are installed. However, if they break, you will have to dismantle the old coating and install a new one.
Advantages
- The roll width is 510 cm, so seamless finishing can be done.
- Installation with minimal reduction in wall height. In a room with the correct geometry, only 15 mm is “eaten up”.
- Strength. It is possible to damage the fabric intentionally, but it is unlikely to be accidental. She is not afraid of quite serious mechanical impacts.
- Vapor permeability. Thanks to special impregnation, the fabric retains water for a short time, but at the same time allows steam and air to pass through well. This allows the structure to “breathe”.
- Wide range of “operating” temperatures. It ranges from 80 to -40°C. This makes it possible to install fabric systems in different rooms. For example, in loggias that are unheated in winter or in attics that are very hot in summer
- Fire safety. The material is treated with fire retardants, so it does not burn and does not produce smoke.
- Antibacterial effect. Bacteria and mold do not live on the surface of synthetic fibers.
- Installation is carried out without the use of heat guns.
Fabric coverings have few disadvantages, but you need to be aware of them.
Flaws
- After dismantling, the fabric cannot be re-stretched.
- Insufficient resistance to moisture. It is not recommended to install in rooms with high humidity, as “dirty” stains may appear. Despite the special impregnation, the canvas does not tolerate washing. It can only be dry cleaned. If it leaks from above, it will not hold the liquid.
- The fabric absorbs odors. It is extremely difficult to get rid of them later. Therefore, smoking, for example, in rooms with such a ceiling is not recommended.
If the width of the room where you plan to install the system is more than 5 m, you will have to make a joint and cover it with a special cover.
- Ceiling
Which stretch ceiling is better - matte or glossy: compare and choose
PVC film
Polyvinyl chloride film of various thicknesses is stretched. Unscrupulous manufacturers may use cheap toxic raw materials in the production process. When heated, such a film releases toxic substances, and after its installation there is a persistent unpleasant odor. To avoid such a result, when purchasing, you need to check the quality and safety certificate of the material.
Instagram andrei_potolki_kzn
Instagram potolki_azbuka
Film coatings are available in a variety of colors, there are dozens of them. There are matte, glossy, satin and mirror films. It is possible to use photo printing, although in modern interiors this is losing relevance.
pros
- Completely waterproof. When flooded from above, the elastic film stretches and holds the liquid inside. After draining it returns to its original shape.
- Reusable. After dismantling, the canvas can be installed again.
- Easy to care for. Dry and wet cleaning possible. Dirt can be easily washed off with soapy water. The use of aggressive chemicals is prohibited.
- Low cost of material and installation.
PVC film has many disadvantages. Let's list them all.
Minuses
- Low strength. The thin film can be easily damaged if caught with a sharp object. Champagne corks and similar impacts cause serious damage.
- The width of the canvas is small, the maximum is three meters. Thus, to finish spacious rooms it is necessary to weld two or more strips.
- Small range of “operating” temperatures. At -5°C and below, the material becomes brittle and begins to crack and collapse. Therefore, it is not used in houses with seasonal residence. High temperatures soften the plastic and it increases in size. When exposed to extreme heat, it may change color, such as yellowing, in areas near lamps.
- Quite complex installation using special equipment. The plastic strip is heated with a heat gun and tucked into the fasteners. If errors are made during the installation process, it sags or collapses, that is, sticks to the base.
- Cleaning
How and how to wash a suspended matte ceiling
We complete the ceiling
The kit includes:
- aluminum or plastic profile;
- canvas;
- fasteners.
The design of suspended ceilings in the bedroom, as in other rooms, depends on your personal preference. The nature of the room plays a significant role in the choice.
Today there is a huge selection of panels available. Drawings, applications, photo prints and many other designs can be selected for decoration. Your personal taste and designer's advice will help you make the right choice.
Installation steps
To understand how to properly make a suspended ceiling, you need to follow the steps we have proposed:
Note!
- How to make slopes - simple ways to create slopes. Making slopes correctly with your own hands (110 photos + video)
- How to make a staircase - diagrams, drawings, projects and tips for making stairs and flights of stairs (135 photos + video)
- How to make a box - a step-by-step master class on making a box with your own hands (125 photos + video)
- mark the walls;
- install mounting moldings;
- stretch the canvas;
- install a ceiling molding.
A few recommendations
Here are a few more short recommendations for installing suspended ceilings with your own hands:
- Use only good quality materials. This way you will ensure yourself a reliable and durable ceiling covering.
- Take your time while working. Make a plan, spend more time on surface markings and calculations so as not to make mistakes and not run to the shops for missing materials.
- GKL brand drywall should only be used in dry rooms.
- Level is your best assistant.
- To further soundproof the room, use mineral wool, placing it above the frame.
- Before you begin attaching the drywall, leave it lying flat for a few days.
Installing suspended plasterboard ceilings is not such a difficult task. These instructions will help you make a suspended ceiling with your own hands and avoid mistakes and shortcomings.
cloth
Before proceeding with installation, you need to warm up the room to 40 degrees (this is done using a heat gun).
Note!
- How to make a roof - a step-by-step description of building a roof with your own hands. 110 photos and videos of roof construction
- Do-it-yourself strip foundation: instructions from A to Z, photos, dimensions, calculations, choice of materials
- How to make sound insulation - tips on choosing materials and a review of the best methods of insulating cars and apartments (video + 85 photos)
Mounting occurs in several stages:
- Remove the canvas, secure the base corner, and warm it up.
- Attach the opposite corner.
- We secure the remaining corners and warm up the entire canvas.
- Gradually warming the surface, insert it into the baguette with special spatulas.
Make sure that the canvas is smooth and without wrinkles. If you notice any shortcomings, they must be corrected immediately.
After the canvas is installed and warmed up, you can move on to the lighting fixtures. This is the final stage.
Stage seven. Finishing
Once the installation is complete, all that remains is to do the final finishing. First, all joints between the sheets are carefully puttied and leveled, as mentioned above. After the putty has dried, a layer of finishing material (for example, paint, plaster, etc.) is applied. Lighting devices are being installed.
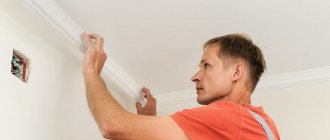
Ceiling baguette
After the lighting is installed, all that remains is to glue the decorative plinth, which is glued to the adhesive base. That's it, you can admire your own works.
If you have enough strength, patience, and skills, then you will be able to install a two-level stretch ceiling in the bedroom, kitchen, nursery, and living room.
Note!
- How to make a fireplace - a step-by-step description of how to build a small fireplace with your own hands quickly and easily (115 photos and videos)
- How to make a socket - tips on selection, installation, connection and features of moving the socket (110 photos)
- How to make a second floor - a detailed description of the choice of design and decoration of the second floor (115 photos)
But, if you have even the slightest doubt that you will cope with the task, do not take the risk. It is better to invite a specialist who will do all the work quickly and efficiently.
Preparatory work
Before applying decorative plaster, it is necessary to level the surface using special plaster mixtures and perforated metal strips.
You can also make a 1-level ceiling by installing plasterboard sheets on the “base”, then apply plaster on them.
What it is? Ceiling types
The tension structure is a continuous fabric stretched under a regular ceiling and secured around the perimeter with a special profile made of aluminum or plastic. The most common types of material used as the main covering are PVC film or synthetic textiles (polyester impregnated with polyurethane). Depending on their texture, there are matte, glossy, satin, fabric and stretch ceilings with photo printing.
Matte stretch ceiling
This ceiling is distinguished by a perfectly smooth surface, reminiscent of painted plaster. The advantage of this design is the absence of glare and refractions of light, as well as the complete invisibility of seams that are formed when soldering the canvases. High aesthetic qualities make matte stretch ceilings indispensable in creating an elegant classic interior.
Glossy (mirror) stretch ceiling
A glossy stretch ceiling is the best choice if you want to visually raise the height of the room and make it brighter. Regardless of color, such a film is similar to a clear surface of water, in which every photon of illumination, both daylight and artificial, is reflected.
Satin stretch ceiling
This option can be called a compromise between matte and glossy stretch ceilings. Its main feature is its soft pearlescent luster, giving the room the delicate glow of pearls or silk. The absence of sharp shadows allows the use of satin coverings to create a cozy and comfortable atmosphere for relaxation.
Fabric stretch ceiling
The fabric ceiling is installed without preheating and most often does not have seams: the width of the roll can be from 3 to 5 meters, and this is quite enough for not too large rooms. Unlike PVC film, textiles are resistant to low temperatures, so they can be used in unheated rooms and cottages.
Stretch ceiling with photo printing
A ceiling with photo printing is an amazing opportunity to realize any design ideas by placing a high-quality image on the ceiling. It could be the sky, flowers, birds, butterflies, landscape, world map, skyscrapers, children's pictures or abstractions. At the same time, it is important to beautifully combine such a stretch ceiling with the rest of the interior, without overloading the space with large details.
Advantages
— Thanks to its absolute moisture resistance, PVC film is ideal for kitchens and bathrooms. In emergency cases, it is even capable of holding a fairly large volume of water, if suddenly the neighbors’ water pipe breaks above.
— Often, suspended ceilings are combined with plasterboard, creating interesting multi-level structures.
— Another advantage of this finish is the ability to easily hide minor irregularities in the base, and with them, hide wiring and some lighting elements.
Manufacturer's choice
In many ways, the properties of the material for a tensile structure depend on the technology of its manufacture and the quality of the raw materials used. These nuances affect the cost of products. Cloths from different manufacturers differ greatly in their quality characteristics.
This is evidenced by a brief description of paintings produced in different countries:
- France
. Modern ceiling coverings from French manufacturers are considered to be the standard, which is understandable, since this is the country in which they first appeared. When making a French stretch ceiling, they use a dense, durable fabric with a beautiful shine, which has only one serious drawback - high cost. - Germany
. German materials for ceiling coverings are of high quality, although they are slightly cheaper than their French counterparts. Canvases from Germany are known for their rich variety of colors. - Italy
. In this country, materials for suspended ceilings were invented that practically do not require maintenance, while all their positive qualities remain unchanged. - Russia
. Enterprises produce economy-class ceiling coverings. This product looks great. If you don’t know that it was produced at a Russian factory, it is impossible to distinguish it from European products. This fabric lasts much less compared to Italian or German materials. - China
. Products from this country are more difficult to deal with. Among the Chinese paintings there are both high-quality copies and those that are better not to buy. You can distinguish bad material from good material by smell - high-quality products stop emitting a specific smell 1-3 days after installation is completed.
There are several rules for choosing the right stretch ceilings:
- Sellers of paintings must have certificates confirming their environmental safety.
- The width of the roll needs to be taken into account as a number of European manufacturers do not have wide options.
- When purchasing preference is given to a glossy film, you need to look at its shine, since high-quality material has good specularity.
- Some types of products have the manufacturer's logo on the border.
Before choosing suspended ceilings, you need to remember that not only the beauty of the home, but also the health of family members depends on the right decision.