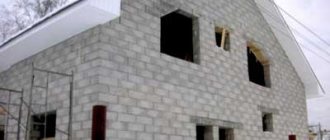
The construction industry is developing along the path of simplifying and speeding up work, as well as improving the quality of building materials. Heavy and bulky buildings are being replaced by easily erected structures created from standardized elements.
This trend can also be seen in the field of construction related to facades. A lightweight and reliable frame with durable cladding – this is the look of the modern façade of residential, public and industrial buildings.
Curtain facades are divided into two types:
- Regular. There is no air gap between the facing material and the wall (or insulation). This method is rarely used due to unsatisfactory performance characteristics.
- Ventilated. Between the facing material and the wall (or insulation) there is a ventilation gap 40-100 mm wide through which air circulates.
Various materials are used for cladding: metal, wood or plastic siding, profiled sheets, composite cassettes, ceramic granite, natural stone.
Different materials serve different purposes, but for simple and reliable façade finishing, preference is given to attaching metal siding to a metal profile.
Installation
The frame for siding is a simple structure, so it is quite possible to make it yourself.
The following step-by-step instructions will help them with this: Sheathing a house with siding begins with the installation of a frame subsystem; it must be carried out on carefully prepared walls. To do this, the external surfaces should be cleaned of dust, plaster or paint residues. Then all cracks are sealed with cement mortar. If an additional heat insulator is installed, then the protrusions are removed from the walls, the deep depressions are plastered, the platbands are removed from the windows and the slopes are knocked down. There should be a clear and accessible surface around door and window openings. After the base of the walls is ready for work, you can install the sheathing itself. This must be done in a certain order: first you need to mount the frame profiles, then attach the sheathing to them. If you need to sheathe a wooden surface with siding, then it is treated with antiseptic agents that protect the wood from mold and mildew. Next, the surface is marked for mounting the frame. Lines are drawn along the base in the form of a lattice; they will later serve as a place for attaching hangers. Profiles and beams are prepared and painted to the required length. Installation work with the frame. Fastening the elements can be done in different ways, everything depends not only on the features of the wall, but also on the type of sheathing. The beams are usually fixed to a wooden surface without the use of fastening systems. According to the prepared markings, first of all, horizontal and vertical elements are filled, then jumpers. Fastening is done using screws and nails.
Installation should begin from the base area, which protrudes above the surface of the walls
For brick and concrete walls, it is best to choose sheathing made of metal profiles, which is fixed with brackets. Fastening is usually carried out on steel angles or hangers.
Installation is carried out strictly according to the markings, bending the suspension in the form of the letter “P”. The frame platform is fixed to the wall with dowels, and the profile with self-tapping screws.
The installation of frame profiles begins with fastening the starting strip; it is mounted along the entire perimeter of the building at a height of 50 mm from the ground. In this case, you need to leave a small gap of 10 mm between the ends of the plank and take into account the fixation of the outer corners, which are set vertically and fastened with dowels at a distance of 90 cm. An important point in the work will be the edging of the openings, the accuracy of the cladding will depend on it. Window openings are trimmed with a special profile, and doorways usually have a recess that forms a vestibule, so internal corners are simply installed for them, and the outside is finished with a plank. If the wall exceeds 32 cm, then it is usually covered with additional strips.
Fourth step: Installation of platbands.
There are three systems for framing openings:
- Window or door flush with the wall.
In this case, you can use a J-bar
It is important to make the connections correctly at the corners
- Install waterproofing.
- Install two vertical J-straps or trim on either side.
- Fix the profile horizontally over the opening with a minimum of 6 cm beyond the frame. from each side.
- Connect the slats using the following method: cut a strip at the bottom of the horizontal profile and bend it down, make a 2cm cut on the side of the vertical slats. and cut at an angle of 45 degrees. top part.
- Fasten the top and side elements.
- Attach the bottom rail in the same way, but make the strip on the vertical elements. You need to make strips so that they cover the sheathing joint, protecting against moisture penetration inside.
- Openings with slopes no more than 20 cm.
Finishing should be done around window trims or platbands.
- Install finishing strips around the entire perimeter.
- Install the top and bottom profiles first, then the side ones.
- Make connections as described above.
- Openings with deep slopes.
They are usually finished with siding. A flexible ebb is installed on the inside.
- Attach inner and outer corner panels around the perimeter.
- Install siding between them.
Fifth step: Attaching the first panel.
The general rule of fixation is that the siding cannot be tightly nailed or pulled; gaps are required for temperature changes in size. It should be fixed in increments of 30-40 cm.
- Insert the first panel into the corner piece and the starter bar lock. There is a 6 mm gap between the panel and the bottom edge of the lock. (When installing in the cold season, leave 9 mm.).
- Attach the siding to the sheathing.
Extension can be done:
- The overlap is 2.5 cm; to do this, shorten the fastening strips and panel locks.
- H-profile - performed in the same way as joining corner strips. Leave a gap of 3 mm to the soffit; in relation to the starting strip, lower the profile by 6 mm. The same gap remains around any structures protruding from the wall.
Sixth step: Installation of siding.
- Install the remaining panels in the same way as the first.
- Check the level every 2-3 rows.
- When installing siding around openings, trim as necessary. At the bottom of the window, fix an additional finishing strip to level the surface of the trim.
- Fasten with “hooks”.
Seventh step: Cladding under the roof.
The finishing strip is attached under the roof structure:
- Measure the distance between the lock of the penultimate panel and the bottom line of the lock of the finishing strip, retreat 2 mm.
- On a separate panel, cut off the top locking module.
- Make hooks on top at a distance of 20 cm from each other. Bend the cuts to the outside.
- Insert the trimmed siding into the penultimate panel and snap the finish locks into place.
Types of lathing
Let's move on to installation and start with choosing the sheathing. The sheathing is made from:
- wooden beams;
- profiles for fastening drywall;
- metal U-shaped profiles for siding;
- plastic structures designed for the installation of vinyl and acrylic panels.
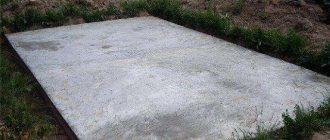
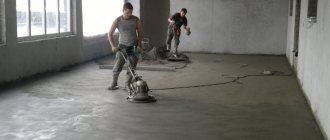
Before installing the sheathing, inspect the surface. If there are cracks, crevices and other defects on it, they need to be repaired. If the old cladding is crumbling (for example, paint or plaster), it must be removed. If there are strong differences and unevenness on the walls, they should be smoothed out. Otherwise, the geometry of the wall will be disrupted and the siding may crack or deform.
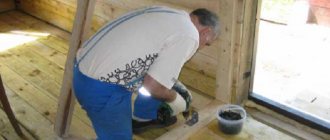
After eliminating the unevenness, you need to treat the walls with a protective coating. To protect the walls of a wooden house, use an antiseptic and a fire retardant: the first will cope with moisture and rot, the second will prevent fire. Treat concrete walls with a deep penetration primer. It will prevent the appearance of mold and mildew.
Wooden sheathing for siding (photo No. 5)
The sheathing is mounted perpendicular to the siding panels. In other words, if you want to lay the siding horizontally, then the sheathing frame must be made vertical. And vice versa. The step between wooden beams or metal profiles should be 30-50 cm.
Hydro-wind insulation is laid under the sheathing. It protects the building from wind and moisture. Thanks to the presence of the lathing, a ventilation gap is formed between the walls of the house and the finishing panels. The gap prevents the appearance of condensation harmful to the walls and cladding. To keep the house warm, you can lay insulation between the sheathing. For this purpose, mineral wool and expanded polystyrene foam are used.
Let's take a closer look at each lathing option.
Wooden sheathing. It is made from beams 4 cm or 5 cm thick
When choosing beams, pay attention to the smoothness of the surface and the absence of cracks. Before installation, you need to dry the wood and cover it with solutions that protect the wood from rot and fire.
If you are faced with the question of how to attach siding to wood, then there are 2 options: with a screwdriver and self-tapping screws or with a hammer and nails.
Metal sheathing of walls and plinth (photo No. 6)
Profile for fastening drywall. If the goal is to save money, then profiles for interior work are used to install siding. Most often, sheets of plasterboard are attached to such structures. Manufacturers do not recommend using drywall profiles outdoors. Due to the thin zinc coating, corrosion occurs on them when exposed to moisture. They are intended for indoor use and are not suitable for attaching siding.
Metal U-shaped profile. To attach the siding, a durable metal profile 1 mm thick is also used. This design is more reliable than lathing with a plasterboard profile, but will be more expensive. If you use heavy cladding panels (for example, basement or metal siding), then you need to use street profiles.
Alta-Profile polymer façade fastening system. Polymer profiles are not subject to rust and rotting; they do not require additional processing or special storage conditions. If you choose vinyl siding to clad your building, you need to take into account that it expands in the hot summer and contracts in winter. Polymer profiles prevent deformation of cladding panels due to sudden temperature changes; they have the same coefficient of expansion as siding.
Plastic profiles are not subject to rust and rot (photo No. 7)
Peculiarities
Lathing for siding is a frame that is attached to the surface of the walls before facing them with decorative panels. It is usually made of metal or wood. Without such a frame, installation is considered difficult and time-consuming. If you fix siding directly to a concrete, wood or brick base, this can lead to a lot of problems.
Therefore, the lathing is an important building structure that performs the following functions:
- Leveling the surface. Sometimes the walls may have unnoticeable irregularities, but if they are not eliminated, then not only the geometry of the entire finish may be disrupted, but also difficulties in installing the siding. The lathing levels the base, neutralizing these flaws.
- Thermal insulation. Insulation is placed under the frame, which reliably protects the walls from heat loss.
- Creating good ventilation for the facade. Since a small air gap is formed between the siding, sheathing and walls, the surface has access to ventilation and “breathes.”
- Ensuring strength. Thanks to the frame, the risk of panels moving is reduced and the service life of the cladding is increased.
To make the lathing, special profiles and fasteners are used. It is installed over the entire surface of the working base in the form of a lattice or parallel straight lines. The location and direction of the profiles depends on the type of decorative panels, since siding can be vertical or horizontal.
As a result of installing the sheathing, the walls are leveled, and due to its thickness, a gap is created for ventilation.
Today, wooden beams and metal profiles are used to install frame structures under siding. Since each of these materials is characterized by its own advantages and disadvantages, before installation it is necessary to weigh their pros and cons and decide on the most suitable type of sheathing.
Many craftsmen choose a frame made of metal profiles for siding ; although it is considered expensive, it has increased rigidity and strength. Thanks to such indicators, the metal lathing makes the cladding resistant to deformation under the negative influence of humidity and temperature changes. The metal profile is produced in standard sizes with a zinc coating, so it is protected from corrosion, durable and easy to attach.
Since the material is intended for the manufacture of frames, it is produced in two types: guide and rack. Additionally, the profiles also include fastening parts: dowels, self-tapping screws and connecting hangers.
As for wood lathing, it is characterized by naturalness and environmental friendliness. The wooden structure is assembled from beams; its installation can be easily done with your own hands, but the wood is often exposed to fungal diseases and rotting processes. In addition, the beams can be damaged by bugs and they are a fire hazard. To avoid this, the building material must be treated with special substances. Another disadvantage of beams is that they are susceptible to warping, which is why the beam can bend in the transverse or longitudinal direction.
Therefore, wooden sheathing is rarely used for paneling, the only exception being vinyl siding, which should be installed with insulation.
Installation of sheathing
Preparing the walls of the house for installation of sheathing
Before making sheathing for siding (no matter - wood or metal), it is necessary to prepare the walls of the house itself. Preparation is carried out according to the following algorithm:
- We remove the trim from windows and doors, as well as all elements protruding beyond the plane of the wall.
- We clean the walls of the house from contamination, if possible, remove the remnants of the previous finishing, especially those that are peeling and falling off.
- If the outside of the house is lined with wooden clapboards, check how securely the boards are fastened. If there are loose cladding elements, we fix them with self-tapping screws.
- We treat the walls of the house with an antiseptic. This is done in order to prevent the development of mold fungi under the siding in case of possible moisture penetration under the sheathing.
Option for placing profiles
After preparing the walls, you need to mark them. The pitch of the sheathing under the siding depends on what kind of material we plan to use: the denser and heavier the siding panels, the smaller the pitch between the beams or sheathing profiles should be. As a rule, when installing vinyl siding, sheathing is used with a pitch of 40-60 mm.
Also at this stage we determine the direction of the sheathing: if the siding is attached horizontally, then the sheathing will be installed vertically under the siding, and vice versa.
Vertical lathing
The lathing for basement siding can also be either vertical (maximum step - 90 cm) or horizontal (step up to 45 cm). An exception is Dolomite basement siding - its panels can be mounted exclusively on vertical sheathing.
Installation of metal sheathing
The metal sheathing for fastening with siding is made from a U-shaped profile. The most commonly used profile is a section of 27x60 mm and a length of 3 m.
The profile is fixed to the base using hangers - perforated plates made of galvanized steel (pictured). Sometimes, instead of suspensions, special brackets are used - they are much more durable.
Profile hanger
The profile sheathing for siding is mounted according to the following scheme:
- We begin installing the profiles from both edges of the wall - they will serve as guides for leveling the plane.
- Using a hammer drill, we drill holes according to the markings on the wall. We insert plastic dowels into these holes, after which we fix the brackets for the profile, or metal hangers.
Installation diagram
- If you plan to insulate the facade, then before installing the main profiles it is necessary to install slabs of heat-insulating material. To do this, we cut holes in the slabs opposite the brackets and put the slabs on the fixed brackets.
- Using the same technology, a windproof membrane is placed under the sheathing.
- We attach profiles for the sheathing to the outer brackets. We stretch a cord between them - we will use it to align the remaining profiles.
- We continue to install the frame elements. To add rigidity, we connect the main profiles of the sheathing with perpendicular jumpers from scraps of the same profile.
- To attach the vertical sheathing, you may need a 28x27 mm profile. We will use it as a starting profile into which we will insert the ends of the main profile.
Metal sheathing
The installation of sheathing for siding must be completed by checking the resulting plane. For control, you can use a water or laser level.
Installation of timber sheathing
As we noted above, wooden sheathing for siding is somewhat cheaper: almost anyone can do it with their own hands, so you will also save on labor costs for craftsmen. The wood for sheathing must be thoroughly dried and treated with an antiseptic. In addition, it is better to choose even beams, since even a slight curvature of the tree complicates the work and makes it difficult to align the sheathing.
Assembling wooden sheathing
We install the sheathing under the siding as follows:
- We cut the beams for the sheathing in advance, so that the length of the beam matches the dimensions of the wall. If the length of one beam is not enough, you will have to join it, which is undesirable.
- We begin fastening the beams in the same way as when installing metal sheathing - by installing brackets. We apply the sheathing beams to the brackets, align them on a plane and fix them with self-tapping screws.
- If insulation of the space under the siding is not planned, then it is possible to attach the sheathing directly to the wall. When fastening in this way, the bars are drilled through with a hammer drill, and then attached directly to the wall through these holes. To level the sheathing, we use wooden or plastic mounting wedges.
Pros and cons of wooden sheathing
Wooden sheathing is a traditional solution that has its pros and cons.
The advantages include:
- Availability of material.
- Ease of processing.
- Low weight of the material, which does not create unnecessary load on the wall.
- Possibility of making to order in any size.
- Wooden blocks do not require additional insulation, being themselves heat insulators.
- Convenient to attach siding panels.
Flaws:
- The bars do not have a perfectly straight surface; correction is required.
- There is a danger of warping or turning by a screw, which can change the geometry of the finished skin.
- Wood is flammable.
- There is a danger of mold, rot or insects; treatment with antiseptics is required.
- Wood reacts actively to changes in air humidity.
Despite all the shortcomings, there are many supporters of the traditional approach to the manufacture of sheathing. This is explained by the possibility of independently making planks from any available wood using a hand-held power saw.
Wooden sheathing
Types of lathing for siding a house
The appearance of the cladding of the house depends on how well the sheathing is built. A frame installed in accordance with all the rules can hide any flaws and irregularities in the walls and gables of the building. The lathing is the base to which the finishing material sheets are attached.
When installing metal and vinyl slats, two types of frames are used:
- from wooden blocks;
- from a metal profile.
Types of lathing for siding a house
Any of them is suitable for installing facing material on wooden walls. A correctly installed frame allows you to lay any of the modern heat insulators on the walls. The lathing also provides the ventilation gap required to eliminate excess moisture.
In the photo there is insulation laid between the sheathing posts
Installation of the frame is not necessary if the walls of the wooden house are perfectly smooth. You can safely attach siding to such a surface without using a structure of additional supports.
Siding without sheathing can be easily installed on wood and chipboard surfaces, plywood, etc.
Advantages of a metal frame
It is better to install siding on a metal profile. This material has a number of undeniable advantages:
- Quick and easy installation.
- Durability – withstands loads without deformation throughout its entire service life.
- Fire safety.
- Anti-corrosion coating.
- Light weight makes it easy to transport and store until installation.
- Possibility to use without waste.
Installing metal guides on the brackets allows you to avoid applying rough plaster to level the base.
Lathing installation technology
This process is considered understandable and simple if you know exactly what sequential actions must be performed, as well as what nuances you will have to deal with, and how to do everything correctly.
As a rule, perfectly smooth walls are very rare, and attaching siding to the walls would be very inconvenient, so installing siding requires preliminary formation of a frame. At the discretion of the owner of the building, the sheathing can be metal or wood. Let's consider the manufacturing process of each of them separately.
Metal structure
The first step is to make vertical and horizontal markings on the wall. It is much more convenient to carry out the work if you have a laser level, but if you don’t have one, then you can get by with an ordinary water level and plumb line.
At the next stage, a metal sheathing is created, for the manufacture of which you will need:
- Guide UD profile.
- Rack CD profile.
- CD connector for CD profile (if necessary).
- ES-bracket (U-shaped profile).
According to the applied vertical markings, a U-shaped fastener is attached to the wall. The insulation is put directly on it, and everything is covered with a wind- and moisture-proof vapor-proof membrane.
Then, the starting profile is fixed strictly horizontally. You need to make sure that it is secured evenly. The starting profile is necessary not only as a base for the siding covering, it also protects the thermal insulation materials from moisture and other influences from below.
Wooden structure
To make the sheathing, a wooden beam of the thickness of the insulation is used, pre-treated with fire-bioprotection. It is attached to the surface of a wooden house in a horizontal position with self-tapping screws or long nails immediately above the base or in the lower part of the house installed on stilts. (The bars are attached to a stone or brick house with dowels). The next horizontal beam is attached in such a way that the seal fits tightly into it.
The space between the panels and the walls of the structure is filled with thermal insulation materials. Mineral wool or extruded polystyrene foam are excellent for this. If cotton wool is used, it is used exclusively in conjunction with waterproofing films, since if moisture gets on it, it will lose its positive properties. Laying should be done in such a way that the insulation boards fit tightly into the available space. After laying and securing the heat-insulating material, it is covered with a wind- and moisture-proof vapor-tight membrane. Installation of the film begins from the bottom in a horizontal position with the rough side inward. It is attached to the bars with a stapler
The next layer of film is laid overlapping the bottom one, by at least 10 cm, and is also fastened. Now it is important to make such a frame with identical cells, the distance between which will be optimal for the future installation of siding; usually it is made 40 cm. To do this, vertical posts are attached in the corners, a cord is pulled between them from above and below, along which all installed slats are aligned.
Dimensions
The sheathing for the siding panels is made in accordance with the area of the facing panels. Most often, its dimensions can be 30 × 40 mm, 50 × 50 mm, 50 × 75 mm and 50 × 100 mm. In this case, the length of the structure may vary, depending on the construction features of the building. If a wooden beam is used for the frame, then it is chosen with a humidity of no more than 12% and a step of 40 cm is taken between the fastenings.
For a metal frame, U-shaped profiles with a length of 3 m and a cross-section of 60 × 27 mm are recommended. These are standard profiles that have a flange along the edge and are used for installations of plasterboard structures. Products with a cross section of 50 × 40 mm and 40 × 40 mm are not equipped with flanging, so they are not suitable for lathing. Vertical posts are mounted at a distance of 60 cm from each other, and horizontal struts are installed in increments of 40 cm.
The size of the structure should be calculated so that the load on the corners and hangers does not exceed 40 kg. Otherwise, the structure will not withstand heavy weight and may become deformed. In addition, it is important to take into account the fact that thermal insulation will be placed under the frame. Therefore, the step between the profiles must be made according to the width of the expanded polystyrene panels. If the siding is heavy, then you will need to make lathing with frequent installation of slats.
The choice of professionals - metal profile lathing
Despite the fact that professionals sometimes use a wooden frame, metal sheathing for siding is more in demand, as it has higher strength and performance characteristics. Its installation is in many ways similar to the installation of a wooden frame, but there are also significant differences.
Which profile is used?
When constructing a frame from a metal profile, two main types of profile will be required:
- UD profile, which will be attached around the perimeter of the structure, and will also frame window and door openings.
- CD profile on which the siding will be directly attached. These elements are inserted directly into the UD profile and provide rigidity to the structure.
The sheathing for metal profile siding is attached to the surface using ES brackets. This is quite convenient and allows you to compensate for unevenness.
Calculation of materials and components
To determine how much material and components are required for metal profile lathing, you will need to make preliminary calculations.
Next, depending on the size of the metal profile and the step of its fastening, it will be possible to determine the required amount of material.
Scheme
It is also important to determine the number of fasteners required. Here, brackets or special canopies can be used as the main elements
You will also need dowel nails and screws. It is better to purchase them with a reserve.
Marking the wall, installing hangers
Surface marking is carried out using a level and plumb line. If insulation is installed, the distance from the wall should be greater.
This must be taken into account when installing support elements. If the building is made of timber, then the hangers are fixed with self-tapping screws. If the base of the structure is concrete or brick, then you should use dowel-nails.
Installation of the guide profile
After fixing the suspensions, it is necessary to install guides that can be used to guide during further work.
Installation of guides
To ensure that the sheathing of a house made of metal profiles for siding is of high quality and level, after attaching each element, it is necessary to check its position with a level. Installation of the guide profile should begin around the perimeter. Based on these planks, all subsequent ones are attached. Next you will need to frame all openings with a profile.
How to properly install a frame at the corners of a house
To properly distribute the load, you should pay special attention to the corner elements. Leaving a gap of 10 cm from the corner will ensure a tight fit to the vertical profile
Corner elements
Corner parts should be installed with a distance of 6 mm from the cornice, as well as from the starting strip.
Installation of the stand profile and its alignment
The stand-up CD profile is fixed into the UD profile. How much is needed depends on the height of the building. It is intended to be used for every 60 cm of surface. It is on this that the starting bar is then fixed.
How to make sheathing for siding around windows and doors
Installing additional horizontal elements around the openings is not necessary, but experts recommend doing this, as this process will help improve the degree of rigidity of the structure.
Material calculation
The correct assembly of the structure largely depends on the correct calculation of the number of products.
- The layout of the cladding is being clarified. The racks must be made perpendicular to the panels.
- The height and width of each side of the house is determined. The plinth and pediment are taken into account separately.
- The pitch of the parts is 40–60 cm.
- When choosing a metal profile, you will need hangers mounted along the length of the rack every 35–50 cm. The exact value depends on the condition of the base.
Installation technology
Installing the structure is not difficult if you do all the work carefully and carefully.
Construction of a timber frame
- The thickness of the thermal insulation products is determined, and wooden racks are selected for it. Most often they have dimensions of 50*40 mm.
- When working on a house made of timber or similar material, a vapor barrier is laid.
- Marking is carried out, lines for the location of elements are drawn.
- The parts in the corners are mounted first. To do this, they are pre-drilled. It is recommended to make no more than two full passes through the batten to ensure quick baiting, and the rest as basting. The holes are located at a distance that ensures reliable fixation with self-tapping screws. As an alternative for fastening, you can choose nails.
- The slats are installed in place and baited. A block or other suitable material is placed under them, after which the planks are leveled using a level and fixed.
- A cord is stretched between the corner posts; the remaining elements must be placed along it.
- If insulation is planned, then to create a ventilation gap, waterproofing is laid on top, and slats must be placed over the existing fragments.
Installation of metal profile
Installing a frame under profile siding is considered a simpler procedure than the previous option. Algorithm of actions:
Installation of internal corner strips
The corners are installed before installing the main panels, immediately after attaching the starting strip. The internal corner profile is attached with the lower edge at the level of the starting strip; the screw density is recommended to be 25-30 cm.
If the starting strip prevents you from positioning the profile in the right place, nail strips should be cut from the corner profile to a length equal to the width of the starting profile plus the temperature gap.
If it is necessary to extend the corner strip, cut off the nail strips from the top by 30 mm and overlap the top one over the bottom one for proper water drainage. The amount of overlap is no more than 25 mm to ensure that the temperature gap is maintained.
You can make a corner connection using a J-bar, which is cheaper than a corner connection. This can be done using one plank, when it fits tightly with its outer edge to a row of panels on one side, and the panels on the second side are installed into it.
The second option is to use two strips on each side of the corner, in which case there is a danger of water entering the gap between the strips, since absolute tightness of the connection cannot be achieved here, in addition, temperature gaps are necessary in any case.
Recommendations
Installation of metal and wooden frames is slightly different. At the metal sheathing, a UD guide profile is first attached along the perimeter of the building at the top and bottom and around the openings. Its main task is to secure the structure and give it rigidity. A CD profile is already attached perpendicularly to it in increments of 50-60 cm. The profile is secured to the wall with an ES bracket or bracket. At the same time, the brackets make it possible not to use stretched beacons. Metal can expand in hot weather, so it is recommended to leave a small gap between the joints of the profiles.
A wooden frame is much easier to install. It does not require horizontal jumpers, but starting strips under the siding and around openings must be present. The edge bars can be additionally reinforced with metal profiles, as can the corners. This will give the structure greater strength, without making it much more expensive. The construction of a wooden frame should not be done in rainy weather or high humidity. The wood will absorb excess moisture, and when it dries, the entire structure will warp.
Even with an accurate calculation of the material, it is better to play it safe and buy 10-15% more of it. Due to window and door openings, the material will have to be cut, and among the timber there may even be defects, especially if a large batch is purchased. The remaining material will always be useful in gardening and planting work. Many hardware stores accept back unused materials while maintaining their presentation.
If you are doing the construction of a frame with your own hands for the first time in your life, then it is better to choose a wooden structure. It is easier to install and cheaper, damaged materials will be easier to replace. If the main requirement is durability or the climate of the region is characterized by high humidity, then it is better not to save money and build a metal frame. It will last long enough and will fully pay for its cost.
To learn how to install siding profiles, see the following video.
Flow calculation
Before you begin installing the frame, you should first calculate all the material. The number of beams is determined based on how many post supports need to be installed. They are attached in increments of 50–60 cm, so calculating their consumption will not be difficult. Hardware is also considered an important design detail; 1 element is usually required for a surface area of 400 mm.
If the sheathing is assembled from metal profiles, then for its installation the following should be prepared:
- UD profile. To calculate its number, you must first add up all the perimeters. For example, for covering a surface with an area of 3 × 3 m, in which there is one window opening measuring 1 × 1 m, the calculation is made: 3 × 2 + 3 × 2 = 12 m (consumption per wall) and 1 × 2 + 1 × 2 = 4 m (consumption for cladding near the window).
- SD profile. The required quantity of this element is determined by dividing the length of the wall by 0.6, since it is fixed in increments of 60 cm. If the height of the building is large, then the need for the number of profiles will increase.
- CD connector. It is necessary when the height and width of the building exceeds 4 m. The consumption of the connector depends on the distance between the profiles. As a rule, its consumption is low for cladding in narrow places.
- Suspension. The choice and number are calculated based on the quality of the wall surface. The minimum requirement for hangers is usually 1 piece. by 40 cm.
- Universal screws. For 1m2 you need 15 pieces. dimensions 4.2 × 16 mm and 4.2 × 19 m.
- Driven dowel. One direct suspension usually costs 2 units.
- Insulation. It is purchased taking into account the area of the building that is planned to be covered with siding.
- Wind protection and waterproofing. For 1 m2 of facade, 1 roll is required.
Material calculations should be taken with great responsibility, since the quality and strength of the sheathing will depend on this. Therefore, it is advisable to purchase all construction parts with a small reserve, so that in case of shortage, you do not waste time on additional purchases.