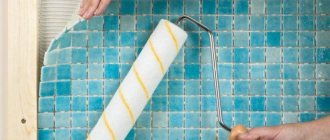
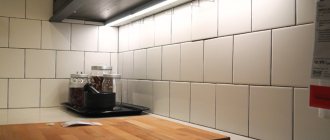
The purpose of the article is to tell the reader how to grout mosaics. This facing material is valued for its practicality and beauty. Mosaics are used to decorate bathrooms, kitchens, corridors and other rooms. However, the originality and integrity of the composition depends precisely on the grout.
Shade, technical properties and quality of application are indicators that determine the type of coating. You can seal the seams yourself, since this work does not require special skills. However, the slightest deviation from the technique will spoil the surface, so you first need to study the information provided in the article so that the result is a high-quality decorative coating.
Grout: features
A characteristic feature of mosaics is a large number of gaps, so they will have to be filled with a special compound. If this is not done, the coating will quickly become unusable. As you know, it is necessary to rub mosaics for the following reasons:
- To protect the wall and floor covering in a room with a high level of humidity (for example, in a shower room) from the negative effects of moisture. If you do not fill the seams of the mosaic, mold or mildew will form in them over time. In addition, dirt will constantly accumulate in the joints.
- To disguise unevenness, seams, residual adhesive solution, chips and other defects.
- For surface decoration.
The durability of the mosaic-lined coating depends on the quality of the grouting work.
What you should pay attention to when choosing
When choosing grout, you should pay attention to very important binders
Room type
The purpose of the room where it is planned to be used. Mosaic on a grid will fit well into the design of a room with high humidity. And knowing which grout to choose for a mosaic on a grid, you can achieve not only the most positive result, but also a very attractive appearance.
Transparency and color
Color plays an important role in the choice. Marble or mirror mosaic masonry is especially beautiful
The tile joints do not attract attention, giving the room charm and individuality.
Durability
Comparing the two groups of fugues mentioned above, epoxy compounds have more advantages. They especially benefit in terms of durability. That is, over a long period of operation there will be no need for cosmetic repairs.
This is interesting: Drills for ceramic tiles: subtleties of choice
Requirements
Before grouting the mosaic, you need to study the basic requirements for mixtures:
- The grout should not crumble or crumble after application. Therefore, it is recommended to use only high-quality material and follow the proportions specified by the manufacturer when mixing the composition.
- The finished mixture must be in such a condition that no drips will form on the wall during grouting. However, you should not make the solution too thick, as it will be difficult to apply to the surface. Modern mixtures retain elasticity even after hardening, so the seams will not be damaged when the tiles move.
- Mosaic joints must be protected from bacteria and dirt. Therefore, you need to buy grout mixtures with high water-repellent qualities. This is especially important if you need to cover the walls or floor in the bathroom.
When choosing a filler, you need to consider the following parameters:
- indoor humidity level;
- aggressiveness of the environment (presence of acids and alkalis);
- seam width;
- mosaic color and size.
Grouting compounds come in two main types: cement and epoxy. They have features that should be considered in more detail.
How to clean and protect tiles from fungus and dirt?
Among the protective agents for tiles and mosaics we can recommend:
- water repellents - impregnations with moisture-repellent properties that create a thin protective layer on the seams;
- polymer varnish for the space between tiles - penetrates into the depth of the grout, creating a more durable protective layer that collects drops on its surface;
- silicone or acrylic sealants - used in “problem” areas where contact with water is most likely (corner seams, areas near the sink, bathroom, plumbing fixtures).
Seams protected from moisture will not accumulate bacteria and fungus. To protect against mold, fungicides are also added to the grout, which do not give the fungus a chance to grow.
If the fungus still prevails, and unpleasant stains of dirt appear on the seams, the following will help:
- white vinegar - spray it onto the seams, leave until dry, and then remove dirt with a brush;
- hydrogen peroxide - the algorithm of use is similar to vinegar;
- tea tree oil – 1 tsp. dilute in a glass of water, spray on the seams, do not rinse;
- furatsilin – 1 tablet, dissolved in a liter of water, apply and thoroughly wash the seams;
- household chemicals – chlorine-containing and anti-mold agents such as “Isocid”, DALI, “Antifungal”, “Mill Kill”.
Read more about how to remove mold from tile joints in this article.
Cement based grout
This material is susceptible to mechanical and chemical stress, and also does not tolerate moisture well. However, dried seams can be treated with a special impregnation (for example, Atlas Delfin) or polymer varnish to provide them with additional protection. In addition, the mixture must be mixed with a latex base using a plasticizer to enhance its hydrophobic properties.
Cement grouts are sold in the form of dry powder. As a rule, pure cement compositions are used to fill joints whose width does not exceed 5 mm. The advantages of this material include the following qualities:
- low cost (minimum price for 2 kg - 112 rubles);
- ease of application;
- plastic;
- the presence of sand in some compositions, which increases the strength of the mixture.
However, before grouting mosaic tiles, it is necessary to study the disadvantages of cement-based grout mixture:
- Low moisture resistance.
- Porosity, due to which dirt will constantly accumulate in the seams.
- There are small grains of sand, so mirror mosaics cannot be rubbed with this composition.
According to the advice of the experts, a stabilizer should be added to the solution to increase adhesion, water absorption, abrasion resistance, etc.
About prices
| Rub over the mosaic sheet with 4 basic colors: (we keep the sheet). | 3000 rubles |
| Grind the mosaic sheet using our grout tinting system: | 5000 rubles per sheet. |
| Cost of transparent grout: | 2000 rubles per 1 kg. |
| Consumption of transparent grout: | 1 kg per 1 square meter. |
| Acid cocktail: | 15,000 rubles for 2 liters. |
| Glowing Additive: | 6000 rubles for 1 pack. |
| The cost of grouting mosaic joints with transparent grout is: | 6000 rubles per square meter. |
| The cost of grouting tile joints with transparent grout is: | 5000 rubles per square meter. |
| Visit of a master consultant: | 3000 rubles. |
| Visit of a specialist with all samples to the site: | 7000 rubles. |
Epoxy grout
Compared to a cement-based mixture, this composition for filling joints has a high price (the average cost for 2 kg is 2000 rubles). This type of grout will not fade over time, since colored quartz sand, which is also a filler, acts as a dye. Epoxy mixture has the following advantages:
- durability;
- high moisture resistance;
- resistance to UV rays;
- immunity to dust, water and chemicals;
- good wear resistance;
- no additional processing or addition of plasticizer to the solution is required;
- large selection of colors.
However, the applied solution dries out after 25-30 minutes. Therefore, before grouting the mosaic with epoxy grout, you need to prepare a special cleaner that will quickly remove traces of the mixture. In addition, experts recommend mixing the solution in small portions. If the epoxy grout dries out, you will have to use a gel remover to remove it from the surface of the mosaic. But even with these difficulties, the mixture is considered a priority material for filling joints.
If the question arises of how to grout mirror mosaic, the answer is: for these purposes you need to use a special epoxy mixture - Kerapoxy Design, available on the market in 32 different colors.
Chameleon grout for mosaic panels
Transparent grout was invented specifically for mosaic panels, where finely chopped pieces of glass have very small seams between each other, up to 2 mm. Imagine a mosaic panel depicting an autumn mixed forest or an underwater world, where the number of colors is limited only by the artist’s imagination. See how the clear grout changes on different mosaic colors.
Grout consumption
This indicator is influenced by the following factors:
- Mosaic size. A surface lined with tiles, the dimensions of which are 30 x 30 cm, will have more seams per 1 m2 than a coating covered with a wider and longer material. The same applies to the thickness of the mosaic: the higher this parameter, the deeper the gaps between the tiles. The grout must be applied so that it fills all the voids.
- The width of the joints is an indicator that directly depends on the parameters of the tile. A small mosaic looks better framed by narrow joints. In turn, for large tiles you can leave seams equal to approximately 3 mm.
- Composition density. As a rule, this parameter is 1.5–2 kg/dm3.
The grout consumption must be indicated on the packaging of the material. In addition, much depends on the skills of the craftsman performing the work. The more experienced the master, the less material he will need to grout the joints.
Removing grout from the mosaic surface
When the grout has completely dried (and not just set), you can begin the final removal of plaque. The amount and intensity of deposits depend on how thoroughly the sponge or rag was washed and how often the water in the container was changed.
The most effective way to remove excess grout is to use a hose to spray clean water. There is no need to rub anything, use rags or abrasives. If there is no practical possibility to implement such a method, they resort to the dry method. The best option is felt fabric; it is quite abrasive, but at the same time soft and will not damage the mosaic coating.
The only exception is complex mosaics with a textured and grooved surface. Here you will have to resort to a special solvent that can penetrate into the smallest crevices.
After laying and grouting the mosaic, all that remains is to take care of periodic maintenance of the coating. Splashes should be removed from the surface in a timely manner, wiped dry, and avoid contact with alcohol-containing and alkaline products that deprive the mosaic of its shine.
Color selection
If you choose a grout with a suitable shade, you will be able to eliminate the roughness. However, we should not forget about the properties of mosaic: facing material with glass or mirror coating requires careful handling. In this case, the ideal choice is clear epoxy grout. In addition, after drying the mixture may become a little lighter or, conversely, darker. If the reader is interested in what color to grout the mosaic, to solve this issue you need to focus on the following recommendations:
- The light coating completely merges with the hardened mixture, making the lined surface appear monolithic. This method is an ideal option for hiding defective areas.
- Grout that has a dark shade is useful when you need to zone a room (for example, in combined bathrooms).
- If it is necessary to grout the seams of floor mosaic tiles, it is customary to use a brown mixture for this purpose.
- The use of bright colors is appropriate only in combination with the design of the room.
Before grouting the mosaic, you need to choose its color, taking into account the mentioned recommendations. This nuance needs to be thought out in advance, since an unsuccessful shade will spoil the appearance of the room.
Choosing the right composition - how not to get confused in the variety?
Epoxy grout for tile joints has appeared on the market relatively recently - at first it was developed in production facilities, and when a choice of different colors appeared, ordinary consumers also paid attention to the material. Of all the brands, consumers identify only a few proven ones: Litokol, Mapei, Quick-Mix.
Epoxy resin and hardener are sold in two different buckets - purchase all components from the same manufacturer.
When opening a bucket of epoxy resin, many are frightened by its thick consistency - it seems that it has almost hardened and it is simply impossible to mix it. However, after adding the hardener, a polymerization reaction will begin, making mixing easier. However, epoxy grout, regardless of the manufacturer, is very viscous and will not be easy to work with. Especially if you intend to sand the mosaic seams.
How to grout mosaic tile seams: necessary tools
It is necessary to prepare the following devices:
- a small container for diluting the solution (for example, a plastic bucket);
- hand sprayer;
- cellulose sponge and foam grater;
- rubber spatula (recommended width - 150 mm);
- electric drill with mixer attachment.
The last tool is not needed if you need to dilute a small amount of the mixture. A trowel will perfectly replace it.
How to remove excess grout?
It is better to clean the tiles from excess grout immediately - a flexible rubber spatula is suitable for this, which is not dangerous to run even on the glossy surface of the tile. Final cleaning is carried out after the last seam has been filled. At this stage, return to the very first tile and wipe it with a dry soft cloth or foam sponge.
When the mixture initially sets - after about an hour - you can walk over the surface with a damp cloth. In this case, you can clean not only the edges of the tiles, but also the space between the joints - this will make the grout layer smooth.
It is important not to miss the moment and not wait for the grout to harden, especially for epoxy products. Otherwise, simply wiping and washing the tiles will not get rid of it.
You will have to buy special acidic removers that react with the components of the grout and remove them from the surface.
Application process: instructions
Work can begin after 24 hours from the date of laying the tiles. This time is enough for the glue on which the facing material was attached to completely harden. This requirement should not be neglected, otherwise moisture will destroy the mixture with which the seams are filled. The craftsmen have come up with the best method for grouting the seams on a mosaic:
- There should be no tile adhesive residue on the wall, so the surface must be treated with an acid cleaner.
- Wipe the mosaic with a sponge or terry towel.
- Mix the solution according to the instructions on the package.
- Rub the seams with the prepared mixture, moving diagonally from top to bottom. The main thing is to fill all the seams at once.
- Remove excess solution with a rubber spatula.
- After some time (usually the drying time of the mixture is 30 minutes), wash the tiles. To complete this step, you need to wipe the mosaic with a cellulose sponge to remove excess solution.
- Wait a few days. During this time, the coating must be protected from drafts, moisture, UV rays and temperature changes.
- Wipe the surface with a foam float.
To prevent cracks from forming, during the work you need to moisten the seams with water using a spray bottle.
Detailed guide to installing mosaics
This guide is intended to provide useful information for the correct installation of glass mosaics, mosaics and natural stone, marble and onyx slabs 1. Preliminary inspection of the substrates Before proceeding with installation, it is necessary to ensure that the following specifications of the substrate are met. Flatness One of the most important characteristics of bases is their flatness. When laying marble slabs with a minimum thickness of 10 mm, when checking with a two-meter strip, the permissible deviation should not exceed ± 3 mm, and when laying glass mosaics with a thickness of 4 mm, the permissible deviation should not exceed ± 1.5 mm. Minor unevenness in the surface can be corrected using the same adhesive that will be used for laying, more obvious unevenness (> 5 mm) should be corrected using appropriate cementitious leveling mixtures: • Ultraplan - self-levelling, fast-setting, fast-drying cementitious leveling compound bases with a layer from 3 to 10 mm., without shrinkage, with low emission of volatile organic substances - EMICODE EC1, for interior work; • Ultraplan Maxi - self-leveling cementitious composition of quick setting and drying for leveling bases with a thickness of 3 to 30 mm; • Topcem Pronto + Planicrete is a very fast setting and drying thixotropic cementitious leveling compound for horizontal surfaces with a thickness of 35 mm or more. • Nivoplan Plus + Planicrete – Cement-based composition for leveling walls, ceilings indoors and outdoors, application thickness from 5 to 50 mm. Curing and maximum permissible humidity Regardless of their characteristics, the substrates must go through their curing cycle so that they become stable and do not shrink after laying the mosaic or tile. In the case of traditional cement screed, the holding time may vary, depending on the time of year, from 7 to 10 days for each centimeter of thickness. Faster curing times can be achieved by using special normal setting, fast drying hydraulic cements such as Topcem, instead of the commonly used Portland cement, allowing glass mosaics to be laid in 24 hours and natural stone in 3 days. For such substrates, the maximum permissible humidity should not exceed 3%. In the case of concrete surfaces, the curing time is at least 6 months. Gypsum substrates such as anhydrite screeds or gypsum plasters must achieve a maximum residual moisture content of 0.5%. When using a ready-made cement-based plaster mixture, it is recommended to follow the supplier's instructions, which indicate the curing time, drying time and mechanical strength. Cleaning Substrates must always be clean and free of loose paint, wax, grease, oil or any other substance that could affect the adhesion of the adhesive. Concrete surfaces must be cleaned of form release agents. It is recommended to carry out preventive cleaning with hot water using high-pressure washers or sandblasting. Old ceramic cladding must be thoroughly degreased with alkaline detergents or caustic soda solution. Mechanical strength Floor covering substrates must have adequate mechanical compressive strength for the specific type of application. As an example, consider the case of a cement screed inside a residential premises. In this case, the screed must have a compressive strength of at least 20 N/mm2, while cement or gypsum-based plaster on the interior wall of the room must have adhesion to the base of at least 0.5 N/mm2. In the case of external facade installation on plaster, make sure that the plaster is suitable for gluing mosaics or natural stone slabs (which are heavy) and therefore must have an adhesion to the base of at least 1 N/mm2. To ensure good adhesion, the base should not be dusty. To improve this indicator, you can use appropriate water-dispersion strengthening primers of the “PRIMER G” type, compatible with any cement adhesive. Preparing the base for laying mosaics When laying transparent glass mosaics, it is necessary to first level the base using white cement adhesive such as Adesilex P10, Sopro 455, in order to obtain a uniform color and to avoid discoloration of the mosaic. In case of very smooth, poorly absorbent or subject to vibration or expansion of the substrate, we recommend mixing Adesilex P10 with Isolastic latex additive diluted in water in a ratio of 1:1 to improve adhesion.
Subsequent installation of the mosaic can only be carried out after the leveling layer of adhesive has completely cured, which occurs after approximately 24 hours depending on the ambient temperature. Before you begin installation, it is advisable to mark the surface on which the mosaic will be laid to facilitate even laying of the sheets. Squares, level indicators or laser tools can be useful for this purpose. Having spread the sheets on the floor, measure the total size of 3 adjacent sheets, laid so that the distance between the mosaic sheets is equal to the distance between the mosaic tips. Transfer this measurement to the surface to be tiled, both horizontally and vertically, so that, using a ruler and level, you can draw a grid. The wall will be divided into several squares, each of which corresponds to nine mosaic sheets. In case the mosaic is a pattern or must follow a certain direction, installation instructions must be followed. If the mosaic tips are not square, and therefore the edges of the sheet are irregular, it is important to make sure that the distance between the sheets is equal to the distance between the individual mosaic tips, i.e. All seams are the same. Preparing the Substrate for Laying Marble Slabs This paragraph lists methods that can be used when laying stone material on a cement base to avoid staining and efflorescence. Despite the possibility of stains on almost all stone materials, this problem becomes even more important when working with white marble such as Carrara, Thassos, onyx and others. This problem arises due to the presence of iron ores in stone materials, which interact with the water base contained in the glue or base, and then with oxygen and light, causing stains and spoiling the aesthetic appearance of the surface. Possible solutions to prevent these phenomena are the following: - In the case of laying on the floor, provide a vapor barrier before screeding in order to prevent capillary rise of moisture. — Observe the curing time of the screed or plaster and ensure that the maximum moisture content (measured with a carbide hygrometer) does not exceed 3% in the case of cement screed or plaster and 0.5% in the case of anhydrite screed or gypsum-based plaster. It is possible to use fast-drying binders for screeds (eg Topcem, a binder produced by MAPEI), which allow installation after only 3 days of curing. — In case of leveling the base, use quick-acting leveling or self-leveling mortars such as Ultraplan, Ultraplan Maxi, Topcem Pronta or Nivoplan Plus. — For laying marble slabs that may be prone to stains, use white fast-acting or reactive cement adhesive such as Adesilex P10 + Isolastic and Keralastic T (it is important to know that all cement adhesives can affect the occurrence of stains, so if possible, use 2-component polyurethane water-free adhesives) produced by MAPEI 2. Selection of adhesives It is better to give preference to the use of white adhesives, without vertical sliding, for installation on walls. The white color of the adhesive is absolutely necessary in the case of transparent glass mosaics, white marble and onyx tiles in order to avoid the appearance of an undesirable tint after installation. Particular attention should be paid to Kerapoxy design epoxy mortar, which can be used both as an adhesive and as a grout for glass mosaic tiles. The use of this product has many advantages, in particular in the case of glass mosaics of small thickness, the main advantage is the ability to use this product both as an adhesive and as a grout mixture. This allows you to use any color without fear of differences between the color of the mortar and the adhesive used for installation. * When laying marble mosaics on a mesh in a pool, it is necessary to use Keralastic T or Adesilex P10 + Isolastic 100%. * In case of using white marble/onyx or marble prone to staining, use Adesilex P10 + Isolastic 100%, Keralastic T, Kerapoxy 100, Kerapoxy design 799. * When ordering marble mosaics, it is necessary to clarify the possibility of use in wet areas (swimming pools, bathtubs, hammams, etc.). Precautions when laying green marble When laying marble slabs, in addition to the above precautions to avoid stains, factors affecting dimensional stability must be taken into account. Some types of marble, for example, green marble (Antique Green, Bamboo Green, Olive Green, Verde Green, Verde Giada, Lapland Green, Verde Lapponia, Verde Luna, Namibia Green) Verde Namibia) may become deformed due to the absorption of moisture contained in the adhesive. For these categories of marble, it is necessary to choose a two-component reactive adhesive of the KERALASTIC T type, which does not contain water; its use prevents deformation of the slab. It is difficult to foresee all possible precautions, because... how these deformations also depend on the thickness and shape of the plates. 3. Laying After the most suitable glue has been selected and the solution has been prepared in accordance with the instructions indicated on the packaging and in the technical data sheets, we recommend applying the glue to the base with the smooth side of a spatula to give the base a uniform color, immediately after that apply another layer of glue with a notched spatula. In the case of glass mosaics with a thickness of more than 5 mm, the size of the teeth should be no more than 3.5 mm; if marble slabs are laid, a larger tooth size is required. In these cases, the trowel teeth must be proportional to the format of the slabs and must provide at least 80% coverage of the back of the slab with adhesive for internal installations and 100% coverage for external installations. For large slab formats, it is necessary to use the double application method. It is preferable not to cover too large areas with glue (about 1 m2) in order to avoid the formation of a surface film. In the case of transparent mosaic, it is necessary to remove the adhesive strips (otherwise they will be visible under the transparent mosaic) using the smooth side of the spatula, being careful not to remove the adhesive. When laying white marble and onyx slabs, it is also very important to ensure that the adhesive is completely applied over the entire surface of the slab to avoid paint defects due to the presence of voids between the base and the slab. When laying mosaic sheets, it is necessary to tap the mosaic tips with a rubber spatula or iron them with a rubber roller to ensure a perfect fit and remove air bubbles. It is also necessary to avoid getting glue into the seams between the tips and to leave enough space in the seams along the thickness of the mosaic for subsequent grouting of the mosaic. If an excessive amount of glue has been applied, or the glue leaks out of the seams, then it is necessary to remove the excess before the glue hardens, using a brush or a brush with stiff bristles. Precautionary measures: Before grouting with KERAPOXY DESIGN, make sure that the joints are completely dry. Laying a mosaic from a natural shell Laying a mosaic from a natural shell is difficult with the thickness of the mosaic being 2-3 mm, this thickness dictates the perfect preparation of the base; the permissible difference should not exceed 1 mm due to the impossibility of using a spatula with a large tooth. This type of mosaic is suitable both for decorative use and for swimming pools and hammams, due to its thin structure it allows you to bypass smooth elements. The size of the spatula teeth should be 1.5-2mm
3.1 Installation in swimming pools, hammams and thermal baths We considered it important to devote an entire section to this type of installation due to the special difficulties of its implementation. Below are precautions that must be taken into account for proper installation. Swimming pools Laying tiles in swimming pools with a reinforced concrete structure requires a preliminary inspection of the pool structure itself to ensure its durability. 1. It is necessary to ensure the water resistance of reinforced concrete structures buried in the ground on the outside of the wall before closing the pit in order to prevent the negative effects of water, which can adversely affect the internal surface of the pool. 2. The curing time of concrete structures is about 6 months, this is necessary for hygrometric shrinkage and stability of the structure. 3. It is necessary to perform a static test of the structure by filling it with water in order to speed up the shrinkage process of the structure and check its tightness. In this way, leaks can be detected which can be quickly repaired. 4. The internal walls and floor of the pool bowl must be leveled with special cement mortars containing polymer additives. This will allow you to obtain a smooth and flat surface for installation, will prevent the use of excess amounts of glue, and in the case of glass mosaics of small thickness, installation without this operation is very difficult, and sometimes impossible. 5. In order to ensure complete tightness of the bowl, before laying the cladding, it is necessary to apply to the surface a two-component cement mortar for waterproofing type Mapelastic A+B. The waterproofing mortar is applied in two layers, between the first and second layer it is necessary to place a reinforcing fiberglass mesh, with 4X4 cells mm, as well as special tapes and parts for waterproofing (Mapeband) for sealing corners, butt joints, drain holes, and illumination. 6. When installing, use adhesives recommended for the selected type of mosaic. 7. When grouting joints, we recommend using a two-component epoxy composition such as KERAPOXY, KERAPOXY DESIGN, which, due to its characteristics such as zero absorption, high mechanical strength and chemical resistance, can significantly extend the durability of joints compared to cement-based products. The use of epoxy mortars KERAPOXY and KERAPOXY DESIGN becomes mandatory when installing in thermal baths or seawater pools. Hammam (hammam) Hammam, or Turkish bath, is a real health program that involves a person being in a moisture-saturated room with a variable temperature from +30 ° C to +60 ° C. Very often, the inside of these structures consists of prefabricated panels and elements (sofas, benches, niches, etc.) made of extruded polystyrene in combination with waterproof coverings onto which facing materials can be directly glued. And in this case, grouting is carried out exclusively with KERAPOXY DESIGN epoxy mortar, which, in addition to ensuring durability, guarantees hygiene and ease of maintenance. 4. Grouting Before starting grouting work, make sure that the glue used is completely dry and hardened and that the seams are completely dry. Once you are sure of this, it is necessary to mechanically remove the glue that has leaked into the seams. It is recommended to use the epoxy mortar KERAPOXY, KERAPOXY DESIGN produced by MAPEI for grouting mosaics and marble slabs, which has the following advantages: • Uniform shiny color • Large range of colors • Almost zero water absorption • Easy to use and clean • High grout strength, and therefore durability Carefully Follow the instructions for use on the product packaging and below. Make sure working conditions are suitable for applying grout. When grouting large format marble slabs and floors without pre-treatment, Kerapoxy Design epoxy mortar must be applied with a spatula over the entire surface of the slabs to ensure uniform absorption of the resin to avoid discoloration. Conversely, if the slabs have been pre-surfaced, Kerapoxy Design epoxy mortar can only be applied close to the joints. In the case of laying mosaics containing elements made of Grigio Bardiglio marble, grouting with epoxy mortar leads to tinting of the surface (wet effect). Kerapoxy Design is versatile and can be used for a variety of applications, such as: • Flooring and cladding indoors and outdoors • Bathrooms and showers • Swimming pools, thermal baths, hammams, saunas • Kitchens • Furnishings such as doors , bar counters, etc. including in the shipping industry. Kerapoxy Design 700 Kerapoxy Design 700 is designed for grouting glass transparent and artistic mosaics. Its special composition, based on fillers consisting of glass beads, allows the joint filling composition to “absorb” the color of the mosaic transparent glasses and, therefore, change depending on their color. Best results are obtained when installed on transparent substrates such as Plexiglas, polycarbonate, glass and crystal, possibly backlit. Another possibility of using Kerapoxy Design 700 mortar is to grout artistic mosaics, i.e. compositions consisting of mosaic tips, which, when properly processed and positioned, reproduce unique images, rich in shades and shadows. If these compositions are grouted with traditional colored grouts, then the perception of the image will be distorted due to the gap that the colored grouts create between the mosaics. The use of Kerapoxy Design, on the contrary, due to its translucency, preserves the original shades of the composition, thus creating a “neutral” colorless grout that does not distort the image. When laying mosaics of small thickness, which will subsequently be grouted with Kerapoxy Design, it is recommended to use a notched trowel with 2 mm triangular teeth to apply the adhesive, so that the high parts of the adhesive strips are not visible through the grout. Grout Consumption for Marble Slabs Taking into account the wide variety of formats offered by Natural, the consumption of Litochrom Starlike epoxy grout required for grouting joints is calculated using the following formula: (A+B)/(A*B) *C * D *1.55 = kg/m2 A = slab length (in mm) B = slab width (mm) C = slab thickness (mm) D = joint width (mm) 1.55 = specific gravity of Kerapoxy Design After determining the material costs, we advise increase its quantity by 200 g/m2, thus making it possible to take into account possible losses during operation.
Recommendations
To properly grout the seams, you need to consider the following tips:
- The mosaic needs to be washed several times.
- If it is not possible to choose the desired shade, white grout is a mixture that can be combined with almost any mosaic.
- The area processed at a time should not exceed 2 m2.
- Before grouting the mosaic, you need to experiment with applying it on an inconspicuous area.
- During the work, the tiles may move out. To fix it, you need to move the edge of the mosaic with a spatula. The main thing is that the mixture does not have time to harden, otherwise the material will have to be dismantled and re-installed.
- It is recommended to grout the seams of glass mosaics with a colorless solution, since it will not stand out. This way the coating will gain integrity.
- Epoxy grout is easier to clean if you pre-treat the surface with a product that forms a protective film.
Interesting information
For interior decoration, mosaics were used by our distant ancestors, and in Roman times, mosaics were made from precious and semi-precious stones in the walls of noble rooms. Nowadays, mosaics made of natural stone are also not a cheap pleasure, but if you do not lay it out on the entire wall, but only carry out partial finishing, then you can get by without much expense.
As building materials improve, so do the ways in which they are used. For example, today it is possible to apply mosaic elements to the surface not one at a time, but in groups at once, since they are already attached to the mesh base.
This type of finish is liked by many due to its practicality, durability, and ease of maintenance. Mosaic can be adapted to almost any direction in interior design.
How to care for seams: tips
The surface must be periodically cleaned of dust and other contaminants. It is necessary to remember: clean seams are the key to ensuring that harmful bacteria will not multiply on the coating. It is necessary to clean it several times a month. For these purposes, use soap solution, vinegar, citric acid or household disinfectants.
You can bleach the surface with peroxide and soda, and disinfect it with bleach. The seams can be washed with a toothbrush, and dirt can be removed and germs destroyed with a steam cleaner. If the light seams have darkened, it means that fungus has formed on them. In this case, you need to clean the old layer and treat the coating with an antiseptic, and then apply a new solution.
No fungus, replacing silicone at joints
The seams can be made wide up to 10cm, but the transparent effect does not appear. Seams up to 10 cm are usually made when a bathtub or sink is added to the wall; in this case, transparent grout based on white glass is used. At a distance of a meter, such material looks like an extension of the bathtub or sink. Transparent grout is the only material that can truly be called perfectly white. Previously, the joints between the bathtub and the wall, the tray and the glass wall, the jacuzzi and the marble slab were sealed with silicone, white polyurethane sealants, or curb strips and hogs were installed. Now, using transparent grout, you can extend the bathtub to the wall and not worry that the grout will turn black and fungus will form in it, like with silicone sealants. When replacing a bathtub or sink, we can easily remove the grout without damaging the product.
Rules of application
Some brands of tiles may darken the edges when they come into contact with various types of liquids. Therefore, the day before the procedure, it is recommended to test the product for a tendency to such a reaction. If it is detected, you will have to carefully cover the side parts with masking tape while applying the composition.
Required tools and materials
To work you will need the following tools and devices:
- a drill with a mixer, which will be used to mix the composition;
- grater with a spongy rubber part;
- bucket and spray bottle with water;
- mixing container;
- well adjusted scales;
- latex gloves;
- special grout remover;
- cellulose sponge for cleaning surfaces from residues of the composition.
Valera
The voice of the construction guru
Ask a Question
If you couldn’t find a cellulose sponge, you can take a foam rubber one. But it becomes unusable much earlier, and a lot of composition gets clogged into its pores.
Preparation of the solution
The finished grout must be used within an hour.
The mixture is prepared from resinous and hardening components by simple mixing. Packages that go on sale often already take into account the required proportions of the two components.
The mixture hardens quickly - it must be consumed within an hour after preparation . After this period, it will no longer be operational. Therefore, before mixing, you need to find out the required proportions of the two components (for each grout they are given on the packaging) and make a volume of the composition that is guaranteed to be used within an hour. New portions of the mixture are prepared as needed. Pigment additives can be added to the base when mixing, or you can buy a product already painted in the desired color.
Surface preparation
Remove dirt and from the surface of the tile and, if possible, vacuum it. Then you need to let the tiles dry . If it is light, you need to test in advance for darkening when interacting with grout.
Applying grout
The process requires some experience and accuracy, so it is better to work together : one worker is responsible for application , the second for blurring . The composition is drawn onto a spatula and rubbed over the surface. Blurring is done with a sponge soaked in water. In this case, you need to try not to reach the edge of the seam so that the tile remains dry. After cleaning the seams, take a fresh wet sponge. With this, the seams are formed completely. Then another layer of grout is applied and similar operations are performed with it.
After 40 minutes, you can spray the seams with water from a spray bottle and smooth them out with your finger.
After working with floor tiles, it is not recommended to walk on them for two days, since some brands of grout take a long time to dry (up to 4 days).
Cleaning tiles
traces of plaque
are likely to remain on . Removing it will not be difficult if you purchase a special product for removing grout from tiles. The solution is prepared according to the instructions and sprayed over the surface. After waiting the specified time, wipe off traces of grout with a fluffy rag .
Valera
The voice of the construction guru
Ask a Question
You need to work longer with white tiles so that the stained areas do not turn yellow. The resulting foam is washed off with a fresh cloth, and then the surface is treated with another one (microfiber products are well suited for this).
For glass and mirror mosaics
For these two types of wall finishing, the use of grout containing abrasive sand is unacceptable. In these cases, it is better to choose cement compositions (they contain finely ground sand) with the addition of latex or polyurethane; you can mix both components at the same time.
Knowing which grout to choose for a mirror mosaic, you can strengthen the coating, and not only provide a high-quality finish. It is better not to use color, but if you decide to buy a colored fugue, then you can experiment with shades.
Do not grout ceramic mosaic tiles with a porous structure or with a convex relief on the front side. Here you need to work very scrupulously and carefully. Otherwise, this will lead not only to excessive consumption of the mixture, but also to additional labor-intensive cleaning.
Popular manufacturers
Grouts from Italian manufacturers are popular on the Russian market. One example is the Litokol , which offers mixtures of more than a hundred shades, suitable for outdoor use (for example, swimming pools), as well as for rooms with insufficient ventilation. The compositions can be stored, as well as the work itself, only at positive temperatures (from +5 degrees), otherwise they will lose their properties.
Another Italian product is Kerapoxy from Mapei . These grouts have almost no roughness characteristic of most products of this type, and they are very resistant to acids and reagents. But the color range is not as wide as that of the previous company - only 26 colors.
Among Russian manufacturers, we can note the brands “Osnovit”, “Fuga” and “Diamant” . The latest brand product is intended strictly for use in the bathroom and toilet. Available in 46 shades. Osnovit grout is distinguished by its high ductility and resistance to temperature changes over a wide range, withstanding values from -50 to +75 degrees. It is not contaminated with mold and mildew. But the brand has a small range of colors - only 29 tones.
Epoxy grout cost
