- April 25, 2020
- Electricity
- Marina Lobacheva
LED strip is an ideal option for creating lighting in the kitchen. It is attached to cabinets or other parts of the kitchen unit. With its help, you can not only illuminate the work or dining area, but also improve the appearance of the entire room.
The installation process can be done by yourself, as it is very easy to figure out how to attach the LED strip to the kitchen set. Various methods can be used for this, but it is advisable to take into account the advice of professionals so as not to spoil expensive materials.
Concept and characteristics of LED strip
It is represented by a special tape, which is attached in different ways to different parts of the kitchen set, and is available in different lengths and colors. It consists of LEDs, represented by light-emitting diodes. They are semiconductor elements that emit light when electrical current is applied. The intensity of such radiation depends on the chemical composition with which the diode is filled.
The LED strip is connected using a stabilizer. If you connect directly, it may cause overheating and damage to the product. Lighting a kitchen set with an LED strip can significantly simplify the process of using the set, as well as improve the appearance of the entire room. Often the lighting is concentrated on an apron made of matte materials. This allows you to get soft and pleasant lighting.
The LED strip is made of a plastic base, which is equipped with a stabilizing load resistor. It is on this that diodes are applied that emit light.
How to avoid 5 mistakes when connecting tape
To avoid connection errors, follow the instructions and take only 5 steps:
- Cut to the required length. Do not forget that you can only cut 50, 100 or 200 cm.
- If the tape is sealed, then the cut ends must be treated with sealant, and then a silicone connector must be put on it. It comes in the form of a ring.
- We connect the convector and secure it with sealant.
- Keep things clear and connect the wire from the rectifier.
Rectifier
- We check that the entire tape is as tight as possible. Water should not get inside.
Do-it-yourself power supply for the tape is guaranteed.
The rectifier will consist of a diode bridge with its own power. It can be 700 W. In this case, you can safely use 100 meters of a regular LED strip, or 40 meters of a very powerful one. This is quite enough to illuminate a very large room.
The straightener is quite cheap, but if you don’t want to buy it, you can make it yourself. You will need 4 diodes, or a ready-made assembly in absolutely any store specializing in the sale of radio components.
Unlike conventional LEDs, you do not need to pay attention to the thickness of the power wires. Even if you use a wire of 0.75 square millimeters, it can still handle 1500 W very easily.
Since the device does not have a capacitor, the entire tape will flicker at a frequency of 100 hertz due to the fact that it will not be possible to smooth out the ripples. SanNPIN prohibits the use of such pulsations in work areas or where people read. That is why it is undesirable to install such a device in an apartment.
We connect the diode strip to a 220 V network
Features of use
Before attaching an LED strip to a kitchen unit, it is recommended to study its characteristics. These include positive qualities:
- room owners can independently adjust the intensity and even color of lighting;
- the tape can be used to illuminate useful areas in the kitchen or as decoration;
- the strips differ in the number of LEDs and their colors, brightness and direction of light;
- Ribbons are available in multi-colored or plain colors;
- Some tapes are even equipped with a remote control, which greatly simplifies the process of using them, since you can remotely change the brightness and other parameters.
Anyone can figure out how to attach an LED strip to a kitchen unit, so you don’t have to use the help of professional installers. This allows you to save a large amount.
Options for kitchen lighting in the work area (photo selection)
A wide variety of lighting options can be used to illuminate the work area. Each of the options allows for complete high-quality lighting, which will make the area around the tabletop not only functional, but also cozy. In this case, the best solution would be to combine different lighting fixtures.
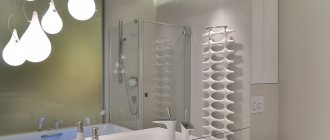
Properly positioned and directed light makes a huge difference
LED Strip Light
Such lighting in the kitchen is considered the most suitable for the kitchen - it is both economical and comfortable to use. LED lighting is becoming increasingly popular for the kitchen, in particular due to its easy installation and variety of colors. Strip lighting will be not only functional, but also a stylish option. For this, special RGB tapes are used.
LED strip is economical, does not heat up and has a long service life
Ice lamps
LED lamps can produce warm, white or cool light, which a person will perceive as yellow and white light. By cold we mean a bluish tint. Ice lighting can be done using tape or in any other form. In the first case, it is important that it has a high level of protection against dust and moisture (such models will be highly expensive). Other options for such lighting are recessed or overhead. As a rule, they are very easy to install and you can connect them yourself. A common option is to install kitchen lamps above the work surface.
In the work area it will be convenient to use LED lamps with touch controls, allowing you to turn devices on and off by simply touching them with any part of your hand.
Spots
This option will fit especially well into a modern interior. Spots look like a small group of light sources that are fixed to a rail attached to the wall. The key advantage of such lighting is that its appearance is very stylish, and it is also possible to adjust the direction of the light. But there is also a drawback - such a design “eats up” additional space, and therefore spots need to be introduced into a small kitchen especially carefully.
For mounting under cabinets, it is better to take flat spots with a thin body, the light source of which is LEDs.
Lamp
There are also many different lamp options. You can purchase wall-ceiling lamps that are suitable for the dining area of the kitchen or living room. Properly selected lamps will add coziness and comfort to the room for communication. You may consider purchasing chandeliers or ceiling lights, as well as various sconces. Square-shaped models are suitable for a minimalist interior, while round or oval ones would be appropriate for a more classic interior.
An option for organizing work area lighting using wall lamps in a kitchen without hanging cabinets
Benefits of use
Fixing the LED strip on different parts of the kitchen unit has some undeniable advantages. These include:
- long product life;
- high reliability of LED strip;
- absence of hazardous components;
- low electricity consumption;
- the luminous flux utilization rate is considered very high, as it is close to 100%;
- the LED strip is small in size, so it can be hidden in different niches or recesses, which prevents deterioration in the appearance of the room;
- the elements are completely safe to use;
- they are resistant to numerous mechanical influences;
- installation and dismantling are simple actions that can be easily accomplished on your own;
- The structure of the tape is considered simple, since there is no diffuser, reflector or lens.
Usually the tape is fixed directly above the work area, which simplifies the cooking procedure. Often, only lighting is used at all, so there is no need to turn on the central chandelier.
Diode strip selection criteria
For kitchen cabinets, lighting is provided by roll LED products, which differ from each other according to several criteria:
- number of lamps per 1 m of strip length (from 30 to 240 pcs.);
- lighting color (warm, cold, neutral, colored);
- lighting intensity (from 4.8 to 32 W/m);
- degree of moisture resistance (interior, waterproof, sealed);
- type of control (mechanical or remote);
- angle of distribution of the light flux (from 80º to 160º).
Where is it installed?
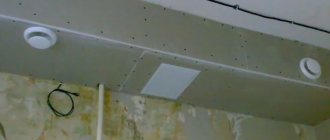
The connection of the LED strip is carried out after the formation of a special plan, which shows where its main parts need to be glued. Typically, a strip with LEDs is attached to the following elements of the kitchen set:
- under wall cabinets attached to the wall of the room, which allows you to direct light directly to the work area, which is used for cooking, washing food and other similar activities;
- in the top drawers, which makes it easy to examine their contents;
- in plinths, since they are usually represented by darkened areas of the structure.
If you do not decide in advance on the location of the lighting, this may negatively affect the operation of the entire room. Often it is necessary to completely dismantle some parts of the kitchen unit.
Why do you need lighting for the work area in the kitchen?
Not many people think about installing additional lighting for the work area, but there is almost always an urgent need for this. Let's list a few reasons why it immediately becomes clear that countertop lighting in the kitchen is simply necessary.
Additional illumination of the working surface has a beneficial effect on human vision
- The main light source in the kitchen is almost always located in the center. While cooking, the housewife stands with her back to this light source. Thus, not only does light not reach the surface of the countertop, but it also creates a shadow that falls on the table and makes the cooking process even more difficult.
- The lighting of each zone performs the function of zoning the space, visually delimiting it.
- It is especially important to illuminate each zone separately in a small kitchen. By dividing the space, light visually enlarges it and makes the room more spacious.
That is, lighting can simultaneously add convenience to cooking, perform a zoning function, and also add comfort and mood to the space.
It is worth highlighting several areas in which lighting is especially necessary - this is the cutting area, sink and stove.
In most cases, the built-in lighting in the hood is sufficient to illuminate the stove.
Preparation for installation
If you plan to install the LED strip in the kitchen with your own hands, then initially preparatory work is carried out. To do this, purchase the necessary materials and direct tape, which will be used to create the backlight. The following elements are being prepared for the planned work:
- LED strip of suitable power;
- electrical cable, its cross-section should be 0.74 mm;
- transformer;
- dimmer, sold together with the control panel;
- electric soldering iron;
- sharp scissors;
- material intended for soldering and rosin;
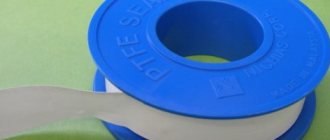
- Double-sided tape;
- electrical tape, which can be replaced with a thermal tube and a hair dryer;
- aluminum profile or PVC corner, which is intended for attaching the tape;
- electric drill;
- brackets for fixation.
The power of the LED strip for a kitchen set is chosen by the direct users, but usually 12 W is used. Installation can be done in different ways.
Types of switches
Switches offered by manufacturers are divided into various groups depending on:
- Control method. They can be mechanical, electronic or remotely operated;
- Installation method. Some models are mounted directly into the aluminum profile of the lighting fixture, others are model or overhead;
- Connection type. There are pass-through and non-pass-through devices. The main advantage of the first type is the ability to turn on/off the lighting system from different places. The second type can be controlled from one specific location.
All products differ in shape, color and texture of the front panel. This allows you to choose the best option, taking into account the overall stylistic design of the room.
A modern touch switch has a number of additional functions. Such devices may have:
- Remote control with IR sensor. It becomes possible to control the controller and RGB strip. The user chooses the backlight color that he likes best;
- Timer. Functional models that allow you to optimize energy costs. With this function, the user has the ability to configure time intervals when the lighting system operates;
- A non-contact system that responds to changes in ambient temperature, a sharp sound, or is triggered when moving objects are within a given radius;
- Dimmer. A functional element that allows you to change the brightness of the LED strip. Brightness control is carried out within a specified range. Light intensity can be changed in the range from 10% to 100%;
- Capacitive response. This element allows you to increase the sensitivity of the panel.
Attention! Touch switches can be activated when you approach the sensor and after direct contact with your fingers. The latter type is most widespread.
Using tape
The LED strip is connected to the network using a transformer and stabilizer, but its fixation can be done using various methods. Often, ordinary double-sided tape is used for these purposes. The protective layer is removed from one side, after which the product is glued to different parts of the kitchen unit where it is planned to create lighting.
After this, the second layer is removed, to which a direct tape is applied, which is pre-cut into the required sections. The cutting procedure is performed only along special dotted lines, which are applied by the manufacturer.
In order not to use separate tape, choose a self-adhesive 220V LED strip. On the reverse side it is already equipped with a special adhesive base. First, the protective strip is removed, after which the tape is applied to the necessary elements of the headset. It is allowed to work on both flat and rough surfaces.
The tape is a very flexible element, so it can stick to curved and uneven surfaces. To increase adhesion, additional glue or paint is sometimes used. This method allows you to attach the tape, but it will not be possible to change its location in the future.
DIY assembly
It is not always possible to purchase a touch switch with suitable parameters. In this case, having sufficient knowledge in the field of electrical engineering and having basic soldering and assembly skills, you can try to assemble such a device on your own.
To do this, you must first find a diagram of the device in order to understand what parts will be required for its manufacture. In the most general case, to manufacture a standard switch it is worth preparing:
- Two KT315 transistors;
- Semiconductor D226;
- The capacitor is ordinary with a capacity of 0.22 μF;
- Electrolytic capacitor with a capacity of 100 μF at 16 V;
- Resistance R1. A 30 Ohm element is sufficient;
- 400 ohm resistance relay;
- Power unit. If you plan for the device to operate autonomously and not from a 220 V network, the power supply can be replaced with a 9 V battery.
The prepared elements are arranged according to the chosen scheme and carefully soldered together. When performing work, be sure to follow safety regulations to prevent injury.
In the simplest scheme, an element made of copper or aluminum alloy acts as a receiver. It is soldered to a regular capacitor. Then both KT315 transistors are connected in series. The next element in the circuit is a resistor with a resistance of 30 Ohms, followed by a parallel electrolytic capacitor, semiconductor D226 and a relay with a resistance of 400 Ohms. Some circuits allow parallel installation of another capacitor.
When making a device for RGB tape with a total length of more than 5 meters, two power supplies can be used to amplify the signal. During the assembly process, these elements should be positioned in such a way that there is sufficient clearance between them. This will ensure timely heat removal from power supplies during their operation.
After the product is completely assembled, you will need to check its functionality and perform the installation correctly.
What to do if the tape comes off?
Typically, citizens prefer to glue the product, for which they buy a 220V self-adhesive LED strip. But sometimes manufacturers skimp on the adhesive base, so literally after a few days or months the tape begins to peel off. Usually the reason is poor preparation of the base or poor quality tape.
Therefore, before starting work, it is recommended to carry out some preparatory work with the base. It is cleaned of dirt and wiped dry. Next, a degreaser is applied, and the procedure is performed a few minutes before gluing the tape. If you buy inexpensive tape, it is advisable to secure it with your own high-quality double-sided tape.
Application of glue
People who are interested in how to attach an LED strip to a kitchen set often use glue for this purpose. Only superglue is selected, which has high adhesion and dries quickly. It will allow you to securely attach the tape, so it will not fall off under different influences.
It is advisable to use gel glue, as it is easy to use. In this case, there is no need to apply glue to the entire surface of the tape, since it is enough to use a drop of 5 cm of tape. The glue is applied directly to the surface of cabinets or other parts of the kitchen unit.
Buying aluminum tape
People who do not know how to make an LED strip on a kitchen set often choose aluminum tape. This is what sellers in construction stores recommend. This is due to the fact that the material is reliable and durable.
Initially, the tape is glued to the surface of the headset, and then the LED strip is applied. To increase adhesion, some people additionally apply a small amount of superglue. With this installation, aluminum not only acts as a method of fixation, but also plays the role of a heat sink and reflector.
Installation of aluminum profile
If the choice of LED strip for kitchen lighting falls on products that have high power, then installation of an aluminum profile is required. It can be overhead, mortise or corner.
Initially, with the help of fasteners, an aluminum profile is attached to parts of the kitchen unit. The tape is fixed inside it using tape or glue. Due to the presence of a perfectly flat surface, the product will hold firmly and reliably.
When removing the protective layer, conductive paths are often exposed, so if they are directly applied to the surface of their aluminum, this will lead to a short circuit. Therefore, to prevent such negative consequences, it is recommended to apply a layer of hot-melt adhesive that has insulating properties to the surface of the profile, and you can also make an insulating substrate.
During operation, you can attach a diffuser to the profile, which will soften the light from the backlight. It is fixed with plastic clamps or nylon ties.
How to illuminate a tabletop with LEDs: interesting design solutions (selection of photos)
To make your lighting original and stylish, you need to familiarize yourself with examples of real finished projects with interesting design ideas and solutions.
The specificity of spot lighting is that the light falls on the surface in spots. This feature can be used to create original design effects
Linear luminaires provide a continuous luminous flux
It is also important to take into account all important rules and regulations. Firstly, when planning your future kitchen, you need to decide how many light sources will be needed in the kitchen, as well as what power they will be. This is not the easiest task, and therefore you can turn to established standards. The illumination of the kitchen space should be at least 150 Lux per square meter. It is believed that calculating power in Watts is no longer very informative, because today there are many modern lamps whose light output per unit of power is not at all the same as that of incandescent lamps.
It is not so difficult to make calculations; you need to multiply the area of the room by the specified norm. Due to the fact that this standard was developed during the USSR period, the result must be multiplied by 1.5.
There are also standards for certain types of lamps:
- for halogen - 30 W per 1 sq. m.;
- for fluorescent - 9 W per 1 sq. m.;
- for incandescent lamps – 26 W per 1 sq. m.;
- for diode sources - 4 W per 1 sq. m.
Interesting effects can be achieved using RGB strips that allow you to change the color of the backlight
An original linear lamp in the spirit of minimalism
What common mistakes are made?
If you do not understand how the LED strip is attached to the kitchen set, you can make many serious mistakes. These include:
- gluing high-power tape directly to the walls of cabinets without using a profile, which leads to the product falling off, and also the LEDs quickly fail;
- using a construction stapler, with which the tape is attached to a surface made of wood or drywall, but if you choose the wrong place for fastening, this leads to damage to the LEDs;
- gluing open LEDs directly to an aluminum profile, which leads to their rapid breakage;
- the use of a plastic profile, which does not provide the desired cooling effect, so you need to use only materials specifically designed for this work;
- the use of hot-melt adhesive, which when heated emits a harmful and unpleasant odor, and it can also lead to overheating of the LEDs.
Therefore, the choice of LED strip for kitchen lighting, as well as additional materials, should be done with the participation of professionals. How durable, safe and attractive the lighting will be depends on the correct choice of elements and the execution of the work.
power unit
To install lighting on wall cabinets, you need to choose LED lamps wisely. Another important element for proper connection is the power supply. The main condition is the optimal power of the equipment. To find out, you need to make preliminary calculations. Using the example of a 50 x 50 mm tape and a power of 12 W:
- If the length of the tape is 5 m, you should multiply 12 by 5, you get 60.
- The reserve is indicated by a coefficient of 1.25. This figure is multiplied by 60 to get 75.
- The optimal power of the power supply will be 75 W.
Depending on the design, there are open, semi-sealed and sealed power supplies. The last two options are optimal for the kitchen, since they are able to work in conditions of high humidity. The models differ from each other only in the structure of the body; the internal contents, as well as the installation principle, are almost identical.
Open
Sealed
Semi-hermetic
Kitchen lighting can include power supplies made from different materials. The following varieties are considered the most popular:
- Plastic. The housing is sealed and has compact dimensions.
- Aluminum. Resistant to external factors, can be used outdoors. Costs more than plastic.
- Perforation. Open type models are large in size and affordable in price. Among such devices, there are the most powerful models, but for use in the kitchen, additional protection from moisture will be required.
No more than 5 m of LED strip can be connected to one power supply. Otherwise, the lighting will be uneven, and the service life of the equipment will be significantly reduced.
Kitchen lighting can be installed through a dimmer - a device that can smoothly reduce the power and brightness of lighting.
Plastic
Aluminum
Perforation
Where to hide the tape?
In order for the lighting to be beautiful and not spoil the appearance of the room, it is advisable to fix it in such a way that it is hidden. It can be hidden in different places:
- in ceiling niches;
- in recesses or niches on the wall;
- behind the ceiling plinth;
- fastening to the bottom or side of a wall cabinet;
- inside the kitchen unit.
Properly placed and correctly attached LED strip kitchen lighting looks bright and attractive. At the same time, the process of cooking or finding the necessary utensils and products is greatly simplified.
What kitchen style goes with LED lighting?
Of course, first of all, when thinking about what kind of interior LED lighting will best fit into, examples of interiors in modern styles come to mind. Such lighting will always look organic in a kitchen in the style of hi-tech, minimalism, and modernism. All these styles value the simplicity of forms, their geometricity, simple and clear lines in furniture, modern technologies, technological innovations, materials - plastic, metal, iron, chrome parts and the futuristic appearance of all elements. Of course, in all this variety of design innovations, LEDs will come in handy more than ever. By introducing such lighting into a modern interior, you don’t have to worry about compatibility and choose a special place.
The color temperature of the light sources purchased is important.
In modern style, cool white light is more often used
Lamps with a warm yellow glow will add warmth to a minimalist interior
But what to do if you want to install LED lighting in a classic style? Or, for example, for kitchens in the Scandi style, Provence, oriental interior, and so on? There are several tricks that will allow you not to give up lighting in such designs.
- Choose a not very bright backlight: one so that it can perform its key function - lighting, but at the same time does not attract much attention to itself.
- Perform a “hidden” installation. Keep the LEDs out of sight.
- It may be worth considering the possibility of slightly “modernizing” the classics with other interior elements so that the LED strip harmonizes with them.
In a classic interior, it is important that the lamps themselves are not visible