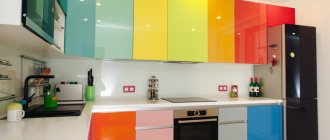
The kitchen in an apartment or house is rightfully considered the embodiment of family hearth and comfort. But how much will this room sparkle with other colors if you add a hand-made touch to its design. An excellent solution for implementing this idea would be a self-made countertop.
The dining table in the kitchen involuntarily attracts the eye, so it must be beautiful in appearance and fit into the interior, but we should not forget about such qualities as strength and reliability.
Of course, the range of modern furniture stores is very wide and varied. You can choose a tabletop to suit almost every taste, however, not to suit every budget.
To save a lot of money and also make your kitchen original, you can try making a kitchen countertop with your own hands.
You need to understand that when choosing a high-quality and modern countertop, you also need to pay attention to the kitchen furniture - it should not be inferior in quality to a modern countertop. Look, here you can order a custom kitchen made from MDF.
The most common materials for manufacturing
The most common materials today used to make the working surface of a kitchen set are:
- fake diamond
- wood or chipboard
- porcelain stoneware
- concrete
Each of the materials described above has its own advantages and disadvantages. Before choosing the most suitable option for certain conditions, it is useful to know their main characteristics.
By following the step-by-step steps of making your own countertops, you can largely avoid mistakes.
What tools and materials may be useful
To independently attach the countertop to the kitchen set, you will need certain materials:
- High strength construction adhesive for joining parts.
- Silicone for creating a smooth surface and finishing ends.
- Universal sealant for filling voids.
- Sealing tapes
- Connecting profile
- Aluminum connecting strips.
At the preparatory stage, the following tools will be useful:
- Jigsaw.
- Sander.
- Drills of different diameters.
At the second stage, when you need to join and secure the parts together, as well as for installing the canvas and installing the plinth, you will need:
- Miter saw.
- Tool set with pliers, hammer, wire cutters, tape measure and screwdrivers.
- Marker.
Artificial stone for countertops
When deciding on the choice of material from which you can make a beautiful countertop, you should pay attention to artificial stone. A surface made from a similar material quite convincingly imitates real rock.
The main components for the manufacture of such imitation stone are polymer resins and high-quality cement. Special fillers are additional additives that give it sufficient strength.
An undoubted advantage is the ability to obtain a product of various configurations, which is an exact copy of the stone surface.
Making a kitchen work surface from artificial stone begins with the manufacture of formwork. It is advisable to use laminated plywood as a formwork material; it is most suitable for these purposes.
Eurobook sofa - 130 photo recommendations on how to make and assemble a comfortable and compact sofa- Assembling furniture with your own hands - 105 photos and a detailed video of how various furniture elements are assembled
Do-it-yourself bookshelves - ideas for building shelves and shelves quickly and easily from scrap materials (155 photos and videos)
It is worth considering that the higher the accuracy of the mold manufacturing, the less time will be spent on additional processing.
Which epoxy to choose?
If you have already decided on the type, look, and design of the future countertop, now it is important to decide on the choice of epoxy resin. Epoxy resin for pouring a countertop must be transparent and have a long life, otherwise you risk seeing the resin “boiling” with your own eyes or spending many times more time on layer-by-layer pouring. Structural and base resins (such as ED-20) are not appropriate here, because they are thicker, which will not allow all the air bubbles to escape, they are more fragile, not always colorless (grade 1), and the hardeners that are used with such resins (pepa, theta, etc.) will give you a mixture with insufficient life time, which again It can also lead to both deformation of the product during rapid curing and boiling of the mixture.
Add a description
Of the resins presented in our store, the EpoxyMaster 2.0 composition will suit you, allowing you to fill layers up to 5 cm in one layer. The composition has a low viscosity, provides good fluidity and filling of hard-to-reach areas, and moderate reactivity allows you to work with large objects. In addition, the EpoxyMaster composition has excellent self-leveling, resistance to peeling and cracking, good fillability and no “whitening” effect of the coating.
EpoxyMaster 2.0 Set for pouring in a layer up to 5 cm thick
Thanks to the transparency of the composition, you can achieve almost any visual effect: pour in various fillers (shells, dry leaves, stones, pictures, etc.), you can organize lighting both in the thickness of the tabletop and under it, you can realize a creative idea with a phosphor or color the resin, while maintaining the overall transparency of the layer.
Tabletop made of laminated chipboard and wood
When wondering what kind of countertop you can make yourself, you can opt for wood, the most common material for making countertops. It compares favorably with other options due to the monetary component.
Disadvantages include poor resistance to mechanical damage.
Despite this, the use of high-quality hard wood will make it possible to make a high-quality product that will last for many years.
Pitfalls of self-installation
Those who want to try their hand at assembling furniture need to understand that only professionals can get a guaranteed good result. If this is your first experience, the result may not be the best. Those who already have the skill of working with MDF, chipboard or veneered wood have a greater chance of success. These are rather capricious materials.
Mistakes during operation can ruin them. It will be impossible to return the coating to its original appearance, which will lead to unnecessary expenses. If you intend to install a difficult-to-install panel, such as glass or stone, it is better to immediately contact professionals. Let us list the main difficulties in working with various materials:
- Natural wood. If handled carelessly, dents or chips may occur. True, in most cases they can be sanded and restored to an attractive appearance, but this is a job for a master.
- Wood boards. Inaccurate cutting will result in chips that cannot be disguised. There is also a high probability of mechanical damage.
- Stone, artificial or natural. The heavy weight of the coating makes installation much more difficult, this is especially true for the latter. In addition, without special skills it is impossible to make cutouts for the sink and hob, as well as cut the blade.
- Metal. It is quite simple to install and dock, but dents and scratches may appear during processing. However, they can be removed.
Instagram sborka_kuhni_ikea
You can only install countertops made from easy-to-install materials yourself. The rest is best left to professionals.
- Kitchen
Which countertop to choose for a white kitchen: 4 universal colors and 6 popular materials
Step-by-step instructions for making a wooden tabletop
You can start working after selecting the required size bars from hard wood (beech, oak). The material for the future working surface must be dried to wood moisture to avoid warping in the future.
The next steps are:
- White table: 115 photos and videos describing the selection and construction of cool and easy-to-use tables
Corner sofas - 130 photos and videos on how to choose and where to place modern original corner sofas
- Do-it-yourself computer desk: 150 photos of making corner tables and features of the choice of materials
- Calibration of prepared bars.
- Gluing the bars into a single panel.
- Giving the resulting shield the required configuration.
- Cleaning and polishing.
- Treatment with protective compounds.
It is worth considering that wooden products must be covered with protective coatings.
Today, hardware stores offer a huge range of protective compounds for wooden surfaces. They do not allow moisture to get inside the fibers and give the surface additional hardness.
Plastic
Photo: usafashiontv.com
1/2
Photo: stemcellglobal.org
2/2
Plastic kitchen countertops are proving to be quite a popular material lately. They do not allow moisture to pass through, are durable if handled carefully, look good, and are inexpensive. Plastic can imitate natural materials - wood, marble, stone.
You can briefly place a hot pan or kettle on the plastic panel, clean the surface with any aggressive household chemicals, and do not be afraid of spilling water on the surface. The variety of colors and textures is so great that you can even choose an intricate print and have it applied.
Pros:
- low price,
- ease of care,
- color resistance to fading from ultraviolet radiation,
- relative heat resistance,
- resistance to household chemicals,
- resistance to humidity,
- variety of colors and textures.
Minuses:
- artificiality of the material, noticeable visually and to the touch,
- the presence of noticeable seams if the kitchen is longer than three meters.
Tabletop Liguria with edge, plastic, 807M 26mm
RUB 1,740*
Buy
*Price may change
Porcelain stoneware countertop for the kitchen
A product made from this material is quite resistant to mechanical damage. The work surface made from it has an attractive appearance and a long service life.
On the Internet you can find many photos of handmade countertops. You can make such a tabletop yourself with a minimum of effort. The disadvantages of porcelain stoneware products include low resistance to impact.
MDF board
Photo: stemcellglobal.org
1/3
Photo: stemcellglobal.org
2/3
Photo: stemcellglobal.org
3/3
This tabletop consists of wooden fibers that are glued with lignin. The types of coating here are the same as for chipboard. MDF has higher strength, but this does not protect the tabletop from cracking and swelling if moisture gets into microcracks. Moisture resistance is imparted to the boards by impregnation with melamine-urea-formaldehyde, which also raises concerns.
Externally, a tabletop made of MDF looks more impressive than one made from chipboard; thanks to the variety of colors and textures, you can choose the right tabletop for any interior style. The material can be matte or glossy.
Pros:
- beautiful appearance,
- environmental friendliness,
- ease of processing,
- wear resistance,
- resistance to fading from ultraviolet rays,
- acceptable cost.
Minuses:
- insufficient moisture resistance,
- instability to abrasive substances,
- ease of damage to the varnished surface.
Postforming tabletop R9 H1150 ST10 Authentic Oak gray, 4100x600x38 mm
RUB 5,667*
Buy
*Price may change
Concrete countertop for kitchen
This option is quite simple to make yourself. The characteristics of a concrete countertop are similar to artificial stone.
But it has a fairly big advantage - environmentally friendly materials such as cement, sand, and water are used in its production.
Details
Varieties
Such designs can be very different. They can be roughly divided into linear and corner countertops for the kitchen, which are not difficult to make with your own hands. It’s easier to make linear ones, since in this case you don’t have to take into account angular curvature, which often makes the workflow more complicated. This is extremely important for structures made of tiles, which will reveal any flaw in the walls by the mismatch of seams between the tiles. So, if everything is clear with linear structures, then corner countertops can have a laconic or complex shape. For example, the table may have smooth corners, which will ensure safety when moving around the kitchen in conditions of lack of space. Moreover, corner models according to the drawings can be made from 3 conventional figures - 2 rectangles and a square in the corner with a beveled corner. Depending on the type, it can be monolithic or prefabricated. Joining in products made of MDF and wood, chipboard can be seamless. It is believed that sawing became the most technologically advanced option, and therefore monolithic structures have become a rarity.
How to make a concrete countertop with your own hands
To give a homemade concrete countertop a beautiful appearance with a marbled texture, in addition to the necessary accessories, you need to consider the presence of a grinding machine. For the work, it is worth preparing plywood (chipboard), aluminum profiles, boards, crushed stone, sand and wire for reinforcement. Even during creation, you need sealant, drying oil, assembly adhesive and paint and varnish for concrete. First, make formwork from boards 4 cm thick. You need to cut the chipboard sheets to size, install the sides, and secure them with self-tapping screws. The places where plywood and beams are fixed are filled with silicone, which will prevent concrete from getting into the cracks. The formwork should be treated from the inside with drying oil so that the solution does not stick to the boards.
As reinforcement, you need to use wire with a thickness of no more than 0.8 cm. A lattice is made from it, slightly smaller than the formwork, and placed in a container into which glue is poured. The grating needs to be glued to the plywood, and after complete drying, you can pour in a concrete solution. To prepare, mix crushed stone, cement and sand in a ratio of 2:1:2. To improve quality, it is worth adding a plasticizer to the solution. The dye is added at the rate of 1 to 50, leaving a little for the finished tabletop. The excess is removed with a spatula, and then the countertop is covered with polyethylene for approximately 1 week. After drying, the surface should be sanded smooth and placed on an old kitchen table. Before this, the old tabletop needs to be removed and the body reinforced with timber supports. You can put the stove in a permanent place.
Manufacturing from chipboard
To make such a tabletop, prepare chipboard boards (this will be the working surface). When working, use 1st grade material with a minimum number of visual defects. To make the chipboard tabletop more durable, it should be made monolithic. Before you start marking the slab, prepare drawings with exact dimensions, holes for tiles and sinks. After this, transfer the dimensions onto chipboard sheets, cut the material with an electric jigsaw with knives of the required size. If it is not there, then use a sharp hacksaw. For smooth sawing and cutting without chips/burrs, stick masking tape along the sawing line. When working, you should use blades with fine teeth. The composite needs to be shaped by grinding the corners and ends, and then checking the surface for smoothness and evenness. If you notice unevenness, then sand everything “to the level”. You can use sandpaper for this.
Afterwards, you can begin to impregnate the composite, and then decorate the surface and produce finishing coatings. The tabletop is treated with protective coatings, and after drying, it is varnished several times. In this case, all new layers are applied only after the previous one has completely dried. Before processing, it is imperative to apply a primer layer to the composite. Only after all this can you paint the slab. A chipboard countertop for the kitchen is made by hand and treated with stain. This substance is suitable for processing particle boards, and this composition usually dries out after 10-12 hours. Varnishing is done with water-based paints, and the ends can be treated with melanin edge or veneer.
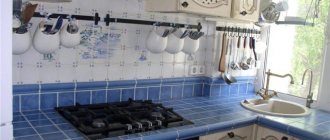
Tile covering
The tile countertop is laid on 2 plywood layers, and they must also be glued together. To improve the quality of the product, the slabs should be treated with waterproofing material. The convenience of the technology is the fact that the design can be made larger than the original one. At the initial working stage, measurements are taken and the material is selected so as to reduce the number of cuts. If you plan to update old countertops, then you can use a pedestal kitchen set. In other cases, painted chipboard should be used. It is worth cutting it with a circular saw (taking into account the required dimensions). After cutting the edge of the substrate, it is worth treating the coating with a moisture-resistant impregnation. You can apply oil putty, but first apply masking tape. Afterwards, the ends are sanded and treated with an oil-based paint and varnish composition. Assembly is carried out using metal corners, screws and dowels. Before you start tiling the countertop, you should coat it with a moisture-resistant impregnation using a paint brush with natural bristles. After that, drying oil is applied, and when the structure dries, you can begin finishing the surface with ceramic material.
It is best to use epoxy/acrylic based glue, as cement glue will not adhere well to the surface of the wood. Laying is done in a thin layer, distributing the mass of glue with notched spatulas. Work begins from the front side and leads to the rear edge (wall). New rows are laid end to end, and when working, special clamps or crosses are used. The ends should be decorated with mosaics or wooden slats. At the final stage of finishing the countertop, you need to grout the seams with a grout mixture. Afterwards, wait for the grout to dry and use a regular dishwashing sponge to get rid of the excess, polishing the finished surface.
Step-by-step instructions for making a concrete surface for a table
Using this method, you can realize the best ideas for handmade countertops. It allows you to get a different color range by adding a dye of one shade or another to a liquid solution.
The future shape of the finished product depends on the shape of the formwork. Therefore, before you begin assembly, you should carefully inspect the plywood for the presence of deep potholes and potholes.
Preparing for work
The room must be well ventilated or have forced ventilation. The indoor air temperature should not be lower than 22 °C. High humidity and dust can ruin your work!!!
It is necessary to prepare materials for the manufacture of formwork. The formwork or form can be assembled from plywood, plexiglass (without scratches or chips) or polished aluminum sheets. You will also need release agents such as wax or semi-permanent release agents. For “home” use, wax is better. And if you are planning a series of countertops, then semi-permanent separators are better, they allow you to make more than 20 removals without rebuilding the separating layer.
Some home craftsmen use ordinary cosmetic Vaseline as a separator. It is easy to purchase, but it is difficult to perfectly align on the mold/formwork and it will cause clouding in places where it comes into contact with the resin. This layer will then need to be sanded.
Accordingly, you need to prepare tools for grinding, or at least a set of abrasive paper of different grain sizes for manual sanding.
Add a description
Don’t forget to prepare personal protective equipment for your loved one) These are gloves, a respirator, and safety glasses. A disposable painting overall and a cap will not be superfluous, because in its liquid state the resin seems to attract any speck of dust, lint, hair...)
Cover the floor and other horizontal surfaces in the area affected by the resin with polyethylene to keep them clean.
You will also need containers for measuring and mixing ingredients. Scales, accurate to 1 g. Or measuring cups, because Some resins are mixed by volume, and some are mixed only by weight, like EpoxyMaster.
Add a description
Features of assembling formwork for countertops
Having previously marked the sheet of plywood, you can begin cutting the material. Sufficient accuracy when cutting can be achieved using a jigsaw.
It is advisable to use wooden blocks as side edges, fastening them together with self-tapping screws. After assembling the formwork, it is necessary to seal the joints. Silicone sealant is used as a sealant.
It should be noted that the higher the accuracy of marking and cut quality, the lower the sealant consumption will be.
To increase the strength properties of the finished product, reinforcement is used using metal rods with a diameter of 8 mm, or a ready-made reinforcing mesh with a cell of 5 cm.
How to attach a countertop to a kitchen unit
Let's look at how to properly attach a countertop to a kitchen set. Screws with a tapered extension securely fix the tabletop cover to the lower cabinets. Z-shaped holders allow for precise and simple installation; an additional advantage is the low cost of the fittings.
Figure-of-eight holders are used after first making a small hole for the bracket with a drill. The element is secured with two screws: one is fixed to the body, and the second to the back of the tabletop. Such fasteners are placed at a distance of 15-20 cm.
Slotted spacers are another mounting option. 2-3 spacers with rectangular grooves are screwed to the side frames of the headset. Additional strips act as ties, increasing the rigidity of the body and preventing deformation of the drawer.
Installation of the tabletop is carried out in several stages, according to step-by-step instructions.
First stage (preparatory work)
It begins with fitting and adjusting the slabs, which are aligned with the facade of the cabinet. The protrusion of the table top above the lower block is made according to the standard - 30-35 cm. The protrusion protects the facade of the cabinets from drops that may fall from above.
Marking for cutting the slab is carried out in several steps:
- An oblique cut of the slab is made so that the edge of the tabletop is subsequently pressed tightly and strictly parallel to the apron. According to the measurements, mark them with a marker and cut off the excess from the slab with a saw or jigsaw. The cutting line is aligned with a guide rail.
- A small allowance on the slab is processed with a grinder to create a smooth edge.
- They trim the edge to accommodate the unevenness of the wall, and also make recesses for kitchen pipes. Relief tiles on the wall will require additional trimming and sanding.
- Using fasteners for the base (their function is performed by steel corners), the tabletop is secured with self-tapping screws on one side to the bottom side of the stove, and the other to the side wall of the cabinet.
Second stage (joining of fragments)
This step is necessary when installing a corner countertop. Several fragments are combined into one monolithic block:
- Carry out marking and trimming of fragments for smooth joining.
- Prepare areas for screeds, preferably in a professional workshop. The required holes are drilled, milled and polished.
- The polished ends of the tabletop parts are treated with construction adhesive.
- Carefully connect the parts and secure with ties.
- Remove excess glue and leave the parts until the glue has completely dried.
- After drying, polish the joint so that it becomes almost invisible.
- Secure the seam with an overhead aluminum joining strip. These strips are available in several types for different connections.
- To install the strip, the end sections are treated with silicone.
- Apply the bar and level it flush. Fixed with self-tapping screws on one side.
- The fragments are connected and clamps are placed in the prepared places. Align them and tighten them tightly.
Euro-sawing technology ensures joining without screeds. The locking connection using the method of pattern cutting on a milling machine guarantees an accurate fit of the parts. The method requires professional skills.
The third stage (installation of the countertop)
Before final installation of the countertops, markings are made and holes are cut for the sink, socket and hob. To do this, use the template included by the manufacturer in the packaging with the equipment.
The order of work at the last stage is as follows:
- Small holes are drilled along the marked lines.
- Using the markings as a template, carefully cut out the required holes with a jigsaw.
- All sections are sanded and treated with silicone to prevent moisture from entering.
- The finished slab is installed on the lower pedestals and aligned with the facade.
- Secure the corner brackets with furniture screws to the side walls of the cabinets. The work is carried out with a partner, because the slab must be pressed tightly to the base.
- A plinth is installed at the junction between the wall and the tabletop. This element performs a decorative function and protects against moisture.
- To do this, take measurements and cut off the required piece of plinth. The edge is treated with abrasive.
- The planned area is treated with silicone, preparing the area for the baseboard.
- Place the bar in place and secure it with self-tapping screws at intervals of 30 cm.
- The decorative overlay is inserted into the groove until a characteristic click appears.
- The joints and ends are sealed with silicone and covered with special linings.
Pouring formwork with concrete solution
Concrete mortar is prepared by mixing sand, cement and crushed stone. To reduce the porosity of a concrete product, it is advisable to use a plasticizer.
Pouring pre-prepared formwork takes place in several stages:
- filling the formwork with concrete solution by 50-40 percent
- laying the reinforcing structure
- complete filling of the entire formwork volume
The final drying time for a concrete countertop is about a week. The finished, dry surface is sanded until a perfectly smooth plane is obtained.
Due to the fact that concrete has high hygroscopic properties, it would not be superfluous to cover it with moisture-proof compounds.
Glass
Photo: stemcellglobal.org
1/3
Photo: stemcellglobal.org
2/3
Photo: jerekeys.com
3/3
Glass surfaces are easy to use and have an original design. They are easy to clean and wash, the glass is not afraid of exposure to high temperatures, it is quite durable. Glass tabletops can be transparent, matte, tinted, sandblasted or photo printed.
The solid glass surface guarantees the absence of cracks, which means the growth of germs and mold. Glass countertops do not wear off or become deformed even after long use. Laminated and tempered glass tabletops of different thicknesses (from 6 to 20 mm) allow them to withstand heavy loads.
The glass tabletop is not afraid of water and grease - any splashes can be quickly wiped off with a soft cloth, no traces will remain. If you regularly care for such a countertop, you will not need to use chemicals - it will be enough to wipe the surface with a soft sponge or rag soaked in water or glass cleaner. Ordering a kitchen design project with a glass countertop is an excellent solution for lovers of minimalism.
Pros:
- wear resistance,
- ease of care,
- safety,
- aesthetics.
Minuses:
- simple appearance compared to other materials,
- impossibility of restoration in case of serious damage.
Epoxy resin table top
This type of material is initially liquid and is quite successfully used for making epoxy countertops with your own hands.
The undoubted advantage of this material is the original appearance of the finished product. With the right approach to choosing decorative elements, you can get a unique appearance of the surface.
Polishing/sanding of the finished product
The product is considered finished after post-curing is completed; you can read more about this in the instructions for your resin. Post-curing allows your product to achieve its maximum properties. If post-curing is not possible or the instructions do not require it (not required), allow your product to gain strength. At a temperature of 22 -25°C this takes 5-7 days. Well, now you can start grinding and polishing work.
Attention! Wet the surface with water to avoid overheating your product, otherwise the resin will begin to melt and clog the abrasive paper. Well, or choose a speed mode that does not lead to overheating.
The final touch is to coat the product with UV-resistant polyurethane varnish in several layers, with intermediate sanding. This will save your masterpiece from yellowing due to exposure to sunlight and will give the piece a much brighter shine than polishing.
Photos of do-it-yourself countertops
Tell your friends

