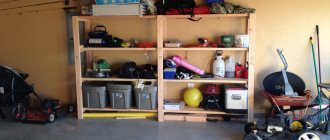
Renovating a kitchen in a residential building is associated with inconvenience and financial expenses. It is unlikely that you will be able to avoid inconveniences, but you can try to save money if you have the desire, tools and skills. Not everyone can make kitchen facades with their own hands, just as professionals do in a workshop. But if your priority is budget and not necessarily luxurious design, you can do everything to your taste and without extra investments.
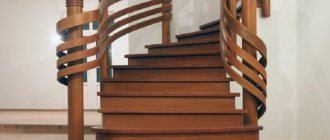
Hanging cabinets and its main stages
How to hang kitchen cabinets? There are two ways to proceed here.
Method 1: ordinary
In the first case, loops and fasteners are used:
- after determining the upper limit, draw a horizontal line along the entire length of the cabinet or cabinets intended for hanging;
- use a water level to check the accuracy of its outline (after all, it can be distorted due to an uneven floor);
- mark the first point on the line for drilling a hole for the fastening element (usually dowels or screws are used, having both plastic and wooden seals, but sometimes also fastening hooks) using a drill or hammer drill;
- install fasteners;
- accordingly, the furniture itself is equipped with metal hinges or brackets that allow small horizontal shifts to ensure better adjustment;
- the cabinet is hung, leveled with a water level, the second attachment point is marked, and the cabinet is removed from the wall;
- further actions are carried out in the same way;
- at the last stage, the cabinet is suspended and the coincidence of its upper edge and the applied horizontal line is checked;
- do the same with other cabinets;
- then the cabinets are connected with furniture screws, after drilling holes. in this case, all adjacent cabinets must be located at the same height;
- Next comes the installation of a unifying decorative cornice, which is screwed to the upper base using screws;
- and then you need to hang the facades, hang the shelf(s), check the doors (how tightly they close, do they sag, do they interfere with each other when closing) and remove them using adjusting screws.
Of course, all this requires utmost attention and a skillful assistant, without whom it will be difficult to accurately calculate the distances between the holes for fasteners.
Method 2: Using a mounting rail
But you can always do it easier and hang kitchen cabinets using a simpler method - a “mounting rail”. It consists of a hook attached to the side of the cabinet so that it protrudes slightly from behind the cabinet. And, of course, from the strip itself, which is installed on the wall at a given height and serves as the basis for which this hook is hooked.
This method allows you to:
- do all the work yourself, since hanging cabinets on an already installed strip is easier than struggling with markings;
- using rotating screws, independently move the cabinets back and forth and up and down, thereby ensuring their alignment;
- make the structure more reliable by breaking the rail into several parts and securing it in the very location of the cabinets with three screws each. Increasing the number of screws will increase the strength of the structure (although if the wall is not strong enough, it is better to completely secure the rail);
- speed up the weighing procedure, which in this case takes at least two hours;
- carry out work after fastening the lower cabinets, which is impossible when fastening with simple hinges, since in this case it is necessary to install a border along the lower edge of the cabinets for alignment, which is dismantled after the process.
But it also has its disadvantages:
- high price of a complete set of parts compared to a conventional set of hinges,
- loose fit of the structure to the wall and the formation of a small gap between the wall and the cabinets.
In this case, you need to hang the closet like this:
- or nail the opgalite to the back wall of the cabinet. And since hanging with a mounting rail does not allow for a tight fit to the wall, the lower part will require additional indentation and installation of the same kind of rail. In this case, the bottom of the cabinet extends slightly onto the kitchen apron (the part of the wall between the work surface and the wall cabinets);
- or insert the hardboard into the holes in the cabinet walls and thus push it a little deeper inside. This design will allow the cabinet to be pressed much more tightly against the wall and, naturally, will not require an apron.
Kitchen installation.
All parts of the kitchen cabinets were laid out in advance and packed in stretch film, according to the numbered order of the sections. That is, let’s say the parts of section No. 4 were packed in one pack, and the parts of the others, each in their own, so that during the installation of the kitchen, when assembling the sections, there would be no confusion. Each pack was unpacked as it reached its turn according to the installation plan. All sections arrived for installation disassembled, except for one - a section with boxes, this one was delivered all assembled (the reason was described in part 4).
Kitchen installation plan
like this: first, section No. 1 was installed, as the most basic and defining all the dimensions of the kitchen. Then, in order, the lower sections Nos. 2 - 4. The upper sections were installed starting with the corner cabinet No. 6, then the dish dryer section, and the last section with the hood was installed.
Installation of a kitchen cabinet.
Initially, the case body was assembled and installed in its place, pushed onto the heating boiler. Next, a false frame was immediately attached to its left wall side, which moved the body of the pencil case away from the wall so that the electrical sockets located nearby would not interfere with the opening of the facades. The false frame was attached in the following way: first it was temporarily fixed with clamps, then screwed down using confirmat.
Unexpected miss. A recess was made in the falsehood to pass cables through it from the electrical extension cord and the heating boiler to the sockets. We made it just above the sockets so that we could carefully tuck it in and stick the plug into the first socket. But it was not there. It turned out that they did not pay attention to the length of the cable from the boiler, and that if it is passed through this hole, then its length is only short enough by a couple of centimeters. I had to make a new hole directly next to the socket, and leave the old one as is.
| Fixing the false panel with a clamp. | Installed false panel. | Hole for wires. | Fixed second hole. |
At the next stage, the base of the pencil case, also known as the bottom connection, was installed. The base is fixed on confirmations (see photo). When the holes for attaching the base were ready, it was necessary to make a cutout in the upper end of the base so that the boiler door could open.
| Base on the pencil case. | Installation of the base. | The boiler door does not open. |
The cutout was made with a router and then covered with a paper edge, which was heated with a hair dryer.
| Gluing the edges using a hair dryer. | The base has a cutout and the door is not an obstacle. |
As expected in part 3, it was necessary to install a retractable cargo net in the pencil case - a cargo net 150 mm wide. To do this, the corresponding parts of the mesh guides were attached to the left side of the pencil case. Since it was planned to mount the facade on the pencil case on the same side, so that the hinges of the pencil case would not interfere, and so that the facade itself would not interfere with the extension of the mesh, the guides were installed on pads made from the remains of laminated chipboard. The bottom lining had to be slightly recessed so that the striker plate for the front hinge could be screwed on. We hang the lower facade of the pencil case.
| Lining under the cargo guide. | Cargo behind the façade. | Retractable mesh in working position. |
On the side of the pencil case, from the inside, we screw the body of the extension cord, under the wire of which we previously made a hole in the falsehood. The location of the extension cord was chosen so that, as they say, “millimeter to millimeter,” the length of the wires of the extension cord itself and the devices connected to them would be enough, in the absence of an extension cord of a different size at the customer’s disposal. We place it behind the stop of the inner door of the pencil case. It was planned to connect electric surface ignition, a hood and an oven here. The power of this extension cord is quite enough for this load, which at maximum will be 2.6 kW. (oven + extractor hood). But, as a rule, these devices will not work simultaneously. In addition, this extension cord was equipped with a fuse to prevent the load from exceeding 15A (this is about 2.8 - 3 kW).
| Extension cord behind inner door. | Facade on the pencil case and cutout for the boiler door. |
Installing the section under the oven and the remaining lower cabinets.
Next to the pencil case, we mount the oven section and attach it to the side of the pencil case using intersectional ties. We align the section along the rear end, the depth from the front end and the actual overhang of the tabletop will be 50 mm. The tabletop will fit flush to the side of the pencil case along the front ends.
| Kitchen installation diagram. | Installing a section under the oven. | Intersectional screeds. |
Next we install the remaining lower sections, the section with drawers and the washing area. Mounting them in the right places, we cut them with a jigsaw, where the need arises, for communications.
| Installation of the box section. | Cutting for pipes. | Installation of lower sections. | |
Installation of a work panel in the kitchen.
The working panel is cut out from a piece of the table top; to do this, we simply cut it to the required size from the front side and trim it to length. According to the design, the table top rests on the work panel, and not vice versa, when the panel is placed on the table top.
This method of installing a work panel is good because it does not take away its space on the countertop and allows you to comfortably install a sink and hob, without the need to fish out millimeters so that these devices fit there.
| We trim the working panel with a jigsaw. | Aligning the end with a router along the guide. |
The working panel is attached between the upper and lower sections, to the side of the pencil case. The panel can be secured from below with a confirmat only through a bonded strip on the box section. The left end is to the pencil case, and so that the right end does not dangle, we screw a stop made from a piece of chipboard left over after cutting the sections for the drain to the horizontal connection of the washing section with a 3.5x30 self-tapping screw. We check the accuracy of installation of the working wall on the right side, using any sufficiently large rectangular part.
| Support for the work panel on the washing section. | Installation of the working panel. | Attaching the panel to the side of the pencil case. |
| Fastening via connection. | We check the accuracy of installation of the working panel. |
After installing the working wall, we cover the section of its upper end, which is located under the hood and is not covered by the bottoms of the upper sections, with a wide edge.
| Visible end. | We glue the wide edge with a hairdryer. | The working panel and what remains behind it. |
Installation of built-in kitchen equipment.
Following the work panel, we install the kitchen countertop itself. We rest the tabletop against the work panel and fasten it from below through connections on the drawer section, from the side, to the end through the wall of the pencil case, and with the help of corners to the sides of the washing section. But before fixing the countertop, we cut out mounting holes in it for installing the hob and kitchen sink.
Additionally:
- Built-in kitchen sinks. Standard sizes.
- Built-in hobs. Dimensions.
| Trying out the table top in place. | Hob and sink. | Cutouts in the countertops for installing the surface and sink. |
We treat the cutouts for equipment with silicone-based sealant, glue all the necessary seals, etc. It is advisable to fasten the sink immediately, on a tabletop that has not yet been fixed, because then it will not be very convenient to crawl into the section from below and tighten each fastener. In this project, it is also advisable to immediately fix the hob, because... in its section, due to the presence of a retractable table, fixing it in place will be quite difficult.
| Preparing the cutout for the hob. | We silicone the cutout for the sink. | We fix the kitchen sink. |
We put the tabletop with the equipment in place and secure it. Immediately connect the gas hose to the stove and check it. To prevent the gas hose from hanging around the back of the section, we fix it with a homemade bracket from below to the tabletop. As a bracket, we used an old strike plate from a regular overhead hinge that was lying around in a suitcase with a tool.
After this, all that remains is to hang the facades on the lower sections, install the wall plinth, the lower plinth and the bottom of the kitchen are already installed. The facades can be hung, but then it is advisable to remove the hinges from the counter strips until the complete installation of the kitchen is completed, so as not to inadvertently damage them.
| Worktop with sink and hob. | Hob, viewed from under the countertop. | We fix the gas hose with a homemade bracket. |
We install the lower plinth on the clips of the kitchen legs. At the wall we cut the base under the baseboard. We make the cutout a little larger so that you can stick your finger through. This is necessary if you need to remove it later when using the kitchen (for example, to remove the “age-old dust under the kitchen”), so it will be convenient to carefully pick it up from one edge with your finger and remove it from the clips.
| Trimming the base. | Kitchen plinth with clips. |
We mount the retractable drawer table on our guides. For drawings, see part 3.
| In working order. | Opened. |
Inside the pencil case, on inset hinges, we hang a false door.
| False door with inset hinges. |
Fastening techniques
Let's start with the fact that fastening methods entirely depend on the parameters of the object being hung (dimensions, weight), and based on the data obtained, you can get an answer to the question - is it possible to hang kitchen cabinets on drywall.
Professional techniques
- The most popular and accessible method even for beginners is to attach kitchen cabinets to plasterboard using butterfly dowels and special plasterboard dowels.
When attaching cabinets to the so-called “butterflies”, you need to make holes in the wall and then install the fasteners. When screwing a self-tapping screw into a “butterfly”, the tendrils of this type of dowel spread in different directions and tightly press the installed fastener to the surface of the gypsum board.
Operating principle of the butterfly dowel
If the cabinet is mounted on special dowels, use a screwdriver to screw the dowel into the cavity of the material and only then screw in the fastening bolt (screw). This method allows you to fasten only lightweight structures whose weight with all contents does not exceed 5 kg.
dowel nail; 2. snail dowel; 3. butterfly dowel;
- The second method is to attach kitchen cabinets to drywall using mounting strips. The main feature of this fastening technology is that the mounting strips are attached to a sheet of drywall, and not to the suspended structure. The strips are fixed in several places (both to the gypsum board and to the metal profile located under the drywall). Fixation is done with self-tapping screws.
Mounting rails for wall cabinets
After completing the installation work, you can hang a cabinet on such slats, the weight of which when fully equipped will not exceed 15 kg. But this method has one significant drawback - the use of unaesthetic fasteners that are unlikely to decorate your kitchen.
If you need to hang bulkier and heavier cabinets on the wall, there are other secure mounting options that will help you do the job yourself:
Extended anchor bolts can be used as fasteners - such fasteners will allow you to attach bulky kitchen cabinets and even household appliances to the wall.
In order to secure them, you should drill deep holes with a hammer drill through the drywall at the very base. We insert anchor bolts into the resulting holes and clamp them there using ordinary wrenches.
This method of fastening is relevant only if there are base walls (this fastening option is not applicable for a plasterboard partition);
Anchor Bolt Installation
The price of mortgages is zero - they can easily be made from leftover building materials.
Unconventional fastening methods
- Thus, a heavy kitchen cabinet suspended on a plasterboard wall can be additionally secured to the ceiling using decorative cables;
Hole in the shelf for the cable
- As additional elements for fastening kitchen cabinets, experts often use decorative chrome-plated tubes - they are screwed to the floor and installed in the form of a frame, which bears the weight of the suspended structure;
In order for the hanging cabinets to be mounted as efficiently and productively as possible, several recommendations must be followed:
- Use only those fasteners that have a quality certificate and meet aesthetic standards;
- When marking fastening points, you must use a building level, and not do the work by eye - correct marking will allow you to evenly distribute the load on all fastening points.
If you follow all the instructions and recommendations described above, then you will probably end up with a reliable fastening system that will quietly serve until the next repair.
In addition to cabinets, the presented techniques allow you to attach any other hanging accessories and attributes to the walls (hoods, air conditioners, cornices, curtains and paintings). All of the above work can be carried out without problems by beginners, without the involvement of expensive specialists.
Shelf on plasterboard for various accessories
Types of kitchen facades
The front panels of the kitchen set are made of solid wood, laminated chipboard (chipboard), MDF, glass, aluminum or plastic.
Door Style for Kitchen Cabinets
Chipboard facade
For facades, laminated chipboard is used, both with
the sides of which are covered with durable decorative film. This option for decorating the front elements of the kitchen is considered the cheapest, due to the comparative ease of processing and the affordable price of the material.
Laminated chipboard comes in different colors, textures, imitates valuable types of wood, artificial and natural stone. Laminated decorative coating is not destroyed by household detergents and is relatively easy to clean.
Wood particle board for kitchen doors
However, in addition to the strengths, there are many weaknesses:
- It is impossible to make laminated chipboard facades in relief, which is why the kitchen interior turns out monotonously flat.
- Contact with moisture, even insignificant, over time leads to swelling of the slab and after two to three years the deformation of the elements of the set becomes very noticeable. The edges peel off at the ends and the aluminum linings shift.
- Proximity to the oven also negatively affects the thermoplastic adhesive of chipboard and plastic edging.
It is quite easy to make folding structures like a book facade from it, but it will not be possible to make any curved elements. Despite the fact that this material is currently considered the cheapest, it is not as popular as MDF.
MDF facade
MDF is a modified analogue of fibreboard (fibreboard). As a binder for wood fibers, natural raw materials are used - lignin, which is also of plant origin.
MDF kitchen drawer doors
Advantages:
- MDF is comparable in strength to solid wood, but much cheaper.
- It tolerates contact with moisture better than chipboard.
- Resistant to temperature fluctuations.
- It can be easily processed, including milling, which makes it possible to produce radius elements and relief surfaces.
The main disadvantage of MDF facades is the high price, when compared with laminated chipboard, the difference is approximately two times.
Solid wood facade
The most expensive option available among modern furniture. Most often, valuable hard wood species that are resistant to variable humidity are used: oak, ash, maple, walnut, mahogany, acacia.
Doors made of natural wood
Advantages:
- Solid wood facades are more durable than similar ones made from wood derivatives (chipboard, MDF). The service life (at least 30 years) depends on the material used, the strength of the coating and operating conditions.
- Made from natural raw materials, without the use of polymer adhesives. Often this advantage is offset by dyes, but the harm from them is significantly lower than from coating MDF, laminated chipboard or plastic linings.
- Classic wooden facades look original in any interior, creating an atmosphere of warmth and comfort.
Tools and materials
The list of tools required for hanging kitchen cabinets is standard:
- Drill and/or hammer drill;
- Screwdriver (it takes a long time to use a regular screwdriver);
- Jigsaw;
- Clamps;
- Level, plumb line, tape measure.
But the choice of hardware used to secure the cabinets will depend on the material of the internal partition in your kitchen:
- For wood, hardened screws with a countersunk head and a double-start thread with a large pitch are suitable.
- Concrete or brick - anchor bolts or hooks with plastic, metal dowels or wooden plugs (plugs).
- Cellular concrete - long bolts with the possibility of fixing on the back side of the wall or capsule himankeras.
If the kitchen is lined with plasterboard, you will have to find long enough studs that will fit securely into the main part of the wall, going right through the thin sheets. Otherwise, heavy cabinets will not be supported by any fasteners.
Restoration of kitchen furniture
To determine the direction and degree of changes in the style and type of kitchen set, it is necessary to highlight the purpose and overall scope of the reconstruction. In the case of a simple renovation of coatings, simply gluing the facades with self-adhesive film may be a sufficient option. Vinyl coating, when pasting facades, will hide any damage, and will also completely update the look of the kitchen set.
If significant changes are planned, with replacement of fittings and repair of individual elements of the headset, then appropriate measures are needed. The procedure for a full reconstruction includes the removal of certain parts of furniture, their repair and painting of surfaces with possible decoration in various ways (decoupage, moldings, replacement of the original decor).
Do-it-yourself wall cabinet mounting
You can install the upper modules of the kitchen unit yourself, without resorting to the services of professional teams
To do this, it is important to have the necessary tool and have minimal skills to work with it. In addition, it is necessary to consider the fastening system
Fixing the cabinet on the wall can be done in two ways:
- on the mounting rail;
- using loops (or corners).
Kitchen Cabinet Fasteners
The first method, despite the more expensive parts, is considered the most reliable and convenient. All work can be done alone, and aligning the modules is easier. Dismantling of structures suspended on the bar is also easy.
Installation of kitchen cabinets on a strip
To install the upper modules, you need to prepare the following tools and accessories:
- perforator;
- screwdriver;
- level;
- tape measure, pencil.
Prices for popular hammer drill models
Hammers
Installation will be carried out on a mounting rail. Planks are available in various lengths: 0.5, 1 or 2 m. They have special holes intended for fastening.
To fix the cabinet, universal canopies are used (2 pieces per cabinet).
The great advantage of such devices is the ability to adjust the installation level of the cabinet in terms of reach and height. Canopies can be right or left, as well as universal.
In addition, you will need self-tapping screws: with dowels for mounting the tire (for greater reliability, you can replace them with anchor bolts) and for attaching canopies.
Step 1.
Tire installation markings are made using the level. The bar itself can be broken off using the notches on it. Many people use separate tires for each canopy for installation. However, for convenience, it is recommended to mount a solid rail across the entire width of the modules. This will immediately ensure the correct installation level.
Marking the tire installation using a laser level. Marking fastening points
Step 2. The plank is applied horizontally to the wall, points for fastening are marked. It is important to familiarize yourself with the location of the wiring in advance, otherwise if it is damaged by a drill, big problems may occur. Step3. To fix the tire, you need to drill holes
The wall can be made of different materials. The vast majority of load-bearing structures are made of reinforced concrete. The cabinet is installed on such bases using dowels with a diameter of 6 mm and self-tapping screws of 4 mm
Step3.
To fix the tire, you need to drill holes. The wall can be made of different materials. The vast majority of load-bearing structures are made of reinforced concrete. The cabinet is installed on such bases using dowels with a diameter of 6 mm and self-tapping screws of 4 mm.
Drilling holes
Step 4.
The resulting debris is removed from the recesses. Dowels are driven into the holes. A mounting rail is supplied. Use a screwdriver to tighten the screws.
Screwing in self-tapping screws
Prices for popular models of screwdrivers
Screwdrivers
Step 5.
Adjustable canopies are fixed to the side walls of the hinged module (from the inside). To make room for the hook, you need to make slits in the back wall. To do this, you can remove the hardboard or plywood from which it is usually made and make cuts. After this, the sheet is screwed back. It is possible to go the other way: use a pen attachment and use a drill to make holes in the back cover without removing it.
Slots in the back wall of the cabinet can be made with a jigsaw or hacksaw
Fastening the back wall of the cabinet
Step 6.
Canopies are being installed. To attach them, you need self-tapping screws 3 cm long (their diameter is usually 3.5 mm). Longer fasteners may pierce through the cabinet material. To fix each canopy you need 2 screws.
Fixing awnings
Step 7.
The cabinet is hung on a rail using hooks.
Hanging a cabinet
You can pull it closer to the wall by tightening the end bolt.
Adjustment by tightening the bolt
Now the cabinet will not be able to jump off the mount, even if it is accidentally lifted a little. Height adjustment is carried out using the second bolt.
Height adjustment
Prices for building levels
Construction levels
The wall cabinet is securely mounted on the kitchen wall.
In order for the dimensions of kitchen structures to best meet the requirements of household members, it is recommended to order designs according to your individual requirements. However, this option is more expensive. If you want to save money, you can purchase standard modules. In this case, you need to consider the proposed options and carefully calculate the installation method to choose the optimal one.
Let's sum it up
You should not be afraid of installing kitchen cabinets yourself, because if you follow all the nuances of the instructions, it is impossible to make a mistake. The most important thing is to have free time, the necessary tools and an assistant who, if something happens, will hold the cabinet, hand you the necessary items, and look from the side to see if the furniture is hung evenly.
Buying a ready-made kitchen set today is not a problem. The industry offers consumers a huge selection of sets made from various materials - from cheap laminated OSB boards to expensive natural wood or artificial stone. But for several reasons, the purchased option cannot be considered optimal for everyone. In a special article we will look at how to make a kitchen set yourself, which designs are the most convenient and reliable.
Installation of cabinets: stages of work
After completing the preparation of surfaces, it is necessary to proceed to the stages of installation of structures. First, we need to apply markings at the optimal height.
Choosing the height of the cabinets
According to the standard, many manufacturers recommend leaving a distance from the table to the beginning of the top cabinet of about 45 centimeters. At the same time, many repairmen and designers consider this arrangement to be incorrect, and call another, the most optimal distance - 50-60 centimeters.
In fact, there is no single rule - cabinets must be installed in such a way that a person can easily reach the highest shelf. Since the height of all people is significantly different, during installation you need to do the following: raise your hands up and mark on the wall the point where your fingers end - the top cabinet will begin from this point and this calculation will allow you to have free access to all other shelves.
Calculations must be carried out based on your height and the growth of other family members
There are also general principles for installing upper cabinets depending on the height of the residents. If the average height of household members is up to 160-165 centimeters, then the cabinet is installed at a distance of approximately 175 centimeters. If you are taller than 170 centimeters, the top shelf should be located at a height of about 185 centimeters. In some cases, cabinets are installed even at a distance of two meters from the floor.
When determining the exact height, it is necessary to calculate the distance from the floor to the highest shelf
Marking
The exact marking height will vary depending on the type of fittings chosen. However, the principle of performing the work will be identical in all cases:
- After you calculate the exact location of the cabinet, you will need to draw a transverse line along the entire surface.
- If the headset is located at a corner, you will have to start from the corner. If the cabinets are located in one line in the middle, then marks should be left from the beginning of the outer cabinet.
- During the process, you must use a measuring tape and a water level. First you will need to place one point, and then determine the location of the second using a level.
A water level is a convenient but cheap tool that allows you to make markings on the wall in the best way.
After determining the location of the points, they will need to be connected to each other to get a line. For such purposes, you can use a ruler or any flat bar.
Tools
During the work you do not have to use a large number of tools. The main thing is to prepare an electric drill with an impact mechanism, or it is better to immediately purchase a hammer drill. In addition, we will need the following:
- measuring tape;
- water level;
- hammer;
- screwdriver;
- screwdriver;
- a simple pencil;
- square;
- knife;
- metal knife.
It is necessary to prepare all the tools in advance
"Ear", or furniture hinge
The most common and budget method. With this installation method, cabinets are hung on a screwed-in screw using a special suspension (the so-called “ear”)
- Helper needed.
- A budget option
- Can be used for minor uneven walls.
- It is more difficult to fix on one horizontal line, the process will be long and labor-intensive, it is necessary to constantly try on the mounted modules and check the level. Even a minor mistake of a fraction of a centimeter will be costly.
- There is no way to adjust or change the position of an already installed module.
- The cabinets will fit tightly to the wall without gaps.
Selection of screws and dowels
There are two types of screws suitable for hanging: standard - for wood or metal and more specific - for concrete.
- For wood or metal. An affordable and quick option to fix the cabinet to a beam, and the use of a dowel ensures reliable fixation of the self-tapping screw in brick, cinder block and similar materials.
- Self-tapping screws for concrete. Such fasteners are noticeably larger in diameter than conventional screws, which allows you to more securely fix kitchen cabinets. Fastening to a concrete wall is carried out as follows: a hole of the required diameter is pre-drilled, then the self-tapping screw is screwed in without a dowel.
The dowel consists of two parts - non-expanding and expansion. The first is designed to preserve the integrity of the upper soft layer of finishing materials. For example, if you are hanging on a stone wall covered with a centimeter layer of plaster, the length of the non-spacer part of the dowel should be about 15 mm.
The second selection criterion is the diameter of the fastener that will be screwed into the dowel. Most often, hooks or screws with a thread diameter of 4-5 mm are used to hang kitchen cabinets. To firmly fix such fasteners you will need a dowel with a diameter of 6-8 mm.
Naturally, you need to take into account the length of the screws. Hanging fittings screwed into a short dowel are not able to provide rigid fixation of the cabinets, and if you make the depth of the hole according to the dimensions of such dowels, then the long fasteners simply cannot be completely tightened.
Dimensions of dowels for the corresponding screws
You can attach the cabinet to the aerated concrete surface with an anchor, through a special dowel, or with a regular self-tapping screw. The latter option is often chosen because of its simplicity, but such fastening is not reliable under prolonged lateral loads.
Dowels and anchors for fastening in porous materials
To the corners
The modules are mounted on rigid metal corners and self-tapping screws screwed into the dowel.
This fastening method has the same features as the option with furniture hinges. Suitable for fastening not only kitchen units, but also any other furniture.
Although this option is more budget-friendly, it is very outdated and is therefore rarely used, as it is inferior to the more modern method of mounting on a rail.
Let's look at an example of how to hang a cabinet in the kitchen using a mounting rail.
Tools you will need:
- Impact drill or hammer drill.
- Several dowels with a diameter of 10 mm and a length of at least 6 mm.
- Two canopies and a mounting plate.
- Metal scissors or jigsaw.
- Concrete drill with a diameter of 10 mm.
- Drills 4 and 2 mm.
Fastening awnings
Let's prepare a cabinet for attaching awnings. To do this, if it is not removed, dismantle the back wall. It is usually made of fiberboard. We insert the canopy inside the cabinet and make sure that its upper part fits snugly against the cabinet body.
The hook, when released, should extend beyond the cabinet body by 4mm.
Use a 4 mm drill to drill a through hole for attaching the canopy.
We do not drill the second hole for fastening the canopy through it, but go through it with a 2 mm drill to screw in the screw.
In practice, two fastenings use screws, but for greater reliability it was decided to use a through screw and nut. The disadvantage of this method is that the screw head will be visible on the side of the cabinet. But even with ordinary screws the cabinet will not fall off.
When the hole is ready, fasten the parts with a screw and washers.
You should not clamp them too tightly so as not to break the canopy body.
We screw the screw into the second hole.
We do the same on the opposite side.
There are “left” and “right” canopies, and they need to be inserted accordingly.
The body is marked with the letters “L” and “R”.
Having secured the canopies to the side walls of the cabinet, we cover the back wall of the fiberboard with a panel, cutting out the places where the hooks exit. This can be done either with metal scissors or with a regular jigsaw.
We nail the panel to the body with thin nails.
Installing the mounting plate
The cabinet is prepared, we determine the height of the mounting plate. It should be assumed that the distance from the sink or countertop to the bottom of the cabinet in the kitchen should be 500 - 600 mm. If this value is less than 450 mm, the cabinet may interfere with work on the work surface of the kitchen countertop. Consider the height of the owner and the depth of the closet. When we have decided on this value, we add it to the distance from the bottom edge of the cabinet to the hooks. This will be the height of the mounting plate.
We mark the calculated value with a marker on the wall, apply a bar at this level and mark the places for drilling holes.
The standard strip is 2000mm long and if you are planning to hang a row of cabinets there is no need to cut it. In the case where two cabinets will be suspended at a distance, we cut off pieces of the required length. To save the bar, it can be broken into several parts, securing it only in the place where the hook will be located.
It is better to make the first hole from one of the edges. Next, without clamping the screw, place a level on the bar and, having chosen the optimal value, make a mark on the other side and in the middle.
Lower the bar and drill holes according to the markings.
We insert the plastic dowels into the holes and screw the screws through the bar.
We check the level and reliability of fastening. We lift the cabinet and place its hooks on the mounting plate.
All that remains is to adjust the tilt with the corresponding canopy screws. This can be done with a Phillips screwdriver. When the work is finished, you can safely lay out the dishes; the awnings will reliably support their weight.
We update old facades
If making new facades for an old kitchen seems too complicated, you can try to restore the surface of the existing ones. Wooden elements can be painted - it is better to cover chipboard with self-adhesive film.
Painting
To do this you will need stain, varnish, putty, solvent, fine-grained sandpaper, and a set of screwdrivers.
Sequencing:
- We remove all removable parts from the doors (glass, decor, fittings).
- Using sandpaper, a spatula or a hairdryer, remove the remaining old paint (preferably until the wood is clean).
- We sweep with a brush, putty potholes and chips, if any.
- We prime.
- After complete polymerization of the soil, we grind it again.
- We apply a paint coating.
Paint or alkyd stain is applied in at least two layers. If the desired tone was obtained in one go, the finishing coat is done with a protective varnish.
Self-adhesive film
Old chipboard furniture cannot be painted; it is better to use self-adhesive film to tidy it up.
Procedure:
- Clean and degrease the surface.
- We try on the film and cut it out with a small margin.
- Peel off part of the protective layer along the edge and gradually straighten the film on the surface of the door.
It is convenient to smooth with a rubber spatula or a clean cloth; if air bubbles appear, pierce or cut them and immediately smooth them out.
Decorative self-adhesive film
Design and drawing development
Before you take on cabinet drawings, you need to understand how to take measurements correctly. The niche in which you plan to install a wardrobe will not always have the correct geometric shape. That is why measurements in a niche must be carried out according to the following rules:
- first, measurements are taken along the back wall: at the top, at the middle level, at the bottom;
- then we also measure the “front part” with an indentation;
- height measurement also occurs in three positions from the “rear” and from the “front”.
Installing a built-in wardrobe without such measurements can lead to the fact that the body, made without taking into account errors and differences, either will not fit, or when trying to assemble the structure, serious gaps will be discovered. It will be a shame if the cut shelf turns out to be smaller than the required size and simply falls through. Before installing, carefully calculate all errors in order to leave allowance for installation. Sometimes it happens that the end drawing of the shelves resembles a trapezoid rather than the expected rectangle. It all depends on the quality of the walls, the density of the plaster on the inner corners of the niche.
Next we move on to the drawing. If you do not have drawing skills, it is better to contact a designer. Based on your data and wishes regarding the material, they will make a drawing of your future wardrobe in a niche. In such work, you need to remember to take into account the thickness of the material, the edges, if you want to thoroughly cover the cut points, and the margin for the mechanism of the compartment itself, which also needs to be about 10 cm.
Having detailed diagrams on hand, you can be sure that the manufacture of cabinet parts will be more accurate. Allowances left when taking into account wall errors will make the installation more accurate.
Now, as for the design of the future cabinet: without much experience in drawing up drawings and installation, give up complex radial facade designs. Here you need not just skills, but good professional experience in order to calculate and then competently assemble such a structure. Limit yourself to a simpler cabinet option that you are guaranteed to be able to control during assembly. Order all decorative elements strictly in accordance with the drawing.
Rules for caring for a modified façade
Furniture care must be carried out according to rules corresponding to the type of material or work performed.
Wood needs quality care.
- It is not recommended to clean painted or varnished doors with abrasive and aggressive chemicals; a warm soapy solution and a soft sponge are sufficient.
- Facades covered with film should not be rubbed intensively or abrasives should be used on them.
- It is important to rub metal surfaces and fittings dry with a special microfiber cloth so that no residue remains.
Useful drilling tools
A jack of all trades always needs certain tools to work in a private house, on a summer cottage, in an apartment, or when building his own house. Many of them are not even worth purchasing if they do not require constant use. For example, for drilling, there are many different attachments that will greatly increase the functions of your drill and significantly expand them.
Let's look at some devices for auxiliary potential.
To obtain precise holes of significant diameter in different workpieces, a device such as a drilling and milling attachment will help to carry out individual milling work.
Make a milling machine out of a drill.
The next device worth mentioning is very expensive, but has the highest versatility. You will sharpen all the tools that you have on the farm, be it knives, shovels, axes, hoes, various drills, effortlessly with the universal sharpening device.
When purchasing drill attachments, be sure to check their compatibility.
Holder with clamp. With its help, you can fix the drill anywhere, use it with various kinds of devices, use it as a mini-lathe, sharpening, milling or grinding and polishing machine.
The drill holder allows you to quickly secure the drill.
All kinds of attachments are also designed for drills. These can be stops that limit the depth of drilling, platforms with which you can drill at a certain angle or perpendicularly. There are nozzles that are adapters and extensions of different designs: offset, angled, flexible.
The angle drill adapter is designed for hand and electric drills.
Metal cutting attachments turn your drill into a one-of-a-kind tool. Some resemble sheet metal shears, while others have a different feature, such as roller shears. The nozzle, called the “Cricket,” seems to cut through the metal.
The main advantage is that they do not damage the polymer coating of the metal.
There are also other attachments designed for monotype work.
- For installing aluminum rivets. There are types for both the same size and those with interchangeable bushings for different calibers.
- Tape-shaped attachment for self-tapping screws. With its help, you will significantly save time when working with plasterboard partitions or when you need to secure other materials with self-tapping screws.
- A belt sanding attachment will completely replace a sanding machine, and it will be much cheaper in cost.
- An attachment with which you can turn your drill into a hammer drill will not be superfluous.
- Using the corner pruner attachment, you can cut various cables, as well as tree branches.
- Using a variety of attachments, the drill will replace your jigsaw, circular saw, pump, and you can polish surfaces and sharpen drills.
- There are unusual attachments.
Whatever attachments we use, the main thing is that the work is enjoyable.
Is it possible to hang cabinets on drywall: basic mounting techniques
There are several ways to attach furniture to drywall.
The fastening methods are as follows:
- The use of drywall dowels and so-called “butterflies”. First, a hole is made in the wall, then a butterfly fastener is installed. The difference between the butterfly and other fasteners is that, when connected to a self-tapping screw, the antennae of the dowel very firmly press the structure to the drywall. The technique of inserting a dowel into the material and then using a screwdriver to tighten the screw is more suitable for lightweight structures. The weight of this cabinet should be about 5 kg including everything inside. This fastening system is invisible to the eye. It is quite possible to implement it at home even for one person.
- Use of mounting rails. The cabinet is suspended from slats attached to drywall. The slats must be firmly attached. It is recommended to fasten the slats in several places. Approximately 10 cm apart. This method is more reliable. The weight of the hanging cabinet can reach 15 kg. The downside is that such fasteners are more massive, solid and, therefore, too noticeable and can ruin the design of your kitchen.
- Use of extended anchor bolts. This technique will make it possible to fasten bulky furniture. But this technique is mainly suitable only for main walls (concrete, brick); it is possible to attach a cabinet to a plasterboard partition using this method if it is directly attached to one of the above types of surfaces.
- If there is a need for attachment to a plasterboard partition, then it is necessary to strengthen the partition in advance. Amplifiers made of timber or other material can be placed at the intended fastening points. It is necessary to make notes in order to determine in the future the location of the reinforcement material.
- If the fastening to the wall does not seem strong, you can use decorative fastenings to the ceiling or to the countertop. The chrome legs can be used as a frame, and the main weight of the cabinet will fall on them, let them rest on the countertop. The cables attached to the ceiling and additionally supporting the hanging cabinet will look no less original.
Selection of fittings for fastening and preparation of walls
Before you hang cabinets on the walls, you need to decide what fixtures you are going to mount them on, because they are not mounted on the furniture itself or the holes. By default, it is believed that furniture is hung by professionals, and they already know everything.
Types of fasteners
| Illustrations | Recommendations |
| Plank. At the moment, one of the most progressive and widespread types of fittings. The idea is that a mounting plate is attached to the wall, and canopies are screwed into the far corners of the cabinet. These canopies are adjustable in 2 directions, which makes it possible to attach furniture to load-bearing walls without gaps. | |
| Furniture hinge. Traditional steel fittings that have come to us since Soviet times. You drive an anchor into the wall, screw the hinge to the cabinet, and then hang the furniture on the wall. The option is good, but the markings for the anchors must be absolutely accurate, and the hinges are not adjustable. | |
| ikea mount. Such fittings have appeared recently and are mainly used in furniture of the same name.
| |
| Hanging corner. Another representative of the Soviet school of cabinet installation. By and large, hanging corners are the same loops, only bent at 90º. And if the hinges were screwed only onto the vertical wall of the cabinet, then the corner can be screwed anywhere on the top horizontal panel. |
Preparing the walls
Careful preparation of walls is considered a desirable rather than a mandatory procedure. After all, wall-mounted furniture covers all noticeable defects on the surface, the only exception being those cases when the defects are so large that high-quality installation of the fittings and the fit of the upper block to the wall is impossible.
Crooked walls
In this case, everything depends on the magnitude of the curvature and the material from which the wall is made. Preparation is necessary if the wall is completely bare, that is, there is no starting plaster coating on it. But such cases are extremely rare, since according to the rules, furniture is delivered last, when the finishing work is completed.
Cinder block, brick, concrete walls, as well as foam block or aerated concrete, are easiest to plaster over beacons. The technology looks something like this:
- Initially, the wall, as far as possible, is cleaned of residual mortar and dust;
- Then, with a drying break, a couple of layers of deep penetration soil are applied;
- The most important stage is the installation of beacons. Beacons are called metal or carbon fiber slats. Beacons are installed on gypsum cakes. First, 2 vertical slats are attached at the edges, after which 2 - 3 cords are stretched between them and the remaining beacons are placed along these cords;
To install the slats vertically, a plumb line is used, and the horizontal is checked with a level.
- Now on the wall, in a layer just above the beacons, spread the starting solution and, before it hardens, level it with a plaster rule, supported by the beacons. The solution will have to be added, since there will be sinks here and there;
- If the beacons are steel, then after 3 - 4 hours (when the solution has set a little), take them out and rub the grooves that appear with the same solution. Carbon fiber slats, if you don’t mind, can be left in the wall.
Full cycle of plastering on beacons.
If you get a poorly plastered wall with differences in the plane, then using beacons is not cost-effective. Such defects are removed using finishing putty or tiles are laid.
The technology for finishing walls with putty, as well as laying tiles, is not technically complicated, but if you have never encountered this, it is better to hire a professional. The work is painstaking and requires skill.
Final leveling of walls with putty requires certain skills.
But for the hobbyist who doesn't want to putty or lay tiles, there is another fail-safe way to prepare walls for hanging kitchen cabinets. It consists in the fact that you strictly horizontally screw 2 - 3 wooden beams to the wall with anchors.
Thus, the bars act as a kind of tire. Furniture and hanging elements do not touch the walls; wooden blocks create a flat surface for them. True, in this case you will have to separately mount an overhead apron between the table and cabinets on the same bars, which will cover the gap between the cabinets and the wall.
A pair of even horizontally fixed bars will hide minor curvatures of the walls.