When building a country house or a private bathhouse, an important step is the thermal insulation of various surfaces. In addition, the insulation itself needs high-quality and reliable vapor barrier protection.
To prevent the negative impact of external factors and the formation of condensation on the thermal insulator, any homeowner should have a general understanding of how to properly install a vapor barrier to ensure a long service life of the entire structure.
Membrane structure and operating principle
The most popular for their performance characteristics are breathable multilayer membranes, which are designed to create reliable vapor barrier protection.
They consist of three layers, each of which performs an important function. The first layer prevents the penetration of steam into the insulation, the second provides the necessary strength of the base, and the third protects against moisture from the outside.
Each individual layer has the necessary perforation for good air exchange. The first layer removes excess moisture, allowing dried air to penetrate. The reinforcing layer retains warm air masses inside thanks to a special weaving of threads. The third layer provides a sufficient level of traction inside the structure.
Some types of membranes have an additional anti-condensation layer based on viscose or cellulose. It retains excess moisture deposited on the paper fibers. To naturally remove moisture from the membrane, a technological gap of 2.5 cm is provided between the vapor barrier and the finishing surfaces.
Types of vapor barrier and materials for it
There are internal and external vapor barriers Rockwool. The choice of a specific option depends on the area of the walls in the bathroom and the material from which the structure is constructed. If the house has a veranda, then heat loss is reduced. In this case, the costs of creating a barrier are minimized. Protection against condensation of concrete buildings, houses made of aerated concrete and foam blocks is characterized by complexity. This is explained by the fact that such buildings are characterized by high rates of heat transfer and thermal conductivity.
External steam protection is carried out using one of the following methods:
- Ventilated facade.
- Gluing a heat-vapor barrier to the surface.
- Sandwich (wall, thermal insulation, external finishing).
The advantage of these methods is that installation can be carried out at any time of the year. You can process individual areas, joints, corners, without disturbing the architectural appearance of the building.
There is no universal material that is suitable for all types of buildings. Therefore, manufacturers offer a number of anti-condensation products. To buy the most suitable option, you need to familiarize yourself with the technical and operational characteristics of each.
Below are the types of vapor isolators that builders most often use:
- Polyethylene film. The main disadvantage is the creation of a greenhouse effect. Therefore, when installing it, you should take care of organizing high-quality ventilation. Cellophane does not allow air to pass through. Therefore, some craftsmen perforate it before using it (make many holes using a roller with nails). The resulting pores allow water droplets to pass through. Therefore, polyethylene is not the best choice for steam protection. It is preferable to use it for waterproofing.
- Membrane film. It has many small holes through which air passes. At the same time, moisture is retained. There are three types of products: outdoor, indoor and vapor barrier with reflective screen. The most prominent representatives are Izospan and Megaizol.
- Mastic. Suitable for gypsum plasterboard. It allows air to pass through well, but retains condensation. This coating agent is applied before finishing work.
Craftsmen also often use liquid rubber, roofing felt, glassine and aluminum foil, which are highly resistant to diffusion.
Features of vapor barrier installation
An important stage in protecting insulating materials is laying a reliable vapor barrier layer. All work is carried out during the repair or reconstruction of a finished building or during the construction of a new building. To correctly install a vapor barrier, you need to understand how to connect membrane sheets and which side to fix them to the insulating base.
Preparatory work
At this stage, work is carried out to select the appropriate type of vapor barrier, taking into account the features of the installation process, operational characteristics and material requirements.
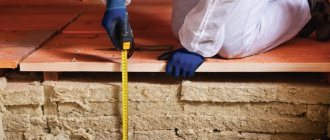
Before laying a vapor barrier, careful surface preparation will be required. It is important to consider the type of material used in the construction of floors, walls, ceilings and roofing structures.
- During the construction of a log house, all structural elements are treated with protective antiseptics and fire retardants.
- When carrying out repair and reconstruction work, complete dismantling of the finishing, cleaning and preparation of surfaces is carried out:
Wooden elements are treated with compounds against aging, rotting and burning. Concrete, block and brick surfaces are treated with deep penetration antiseptic compounds.
Proper preparation of surfaces will ensure a long service life of the insulating material and the entire structure.
Technology for laying vapor barrier on the ceiling
If the roof structure and interfloor ceiling are made of wood, then the installation of a membrane for waterproofing is carried out on a prepared base.
Roll or block insulation is installed in the space between the rafters and joists; the best option is mineral or basalt wool. Next, you can lay vapor barrier protection on the ceiling surface.
When the thickness of the insulation is equal to the height of the logs, an additional slatted counter-lattice is installed to maintain natural ventilation.
It is necessary to install a vapor barrier on the ceiling with a slight overlap on the walls around the perimeter, and special attention should be paid to the corners. It is better to place the joints on the joists and glue them on both sides with tape on a reinforced base.
Important! When installing a vapor barrier, sagging and deformation of the panels should be avoided.
To thermally insulate a flat roof or concrete ceiling, a waterproofing film is mounted from the inside on a self-adhesive tape, then a sheathing made of wood or metal is installed.
The height of the sheathing is determined based on the thickness of the thermal insulation material and the minimum technological gap for ventilation. The installation step is 3 cm narrower than the width of the heat insulator, which allows for high-quality installation of the insulator into the prepared sheathing cells.
Technology for laying vapor barrier on the floor
The installation scheme for vapor barrier protection on the floor is similar to how the material is laid on wall and ceiling surfaces.
The wooden floor is insulated using joists, on which a waterproofing layer is laid. Next, insulation is placed in the space between them - wool on a mineral or basalt basis. After this, vapor barrier material is laid.
The rolled material must be laid with an overlap of 12 cm, with the joints carefully sealed with metallized tape on both sides. A properly laid vapor barrier should completely cover the floor surface with an overlap of up to 10 cm on the walls.
To install a vapor barrier on a concrete base, you will need to install a sheathing, in the cells of which a waterproofing layer and a heat insulator will be laid.
Vapor barrier for ceilings in wooden floors
Of fundamental importance in the ceiling design is the vapor barrier for the ceiling in a wooden floor, which, along with waterproofing layers, protects the thermal layer, boards and beams from dampness.
Wooden structures are hygroscopic, they allow moisture and steam to pass through, which some thermal insulation materials are afraid of - mineral wool turns to stone from moisture, polyurethane foam breaks down over time. Therefore, when installing thermal insulation, the layer must be covered with hydro- and vapor barrier films. How is vapor barrier performed in a wooden house, and what materials are used?
Choosing a side for installing a vapor barrier
Once the material for the vapor barrier has been selected, an important question to consider is which side to attach the vapor barrier to the insulation. Such materials can be fixed as follows:
- Polyethylene films (reinforced and plain) are laid on any side, which does not impair the protective properties of the material.
- Foil films are installed with the reflective side facing the inside of the room to effectively reflect heat.
- Anti-condensation films are mounted with a fabric surface inside the room, treated - to a heat-insulating base.
- Membranes of any type are attached with a smooth surface to the heat insulator, and with a rough surface - inside the room.
- Foam-based insulators are laid similarly to membrane materials.
Important! Before laying the vapor barrier to the insulation, it is recommended to lay out the prepared material on a flat surface to correctly determine the inner and outer sides.
Basement installation diagram
The vapor barrier layer is laid after finishing the installation of the rough covering and insulation. The floor vapor barrier diagram in a wooden house looks like this:
- The films are unwound and cut into strips.
- The material is laid tightly to the insulation (it should run parallel to the joists with an overlap of 10 cm at the joints).
- The strips are attached to the wood using a stapler.
- The resulting joints are glued with mounting tape to achieve the maximum level of tightness.
- Wooden blocks are nailed to the joists on top of the film for installation of the finishing floor covering (a distance of 3-5 cm between the finishing flooring and the membrane is left for ventilation).
Before waterproofing the walls and ceiling, the frame material is treated with an agent against fungi and mold. Rolled waterproofing material is used to line the walls and ceiling in 2 overlapping layers, attaching it to the frame material with a construction stapler. The joints of the waterproofing film are glued together with a special mounting tape (Ondutis BL or Ondutis ML). The final stage is cladding with finishing material, for example, plastic. A wooden house can be compared to a living organism - it breathes. That is, under the influence of external atmospheric phenomena, the wall material can be deformed both in the direction of expansion and in the direction of compression. Therefore, before carrying out internal waterproofing of walls and ceilings, as well as their finishing, it is necessary to mount the frame on sliding fasteners. U-shaped profile elements are attached to the walls and ceiling, to which sheets of frame material are attached using screws. The screws are not tightened completely so that there is a slight degree of mobility.
The materials are made from polymer fabric, which is covered with a protective film on both sides.
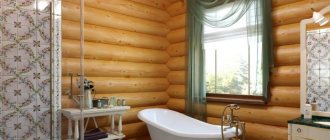
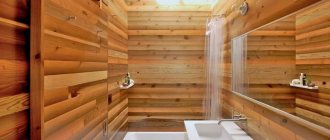
You can spend the whole warm season in a country house or just relax on a weekend in winter: skiing and barbecue on the site. City dwellers strive to relax in nature, in environmentally friendly buildings, but with urban comfort. It is these aspirations that encourage city dwellers to increasingly build houses from natural materials, in particular wood. But wood is a specific building material: it is very sensitive to moisture, therefore, in order to achieve comfort at the level of a city apartment and equip a bathroom in a wooden house, you need to thoroughly waterproof the room.
The face or the back of a vapor barrier?
If a breathable membrane is used to create a protective barrier, the main thing is to determine which side to lay the vapor barrier on - face or back.
The vapor barrier cake must be placed so that the protection is directed towards the heat insulator on both sides with the smooth back side, and with the rough front side facing the inside of the room.
The rough surface provides protection from moisture penetration into the insulation, and the smooth surface promotes maximum heat accumulation.
Materials for installation indoors
When the task is to perform a vapor barrier on walls and ceilings from the inside of a wooden house, “Megaizol V” is used. It is a polypropylene film, which consists of two layers. On the outside of this material there is an anti-condensation surface. The use of this material in winter ensures its protection from phenomena such as condensation and fungus. In addition, its use prevents the destruction of elements of wall structures. This material also protects the room from insulation particles. The same function is inherent in Izospan V.
Is a layer required for ventilation?
At the bottom of the membrane vapor barrier there is a 5-centimeter ventilation gap, which helps prevent the formation of condensation on surfaces and the heat insulator.
Diffusion membranes can be attached to insulation, plywood sheets or OSB. In a membrane with an anti-condensation layer, gaps up to 6 cm wide are located on both sides.
To create a gap for ventilation when insulating the roof structure, a counter-lattice is used. In the process of fastening a ventilated facade, a technological gap is created when installing racks located perpendicular to the vapor barrier.
Performing adhesive moisture protection
If you use the adhesive method of waterproofing bathroom floors, you need to follow a certain sequence of work:
- preparation of the base (cleaning the floor of debris and dust, eliminating cracks and crevices); cutting strips of rolled material of appropriate length;
- uniform application (1.5 mm layer) to the surface of bitumen mastic;
- rolling out sheets or rolls of waterproofing;
- edge treatment with waterproof putty for waterproofing work (layer 1-1.3 mm).
The pasting method is the installation of a waterproofing carpet in several layers.
In the process of waterproofing using the pasting method, it is necessary to maintain a certain thermal regime. Polymer-bitumen materials are installed under high temperatures (45-50 ° C), which requires certain tools and practical experience in performing such installation.
Elements for fastening vapor barrier
To securely fasten membrane or film vapor barriers, wide-headed nails or metal construction staples are used. The most practical fastening option is counter rails.
To increase the tightness of the structure, individual vapor barrier elements are additionally glued with double-sided adhesive tape or wide metallized tape.
To ensure a long service life of modern insulation, high-quality vapor barrier protection is required. Otherwise, it will be difficult to obtain the optimal ratio of temperature and humidity indicators in the premises. The main thing in this matter is to choose the right material and know how and which side to lay to the heat insulator.
Building a house is a responsible process, so every developer makes sure that construction technology is not violated. After all, the durability of the future home and its comfort depend on this.
Currently, many materials have appeared for the outer cladding of a house, making it possible to protect the main supporting structures from adverse atmospheric influences. Their appearance made it possible to insulate houses from the outside using slab or roll insulating materials based on mineral wool.
But, as you know, the worst enemy of any insulation is moisture penetrating into it, which significantly reduces the thermal insulation characteristics of the material. Therefore, the insulation needs to be protected, not only from possible atmospheric influences, but also from moisture penetrating from inside the house. For these needs, special roll materials are used - vapor and wind insulation.
The vapor barrier is mounted directly on the wall of the building, prior to the installation of thermal insulation. And the wind protection should be tightly adjacent to the surface of the insulation from the outside.
Vapor barrier in the bathhouse
A bathhouse, bathroom, or home sauna are rooms with high humidity. The Russian bathhouse at the moment when it is melted is a living hell, where the air turns into continuous steam. The steam room becomes hell not only for people with a weak heart, but also for walls, ceilings, and thermal insulation if they are not protected with a special vapor barrier film. Fungus grows on damp wood, causing the material to rot and deteriorate. And to prevent this from happening, vapor barrier must be carried out with greater care than in living rooms.
To protect wooden bathhouse structures and insulation layers, it is not recommended to use polyethylene vapor barrier, since this material cannot withstand high temperatures. The film may melt. The bathhouse is small; not much material will be used for it. There is no need to save on the quality of construction work, and therefore on your own health.
To reduce the hygroscopicity of wood, it is recommended to cover beams and floor boards with drying oil. For vapor insulation, you should choose aluminum-coated polypropylene films or aluminum foil films.
The film is attached with an overlap of up to 15 cm, with the matte side to the ceiling boards, and the foil layer down into the room. The shiny layer reflects infrared thermal radiation, returning it back to the bath. There is no need to tighten the film too much; it is recommended to allow slight sagging, since in the cold the film shrinks, becomes stretched and can quickly burst. The joints are taped with metallized heat-resistant tape. It is advisable to fill the vapor barrier layer indoors in 2 layers.
To keep the heat in the bathhouse even in severe winter, it is necessary to lay thermal and vapor barrier for the bathhouse ceiling on both sides: from the inside of the room and from the attic. The same applies to the walls of the bathhouse.
Vapor barrier for the ceiling in a bathroom in a wooden house is carried out in the same way as vapor barrier for the ceiling of a bathhouse.
Properly performed insulation of ceilings and walls will protect the house from damage and destruction for many years, and the house itself will be warm and cozy
Windproof films
Wind protection is used when it is planned to install a ventilated façade using external insulation.
Do not think that only new buildings are insulated in this way. This option can also be used to insulate an old building if necessary.
Moreover, this method is successfully used for insulating not only frame and wooden houses - it is suitable for concrete and brick walls.
Windproof films are also used to protect floors, ceilings, and roofs. The only condition is to use them only on the “cold” side: directly under the roofing, subfloor or on the street side of the external walls.
All windproof films are divided into two types:
- Moisture and windproof films are materials that have high vapor permeability (≥ 3000 g/sq. m per day), but low water resistance (approximately 250 mm of water column). These are two-layer films, the smooth outer side of which protects the insulation from atmospheric moisture in the form of rain or sleet, and the internal porous side releases water vapor from the insulation, sending it into the ventilation gap between the wind barrier and the façade cladding. This film also protects the insulation from the effects of air pressure that occurs during strong winds.
- Superdiffusion membranes - with a vapor permeability of 1000 g/sq.m per day, they have a water resistance of about 1000 mm of water column. They are more expensive than conventional windbreaks and are designed for use in areas with high rainfall and strong winds. In such conditions, if the tightness of the wall cladding is insufficient, the insulation can become heavily moistened, which significantly affects the energy efficiency of buildings. The three-layer structure of the membrane perfectly removes steam from the thickness of the insulation, reliably protecting it from snow and rain, which increases the service life of the thermal insulation several times.
What materials are used?
In the retail chain, buyers can offer two types of wind protection - roll and regular tile or tongue-and-groove.
Among the roll modifications that are used for wind protection of walls, a group of non-woven materials created using innovative technologies characterized by increased protective properties and durability can be distinguished.
Membranes do not form toxic substances during combustion and can have different numbers of protective layers, which expands their scope of application. The operating temperature range allows such protection to be installed in any region of the country.
The group of windproof membranes made of non-woven materials includes popular brands:
ISOBOX A 70, roll 70 m2, country of origin Russia, price per roll 2,000 rub.- Izospan A, roll 70 m2, country of origin Russia, price per roll 1,800 rub.
- Turboizol A, roll 50 m2, country of origin Russia, 700 rubles per roll.
- Isobond PREMIUM CLASS A, roll 70 m2, country of origin Russia, price per roll 600 rub.
Elite windproof membranes are sold by manufacturers in EU countries, their price significantly exceeds 1 thousand rubles. per roll, but at the same time they have higher production quality and durability:
- ROCKWOOL roll area 70 m2, country of origin Denmark: Hedehusene, price per roll from RUB 1,700.
- Ondutis A100 roll area 75 m2, country of origin Poland, price per roll 2,000 rubles.
- AT 90 Docke, roll area 90 m2, three-layer, country of origin Germany, price per roll 3300 rub.
Important! Among slab windproof materials, modifications made from wood fiber and fiberboard can be distinguished. The former are installed mainly outside, the latter either as part of a multi-layer cake with external installation, or as independent protection from the inside of load-bearing wall structures.
Wood fiber boards provide additional noise protection for the building; they fit tightly to the load-bearing walls, preventing the absorption of moisture. The pores in the wooden structure of the boards remove internal moisture to the outside, preventing its accumulation.
For this purpose, to keep them dry, they are completely covered with paraffin. This material is the best thermal energy accumulator when it is frosty, and keeps the house fresh during the hot season.
Windproof sheets are a universal type of protection; they are installed outside walls and are used as a vapor-permeable, windproof, insulating layer. The plate creates additional rigidity of the structure and is environmentally friendly. The most popular representatives of this group of windproof materials are:
- Beltermo, tongue and groove, sheet thickness 20 mm, country of origin Russia, per 1 m2 - 355 rubles.
- ISOPLAAT Scandinavian technology, tongue and groove, sheet thickness 12/18/25 mm, 2700X1200 mm, country of origin Estonia, price per 1 m2 - 1,100 rubles.
- STEICO Universal, 600x2500 mm, tongue and groove on 4 sides, sheet thickness 24 mm, country of origin Poland, price per 1 m2 - 1,300 rubles.
Fiberboard slabs are a new technology in construction; they are produced by mixing cement and sawdust and bonding the composition with liquid glass. The material is characterized by high environmental safety, thermal insulation and sound protection.
He is not afraid of either fire or water. After exposure to moisture, it absorbs it quite quickly, but after natural drying it returns to its original state. It is lightweight and easy to cut and install.
Reference. In the CIS countries, the only plant for the production of fiberboard, located in Russia, produces slabs 3000x600x14 mm under the Green Board GB600 brand, material density 600 kg/m3, price per 1 sheet is 600 rubles.
Windproof film installation technology
The main condition for the functionality of wind protection is its correct installation. The technology itself is simple.
But the work must be carried out with the utmost conscientiousness:
- Rolls of windproof film are mounted horizontally, starting from bottom to top. It is very important to sew the film on the correct side - usually the outer side is the side on which the manufacturer's logo is applied. In other cases, you just need to carefully read the instructions included with the material.
- When installing the film, it is necessary to observe the amount of overlap between adjacent panels: horizontally - 100 mm, vertically - 150 mm.
- The film should fit as tightly as possible to the surface of the insulation - this is an important condition for its proper operation. You can fix the windbreak to the insulation frame with galvanized nails or a construction stapler.
- All film joints are taped with special tape so that there are no gaps.
- The bottom of the film should not have contact with the ground. A drain must be provided there to remove condensate formed on the surface of the film.
- Then the film is attached to the insulation frame with vertical bars at least 40-60 mm thick. This will ensure a snug fit of the windbreak and create the necessary ventilation gap between the insulation and the sheathing.
Choosing waterproofing
It is worth mentioning that most of the beneficial properties of wood are due to its porous structure, which works as a relay for the perception of moisture - the board seems to sense that it is humid around. It turns out that at high humidity, the tree absorbs some of the moisture inside, and then releases it when the air becomes dry - this is such a feature. But in the bathroom it is destructive and will not bring any benefit. In addition, keep in mind that a wooden bathroom in a wooden house is also exposed to harmful insects that try to eat the boards. To prevent this from happening in the bathroom, the room will need waterproofing of the floor and walls.
Two methods of insulating wood from water are considered common: coating and lining. The first type of waterproofing is placed on top of the base with a brush or a special disposable roller. The adhesive waterproofing does not require tools - it is immediately glued on top. Each of the above methods is effective, the difference lies in which method is more appropriate and effective when. The choice is made based on the individual wishes of the owner, the presence of heated floors, the design of the house and other factors.
To protect the wooden ceiling in the bathroom from moisture, various vapor and waterproofing materials are used. All of them are divided by type and principle of operation. Features of the processes occurring indoors, to a certain extent, affect the strength and durability of building structures. Often the destructive effects of moisture and water lead to the fact that structures in a wooden house begin to rot and quickly become unusable. The wettest room in a private house is the bathroom, so vapor barrier for the ceiling in a wooden floor is especially important here. We will tell you which vapor barrier is best for the ceiling of a wooden house, and how to install it correctly.
Waterproofing the ceiling in the bathroom can be done using the following materials, which differ in their operating principle. The characteristics of the processes occurring indoors to a certain extent affect the strength and durability of building structures. Often the destructive effects of moisture and water lead to the fact that structures in a wooden house begin to rot and quickly become unusable. The wettest room in a private house is the bathroom, so vapor barrier for the ceiling in a wooden floor is especially important here. We will tell you which vapor barrier is best for the ceiling of a wooden house, and how to install it correctly.
Advantages and disadvantages of a wind barrier
It would seem that using wind protection only has a positive effect. But its use has disadvantages that you also need to be aware of.
Advantages of using wind protection:
- protection of insulation from penetration of atmospheric moisture;
- preventing air filtration through the insulation;
- the ability to protect the insulation during downtime during wall cladding work;
- preventing the destruction of fibrous insulation when exposed to wind (emission of insulation fibers), as a result of which its thickness gradually decreases.
But there are also disadvantages, which mainly arise due to improper execution of work and errors in the design of a ventilated facade.
The disadvantages are as follows:
- Covering the ventilation gap with a windproof film is possible if the film does not adhere tightly to the insulation. The consequence of this is poor ventilation under the skin, which leads to poor removal of water vapor.
- When using films with low vapor permeability, there is a high probability of the insulation becoming waterlogged and losing its heat-protective properties.
- Careless builders often use windproof film to try to hide flaws made during the installation of thermal protection: insufficient thickness of mineral wool slabs, poor fit between them and other violations of technology.
- High flammability of synthetic films and membranes. The latter drawback even caused bans on the use of these materials in some regions.
Moisture and air protection concept
The advantages of wooden houses are the good permeability and thermal insulation properties of the material itself. Its naturalness allows us to hope for the absence of harmful emissions in the air.
But timber or logs, when used as a structural material, also exhibit significant disadvantages. The ability to absorb moisture entails a decrease in heat transfer resistance and biological decomposition of the material. The development of mold negates all the advantages of an environmentally friendly design. Warping due to periodic wetting and drying worsens the tightness of the joints. They start to blow out.
There are a huge number of sources of water vapor in a living room:
- cooking food;
- evaporation of water in the bathroom;
- the breathing of the inhabitants of the house;
- flowers on the windows;
- periodic cleaning of premises.
If there is no vapor barrier on the walls, the breathable structure allows moist air to pass through itself and retains some of the water from it. Overmoistening of the walls of a wooden house can and should be combated.
Vapor barrier device for a wooden house
It is enough to place a barrier permeable to air, but not permeable to moisture, at the junction of warm indoor air and colder enclosing structures. This will significantly improve the working conditions of wooden elements. Let the steam leave the house when ventilating and through the ventilation system.
Windproof materials market news
Despite criticism of windproof films and membranes, they are in demand among the population and the construction industry. Therefore, manufacturers tried to eliminate the shortcomings and released materials with new properties to the market.
Nowadays there are quite a lot of windproof materials on sale with low flammability and even completely non-flammable: non-flammable windproof membrane DELTA®-FAS NG; “Izospan AF”, “Izospan AF+” and others.
So if you want to improve the fire safety of your home, it is worth spending money on more expensive, but also more reliable materials.
A completely new product was Izoplat slabs, which are sheets of heat-insulating material with wind protection, sound insulation and insulation properties. They are made from softwood fibers without the use of any adhesive, so they are absolutely harmless.
Plates differ favorably from films in that they have stable geometric dimensions that do not change over time. Therefore, once correctly installed, they will serve for a long time: cold bridges do not form between them, they cannot be torn by the wind or destroyed by the touch of a sharp object. In this case, a slab with a thickness of 25 mm in terms of thermal insulation corresponds to a wooden wall with a thickness of 90 mm. The material is perfect for use in cold and humid climates.
When planning the construction of a frame house, where the comfort of living in it depends entirely on the insulation, it is worth making sure that it is reliably protected from any adverse influences that destroy its structure and reduce its thermal protection characteristics. Therefore, for wind protection, it is better to choose high-quality materials that are guaranteed to be worth the money spent.
Hello dear readers.
I continue the story about my construction project, today I will tell you how I made wind protection for my house, the whole process of installing it, as well as its role in a frame house. Let's look at mistakes when choosing a membrane, installation, as well as the consequences of misunderstanding its operation.
Wind protection for the walls of a frame house plays a huge role; the condition of the insulation and comfortable living conditions in the house depend on it.
Let's start with a small outline of the article:
- About Us
- How does wind protection work?
- Membrane operating principle
- Role in a frame house
- Errors in film application
- What types of membranes are there?
- Wind protection installation technology
- How it was done for me
- What I might change
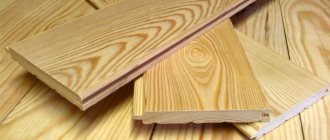
Types of wood
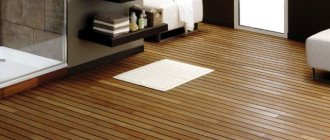
A bathroom is a room in which you can leave a wooden floor only if it is made of certain wood species or has been heat-treated. In the first case, the quality characteristics of the wood partially affect the effectiveness of waterproofing.
A mandatory requirement is good moisture resistance. In the second case, the material acquires additional resistance to moisture, strength, and resistance to fungi due to special manufacturing methods; it practically does not change its geometric dimensions. But the ideal option for finishing the floor in a private home is ceramic tiles.
If we talk about the wood species from which the flooring material is made, then the best option for the bathroom is cork. It is not only resistant to moisture, but also has high strength and excellent decorative properties.
Teak is a material with a high content of essential oils, moisture-resistant, durable (provided that all cracks are filled with sealant). Teak flooring is healthy, but unfortunately, it is expensive.
Waterproofing the floor in a house is a process that requires certain knowledge and skills. Therefore, you need to approach this event thoughtfully, prepare, and study the technology.
About Us
My first interview appeared on the Internet; I gave it to a very talented teacher, Sergei Bondarenko, who, in addition to teaching students, also runs a good website dedicated to teaching computer literacy.
In it you can learn a little about me, about my life, and how I myself came to IT technologies. Read, judging by the comments, the interview was a success.
Dear partners and customers
We are glad to see you on our website!
We draw your attention to the fact that recently there have been more frequent cases of counterfeit products appearing on the market, as well as fake Izospan materials that clone the appearance, symbols and use similar names. Deceived by the external similarity of products, buyers purchase low-quality goods, and as a result, problems arise with its use
Deceived by the external similarity of the products, buyers purchase low-quality goods, and as a result, problems arise with its use.
Hexa Nonwoven Materials LLC, a manufacturer of materials, has been working in the Russian construction market for 17 years, constantly developing its product range, improving technologies and equipment. We carefully control every stage of creating films and membranes so that the quality of our materials always remains at a high level, allowing us to create and maintain an atmosphere of comfort and coziness in your home.
Please be careful when choosing and purchasing materials! Remember that the joy of a low price quickly gives way to disappointment from a low-quality product.
How to spot a fake can be found here...
A post about my jamb and a couple of questions for you.
My head was spinning from all these steam-wind-hydro-thermal insulations. I decided to load you up a little too. It so happened that in our team, at the same time, three people (including myself) are building (or completing construction) wooden houses. And at the same time, all three had the same problem. Water leaked from the ceiling. It’s different for everyone, but according to the same principle. The first one had a tub of water pour out when the vapor barrier was pierced. The second one was screwing a self-tapping screw into the ceiling and it started dripping. The third one (that is, me) has only a little bit of dampness so far.
We all made the same mistake. We made this pie.
I also wrapped the beams. Well, there’s no other way for me, the ceiling of the first floor is already finished.
Then one hundred rocklights.
And everything was wrapped in vapor barrier.
Well, at least I didn’t have time to nail the board.
Three weeks have passed.
First, the first colleague reported the leak. I didn't pay any attention to it.
And a couple of days ago, the second one announced drops from a self-tapping screw screwed into the ceiling. After that, I sounded the alarm. Together we went to my construction site of the century, threw back the boards, pulled back the film
And they found drops of condensation.
Actually, after reading more than one volume of various forums and scrolling through all my work in my head, I came to some conclusions and even more questions.
1. Didn’t make a ventilation gap between the cotton wool and the top layer of film. I'll do it. 2. It was in vain to wrap the beams on top.
They will smell from the steam rising from the first floor. It is not clear what to do with this. After all, the ceiling has already been finished and painted.
3. It was impossible to put a vapor barrier on top of the cotton wool, this is understandable. Question
.
Does the second layer have to be a two- or three-layer membrane, or can you add a windscreen, it seems to allow steam to pass through?
The materials available are: mega-isol D, which was precisely stretched as a vapor barrier. And megaisol A, which I want to use as the top layer.
Yes, an addition. The second floor will be heated, but not soon. Now the task is to launch the first floor. But also lay out the subfloor of the second floor so that you can walk on it and, preferably, not open it in the future.
How does wind protection work?
Windproof film actually performs two functions. Not only does it prevent air masses from penetrating into the insulation when there is wind, but it also acts as a moisture barrier.
A separate type of film is used for arranging insulated roofs. Such films are often called under-roofing membranes, by the way, for some reason many builders neglect them, as it turns out in vain...
Roofing membrane
The windproof membrane consists of polymer fibers sintered in a special way. The film itself is designed in such a way that on one side it is smooth and does not allow moisture from the street to penetrate into the house, on the other it has a rough surface.
Wood floor protection technology
Before installing waterproofing, experts recommend lowering the bathroom floor level a few centimeters below the floor level of other rooms in the house and installing a small threshold. This will hold water in case of a leak.
The coating waterproofing process consists of several stages.
Preparation
First of all, you need to find out the condition of the floor in the bathroom. This will allow us to identify the scope of work, select technology and materials.
The base is cleaned of dirt, dust and foreign objects. Waterproofing requires careful preliminary cleaning. If there are cracks and holes in the floor surface, they need to be sealed with wood mastic to create a reliable protective layer. After this, the floor is once again cleaned of dust and debris.
At this stage, it is necessary to treat the wood with an antiseptic impregnation to avoid the formation of mold.
Primer treatment
To ensure high adhesion of the waterproofing material to the base, the floor of the room is primed. The best option is to use a primer mixture of the same class as the waterproofing material.
The primer solution is prepared as follows: take one part of the dry mixture, dilute it with one part of water to the consistency of thick sour cream.
After this treatment, the floor in the house should be completely dry. Corners and joints must be taped with a special waterproofing tape: this way, all vulnerable spots will be completely protected from moisture.
Preparation of waterproofing solution
The liquid component and the dry mixture are diluted in equal proportions and thoroughly stirred until smooth. You can purchase ready-made bitumen-based mastics. Material consumption – 2-3 kg/sq.m. m.
Applying the mixture
To treat the surface of the floor of a wooden house with a waterproofing compound, use a roller, spatula and brush.
The first time the mixture is applied in an even layer using a roller. In hard-to-reach areas, use a spatula and a brush.
It is necessary to treat the walls with a waterproofing mixture to a height of approximately 10 cm above the floor level: this way moisture will not penetrate into the room.
The first layer of waterproofing must dry completely (4-6 hours). After this, you can apply a second layer, running it perpendicular to the first.
The surface treated with waterproofing compound must be dried within 24 hours. After this, you can begin other types of repair work.
Role in a frame house
For a frame house, a windproof membrane is of great importance. Since insulation is used in such a house, there is a need to protect it from moisture and blowing. Probably many have seen what happens to insulation when it lies in the open air.
The fibers fluff up, the trapped moisture does not want to leave at all, and freezes in winter, which leads to the loss of the thermal insulation properties of any mineral wool insulation.
This has little to do with polystyrene foam; it is not afraid of moisture and is not subject to moisture accumulation. Therefore, many may consider the use of a membrane in a house with foam insulation unnecessary.
But this is a misconception; the film also protects the frame of the building from atmospheric influences, and fulfills its function of protecting from the wind. This is very important in any house, even a log house, especially a log house.
Insulation of the house with
We recommend that our clients use high-quality hydro-, steam-, and wind-proof materials, and install them in accordance with SNiP. Only adherence to technology can significantly increase the service life of engineering structures: beams, walls, ceilings, floors, foundations, and also guarantee the highest thermal insulation properties of the insulation.
Call the company's office by phone: 8 (812) 9999-812 , and our manager will advise you on any issue related to home insulation. With us, your home will become warmer and stronger, and therefore more durable!
Errors in film application
Very often, inexperienced builders make mistakes when choosing and installing wind protection for a home. A common occurrence is the use of a vapor barrier on the outside of the house. People simply do not understand the principle of film operation, and they think that a house can be wrapped in any film.
When purchasing, carefully look at what kind of film they offer you! There are not always smart sellers, and you can easily buy a membrane designed for vapor barrier.
I myself have seen such houses, a pitiful sight, but they are already covered with siding or, even better, metal profiles. When using barrier instead of a wind barrier, moisture is not removed from the wall structure and falls into condensation.
As a result, the walls get wet, and if it is a frame house, then the insulation is completely damaged, and if it is a log house, then hello fungus, mold and rot.
Another mistake is using corrugated sheets as the façade of a house and laying it directly on the wind- and moisture-proof membrane and, accordingly, on the insulation. The film simply stops performing its functions and condensation occurs again.
Make a ventilated gap located vertically between the facade and the membrane. This will allow the vapors and moisture that appears on the membrane to evaporate freely, and you will protect yourself from the problems described above.
What else to consider when arranging a bathroom
To reduce humidity, you need to take care of natural and forced ventilation. In some cases, you cannot do without a dehumidifier.
When choosing a bathtub for a frame house, it is better to give preference to acrylic models. They are lightweight and can be installed on both the first and second floors. If you decide to limit yourself to a shower, then it is better to abandon open showers in favor of a closed shower stall.
Watch how to install a corner acrylic bathtub and make a screen in the video.
Wind protection installation technology
Before you begin installing the windproof membrane, prepare:
- The required amount of film, counting the squares of the walls.
- Stapler and staples, staples still in your pocket, when you are holding a sheet four meters long, you really don’t want to run after the staples that have run out.
- Scotch tape for gluing canvases. Look for the best one recommended for these purposes.
- An assistant, preferably more than one, especially on the roof.
The principle of laying film on both walls and pitched roofs is almost the same.
- We roll out the strip along the wall of the house to the required length, check for correct positioning with the smooth side facing out (in general, the film should indicate which side is facing out, so if this is not the case, then read the documentation for the membrane)
- We stretch the wind protection along the wall of the house without fanaticism, then punch it with a stapler to the studs or slab sheathing, depending on the structure of the building.
- We stick special double-sided tape to the upper edge of the film, without removing the paper from the tape. We will later pull it out from under the top film.
- We roll out the next row of film and also shoot it. We continue until the wall is completely filled from bottom to top.
- We pull out the paper from the tape and carefully glue the membranes together.
- We nail vertical bars to organize a ventilation gap, with the frequency required for a specific type of facade. It is on these slats that we attach the façade of the building.
Ventilation gap block
It is important to close the windbreak as soon as possible; over time, the film loses its properties as a result of exposure to sunlight. Each film has its own timing, but I would close it in the first month after installing the membrane.
For the roof, everything is done in the same way, from bottom to top, and with sizing. Just be careful, it is very inconvenient to climb the rafters and click the stapler. You need long arms or a helicopter)))
Average cost of work
The cost of installing wind protection depends on the type of material: roll or slab, the type of installation - internal or external, and the cost of the material; the more expensive it is, the more expensive the installation. Average prices across the country for installing wind barriers on wooden buildings are presented in the table.
| № | Type of work | Dimension | Cost, rub. |
| 1 | Installation of wall sheathing under thermal protection made of timber | m2 | 324 |
| 2 | Installation of double sheathing of timber walls for thermal protection, two-layer | m2 | 519 |
| 3 | Installation of Izospan | m2 | 83 |
| 4 | Installation of superdiffusion membrane | m2 | 90 |
| 5 | Internal cladding with wood fiber boards Green Board GB600 | m2 | 286 |
| 6 | ISOPLAAT external cladding on scaffolding | m2 | 486 |
| 7 | External cladding with STEICO Universal board on scaffolding | m2 | 430 |
| 8 | External cladding with Beltermo slabs on scaffolding | m2 | 370 |
| 9 | Finishing the facade of the building with a vinyl blockhouse | m2 | 536 |
How it was done for me
In my house I used two types of membranes; for the walls I used an ordinary windproof film, and for the inclined parts of the attic I used a superdiffusion film.
When insulating an attic, the use of a superdiffusion membrane is more relevant. When laying insulation, you don’t have to worry about the gap between the film and the insulation, but lay the mineral water closely. This gap is necessary when using conventional windproof film.
House wall
I stretched the canvas as described, started from one corner and walked around the whole house with the roll, simultaneously fastening the film to the racks. When I finished the first row, I started on the second, and so on until the very top.
It was interesting to attach the membrane to the rafters, the roll is wide, the rafters are high, no matter how we twisted it, we did it! Two rows of membrane on each superdiffusion slope, and one row of regular wind protection. I placed the usual one where the uninsulated part of the slope is.
Three rows of wind protection
For gluing I used adhesive tape, from the same Ondutis company, I want to say right away that it dries in the sun in a moment, and everything comes off. Where I covered it with siding did not come off, and everything is sticking. In theory, the adhesive substance of these tapes should not dry out under any circumstances... I glued it again after installing the siding, it seems to be holding.
How to lay a vapor barrier
The vapor barrier must be installed in compliance with the technology, although in general this process is quite simple and understandable to everyone.
Step 1. Windproof material is spread over the subfloor.
Laying windproof material
Step 2. The film is laid so that its edges overlap the wooden logs.
The film is attached to the logs
Step 3. The material is fixed using a construction stapler along the joists.
A stapler is used for fixation
Step 4. After this, insulation boards are laid on the laid material. They must cover all the space between the joists.
Laying insulation
Step 5. Adhesive tape is glued along the perimeter of the wall in its lower part before installing the vapor barrier layer.
Adhesive tape is applied around the perimeter
Step 6. A vapor barrier layer is laid. Pieces of the required size are laid across the joists with a slight overlap on the walls. The film is laid so that it sags a little in the middle.
Laying vapor barrier
Step 7. The film is fixed using a construction stapler on the joists.
Fastening vapor barrier material with a stapler
Step 8. The edge of the vapor barrier film, placed on the wall, is glued to it using the adhesive tape installed earlier.
Vapor barrier film placed on the wall is glued to adhesive tape
Step 9. The junction of the next layer of film is sealed using adhesive tape, which is glued along the edge of the previously laid layer.
The joints between the film pieces are sealed with adhesive tape.
Step 10. A new piece of material is laid so that there is an overlap at the location of the adhesive tape. The rest of it is again fixed to the joists using a construction stapler.
The second piece of vapor barrier film is laid
Step 11. The floor is being installed.
Floor installation
Video - Vapor barrier films for floors "Ondutis"
https://youtube.com/watch?v=zBeuVSLaQ34
Vapor barrier is a layer in the floor cake that should not be neglected, much less replace it with waterproofing material. It is thanks to vapor barrier that it will be possible to create a microclimate favorable for life in the house.
Anton Svistunovchief editor
Author of publication11/05/2017
Vapor barrier with ventilation gap
If the walls of the house are decorated with “non-breathable” material, for example plastic, tiles or oilcloth, moisture may accumulate in their interior, since there is no way out. To solve this problem, it is necessary to create a special ventilation gap between the wall and the finishing layer. This will allow air flow to circulate.
Vapor barrier installed on the inside of the walls of a frame house is possible in two ways:
- The vapor barrier membrane is attached to the frame of the house, after which finishing is done inside the building;
- A vapor barrier layer is installed, on top of which a lathing for finishing is installed. The resulting ventilation gap will be about five centimeters.
The second option is more suitable for residential buildings, because the process of moisture accumulation there occurs at a more accelerated pace. No ventilation gap is only suitable for houses that are not intended to be used permanently. In this case, you can install a ventilation system (simple or supply and exhaust), which will allow you to promptly remove excess moisture.
If there is a good ventilation system, then the vapor barrier installed in a frame house will have virtually no effect. It will only be needed to prevent moisture from appearing inside the walls.
What is the difference between vapor barrier and polyethylene film?
Vapor barrier is a material that does not allow even very small particles of steam on water to pass through in any direction, has good density, is not subject to the harmful effects of UV, and is easily installed with metal brackets or using self-tapping screws. How does polymer ethylene differ from special film?
Draw your own conclusions.
Advantages of polymer ethylene:
- perfectly retains moisture and steam;
- inexpensive branded vapor barriers.
Disadvantages of ordinary film:
- quickly collapse under the influence of UV radiation (cannot be used for outdoor work);
- the reliability of polymer ethylene is much less than reinforced or membrane films, it breaks more easily, stretches, and is afraid of punctures and cuts;
- the service life is shorter than that of a special vapor barrier;
- Thick polymer ethylene has the necessary strength, but weighs more than special films.
Based on this, it is difficult to use this kind of material on walls or ceilings.
Consider the installation of polyethylene film
In principle, the installation of a vapor barrier made of polyethylene film is no different from the process of installing a special vapor barrier. Since their main feature is the protection of thermal insulation and wooden structures from the penetration of steam from living quarters, they place it in front of the heat insulator.
This is how polyethylene film is installed on the ceiling. Wherever the film is used, it is placed in a horizontal position from bottom to top, with overlaps of at least 15 cm.
The connecting points must be taped with reinforced tape to prevent steam from leaking through the cracks. Moreover, another unbreakable rule when installing a vapor barrier for absolutely any type of “pie” is that there must (!) be a ventilated air between the film and the heat insulator. If condensation somehow appears there, it will successfully roll down the film and will not wet the insulator.
Place of the vapor barrier in the roofing “pie”:
- The roof covering (metal tiles, iron sheets, asbestos-cement sheets) protects the internal free space of the house from climatic and atmospheric phenomena.
- Protection from the negative effects of moisture - in case atmospheric humidity penetrates under the roofing material, the film will protect the heat insulator and wood structures from getting wet. The pairs “roof covering and protection from the negative effects of moisture”, “protection from the negative effects of moisture and heat insulator” should not be attached closely. Double-sided conrogrilling is used to provide ventilation slots.
- Thermal insulator. It is spread in several layers to ensure the required thickness of the casing. The risk of “cold bridges” must necessarily be considered.
- Vapor barrier, as well as protection from the negative effects of moisture, should be at a distance of 2-3 cm from the insulation material to ensure natural ventilation.
- Final ceiling decoration of the attic.
If we talk about interior partitions or ceilings, the situation is similar:
- main wall/ceiling;
- frame frame or frame made of corrugated sheets;
- insulation layer;
- vapor barrier film;
- plasterboard or other finishing material;
- final facing.
As you understand, it is possible to use traditional polymer ethylene, but it must be used very carefully due to its less density and resistance to wear.
We hope that the material was useful to you. We will be grateful if you share it on social networks. The buttons for this are below.
Vapor barrier for the attic “pie”:
- Attic floor (ladders) – necessary for maintenance, repair of the roof and attic space. In order to get to the attic, provide an attic ladder with an insulated hatch (Thermo). To exit from the attic to the roof, we recommend installing blind or glazed exit hatches (Velux, Vilpe, etc.) on the roof.
- Para- or super-diffusion moisture-proof membrane - for effective removal of steam from insulation.
- Insulation - mineral wool slabs. Recommended thickness for the Moscow and Leningrad region is 300mm. 200 mm are laid in the space between the beams, the remaining 100 mm are laid perpendicular to the laid layers - counter-insulation. For comparison, building codes in Finland determine the thickness of insulation from 400 to 500 mm. It is recommended to delay the installation of insulation as much as possible - no earlier than 6 months after the completion of the construction of the house frame. Because For the construction of floors, timber with natural moisture is mainly used. The timber must dry thoroughly, otherwise there is a high probability of wood being damaged by fungi and mold, which entails additional costs for dismantling/installation work and treating the wood with bleaches and antiseptics.
- Counter grille and ventilated gap. For effective ventilation and removal of steam from the surface of the moisture-proof membrane.
- Floor beams. As a rule, in private housing construction a 50x200mm board or 100x200mm natural moisture timber is used.
- Lathing is the basis for laying insulation. It is recommended to use a 100x20 (25) mm board as lathing and lay it in increments of 70-80 mm. The resulting cracks will form an additional air thermal layer under the insulation. That. The insulation slabs (mats) will not lie on a vapor barrier film, but on a rigid base, already under which there will be a vapor barrier. This solution eliminates the possibility of accidental damage to the vapor barrier or its pushing through when laying insulation, during maintenance and repair work of the roof and attic. In this case, you can begin interior decoration of the premises, and postpone the installation of insulation as much as possible (see above).
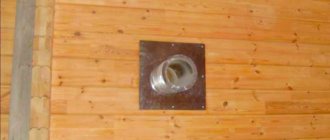
- Vapor barrier of the attic floor on wooden beams - is attached using a construction stapler from below to the rough ceiling (lathing), which allows you to cut off vapors from the entire floor structure. It is necessary to overlap the vapor barrier rolls by at least 15-20 cm and carefully glue them with aluminum adhesive tape. It is necessary to form overlaps on the walls of 15-20 cm and carefully glue them (place them under plaster and other wall finishing). Carefully seal the places where chimneys, ventilation pipes and other utilities pass through the attic floor using special hoses. The best material for vapor barrier is high-density polyethylene film of 200 g/m² and above.
- We close the attic - the finished ceiling is attached to the vapor barrier . The finished ceiling (OSB, gypsum board, etc.) is installed along the sheathing and guides. For the best fire protection, it is recommended to “sew up” the ceiling with 2 layers of plasterboard sheets.